2016 MERCEDES-BENZ AMG GT ROADSTER steering
[x] Cancel search: steeringPage 237 of 289
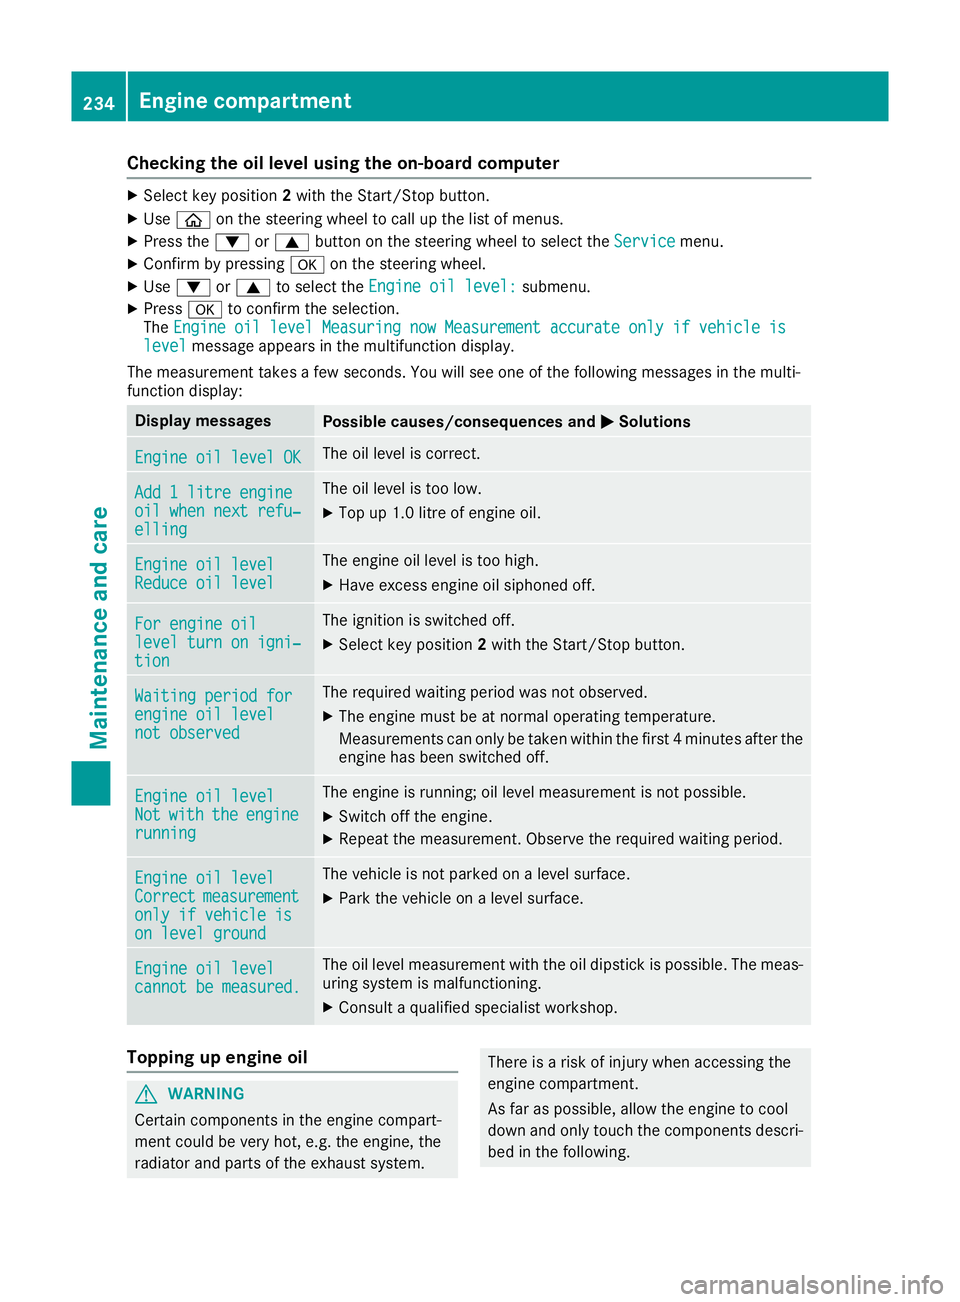
Checking the oil level using the on-board computer
X
Select key position 2with the Start/Stop button.
X Use ò on the steering wheel to call up the list of menus.
X Press the :or9 button on the steering wheel to select the Service
Servicemenu.
X Confirm by pressing aon the steering wheel.
X Use : or9 to select the Engine oil level:
Engine oil level: submenu.
X Press ato confirm the selection.
The Engine oil level Measuring now Measurement accurate only if vehicle is
Engine oil level Measuring now Measurement accurate only if vehicle is
level
level message appears in the multifunction display.
The measurement takes a few seconds. You will see one of the following messages in the multi-
function display: Display messages
Possible causes/consequences and
M
MSolutions Engine oil level OK
Engine oil level OK The oil level is correct.
Add 1 litre engine
Add 1 litre engine
oil when next refu‐ oil when next refu‐
elling elling The oil level is too low.
X Top up 1.0 litre of engine oil. Engine oil level
Engine oil level
Reduce oil level Reduce oil level The engine oil level is too high.
X Have excess engine oil siphoned off. For engine oil
For engine oil
level turn on igni‐ level turn on igni‐
tion tion The ignition is switched off.
X Select key position 2with the Start/Stop button. Waiting period for
Waiting period for
engine oil level engine oil level
not observed not observed The required waiting period was not observed.
X The engine must be at normal operating temperature.
Measurements can only be taken within the first 4 minutes after the
engine has been switched off. Engine oil level Engine oil level
Not Not
with
with the
theengine
engine
running
running The engine is running; oil level measurement is not possible.
X Switch off the engine.
X Repeat the measurement. Observe the required waiting period. Engine oil level
Engine oil level
Correct Correct
measurement
measurement
only if vehicle is
only if vehicle is
on level ground on level ground The vehicle is not parked on a level surface.
X Park the vehicle on a level surface. Engine oil level
Engine oil level
cannot be measured. cannot be measured. The oil level measurement with the oil dipstick is possible. The meas-
uring system is malfunctioning.
X Consult a qualified specialist workshop. Topping up engine oil
G
WARNING
Certain components in the engine compart-
ment could be very hot, e.g. the engine, the
radiator and parts of the exhaust system. There is a risk of injury when accessing the
engine compartment.
As far as possible, allow the engine to cool
down and only touch the components descri- bed in the following. 234
Engine compartmentMaintenance and care
Page 240 of 289
i
The ASSYST PLUS service interval display
does not show any information on the engine oil level. Observe the notes on the engine oil
level (Y page 233).
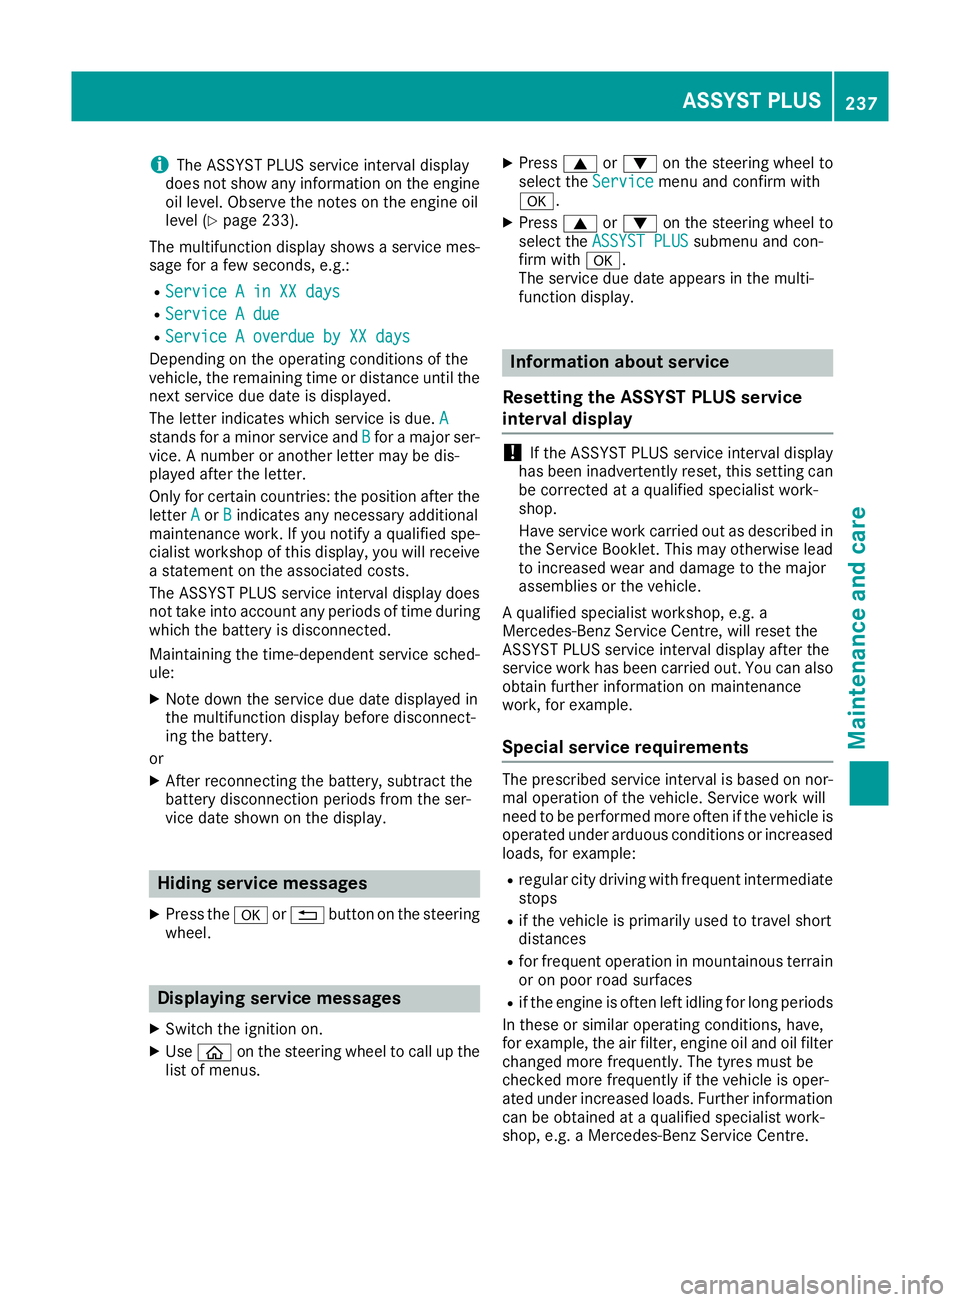
The multifunction display shows a service mes-
sage for a few seconds, e.g.:
R Service A in XX days
Service A in XX days
R Service A due
Service A due
R Service A overdue by XX days
Service A overdue by XX days
Depending on the operating conditions of the
vehicle, the remaining time or distance until the
next service due date is displayed.
The letter indicates which service is due. A
A
stands for a minor service and B Bfor a major ser-
vice. A number or another letter may be dis-
played after the letter.
Only for certain countries: the position after the
letter A
A or B Bindicates any necessary additional
maintenance work. If you notify a qualified spe-
cialist workshop of this display, you will receive
a statement on the associated costs.
The ASSYST PLUS service interval display does
not take into account any periods of time during which the battery is disconnected.
Maintaining the time-dependent service sched-
ule:
X Note down the service due date displayed in
the multifunction display before disconnect-
ing the battery.
or
X After reconnecting the battery, subtract the
battery disconnection periods from the ser-
vice date shown on the display. Hiding service messages
X Press the aor% button on the steering
wheel. Displaying service messages
X Switch the ignition on.
X Use ò on the steering wheel to call up the
list of menus. X
Press 9or: on the steering wheel to
select the Service Servicemenu and confirm with
a.
X Press 9or: on the steering wheel to
select the ASSYST PLUS ASSYST PLUS submenu and con-
firm with a.
The service due date appears in the multi-
function display. Information about service
Resetting the ASSYST PLUS service
interval display !
If the ASSYST PLUS service interval display
has been inadvertently reset, this setting can
be corrected at a qualified specialist work-
shop.
Have service work carried out as described in the Service Booklet. This may otherwise lead
to increased wear and damage to the major
assemblies or the vehicle.
A qualified specialist workshop, e.g. a
Mercedes-Benz Service Centre, will reset the
ASSYST PLUS service interval display after the
service work has been carried out. You can also
obtain further information on maintenance
work, for example.
Special service requirements The prescribed service interval is based on nor-
mal operation of the vehicle. Service work will
need to be performed more often if the vehicle is
operated under arduous conditions or increased loads, for example:
R regular city driving with frequent intermediate
stops
R if the vehicle is primarily used to travel short
distances
R for frequent operation in mountainous terrain
or on poor road surfaces
R if the engine is often left idling for long periods
In these or similar operating conditions, have,
for example, the air filter, engine oil and oil filter changed more frequently. The tyres must be
checked more frequently if the vehicle is oper-
ated under increased loads. Further informationcan be obtained at a qualified specialist work-
shop, e.g. a Mercedes-Benz Service Centre. ASSYST PLUS
237Maintenance and care Z
Page 246 of 289
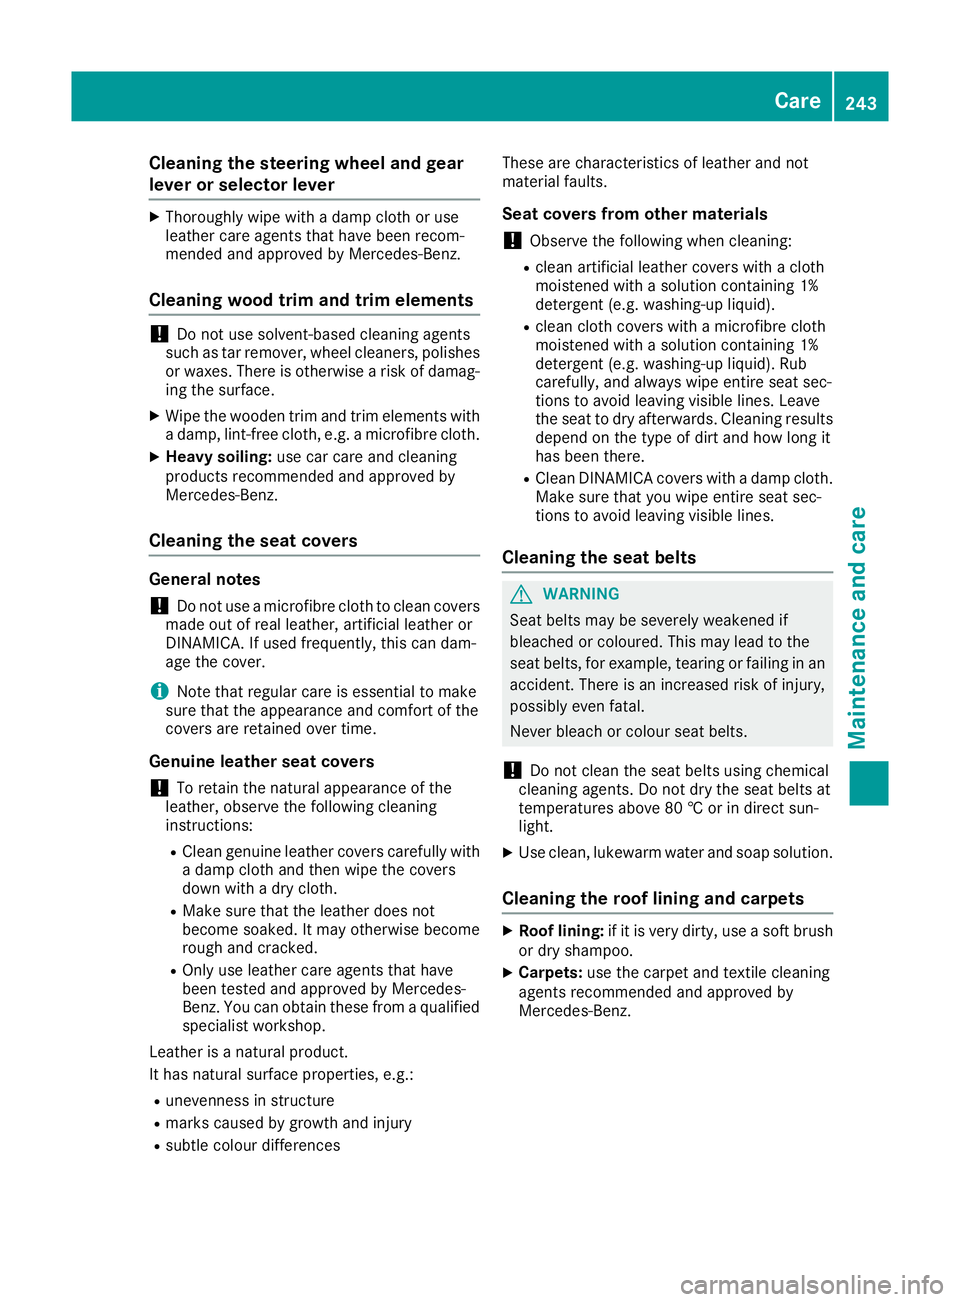
Cleaning the steering wheel and gear
lever or selector lever X
Thoroughly wipe with a damp cloth or use
leather care agents that have been recom-
mended and approved by Mercedes-Benz.
Cleaning wood trim and trim elements !
Do not use solvent-based cleaning agents
such as tar remover, wheel cleaners, polishes
or waxes. There is otherwise a risk of damag- ing the surface.
X Wipe the wooden trim and trim elements with
a damp, lint-free cloth, e.g. a microfibre cloth.
X Heavy soiling: use car care and cleaning
products recommended and approved by
Mercedes-Benz.
Cleaning the seat covers General notes
! Do not use a microfibre cloth to clean covers
made out of real leather, artificial leather or
DINAMICA. If used frequently, this can dam-
age the cover.
i Note that regular care is essential to make
sure that the appearance and comfort of the
covers are retained over time.
Genuine leather seat covers
! To retain the natural appearance of the
leather, observe the following cleaning
instructions:
R Clean genuine leather covers carefully with
a damp cloth and then wipe the covers
down with a dry cloth.
R Make sure that the leather does not
become soaked. It may otherwise become
rough and cracked.
R Only use leather care agents that have
been tested and approved by Mercedes-
Benz. You can obtain these from a qualified
specialist workshop.
Leather is a natural product.
It has natural surface properties, e.g.:
R unevenness in structure
R marks caused by growth and injury
R subtle colour differences These are characteristics of leather and not
material faults.
Seat covers from other materials
! Observe the following when cleaning:
R clean artificial leather covers with a cloth
moistened with a solution containing 1%
detergent (e.g. washing-up liquid).
R clean cloth covers with a microfibre cloth
moistened with a solution containing 1%
detergent (e.g. washing-up liquid). Rub
carefully, and always wipe entire seat sec-
tions to avoid leaving visible lines. Leave
the seat to dry afterwards. Cleaning results
depend on the type of dirt and how long it
has been there.
R Clean DINAMICA covers with a damp cloth.
Make sure that you wipe entire seat sec-
tions to avoid leaving visible lines.
Cleaning the seat belts G
WARNING
Seat belts may be severely weakened if
bleached or coloured. This may lead to the
seat belts, for example, tearing or failing in an accident. There is an increased risk of injury,
possibly even fatal.
Never bleach or colour seat belts.
! Do not clean the seat belts using chemical
cleaning agents. Do not dry the seat belts at
temperatures above 80 † or in direct sun-
light.
X Use clean, lukewarm water and soap solution.
Cleaning the roof lining and carpets X
Roof lining: if it is very dirty, use a soft brush
or dry shampoo.
X Carpets: use the carpet and textile cleaning
agents recommended and approved by
Mercedes-Benz. Care
243Maintenance and care Z
Page 253 of 289
Therefore, place the filler hose in the plastic
bag which contained the TIREFIT kit.
H
Environmental note
Have the used tyre sealant bottle disposed of professionally, e.g. at a qualified specialist
workshop.
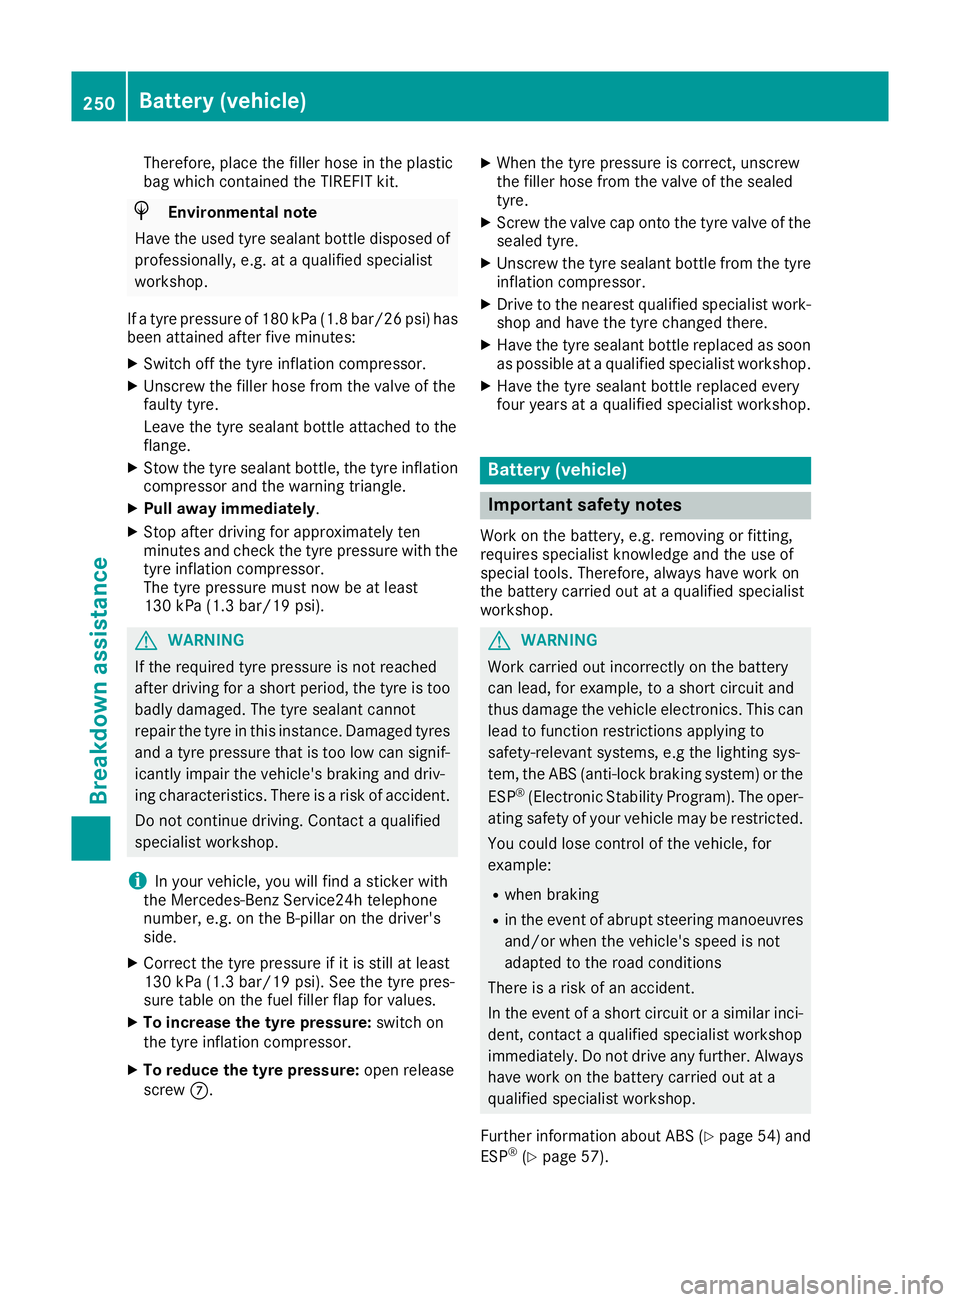
If a tyre pressure of 180 kPa (1.8 bar/26 psi) has been attained after five minutes:
X Switch off the tyre inflation compressor.
X Unscrew the filler hose from the valve of the
faulty tyre.
Leave the tyre sealant bottle attached to the
flange.
X Stow the tyre sealant bottle, the tyre inflation
compressor and the warning triangle.
X Pull away immediately.
X Stop after driving for approximately ten
minutes and check the tyre pressure with the
tyre inflation compressor.
The tyre pressure must now be at least
130 kPa (1.3 bar/19 psi). G
WARNING
If the required tyre pressure is not reached
after driving for a short period, the tyre is too badly damaged. The tyre sealant cannot
repair the tyre in this instance. Damaged tyres and a tyre pressure that is too low can signif-
icantly impair the vehicle's braking and driv-
ing characteristics. There is a risk of accident.
Do not continue driving. Contact a qualified
specialist workshop.
i In your vehicle, you will find a sticker with
the Mercedes-Benz Service24h telephone
number, e.g. on the B-pillar on the driver's
side.
X Correct the tyre pressure if it is still at least
130 kPa (1.3 bar/19 psi). See the tyre pres-
sure table on the fuel filler flap for values.
X To increase the tyre pressure: switch on
the tyre inflation compressor.
X To reduce the tyre pressure: open release
screw C. X
When the tyre pressure is correct, unscrew
the filler hose from the valve of the sealed
tyre.
X Screw the valve cap onto the tyre valve of the
sealed tyre.
X Unscrew the tyre sealant bottle from the tyre
inflation compressor.
X Drive to the nearest qualified specialist work-
shop and have the tyre changed there.
X Have the tyre sealant bottle replaced as soon
as possible at a qualified specialist workshop.
X Have the tyre sealant bottle replaced every
four years at a qualified specialist workshop. Battery (vehicle)
Important safety notes
Work on the battery, e.g. removing or fitting,
requires specialist knowledge and the use of
special tools. Therefore, always have work on
the battery carried out at a qualified specialist
workshop. G
WARNING
Work carried out incorrectly on the battery
can lead, for example, to a short circuit and
thus damage the vehicle electronics. This can lead to function restrictions applying to
safety-relevant systems, e.g the lighting sys-
tem, the ABS (anti-lock braking system) or the
ESP ®
(Electronic Stability Program). The oper-
ating safety of your vehicle may be restricted.
You could lose control of the vehicle, for
example:
R when braking
R in the event of abrupt steering manoeuvres
and/or when the vehicle's speed is not
adapted to the road conditions
There is a risk of an accident.
In the event of a short circuit or a similar inci- dent, contact a qualified specialist workshop
immediately. Do not drive any further. Always have work on the battery carried out at a
qualified specialist workshop.
Further information about ABS (Y page 54) and
ESP ®
(Y page 57). 250
Battery (vehicle)Breakdown assistance
Page 259 of 289
Vehicles with carbon engine cover:
X Replace the jump-starting connection point cover. Make sure all mountings for the fasteners are
positioned precisely behind the corresponding recesses in the cover.
X Press the fasteners into the mountings. Turn the fasteners by Õof a turn to engage.
All vehicles:
X Have the battery checked at a qualified specialist workshop.
Jump-starting is not considered to be a normal operating condition.
i Jump-starting cables and further information regarding jump starting can be obtained at any
qualified specialist workshop. Towing away and tow-starting
Important safety notes
G
WARNING
The rear axle locks when:
R the engine is not running
R the engine stalls while the vehicle is being
towed
R there is a malfunction in the voltage supply
or the vehicle's electrical system
There is a risk of an accident.
In the event of a breakdown, you should
always have the vehicle transported. G
WARNING
If the brake system or power steering is mal-
functioning and your vehicle is then towed
away, significantly more effort may be
required to steer and brake than is normally
required. There is a risk of an accident.
In such cases use a rigid towing bar. Before
towing away, make sure steering moves
freely. G
WARNING
When towing or tow-starting another vehicle
and its weight is greater than the permissible gross weight of your vehicle, the:
R towing eye may be torn off
R car/trailer combination may swerve or
even overturn
There is a risk of an accident. When towing or tow-starting another vehicle,
its weight should not be greater than the per- missible gross weight of your vehicle.
Details on the permissible gross vehicle weight
of your vehicle can be found on the vehicle iden-
tification plate (Y page 276).
! Use the key instead of the Start/Stop but-
ton when towing the vehicle.
Start the engine and keep it running. Turn the key to position 2in the ignition. Set the trans-
mission to Nusing the E-SELECT lever. Make
sure that you then leave the key in position 2.
Check the transmission position in the instru-
ment cluster.
! Make sure that the electric parking brake is
released. If the electric parking brake is faulty,
visit a qualified specialist workshop.
! Secure the tow rope or tow bar to the towing
eye only. The vehicle may otherwise be dam-
aged.
! When Active Brake Assist, Distance Pilot
DISTRONIC or the HOLD function is activated, the vehicle brakes automatically in certain
situations.
To avoid damage to the vehicle, deactivate
these systems in the following or similar sit-
uations:
R when towing away
R in a car wash
! Observe the following points when towing
with a tow rope:
R secure the tow rope on the same side on
both vehicles.
R make sure that the tow rope is not longer
than legally permitted. Mark the tow rope in 256
Towing away and tow-startingBreakdown assistance
Page 261 of 289
Removing the towing eye
X
Loosen the towing eye and unscrew it.
X Fold down the inner cover until it engages.
X Attach cover at the bottom and press it in at
the top until it engages.
X Put the towing eye back into the vehicle tool
kit. Towing the vehicle with all wheels on
the ground
It is important that you observe the safety
instructions when towing away your vehicle
(Y page 256).
The automatic transmission automatically shifts to position Pwhen you open the driver's or front-
passenger door or when you remove the key
from the ignition lock. In order to ensure that the automatic transmission stays in position N
when towing away the vehicle, you must
observe the following points:
X Insert the key into the ignition lock. You must
use the key instead of the Start/Stop button
(Y page 103).
X Start the engine and leave it running during
the entire towing procedure.
X Depress the brake pedal and keep it
depressed.
X Move the transmission to position Nwith the
E-SELECT lever.
X Check the transmission position using the
indicator in the multifunction display
(Y page 111).
X Release the brake pedal.
X Release the electric parking brake.
X Switch on the hazard warning lamps
(Y page 90).
In order to signal a change of direction when
towing the vehicle with the hazard warning
lamps switched on, use the combination switch as usual. In this case, only the turn signals for
the desired direction flash. When you reset the
combination switch, the hazard warning lamps
start flashing again. Transporting the vehicle
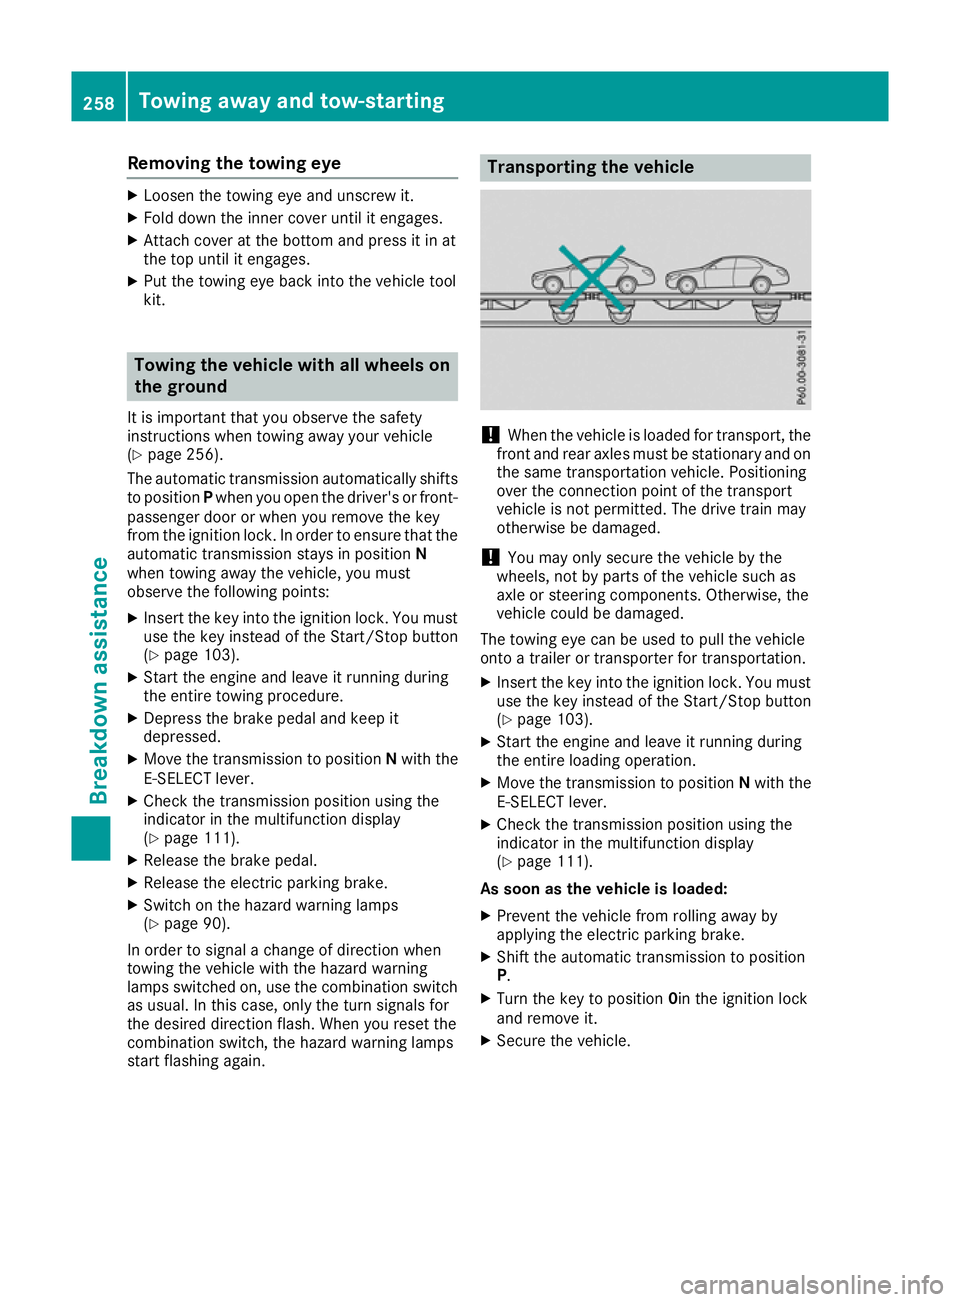
!
When the vehicle is loaded for transport, the
front and rear axles must be stationary and on the same transportation vehicle. Positioning
over the connection point of the transport
vehicle is not permitted. The drive train may
otherwise be damaged.
! You may only secure the vehicle by the
wheels, not by parts of the vehicle such as
axle or steering components. Otherwise, the
vehicle could be damaged.
The towing eye can be used to pull the vehicle
onto a trailer or transporter for transportation.
X Insert the key into the ignition lock. You must
use the key instead of the Start/Stop button
(Y page 103).
X Start the engine and leave it running during
the entire loading operation.
X Move the transmission to position Nwith the
E-SELECT lever.
X Check the transmission position using the
indicator in the multifunction display
(Y page 111).
As soon as the vehicle is loaded:
X Prevent the vehicle from rolling away by
applying the electric parking brake.
X Shift the automatic transmission to position
P.
X Turn the key to position 0in the ignition lock
and remove it.
X Secure the vehicle. 258
Towing away and tow-startingBreakdown assistance
Page 269 of 289
Important safety notes
It is the driver's responsibility to set the tyre
pressure to the recommended cold tyre pres-
sure suitable for the operating situation
(Y page 264). Note that the correct tyre pres-
sure for the current operating situation must
first be taught-in to the tyre pressure monitor. If
there is a substantial loss of pressure, the warn-
ing threshold for the warning message is aligned to the reference values taught-in. Restart the
tyre pressure monitor after adjusting to the cold tyre pressure (Y page 267). The current pres-
sures are saved as new reference values. This
will ensure that a warning message will only
appear if the tyre pressure drops significantly.
The tyre pressure monitor does not warn you of
an incorrectly set tyre pressure. Observe the
notes on the recommended tyre pressure
(Y page 264).
The tyre pressure monitor is not able to warn
you of a sudden loss of pressure, e.g. if the tyre
is penetrated by a foreign object. In the event of a sudden loss of pressure, bring the vehicle to a
halt by braking carefully. Avoid abrupt steering
manoeuvres.
The tyre pressure monitor has a yellow warning lamp in the instrument cluster for indicating a
pressure loss or malfunction. Depending on how
the warning lamp flashes or lights up, a tyre
pressure that is too low or a malfunction in the
tyre pressure monitor is indicated:
R if the warning lamp is lit continuously, the tyre
pressure on one or more tyres is significantly
too low. The tyre pressure monitor is not mal-
functioning.
R if the warning lamp flashes for around a
minute and then remains lit constantly, the
tyre pressure monitor is malfunctioning.
In addition to the warning lamp, a message
appears in the multifunction display. Observe
the information on display messages
(Y page 189).
It may take up to ten minutes for a malfunction
of the tyre pressure monitor to be indicated. A
malfunction will be indicated by the tyre pres-
sure warning lamp flashing for approximately
one minute and then remaining lit. When the
fault has been rectified, the tyre pressure warn- ing lamp goes out after you have driven for a few
minutes.
The tyre pressure values indicated by the on-
board computer may differ from those meas-
ured at a filling station using a pressure gauge. The tyre pressures shown by the on-board com-
puter refer to those measured at sea level. At
high altitudes, the tyre pressure values indica-
ted by a pressure gauge are higher than those
shown by the on-board computer. In this case,
do not reduce the tyre pressures.
The operation of the tyre pressure monitor can
be affected by interference from radio transmit- ting equipment (e.g. radio headphones, two-way
radios) that may be being operated in or near the vehicle.
Checking the tyre pressure electroni-
cally X
Switch the ignition on (Y page 103).
X Press the òbutton on the steering wheel
to call up the list of menus.
X Press 9or: on the steering wheel to
select the Service Servicemenu.
X Press the abutton.
X Select Tyre pressure
Tyre pressure with9 or:.
X Press the abutton.
The current tyre pressure for each wheel will
be displayed in the multifunction display.
If the vehicle was parked for longer than
20 minutes, the following message appears:
Tyre pressures will be displayed Tyre pressures will be displayed
after a few minutes of driving after a few minutes of driving.
After a teach-in period, the tyre pressure moni-
tor automatically detects new wheels or new
sensors. As long as a clear allocation of the tyre pressure values to the individual wheels is not
possible, the Tyre Tyrepressure
pressure monitor
monitoractive
active
message is shown instead of the tyre pressure
display. The tyre pressures are already being
monitored.
If an emergency spare wheel is fitted, for a few
minutes the system may continue to show the
tyre pressure of the wheel that has been
removed. If this occurs, note that the value dis-
played for the position where the spare wheel is fitted is not the same as the current tyre pres-
sure of the emergency spare wheel. 266
Tyre pressureWheels and ty
res
Page 270 of 289
Warning messages of the tyre pressure
monitor If the tyre pressure monitor detects a pressure
loss in one or more tyres, a warning message is shown in the multifunction display. The yellow
tyre pressure warning lamp then lights up.
R If the Please correct tyre pressure
Please correct tyre pressure
message appears in the multifunction display,
the tyre pressure in at least one tyre is too
low. The tyre pressure must be corrected
when the opportunity arises.
R If the Check Check tyre(s)
tyre(s) message appears in the
multifunction display, the tyre pressure in at
least one tyre has dropped significantly. The
tyres must be checked.
R If the Warning tyre defect Warning tyre defect message
appears in the multifunction display, the tyre
pressure in at least one tyre has dropped sud- denly. The tyres must be checked.
Observe the instructions and safety notes in the display messages in the "Tyres" section
(Y page 189).
If the wheel positions on the vehicle are inter-
changed, the tyre pressures may be displayed
for the wrong positions for a short time. After a
few minutes of driving, this is rectified and the
tyre pressures are displayed for the correct
positions.
Restarting the tyre pressure monitor When you restart the tyre pressure monitor, all
existing warning messages are deleted and the
warning lamps go out. The monitor uses the cur-
rently set tyre pressures as the reference values
for monitoring. In most cases, the tyre pressure monitor will automatically detect the new refer-
ence values after you have changed the tyre
pressure. However, you can also set reference
values manually as described here. The tyre
pressure monitor then monitors the new tyre
pressure values.
X Use the table on the inside of the fuel filler flap
to ensure that the tyre pressure is set cor-
rectly in all four tyres for the current operating
conditions.
Also observe the notes in the section on tyre
pressures (Y page 264).
X Switch the ignition on (Y page 103).
X Press the òbutton on the steering wheel
to call up the list of menus. X
Press 9or: on the steering wheel to
select the Service
Service menu.
X Press the abutton.
X Select Tyre pressure
Tyre pressure with9 or:.
X Press the abutton.
The current tyre pressure for each wheel or
the Tyre Tyre pressures
pressures will
willbe
bedisplayed
displayed
after a few minutes of driving
after a few minutes of driving mes-
sage will be displayed in the multifunction
display.
X Press the :button.
The Use Use current
current pressures
pressures as
asnew
new ref‐
ref‐
erence
erence values
valuesmessage appears in the mul-
tifunction display.
If you wish to confirm the restart: X Press the abutton.
The Tyre
Tyre press.
press. monitor
monitor restarted
restarted mes-
sage appears in the multifunction display.
After you have driven for a few minutes, the
system checks whether the current tyre pres-
sures are within the specified range. The new tyre pressures are then accepted as refer-
ence values and monitored.
If you wish to cancel the restart: X Press the %button.
The tyre pressure values stored at the last
restart will continue to be monitored. Changing a wheel
Flat tyre
You can find information on what to do in the
event of a flat tyre in the "Breakdown assis-
tance" section (Y page 247).
Vehicles with an emergency spare wheel: in
the event of a flat tyre, the emergency spare
wheel is fitted according to the description
under "Fitting a wheel" (Y page 268). Interchanging the wheels
G
WARNING
Interchanging the front and rear wheels may
severely impair the driving characteristics if
the wheels or tyres have different dimensions. The wheel brakes or suspension components Changing a wheel
267Wheels and tyres
Z