Page 3 of 660

3
1
9 8
7
6 4 3
2
10
5
NX200t_OM_USA_OM78081U
4-1. Before driving Driving the vehicle ......................166
Cargo and luggage......................174
Vehicle load limits ........................ 178
Trailer towing (vehicles with towing package) .............. 179
Trailer towing (vehicles without towing package) ........ 191
Dinghy towing ...............................192
4-2. Driving procedures Engine (ign ition) switch .............193
Automatic transmission ........... 198
Turn signal lever .......................... 203
Parking brake .............................. 204
Brake Hold ................................... 207
ASC (Active Sound Control) ...................................... 209
4-3. Operating the lights and wipers
Headlight switch ......................... 210
Automatic High Beam...............214
Fog light switch ............................ 218
Windshield wipers and washer ...........................................219
Rear window wiper and washer ......................................... 225 4-4. Refueling
Opening the fuel tank cap ......227
4-5. Using the driving support systems
Dynamic radar cruise control ...........................................231
Dynamic radar cruise control with full-speed
range .............................................244
Cruise control ............................. 258
LDA (Lane Departure Alert with steering co ntrol) .............. 261
Intuitive parking assist ...............270
Lexus parking assist monitor.........................................278
Driving mode select switch ........................................... 294
Driving assist systems ...............297
All-wheel drive lock switch (AWD models) .......... 302
PCS (Pre-Collision System) ....................................... 303
BSM (Blind Spot Monitor)..... 309
4-6. Driving tips Winter driving tips ....................... 317
Utility vehicle pr ecautions........321
4Driving
Page 7 of 660

7
1
9 8
7
6 4 3
2
10
5
NX200t_OM_USA_OM78081U
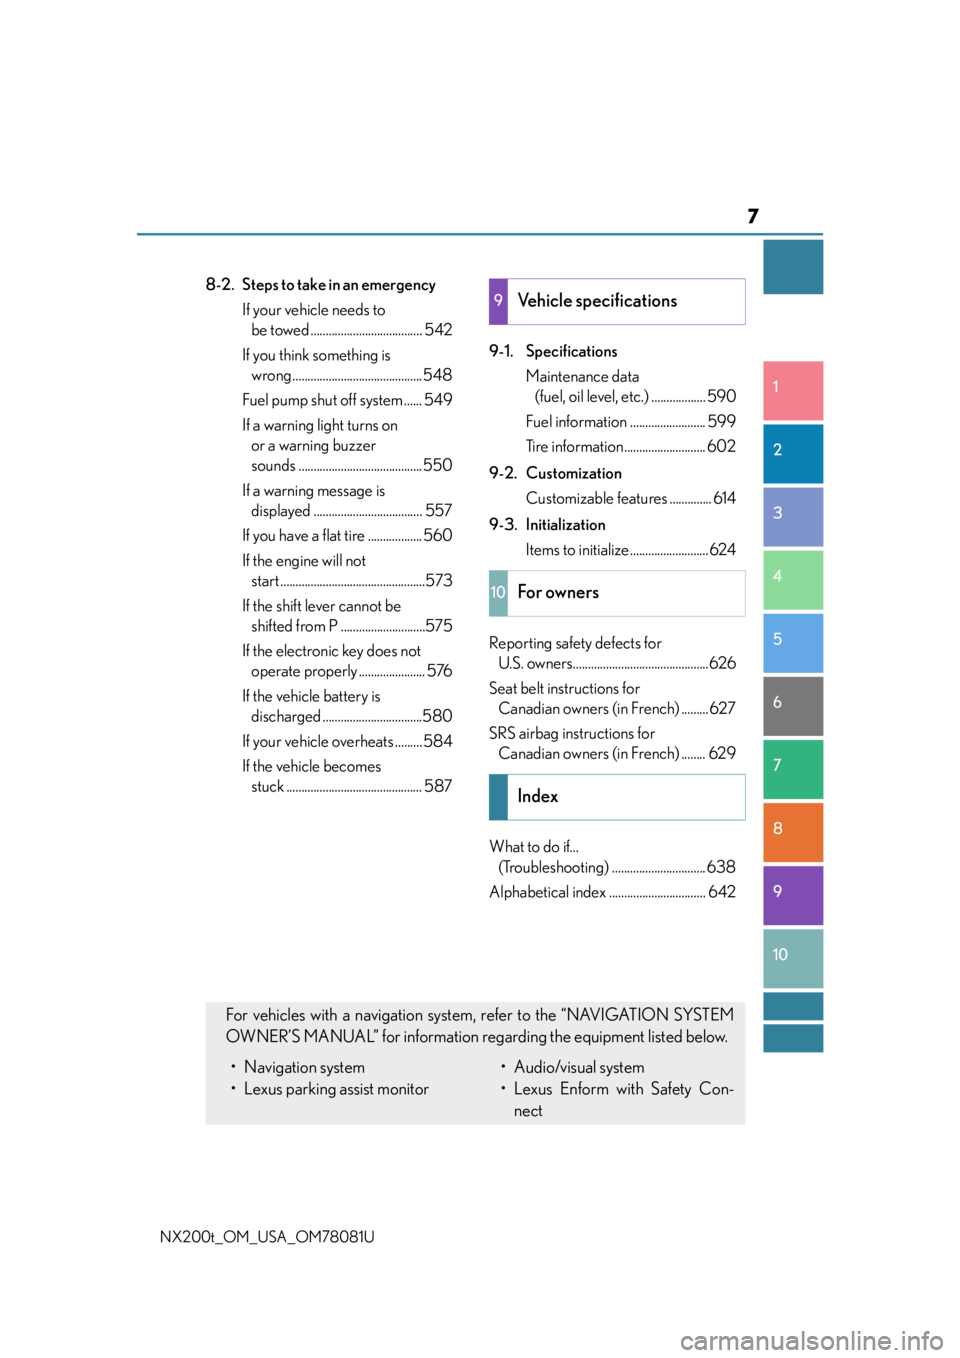
8-2. Steps to take in an emergency If your vehicle needs to be towed ..................................... 542
If you think something is wrong ........................................... 548
Fuel pump shut off system ...... 549
If a warning light turns on or a warning buzzer
sounds ......................................... 550
If a warning message is displayed .................................... 557
If you have a flat tire .................. 560
If the engine will not start ................................................573
If the shift lever cannot be shifted from P ............................575
If the electronic key does not operate properly ...................... 576
If the vehicle battery is discharged .................................580
If your vehicle overheats ......... 584
If the vehicle becomes stuck ............................................. 587 9-1. Specifications
Maintenance data (fuel, oil level, etc.) .................. 590
Fuel information ......................... 599
Tire information........................... 602
9-2. Customization Customizable features .............. 614
9-3. Initialization Items to initialize..........................624
Reporting safety defects for U.S. owners.............................................626
Seat belt instructions for Canadian owners (in French) ......... 627
SRS airbag instructions for Canadian owners (in French) ........ 629
What to do if... (Troubleshooting) ............................... 638
Alphabetical index ................................ 6429Vehicle specifications
10For owners
Index
For vehicles with a navigation system, refer to the “NAVIGATION SYSTEM
OWNER’S MANUAL” for information rega rding the equipment listed below.
• Navigation system
• Lexus parking assist monitor• Audio/visual system
• Lexus Enform with Safety Con-
nect
Page 16 of 660

16Pictorial index
NX200t_OM_USA_OM78081U
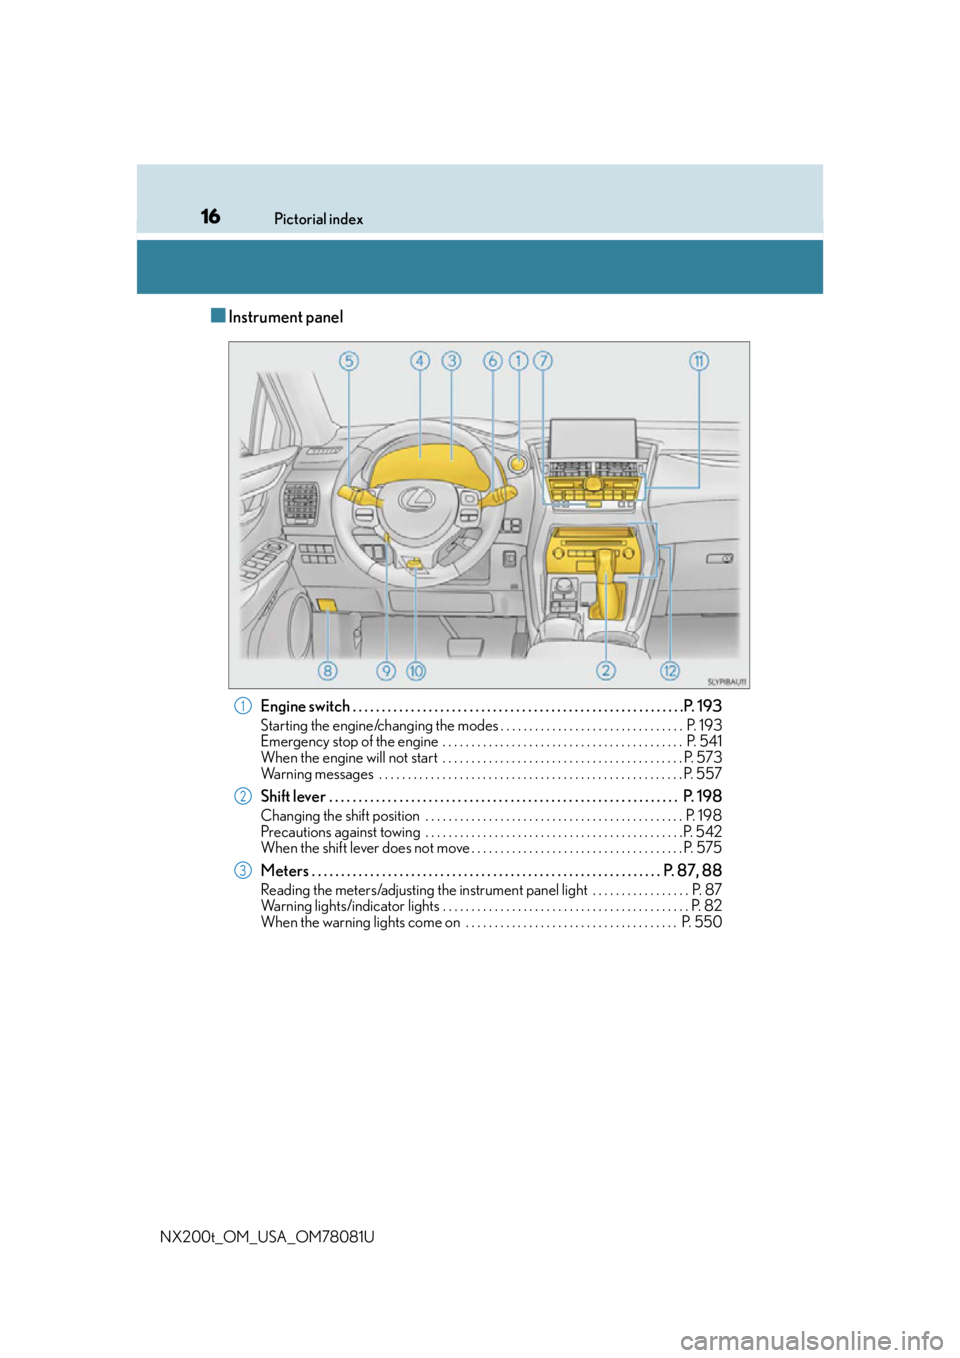
■Instrument panel
Engine switch . . . . . . . . . . . . . . . . . . . . . . . . . . . . . . . . . . . . . . . . . . . . . . . . . . . . . . . . . P. 1 9 3
Starting the engine/changing the modes . . . . . . . . . . . . . . . . . . . . . . . . . . . . . . . . P. 193
Emergency stop of the engine . . . . . . . . . . . . . . . . . . . . . . . . . . . . . . . . . . . . . . . . . . P. 541
When the engine will not start . . . . . . . . . . . . . . . . . . . . . . . . . . . . . . . . . . . . . . . . . . P. 573
Warning messages . . . . . . . . . . . . . . . . . . . . . . . . . . . . . . . . . . . . . . . . . . . . . . . . . . . . . P. 55 7
Shift lever . . . . . . . . . . . . . . . . . . . . . . . . . . . . . . . . . . . . . . . . . . . . . . . . . . . . . . . . . . . . P. 198
Changing the shift position . . . . . . . . . . . . . . . . . . . . . . . . . . . . . . . . . . . . . . . . . . . . . P. 198
Precautions against towing . . . . . . . . . . . . . . . . . . . . . . . . . . . . . . . . . . . . . . . . . . . . .P. 542
When the shift lever does not move . . . . . . . . . . . . . . . . . . . . . . . . . . . . . . . . . . . . . P. 575
Meters . . . . . . . . . . . . . . . . . . . . . . . . . . . . . . . . . . . . . . . . . . . . . . . . . . . . . . . . . . . . P. 8 7 , 8 8
Reading the meters/adjusting the instrument panel light . . . . . . . . . . . . . . . . . P. 87
Warning lights/indicator lights . . . . . . . . . . . . . . . . . . . . . . . . . . . . . . . . . . . . . . . . . . . P. 82
When the warning lights come on . . . . . . . . . . . . . . . . . . . . . . . . . . . . . . . . . . . . . P. 550
1
2
3
Page 32 of 660
321-1. For safe use
NX200t_OM_USA_OM78081U
To release the hooked buckle B,
push the buckle release button.
Insert the mechanical key (P. 1 0 8 )
or plate B into the notch of buckle A
and remove the belt.
Retract the belt slowly when releasing
and stowing the seat belt.
Stow in the cover in the order of
plate B and then plate A.
In order to securely fix it, firmly insert it
to the back.
Releasing and stowing the seat belt (for the rear center seat)
Release button
1
Buckle A
Plate B
2
Plate A
Plate B3
Page 33 of 660
331-1. For safe use
1
For safety and security
NX200t_OM_USA_OM78081U
Stow seat belt buckle A and buckle
B in the pockets.
Push the seat belt shoulder anchor
down while pressing the release but-
ton.
Push the seat belt shoulder anchor
up.
Move the height adjuster up and down
as needed until you hear a click.
The pretensioners help the seat belts to
quickly restrain the occupants by
retracting the seat belts when the vehi-
cle is subjected to certain types of
severe frontal or side collision or a vehi-
cle rollover.
The pretensioners do not activate in the
event of a minor frontal impact, a minor
side impact or a rear impact.
Buckle A
Buckle B
4
Adjusting the seat belt shoulder anchor height (front seats)
Release button
1
2
Seat belt pretensioners (front seats)
Page 41 of 660

411-1. For safe use
1
For safety and security
NX200t_OM_USA_OM78081U
WA R N I N G
■SRS airbag precautions
Observe the following precautions regarding the SRS airbags.
Failure to do so may cause death or serious injury.
●The driver and all passengers in the vehicle must wear their seat belts properly.
The SRS airbags are supplemental devices to be used with the seat belts.
●The SRS driver airbag deploys with consider able force, and can cause death or seri-
ous injury especially if the driver is very close to the airbag. The National Highway
Traffic Safety Administration (NHTSA) advises:
Since the risk zone for the driver’s airbag is the first 2 - 3 in. (50 - 75 mm) of inflation,
placing yourself 10 in. (250 mm) from your driver airbag provides you with a clear
margin of safety. This distance is measured from the center of the steering wheel to
your breastbone. If you sit less than 10 in. (250 mm) away now, you can change your
driving position in several ways:
• Move your seat to the rear as far as you can while still reaching the pedals com- fortably.
• Slightly recline the back of the seat. Al though vehicle designs vary, many drivers
can achieve the 10 in. (250 mm) distance, even with the driver seat all the way for-
ward, simply by reclining the back of th e seat somewhat. If reclining the back of
your seat makes it hard to see the road, raise yourself by using a firm, non-slippery
cushion, or raise the seat if your vehicle has that feature.
• If your steering wheel is ad justable, tilt it downward. This points the airbag toward
your chest instead of your head and neck.
The seat should be adjusted as recommen ded by NHTSA above, while still maintain-
ing control of the foot pedals, steering whee l, and your view of the instrument panel
controls.
Page 43 of 660
431-1. For safe use
1
For safety and security
NX200t_OM_USA_OM78081U
WA R N I N G
■SRS airbag precautions
●Do not sit on the edge of the seat or lean
against the dashboard.
●Do not allow a child to stand in front of the
SRS front passenger airbag unit or sit on the
knees of a front passenger.
●Do not allow the front seat occupants to hold
items on their knees.
●Do not lean against the door, the roof side rail
or the front, side and rear pillars.
●Do not allow anyone to kneel on the passen-
ger seat toward the door or put their head or
hands outside the vehicle.
Page 67 of 660
671-1. For safe use
1
For safety and security
NX200t_OM_USA_OM78081U
Place the child restraint system on the seat facing the front of the vehicle.
Sit the child in the child restraint
system. Fit the seat belt to the
child restraint system according
to the manufacturer’s instructions
and insert the plate into the
buckle. Make sure that the belt is
not twisted.
Check that the shoulder belt is cor-
rectly positioned over the child’s
shoulder and that the lap belt is as
low as possible. (P. 3 0 )
◆Removing a child restraint system installed with a seat belt
Press the buckle release button and
fully retract the seat belt.
When releasing the buckle, the child
restraint system ma y spring up due to
the rebound of the seat cushion.
Release the buckle while holding
down the child restraint system.
Since the seat belt automatically
reels itself, slowly return it to the
stowing position.
2
Booster typeHigh back type
3