2016 LEXUS NX200T tow
[x] Cancel search: towPage 133 of 660

1333-2. Opening, closing and locking the doors
3
Operation of each component
NX200t_OM_USA_OM78081U
■Electronic Key battery-Saving Function
When battery-saving mode is set, battery depletion is minimized by stopping the elec-
tronic key from receiving radio waves.
■Conditions affecting operation
The smart access system with push-button star t, wireless remote control and immobilizer
system use weak radio waves. In the followi ng situations, the communication between the
electronic key and the vehicle may be affected, preventing the smart access system with
push-button start, wireless remote control and immobilizer system from operating prop-
erly. (Ways of coping: P. 5 76 )
●When the electronic key battery is depleted
●Near a TV tower, electric powe r plant, gas station, radio station, large display, airport or
other facility that generates strong radio waves or electrical noise
●When the electronic key is in contact wi th, or is covered by the following metallic
objects
• Cards to which aluminum foil is attached
• Cigarette boxes that have aluminum foil inside
• Metallic wallets or bags
•Coins
•Hand warmers made of metal
• Media such as CDs and DVDs
●When other wireless keys (that emit radio waves) are being used nearby
●When carrying the electronic key together with the following devices that emit radio
waves
• Portable radio, cellular phone, cordless phone or other wireless communication
devices
• Another vehicle’s electronic key or a wireless key that emits radio waves
• Personal computers or personal digital assistants (PDAs)
• Digital audio players
• Portable game systems
●If window tint with a metallic content or me tallic objects are attached to the rear win-
dow
●When the electronic key is placed near a battery charger or electronic devices
Press twice while pressing and holding .
Confirm that the electronic key indicator flashes
4 times.
While the battery-saving mode is set, the smart
access system with push-button start cannot be
used. To cancel the function, press any of the
electronic key buttons.
Page 139 of 660

1393-3. Adjusting the seats
3
Operation of each component
NX200t_OM_USA_OM78081U
■Before folding down the rear seatbacksStow the rear center seat be lt and seat belt buckles. (P. 3 2 )
Lower the head restraint of the rear seat. ( P. 1 4 9 )
■Folding down rear seatbacks (manual seat)
Pull the seatback angle adjustment
lever and fold down the seatback.
■Folding down rear seatbacks (power seat)
Press and hold the switch to fold down the seatback.
The buzzer sounds and operations start. Th e buzzer sounds again when the operation
is complete.
To stop the operation of a se at partway, press either seat operation switch for that
seat, once more. Switches for that seat in other locations can be used to stop the
operations. (buzzer sounds depending on stopping position of the seatback)
Folding down the rear seatbacks
1
2
Instrument panel switchRear seat switch
When the seatback is collapsed to the
rear, put the seatback in the most
upright position and press the switch
once again.
Page 144 of 660

1443-3. Adjusting the seats
NX200t_OM_USA_OM78081U
WA R N I N G
■Seat adjustment
To reduce the risk of sliding under the lap belt during a collision, do not recline the seat
more than necessary.
If the seat is too rec lined, the lap belt may slide past the hips and apply restraint forces
directly to the abdomen, or your neck may contact the shoulder belt, increasing the risk
of death or serious injury in the event of an accident.
Adjustments should not be ma de while driving as the seat may unexpectedly move and
cause the driver to lose control of the vehicle.
■After returning the rear seatback to the upright position
Observe the following precautions.
Failure to do so may result in death or serious injury.
●Make sure that the seatback is securely locked in position by lightly pushing it back
and forth.
●Check that the seat belts are not twisted or caught in the seatback.
■Jam protection function (vehicles with a power seat)
Observe the following precautions.
Failure to do so may cause death or serious injury.
●Never use any part of your body to intentio nally activate the jam protection function.
●The jam protection function may not work if something gets caught just before the
seatback is fully folded forward. Be careful not to get fingers caught or anything else.
●The jam protection function may not work depending on the shape of the object that
is caught. Be careful not to catch fingers or anything else.
NOTICE
■Stowing the seat belts
The seat belts and the buckles for the rear ce nter seat, as well as the armrest, must be
stowed before you fold down the rear seatbacks. ( P. 3 2 , 4 5 4 )
Page 150 of 660

1503-3. Adjusting the seats
NX200t_OM_USA_OM78081U
■Removing the head restraints
■Installing the head restraints
■Adjusting the height of the he ad restraints (front seats)
■Adjusting the center rear seat head restraint
Always raise the head restraint one level from the stowed position when using. Pull the head restraint up while pressing the lock
release button.
If the head restraint to uches the ceiling, making
the removal difficult, change the seat height or
angle. ( P. 137, 138)
Align the head restrain t with the installation
holes and push it down to the lock position.
Press and hold the lock release button when
lowering the head restraint.
Make sure that the head restraints are adjusted
so that the center of the head restraint is closest
to the top of your ears.
WA R N I N G
■Head restraint precautions
Observe the following precautions regarding the head restraints.
Failure to do so may result in death or serious injury.
●Use the head restraints designed for each respective seat.
●Adjust the head restraints to the correct position at all times.
●After adjusting the head restraints, push down on them and make sure they are
locked in position.
●Do not drive with the head restraints removed.
Lock release button
Lock release button
Page 151 of 660

1513-4. Adjusting the steering wheel and mirrors
3
Operation of each component
NX200t_OM_USA_OM78081U
Steering wheel
Manual type
Hold the steering wheel and push
the lever down.
Adjust to the ideal position by mov-
ing the steering wheel horizontally
and vertically.
After adjustment, pull the lever up to
secure the steering wheel.
Po w e r t y p e
Operating the switch moves the steering wheel in the following directions:
Up
Down
Toward the driver
Away from the driver
Adjustment procedure
1
2
1
2
3
4
Page 165 of 660

165
4Driving
NX200t_OM_USA_OM78081U
4-1. Before drivingDriving the vehicle ...................... 166
Cargo and luggage ..................... 174
Vehicle load limits ....................... 178
Trailer towing (vehicles with towing pa ckage) ............. 179
Trailer towing (vehicles without towing package) ....... 191
Dinghy towing............................... 192
4-2. Driving procedures Engine (ignition) switch ............ 193
Automatic transmission ............198
Turn signal lever ..........................203
Parking brake ...............................204
Brake Hold .................................... 207
ASC (Active Sound Control)...................................... 209
4-3. Operating the lights and wipers
Headlight switch .......................... 210
Automatic High Beam .............. 214
Fog light switch............................. 218
Windshield wipers and washer........................................... 219
Rear window wiper and washer..........................................225 4-4. Refueling
Opening the fuel tank cap ..... 227
4-5. Using the driving support systems
Dynamic radar cruise control .......................................... 231
Dynamic radar cruise control with full-speed
range ............................................ 244
Cruise control .............................258
LDA (Lane Departure Alert with steering control) .............. 261
Intuitive parking assist .............. 270
Lexus parking assist monitor ........................................ 278
Driving mode select switch ........................................... 294
Driving assist systems................297
All-wheel drive lock switch (AWD models) ..........302
PCS (Pre-Collision System)........................................303
BSM (Blind Spot Monitor) .....309
4-6. Driving tips Winter driving tips .......................317
Utility vehicle precautions ....... 321
Page 168 of 660

1684-1. Before driving
NX200t_OM_USA_OM78081U
■Breaking in your new Lexus
To extend the life of the ve hicle, observing the followin g precautions is recommended:
●For the first 200 miles (300 km):
Avoid sudden stops.
●For the first 1000 miles (1600 km):
• Do not drive at extremely high speeds.
• Avoid sudden acceleration.
• Do not drive continuously in low gears.
• Do not drive at a constant speed for extended periods.
Vehicles with towing package
●For the first 500miles (800 km):
Do not tow a trailer.
■Operating your vehicle in a foreign country
Comply with the relevant vehi cle registration laws and confirm the availability of the cor-
rect fuel. ( P. 599)
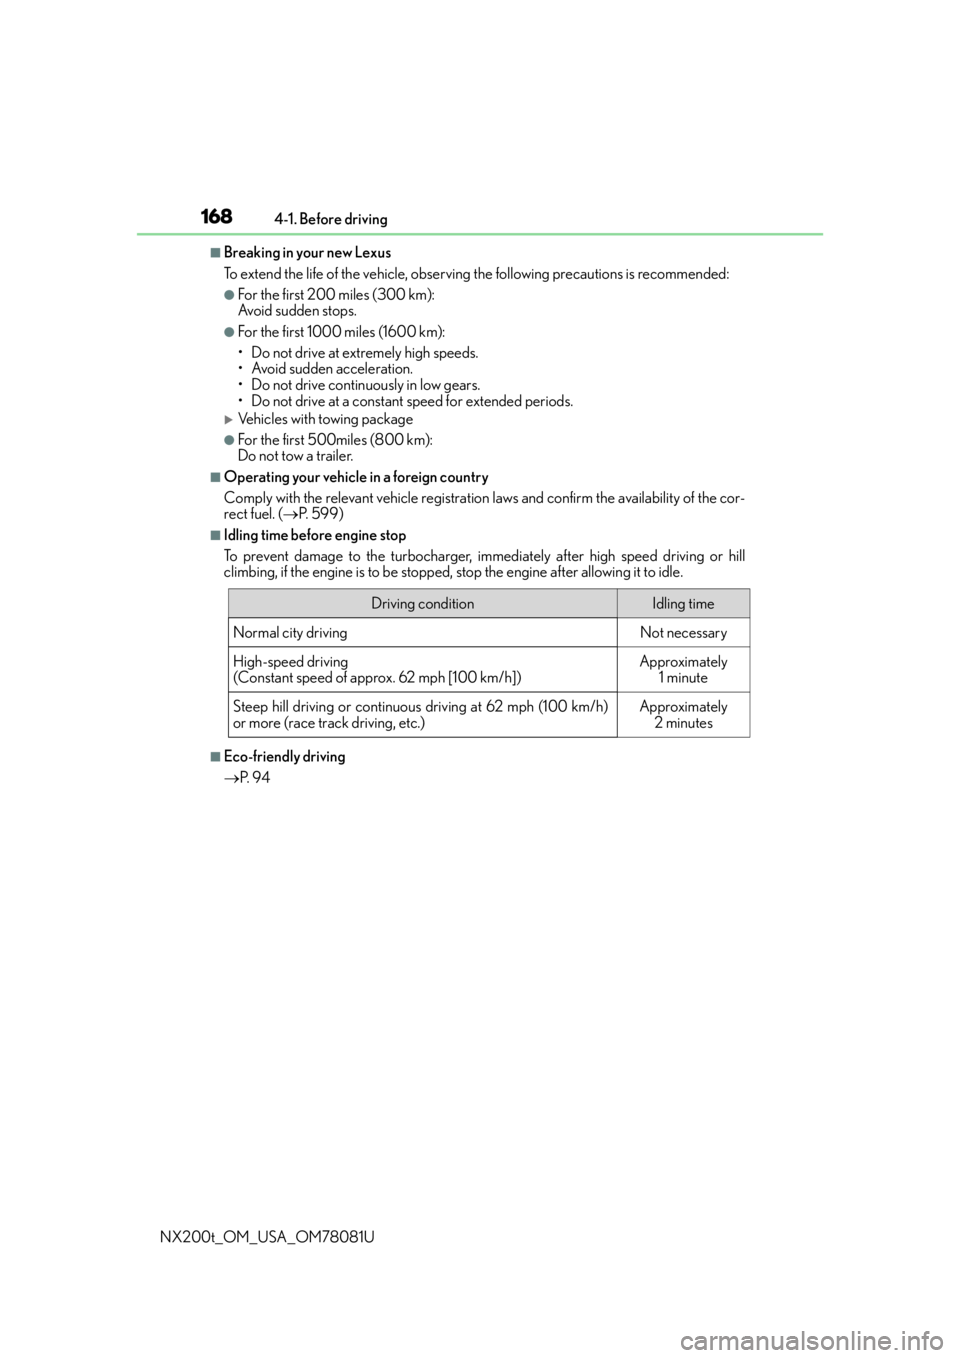
■Idling time before engine stop
To prevent damage to the turbocharger, immediately after high speed driving or hill
climbing, if the engine is to be stopped, stop the engine after allowing it to idle.
■Eco-friendly driving
P. 9 4
Driving conditionIdling time
Normal city driving
Not necessary
High-speed driving
(Constant speed of approx. 62 mph [100 km/h])
Approximately 1 minute
Steep hill driving or continuous driving at 62 mph (100 km/h)
or more (race track driving, etc.)
Approximately 2 minutes
Page 174 of 660

1744-1. Before driving
NX200t_OM_USA_OM78081U
Cargo and luggage
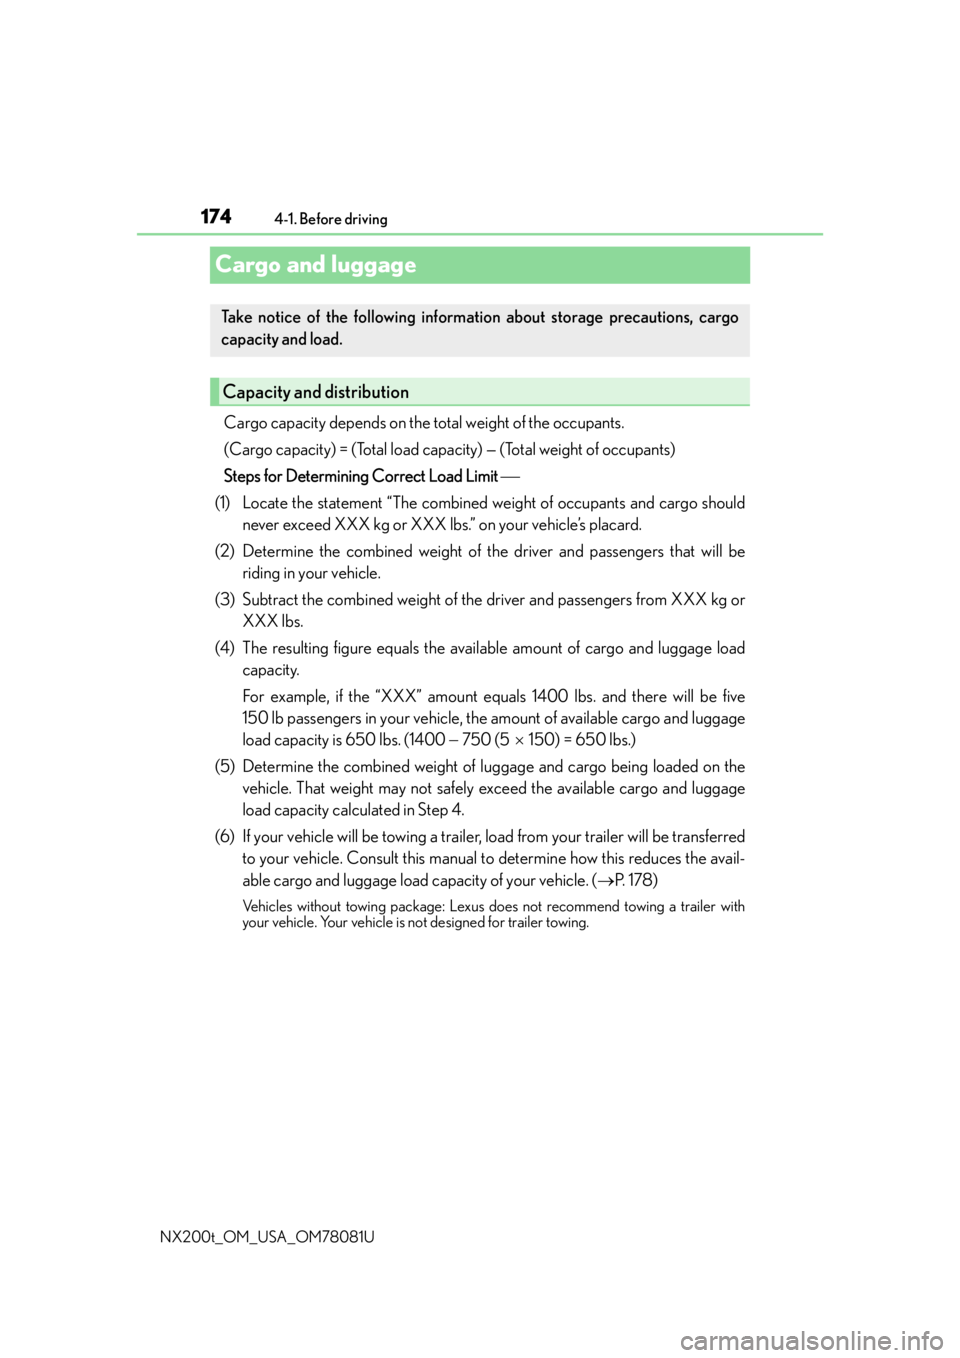
Cargo capacity depends on the to tal weight of the occupants.
(Cargo capacity) = (Total load capacity) — (Total weight of occupants)
Steps for Determining Correct Load Limit
(1) Locate the statement “The combined weight of occupants and cargo should never exceed XXX kg or XXX lbs.” on your vehicle’s placard.
(2) Determine the combined weight of the driver and passengers that will be
riding in your vehicle.
(3) Subtract the combined weight of the driver and passengers from XXX kg or
XXX lbs.
(4) The resulting figure equals the ava ilable amount of cargo and luggage load
capacity.
For example, if the “XXX” amount equals 1400 lbs. and there will be five
150 lb passengers in your vehicle, the amount of available cargo and luggage
load capacity is 650 lbs. (1400 750 (5 150) = 650 lbs.)
(5) Determine the combined weight of luggage and cargo being loaded on the
vehicle. That weight may not safely exceed the available cargo and luggage
load capacity calculated in Step 4.
(6) If your vehicle will be towing a trailer, load from your trailer will be transferred
to your vehicle. Consult this manual to determine how this reduces the avail-
able cargo and luggage load capacity of your vehicle. (P. 1 7 8 )
Vehicles without towing package: Lexus does not recommend towing a trailer with
your vehicle. Your vehicle is not designed for trailer towing.
Take notice of the following information about storage precautions, cargo
capacity and load.
Capacity and distribution