2016 FORD F450 SUPER DUTY steering
[x] Cancel search: steeringPage 185 of 507
Fixed guidelines are always shown in thedisplay, but the active guidelines onlydisplay when the steering wheel is turned.To use active guidelines, turn the steeringwheel to point the guidelines toward anintended path. If the steering wheelposition is changed while reversing, thevehicle might deviate from the originalintended path.
The active guidelines fade in and outdepending on the steering wheel position.The active guidelines are not shown whenthe steering wheel position is straight.
Always use caution while reversing.Objects in the red zone are closest to yourvehicle and objects in the green zone arefarther away. Objects are getting closer toyour vehicle as they move from the greenzone to the yellow or red zones. Use theside view mirrors and rear view mirror toget better coverage on both sides and rearof your vehicle.
Enhanced Park Aids
Note:Enhanced park aids is only availablewhen the transmission is in reverse (R).
Note:The reverse sensing system is noteffective at speeds above 3 mph (5 km/h)and may not detect certain angular ormoving objects.
The system uses red, yellow and greenhighlights which appear on top of the videoimage when an object is detected by thereverse sensing system. The alert highlightsthe closest object detected. The reversesensing alert can be disabled and if visualpark aid alert is enabled, highlighted areasare still displayed.
Selectable settings for this feature are ONand OFF.
Manual Zoom
WARNING
When manual zoom is on, the fullarea behind your vehicle is notshown. Be aware of yoursurroundings when using the manual zoomfeature.
Note:Manual zoom is only available whenthe transmission is in reverse (R).
Note:When manual zoom is enabled, onlythe centerline is shown.
This feature allows you to get a closer viewof an object behind your vehicle (forexample, a trailer). The zoomed imagekeeps the bumper in the image to providea reference. The zoom is only active whilethe transmission is in reverse (R). Whenthe transmission is shifted out of reverse(R), the feature automatically turns offand must be reset when it is used again.
Selectable settings for this feature is OFF,Level 1, Level 2 and Level 3. The selectedlevel will appear between the buttons (forexample, Level 1) The default setting forthe manual zoom is OFF.
Rear Camera Delay
When shifting the transmission out ofreverse (R) and into any gear other thanpark (P), the camera image remains in thedisplay until your vehicle speed reaches5 mph (8 km/h). This occurs when the rearcamera delay feature is on or until a radiobutton is selected.
Selectable settings for this feature are ONand OFF. The default setting for the rearcamera delay is ON.
182
Super Duty (TFA) Canada/United States of America, enUSA, First Printing
Parking Aids
Page 186 of 507
PRINCIPLE OF OPERATION
Cruise control lets you maintain a setspeed without keeping your foot on theaccelerator pedal. You can use cruisecontrol when your vehicle speed is greaterthan 20 mph (30 km/h).
USING CRUISE CONTROL
WARNINGS
Do not use cruise control in heavytraffic, on winding roads or when theroad surface is slippery. This couldresult in loss of vehicle control, seriousinjury or death.
When you are going downhill, yourvehicle speed may increase abovethe set speed. The system will notapply the brakes. Change down a gear toassist the system in maintaining the setspeed. Failure to do so could result in lossof vehicle control, serious injury or death.
Note:Cruise control will disengage if thevehicle speed decreases more than 10 mph(16 km/h) below your set speed whiledriving uphill.
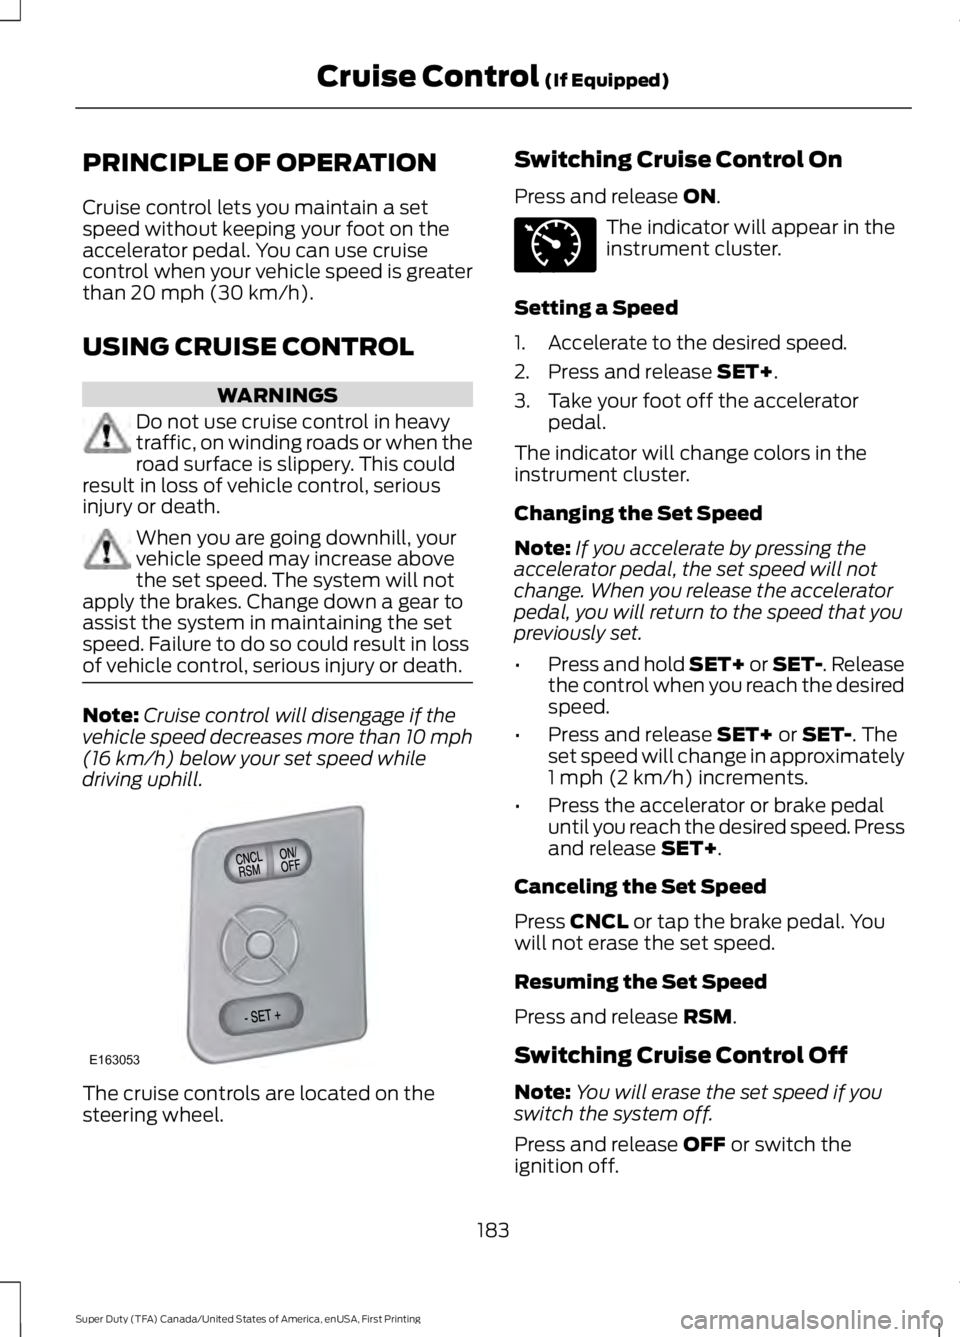
The cruise controls are located on thesteering wheel.
Switching Cruise Control On
Press and release ON.
The indicator will appear in theinstrument cluster.
Setting a Speed
1. Accelerate to the desired speed.
2. Press and release SET+.
3. Take your foot off the acceleratorpedal.
The indicator will change colors in theinstrument cluster.
Changing the Set Speed
Note:If you accelerate by pressing theaccelerator pedal, the set speed will notchange. When you release the acceleratorpedal, you will return to the speed that youpreviously set.
•Press and hold SET+ or SET-. Releasethe control when you reach the desiredspeed.
•Press and release SET+ or SET-. Theset speed will change in approximately1 mph (2 km/h) increments.
•Press the accelerator or brake pedaluntil you reach the desired speed. Pressand release SET+.
Canceling the Set Speed
Press CNCL or tap the brake pedal. Youwill not erase the set speed.
Resuming the Set Speed
Press and release RSM.
Switching Cruise Control Off
Note:You will erase the set speed if youswitch the system off.
Press and release OFF or switch theignition off.
183
Super Duty (TFA) Canada/United States of America, enUSA, First Printing
Cruise Control (If Equipped)E163053 E71340
Page 187 of 507
STEERING
To help prevent damage to the powersteering system:
•Never hold the steering wheel at itsfurthest turning points (until it stops)for more than three to five secondswhen the engine is running.
•Do not operate the vehicle with a lowpower steering pump fluid level (belowthe MIN mark on the reservoir).
•Some noise is normal during operation.If excessive, check for low powersteering pump fluid level beforeseeking service by your dealer.
•Heavy or uneven efforts may be causedby low power steering fluid. Check forlow power steering pump fluid levelbefore seeking service by your dealer.
•Do not fill the power steering pumpreservoir above the MAX mark on thereservoir, as this may result in leaksfrom the reservoir.
If the power steering system breaks down(or if the engine is turned off), you cansteer the vehicle manually, but it takesmore effort.
If the steering wanders or pulls, check for:
•an improperly inflated tire
•uneven tire wear
•loose or worn suspension components
•loose or worn steering components
•improper vehicle alignment
If any steering components are serviced orreplaced, install new fasteners (many arecoated with thread adhesive or haveprevailing torque features which may notbe re-used). Never re-use a bolt or nut.Torque fasteners to specifications.
A high crown in the road or high crosswindsmay also make the steering seem towander or pull.
184
Super Duty (TFA) Canada/United States of America, enUSA, First Printing
Driving Aids
Page 200 of 507
Remember to account for the trailertongue weight as part of your vehicle loadwhen calculating the total vehicle weight.
Trailer Towing Connector
When attaching the trailer wiring connectorto your vehicle, only use a proper fittingconnector that works with the vehicle andtrailer functions. Some seven-positionconnectors may have the SAE J2863 logo,which confirms that it is the proper wiringconnector and works correctly with yourvehicle.
FunctionColor
Left turn signal and stop lampYellow
Ground (-)White
Electric brakesBlue
Right turn signal and stoplampGreen
Battery (+)Orange
Running lightsBrown
Reverse lightsGrey
Dynamic Hitching Using the RearView Camera System
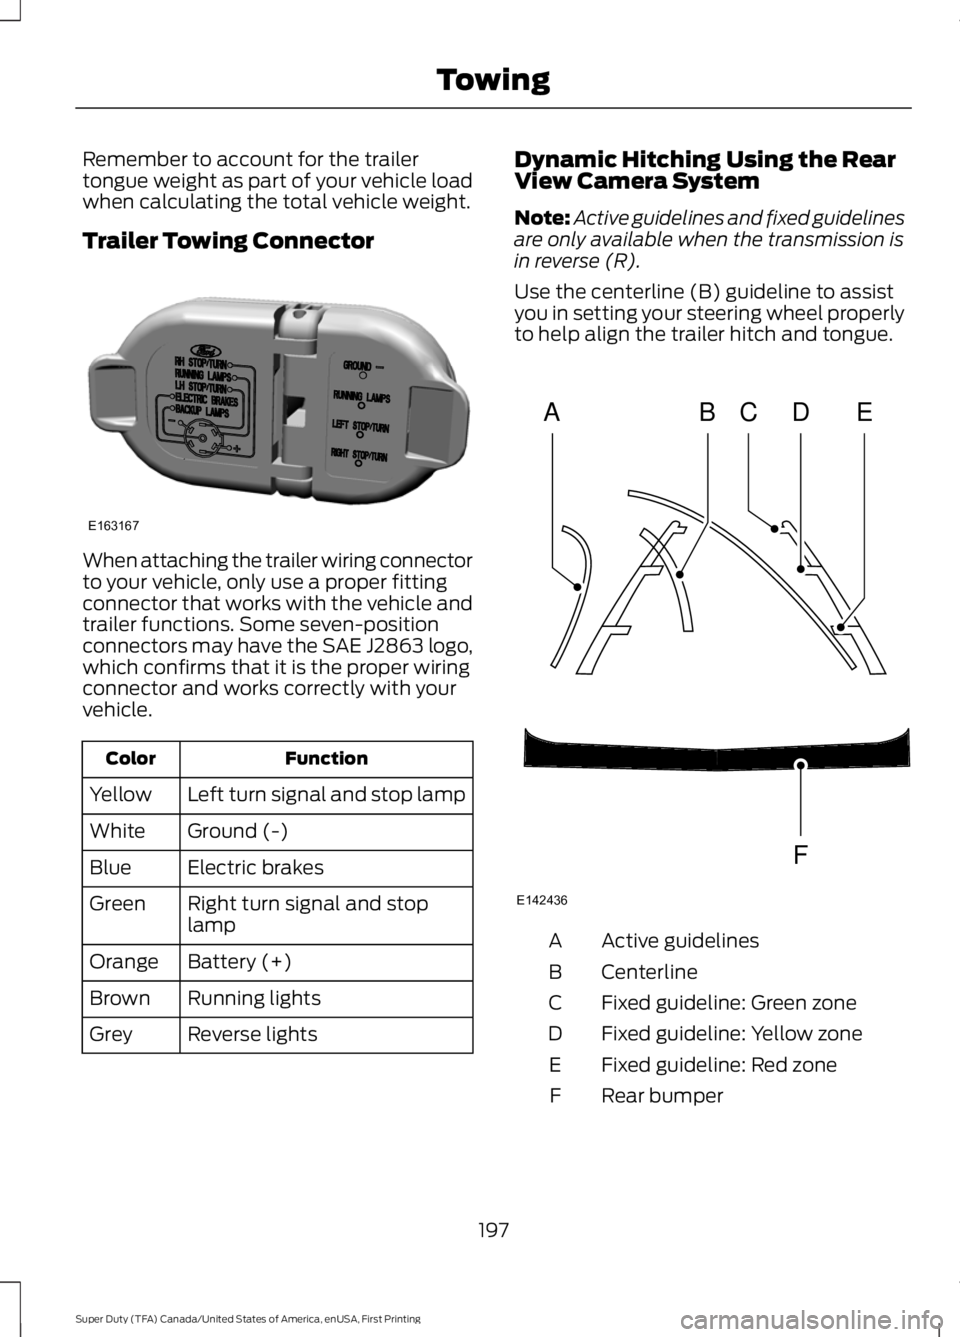
Note:Active guidelines and fixed guidelinesare only available when the transmission isin reverse (R).
Use the centerline (B) guideline to assistyou in setting your steering wheel properlyto help align the trailer hitch and tongue.
Active guidelinesA
CenterlineB
Fixed guideline: Green zoneC
Fixed guideline: Yellow zoneD
Fixed guideline: Red zoneE
Rear bumperF
197
Super Duty (TFA) Canada/United States of America, enUSA, First Printing
TowingE163167 ABCD
F
E
E142436
Page 201 of 507
Fixed guidelines are always shown in thedisplay, but the active guidelines onlydisplay when the steering wheel is turned.To use active guidelines, turn the steeringwheel to point the guidelines toward anintended path. If the steering wheelposition is changed while reversing, yourvehicle might deviate from the originalintended path.
The active guidelines fade in and outdepending on the steering wheel position.The active guidelines are not shown whenthe steering wheel position is straight.
Always use caution while reversing.Objects in the red zone are closest to yourvehicle and objects in the green zone arefarther away. Objects are getting closer toyour vehicle as they move from the greenzone to the yellow or red zones. Use theside view mirrors and rear view mirror toget better coverage on both sides and rearof your vehicle.
Refer to the Rear View Camera section foradditional information. See Rear ViewCamera (page 180).
Hitches
WARNING
On pick-up trucks, the trailer hitchprovided on this vehicle enhancescrash protection for the fuel system.Do not remove!
Do not use a hitch that either clamps ontothe bumper or attaches to the axle. Youmust distribute the load in your trailer sothat 10-15% for conventional towing or15-25% for fifth wheel towing of the totalweight of the trailer is on the tongue.
Weight-distributing Hitches
WARNING
Do not adjust a weight-distributinghitch to any position where the rearbumper of the vehicle is higher thanit was before attaching the trailer. Doingso will defeat the function of theweight-distributing hitch, which may causeunpredictable handling, and could resultin serious personal injury.
When hooking-up a trailer using aweight-distributing hitch, always use thefollowing procedure:
1. Park the loaded vehicle, without thetrailer, on a level surface.
2. Measure the height to the top of yourvehicle's front wheel opening on thefender. This is H1.
3.Attach the loaded trailer to your vehiclewithout the weight-distributing barsconnected.
4. Measure the height to the top of yourvehicle's front wheel opening on thefender a second time. This is H2.
5. Install and adjust the tension in theweight-distributing bars so that theheight of your vehicle's front wheelopening on the fender is approximatelyhalfway between H1 and H2.
6.Check that the trailer is level or slightlynose down toward your vehicle. If not,adjust the ball height accordingly andrepeat Steps 2-6.
Once the trailer is level or slightly nosedown toward the vehicle:
•Lock the bar tension adjuster in place.
•Check that the trailer tongue securelyattaches and locks onto the hitch.
•Install safety chains, lighting, and trailerbrake controls as required by law or thetrailer manufacturer.
198
Super Duty (TFA) Canada/United States of America, enUSA, First Printing
Towing
Page 206 of 507
•Check your hitch, electrical connectionsand trailer wheel lug nuts thoroughlyafter you have traveled 50 miles (80kilometers).
•When stopped in congested or heavytraffic during hot weather, place thegearshift in position P to aid engine andtransmission cooling and to help A/Cperformance.
•Turn off the speed control with heavyloads or in hilly terrain. The speedcontrol may turn off automaticallywhen you are towing on long, steepgrades.
•Shift to a lower gear when driving downa long or steep hill. Do not apply thebrakes continuously, as they mayoverheat and become less effective.
•If your transmission is equipped with aGrade Assist or Tow/Haul feature, usethis feature when towing. This providesengine braking and helps eliminateexcessive transmission shifting foroptimum fuel economy andtransmission cooling.
•If your vehicle is equipped withAdvanceTrac with RSC, this systemmay turn on during typical corneringmaneuvers with a heavily loaded trailer.This is normal. Turning the corner at aslower speed while towing may reducethis tendency.
•If you are towing a trailer frequently inhot weather, hilly conditions, at thegross combined weight rating (or anycombination of these factors), considerrefilling your rear axle with syntheticgear lubricant (if the axle is not alreadyfilled with it). See Capacities andSpecifications (page 303).
•Allow more distance for stopping witha trailer attached. Anticipate stops andbrake gradually.
•Avoid parking on a grade. However, ifyou must park on a grade:
1. Turn the steering wheel to point yourvehicle tires away from traffic flow.
2. Set your vehicle parking brake.
3. Place the automatic transmission inposition P.
4. Place wheel chocks in front and backof the trailer wheels. (Chocks notincluded with vehicle.)
Your vehicle may be equipped with atemporary or conventional spare tire. A"temporary" spare tire is different in size(diameter or width), tread-type(All-Season or All Terrain) or is from adifferent manufacturer than the road tireson your vehicle. Consult information on thetire label or Safety Compliance label forlimitations when using.
Launching or Retrieving a Boat orPersonal Watercraft (PWC)
Note:Disconnect the wiring to the trailerbefore backing the trailer into the water.
Note:Reconnect the wiring to the trailerafter you remove the trailer from the water.
When backing down a ramp during boatlaunching or retrieval:
•Do not allow the static water level torise above the bottom edge of the rearbumper.
•Do not allow waves to break higherthan 6 inches (15 centimeters) abovethe bottom edge of the rear bumper.
Exceeding these limits may allow water toenter vehicle components:
•Causing internal damage to thecomponents.
•Affecting driveability, emissions, andreliability.
203
Super Duty (TFA) Canada/United States of America, enUSA, First Printing
Towing
Page 209 of 507
TOWING THE VEHICLE ON
FOUR WHEELS
Emergency Towing
If your vehicle becomes inoperable(without access to wheel dollies,car-hauling trailer, or flatbed transportvehicle), it can be flat-towed (all wheelson the ground, regardless of the powertrainand transmission configuration) under thefollowing conditions:
•Your vehicle is facing forward fortowing in a forward direction.
•Place the transmission in position N. Ifyou cannot move the transmission intoN, you may need to override it. SeeTransmission (page 151).
•Maximum speed is 35 mph (56 km/h).
•Maximum distance is 50 mi (80 km).
WARNING
If your vehicle has a steering wheellock make sure the ignition is in theaccessory or on position when beingtowed.
Recreational Towing
Note:Put your climate control system inrecirculated air mode to prevent exhaustfumes from entering your vehicle. SeeClimate Control (page 110).
Follow these guidelines if you have a needfor recreational towing, such as towingyour vehicle behind a motorhome. Wedesigned these guidelines to preventdamage to your transmission.
Two-wheel Drive Vehicles andFour-wheel Drive Vehicles Equippedwith an Electronic-shift Transfer Case
Do not tow your vehicle with any wheelson the ground, as vehicle or transmissiondamage may occur. It is recommended totow your vehicle with all four (4) wheelsoff the ground, such as when using acar-hauling trailer. Otherwise, you cannottow your vehicle.
Four-wheel Drive Vehicles Equippedwith a Manual-shift Transfer Case
1. Put the transmission in position N.
2. Put the transfer case in position N.
3.Put the hub locks in the FREE position.Always make sure that both hub locksare set to the same position.
206
Super Duty (TFA) Canada/United States of America, enUSA, First Printing
Towing
Page 211 of 507
•Transmissions give their best fueleconomy when operated in the topcruise gear and with steady pressureon the gas pedal.
•Four-wheel-drive operation (ifequipped) is less fuel efficient thantwo-wheel-drive operation.
•Close the windows for high-speeddriving.
DRIVING THROUGH WATER
WARNING
Do not drive through flowing or deepwater as you may lose control of yourvehicle.
Note:Driving through standing water cancause vehicle damage.
Note:Engine damage can occur if waterenters the air filter.
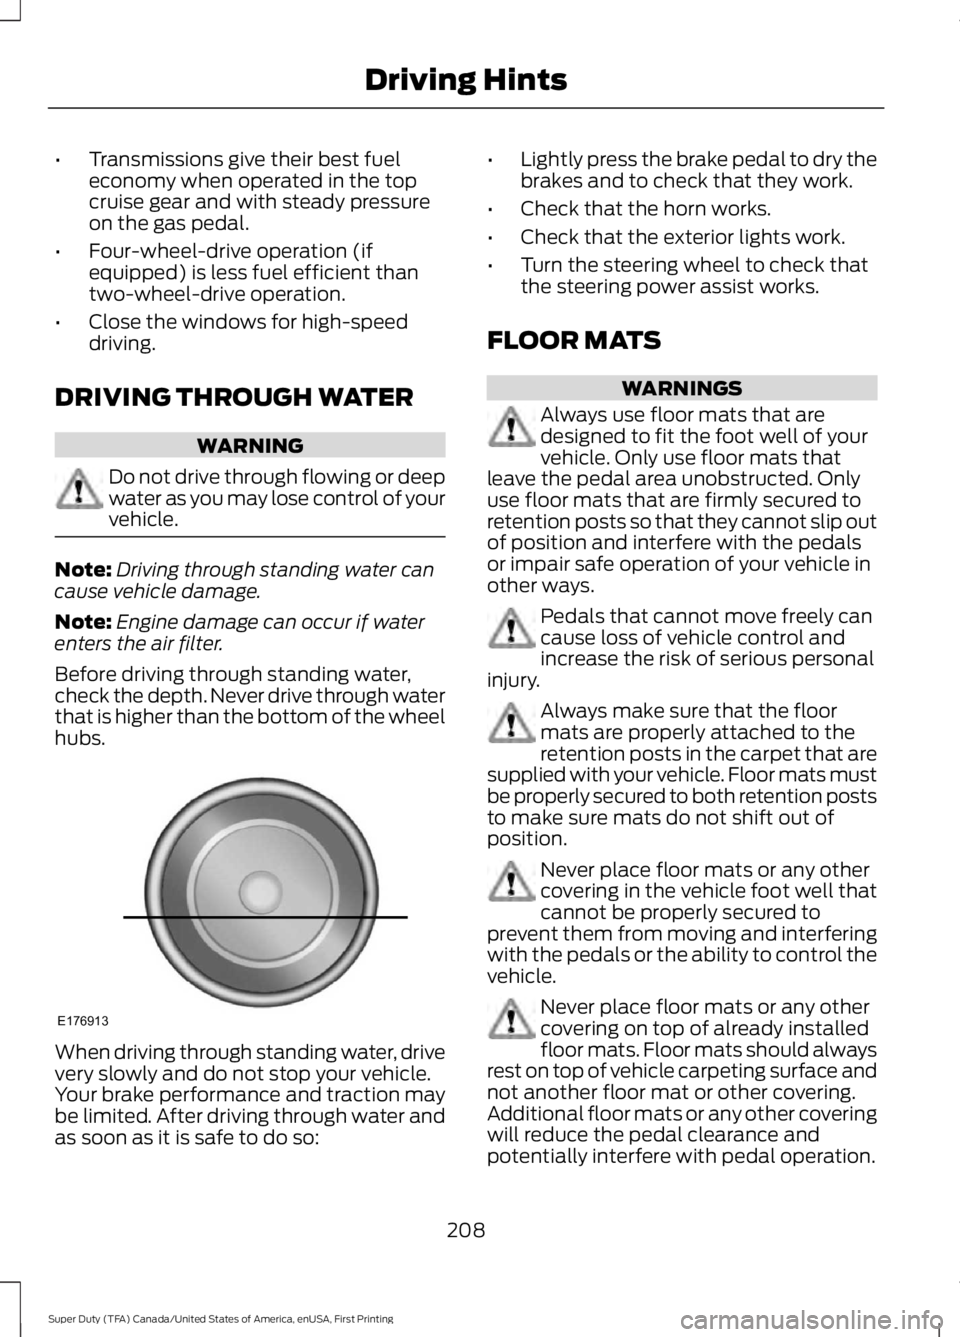
Before driving through standing water,check the depth. Never drive through waterthat is higher than the bottom of the wheelhubs.
When driving through standing water, drivevery slowly and do not stop your vehicle.Your brake performance and traction maybe limited. After driving through water andas soon as it is safe to do so:
•Lightly press the brake pedal to dry thebrakes and to check that they work.
•Check that the horn works.
•Check that the exterior lights work.
•Turn the steering wheel to check thatthe steering power assist works.
FLOOR MATS
WARNINGS
Always use floor mats that aredesigned to fit the foot well of yourvehicle. Only use floor mats thatleave the pedal area unobstructed. Onlyuse floor mats that are firmly secured toretention posts so that they cannot slip outof position and interfere with the pedalsor impair safe operation of your vehicle inother ways.
Pedals that cannot move freely cancause loss of vehicle control andincrease the risk of serious personalinjury.
Always make sure that the floormats are properly attached to theretention posts in the carpet that aresupplied with your vehicle. Floor mats mustbe properly secured to both retention poststo make sure mats do not shift out ofposition.
Never place floor mats or any othercovering in the vehicle foot well thatcannot be properly secured toprevent them from moving and interferingwith the pedals or the ability to control thevehicle.
Never place floor mats or any othercovering on top of already installedfloor mats. Floor mats should alwaysrest on top of vehicle carpeting surface andnot another floor mat or other covering.Additional floor mats or any other coveringwill reduce the pedal clearance andpotentially interfere with pedal operation.
208
Super Duty (TFA) Canada/United States of America, enUSA, First Printing
Driving HintsE176913