2016 FORD F250 SUPER DUTY ECU
[x] Cancel search: ECUPage 135 of 507

The LED lamp above the selected buttonwill illuminate to confirm that the systemis responding to the button command.
Erasing the Function Button Codes
Note:You cannot erase individual buttons.
1. Press and hold the outer two functionbuttons simultaneously for approximately20 seconds until the LED lamps above thebuttons flash rapidly
2. When the LED lamps flash, release thebuttons. You have erased all of the buttoncodes.
FCC and RSS-210 Industry CanadaCompliance
This device complies with Part 15 of theFCC Rules and with RSS-210 of IndustryCanada. Operation is subject to thefollowing two conditions:
1. This device may not cause harmfulinterference, and
2. This device must accept anyinterference received, includinginterference that may cause undesiredoperation.
Changes or modifications to your devicenot expressly approved by the partyresponsible for compliance can void theuser’s authority to operate the equipment.
HomeLink Wireless ControlSystem (If Equipped)
WARNING
Do not use the system with anygarage door opener that does nothave the safety stop and reversefeature as required by U.S. Federal SafetyStandards (this includes any garage dooropener manufactured before April 1, 1982).A garage door opener that cannot detectan object, signaling the door to stop andreverse, does not meet current federalsafety standards. Using a garage dooropener without these features increasesthe risk of serious injury or death.
Note:Make sure that the garage door andsecurity device are free from obstructionwhen you are programming. Do not programthe system with the vehicle in the garage.
Note:Make sure you keep the originalremote control transmitter for use in othervehicles as well as for future systemprogramming.
Note:We recommend that, upon the saleor lease termination of your vehicle, youerase the programmed function buttons forsecurity reasons. See Erasing the ButtonCodes later in this section.
Note:You can program a maximum ofthree devices. To change or replace any ofthe three devices after you haveprogrammed them, you must first erase thecurrent settings. See Erasing the ButtonCodes later in this section.
132
Super Duty (TFA) Canada/United States of America, enUSA, First Printing
Universal Garage Door Opener (If Equipped)E164777 E142657
Page 136 of 507
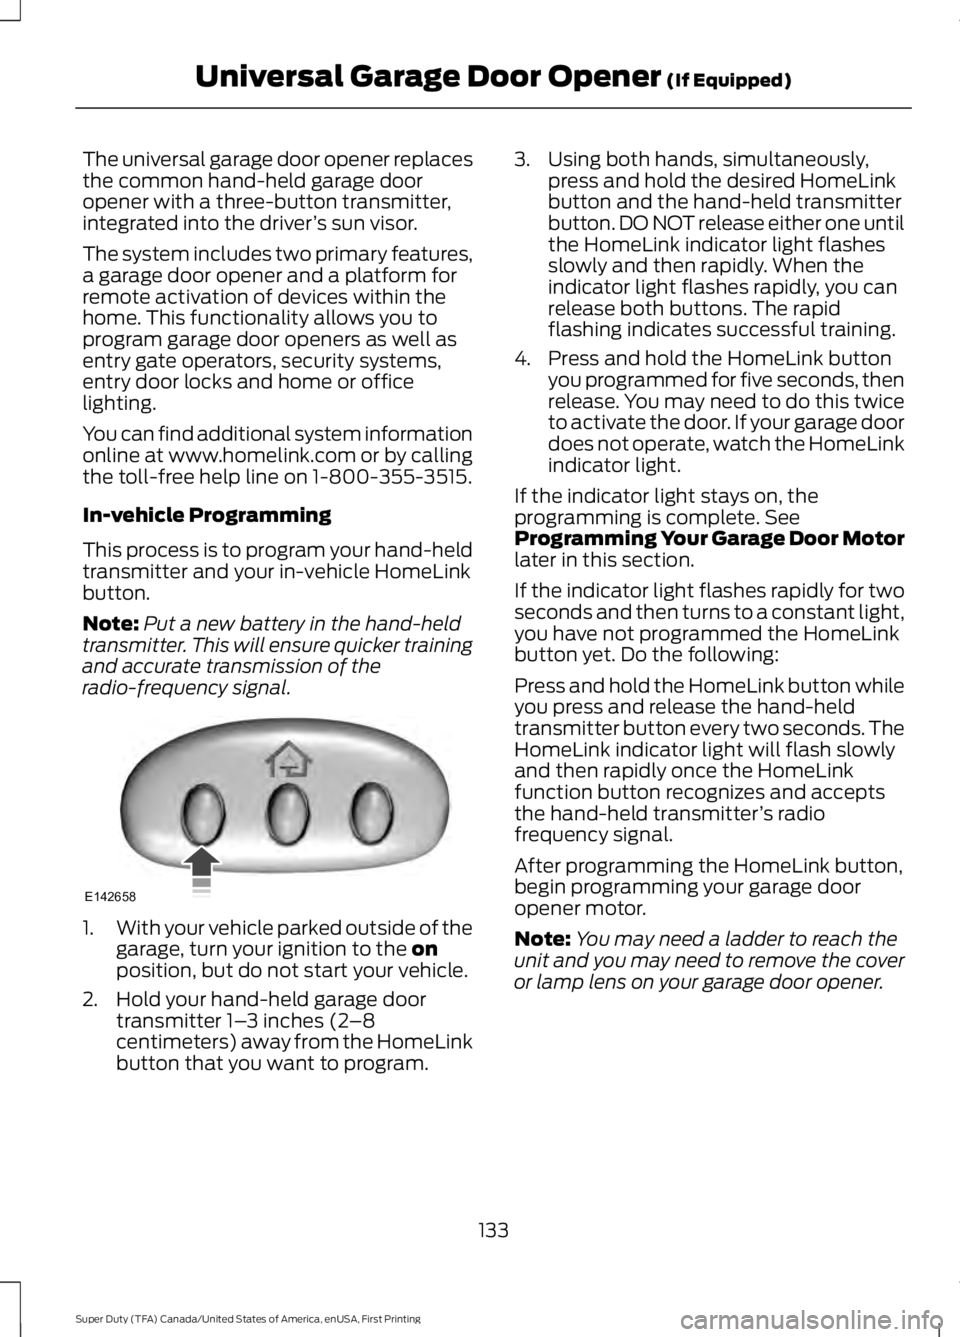
The universal garage door opener replacesthe common hand-held garage dooropener with a three-button transmitter,integrated into the driver’s sun visor.
The system includes two primary features,a garage door opener and a platform forremote activation of devices within thehome. This functionality allows you toprogram garage door openers as well asentry gate operators, security systems,entry door locks and home or officelighting.
You can find additional system informationonline at www.homelink.com or by callingthe toll-free help line on 1-800-355-3515.
In-vehicle Programming
This process is to program your hand-heldtransmitter and your in-vehicle HomeLinkbutton.
Note:Put a new battery in the hand-heldtransmitter. This will ensure quicker trainingand accurate transmission of theradio-frequency signal.
1.With your vehicle parked outside of thegarage, turn your ignition to the onposition, but do not start your vehicle.
2. Hold your hand-held garage doortransmitter 1–3 inches (2–8centimeters) away from the HomeLinkbutton that you want to program.
3. Using both hands, simultaneously,press and hold the desired HomeLinkbutton and the hand-held transmitterbutton. DO NOT release either one untilthe HomeLink indicator light flashesslowly and then rapidly. When theindicator light flashes rapidly, you canrelease both buttons. The rapidflashing indicates successful training.
4. Press and hold the HomeLink buttonyou programmed for five seconds, thenrelease. You may need to do this twiceto activate the door. If your garage doordoes not operate, watch the HomeLinkindicator light.
If the indicator light stays on, theprogramming is complete. SeeProgramming Your Garage Door Motorlater in this section.
If the indicator light flashes rapidly for twoseconds and then turns to a constant light,you have not programmed the HomeLinkbutton yet. Do the following:
Press and hold the HomeLink button whileyou press and release the hand-heldtransmitter button every two seconds. TheHomeLink indicator light will flash slowlyand then rapidly once the HomeLinkfunction button recognizes and acceptsthe hand-held transmitter’s radiofrequency signal.
After programming the HomeLink button,begin programming your garage dooropener motor.
Note:You may need a ladder to reach theunit and you may need to remove the coveror lamp lens on your garage door opener.
133
Super Duty (TFA) Canada/United States of America, enUSA, First Printing
Universal Garage Door Opener (If Equipped)E142658
Page 154 of 507
AUTOMATIC TRANSMISSION
WARNING
Always set the parking brake fullyand make sure the gearshift islatched in park (P). Turn the ignitionto the off position and remove the keywhenever you leave your vehicle.
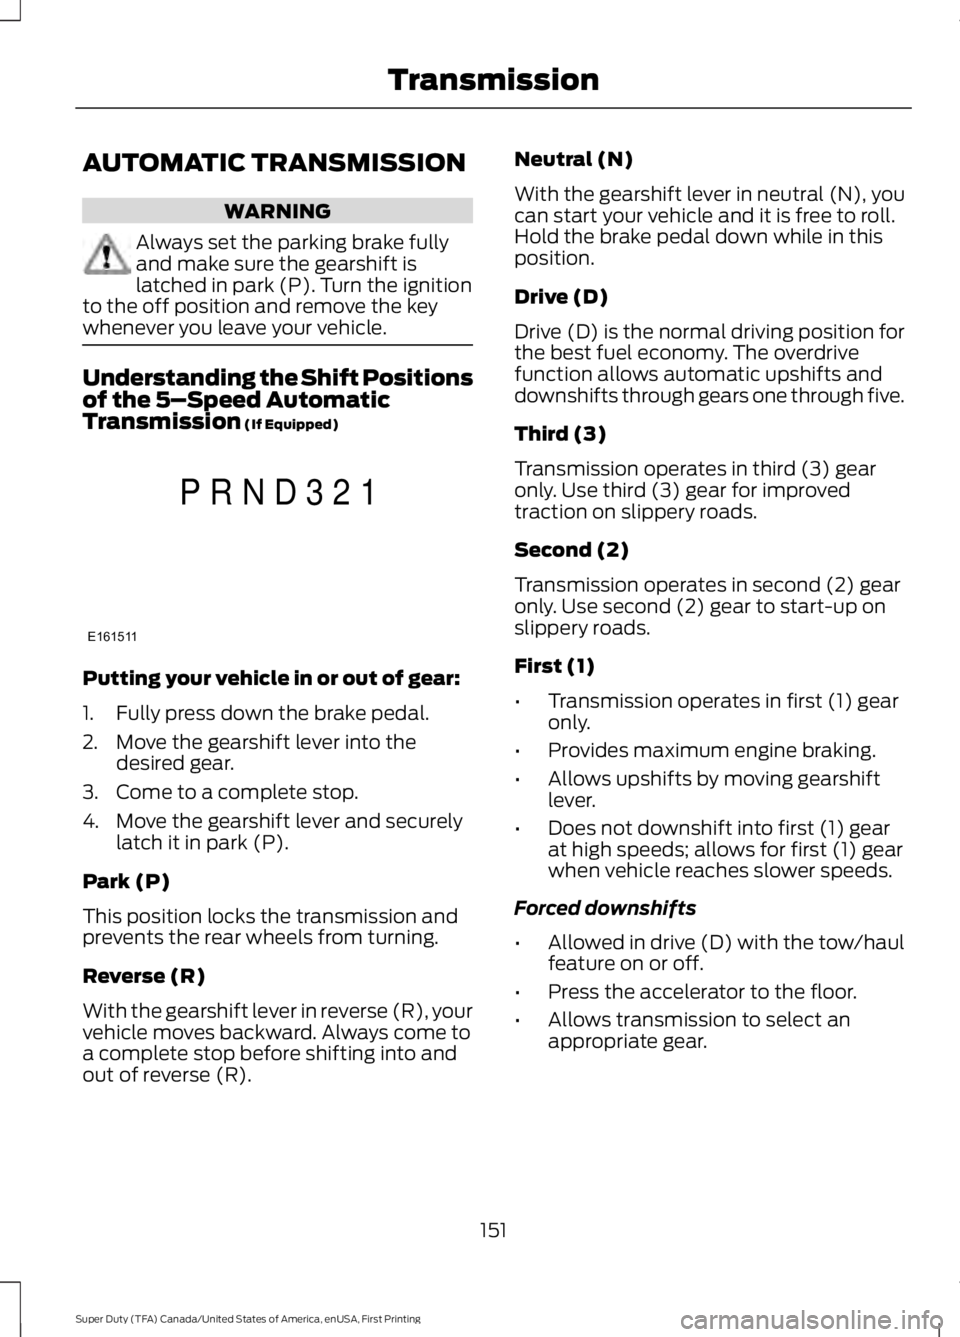
Understanding the Shift Positionsof the 5–Speed AutomaticTransmission (If Equipped)
Putting your vehicle in or out of gear:
1. Fully press down the brake pedal.
2. Move the gearshift lever into thedesired gear.
3. Come to a complete stop.
4. Move the gearshift lever and securelylatch it in park (P).
Park (P)
This position locks the transmission andprevents the rear wheels from turning.
Reverse (R)
With the gearshift lever in reverse (R), yourvehicle moves backward. Always come toa complete stop before shifting into andout of reverse (R).
Neutral (N)
With the gearshift lever in neutral (N), youcan start your vehicle and it is free to roll.Hold the brake pedal down while in thisposition.
Drive (D)
Drive (D) is the normal driving position forthe best fuel economy. The overdrivefunction allows automatic upshifts anddownshifts through gears one through five.
Third (3)
Transmission operates in third (3) gearonly. Use third (3) gear for improvedtraction on slippery roads.
Second (2)
Transmission operates in second (2) gearonly. Use second (2) gear to start-up onslippery roads.
First (1)
•Transmission operates in first (1) gearonly.
•Provides maximum engine braking.
•Allows upshifts by moving gearshiftlever.
•Does not downshift into first (1) gearat high speeds; allows for first (1) gearwhen vehicle reaches slower speeds.
Forced downshifts
•Allowed in drive (D) with the tow/haulfeature on or off.
•Press the accelerator to the floor.
•Allows transmission to select anappropriate gear.
151
Super Duty (TFA) Canada/United States of America, enUSA, First Printing
TransmissionE161511
P R N D 3 2 1
Page 155 of 507
Tow/Haul Mode
To activate tow/haul, press thebutton on the gearshift leveronce. The TOW HAUL indicatorlight illuminates in the instrument cluster.
The tow/haul feature:
•Delays upshifts to reduce the frequencyof transmission shifting.
•Provides engine braking in all forwardgears, which slows your vehicle andassists you in controlling your vehiclewhen descending a grade.
•Depending on driving conditions andload conditions, may downshift thetransmission, slow your vehicle andcontrol your vehicle speed whendescending a hill, without pressing theaccelerator pedal. The amount ofdownshift braking provided variesbased upon the amount you press thebrake pedal.
The tow/haul feature improvestransmission operation when towing atrailer or a heavy load. All transmissiongear ranges are available when usingtow/haul.
To deactivate the tow/haul feature andreturn to normal driving mode, press thebutton on the gearshift lever twice. TheTOW HAUL light deactivates. Tow/haulalso deactivates when you power downyour vehicle.
WARNING
Do not use the tow/haul featurewhen driving in icy or slipperyconditions as the increased enginebraking can cause the rear wheels to slideand your vehicle to swing around with thepossible loss of vehicle control.
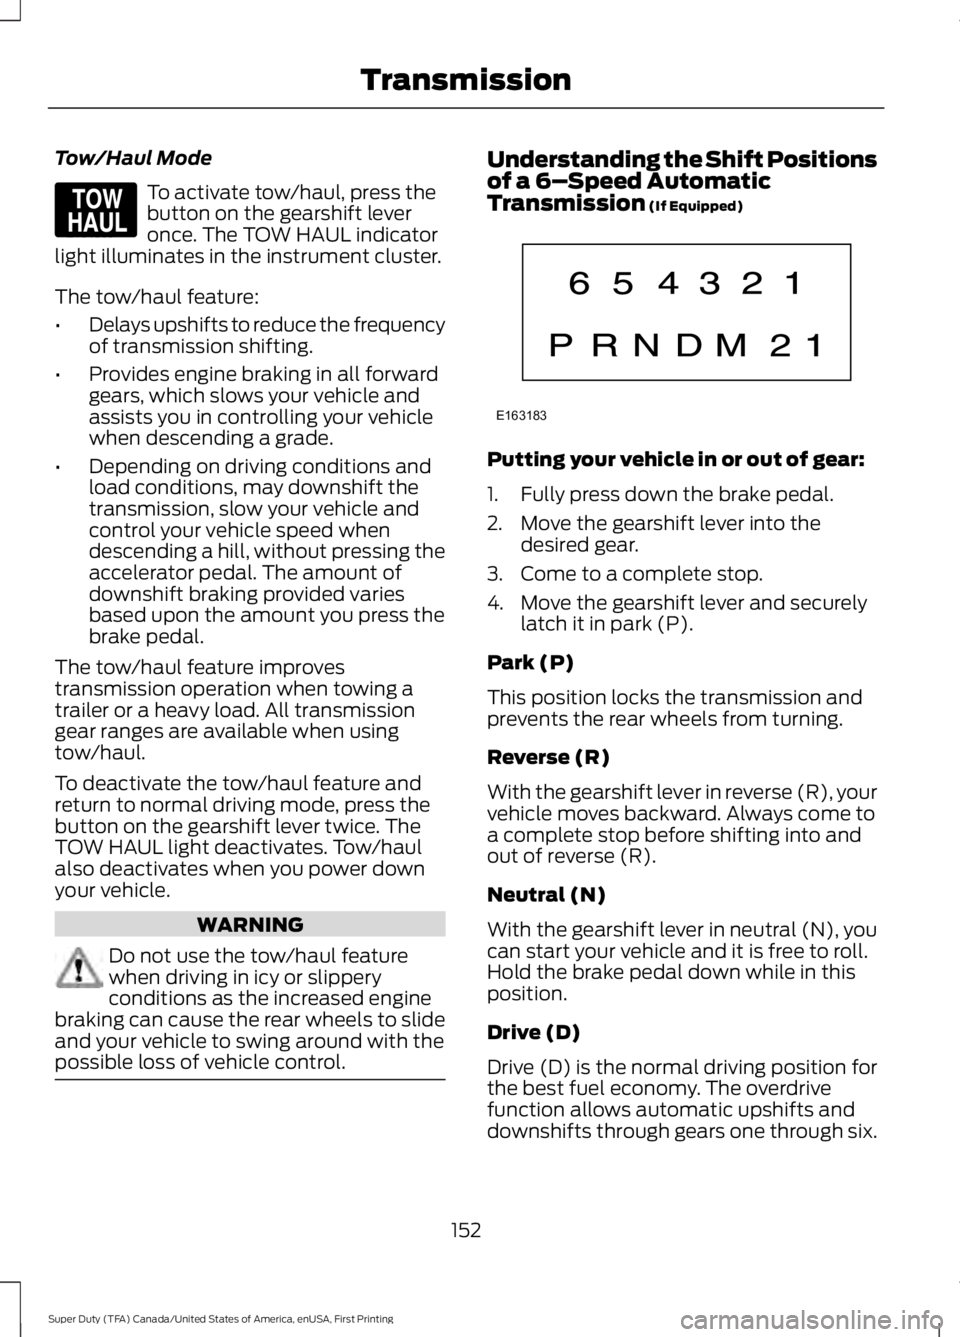
Understanding the Shift Positionsof a 6–Speed AutomaticTransmission (If Equipped)
Putting your vehicle in or out of gear:
1. Fully press down the brake pedal.
2. Move the gearshift lever into thedesired gear.
3. Come to a complete stop.
4. Move the gearshift lever and securelylatch it in park (P).
Park (P)
This position locks the transmission andprevents the rear wheels from turning.
Reverse (R)
With the gearshift lever in reverse (R), yourvehicle moves backward. Always come toa complete stop before shifting into andout of reverse (R).
Neutral (N)
With the gearshift lever in neutral (N), youcan start your vehicle and it is free to roll.Hold the brake pedal down while in thisposition.
Drive (D)
Drive (D) is the normal driving position forthe best fuel economy. The overdrivefunction allows automatic upshifts anddownshifts through gears one through six.
152
Super Duty (TFA) Canada/United States of America, enUSA, First Printing
TransmissionE161509 E163183
Page 157 of 507

Understanding your SelectShiftAutomatic™ transmission (If Equipped)
Your vehicle is equipped with a SelectShiftAutomatic™ transmission gearshift lever.The SelectShift Automatic transmissiongives you the ability to change gears up ordown (without a clutch) as desired.
In order to prevent the engine from runningat too low an RPM, which may cause it tostall, SelectShift will still automaticallymake some downshifts if it has determinedthat you have not downshifted in time.Although SelectShift will make somedownshifts for you, it will still allow you todownshift at any time as long as theSelectShift determines that damage willnot be caused to the engine fromover-revving.
SelectShift will not automatically upshift,even if the engine is approaching the RPMlimit. It must be shifted manually bypressing the + button.
Note:Engine damage may occur if youmaintain excessive engine revving withoutshifting.
The SelectShift Automatic transmissionfeature has two modes: PRS and M mode.
PRS (Progressive Range Selection)
Progressive Range Selection gives you theability to lockout gears from the automaticshifting range. This may provide you withan improved driving experience (forexample, in slippery conditions or whenexperiencing a steep grade).
With the gearshift lever in drive (D), pressthe – button to active PRS. The availableand selected gears are indicated on theinstrument cluster.
All available gears will display with thecurrent gear indicated. Press the – buttonagain to lock out gears beginning with thehighest gear. Example: press the – buttontwice to lock out 6th and 5th gears. Onlythe available gears will display and thetransmission will automatically shiftbetween the available gears. Press the +button to unlock gears to allow thetransmission to shift to higher gears. Thetransmission will shift automatically withinthe gear range you select.
Manual (M)
Moving the gearshift lever to the manual(M) position will allow you to manuallyselect the gear you desire. Only the currentgear will display. Use the buttons on thegearshift lever to manually select gears.Press the + button to upshift or the –button to downshift. Return thetransmission to a different gearshiftposition to deactivate manual control.
Recommended shift speeds
Upshift according to the following chart:
154
Super Duty (TFA) Canada/United States of America, enUSA, First Printing
TransmissionE163184
Page 159 of 507
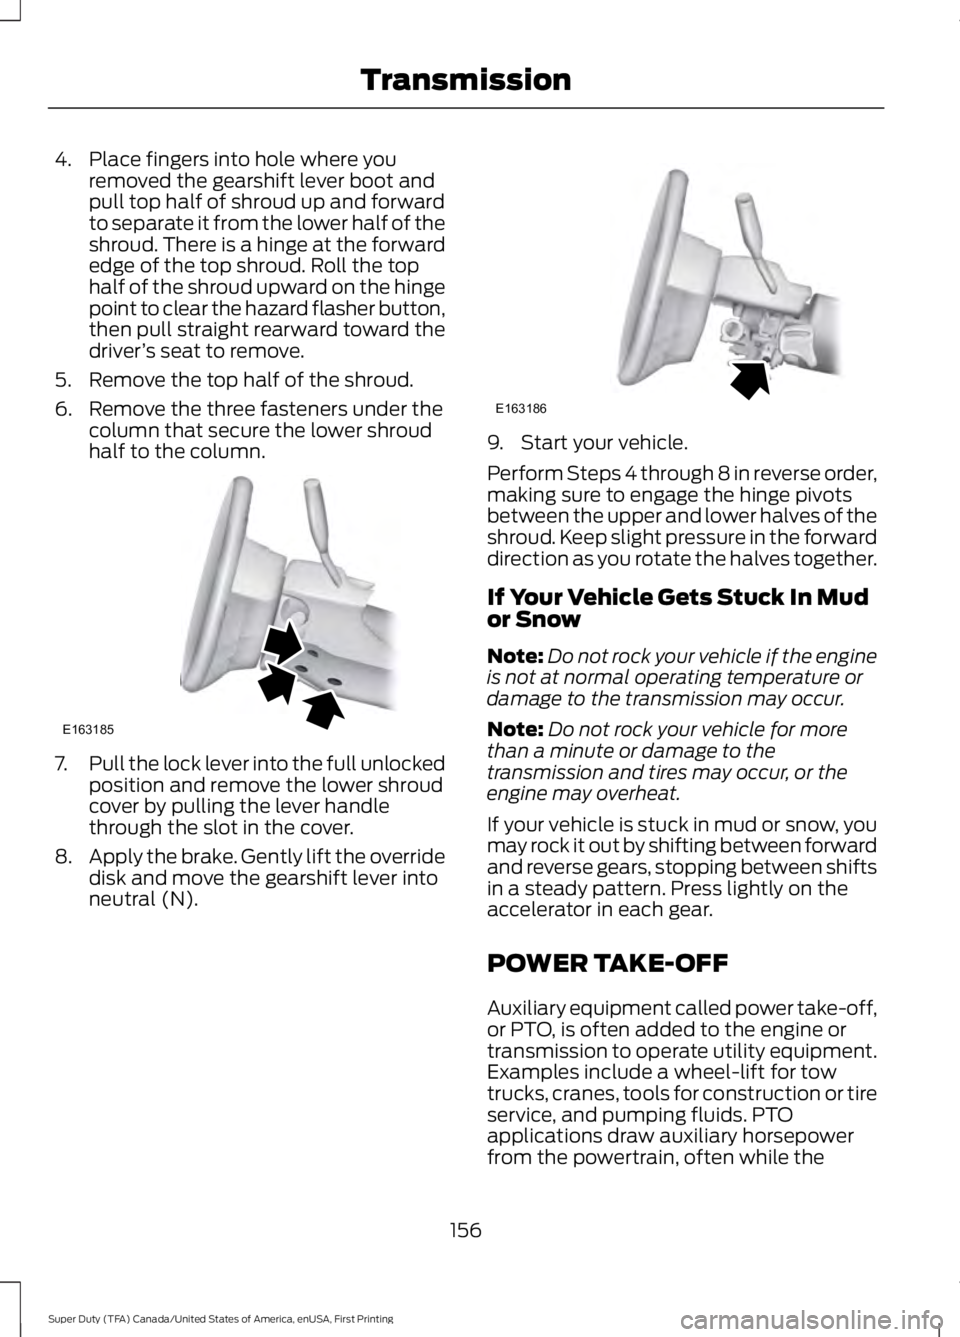
4. Place fingers into hole where youremoved the gearshift lever boot andpull top half of shroud up and forwardto separate it from the lower half of theshroud. There is a hinge at the forwardedge of the top shroud. Roll the tophalf of the shroud upward on the hingepoint to clear the hazard flasher button,then pull straight rearward toward thedriver’s seat to remove.
5. Remove the top half of the shroud.
6. Remove the three fasteners under thecolumn that secure the lower shroudhalf to the column.
7.Pull the lock lever into the full unlockedposition and remove the lower shroudcover by pulling the lever handlethrough the slot in the cover.
8.Apply the brake. Gently lift the overridedisk and move the gearshift lever intoneutral (N).
9. Start your vehicle.
Perform Steps 4 through 8 in reverse order,making sure to engage the hinge pivotsbetween the upper and lower halves of theshroud. Keep slight pressure in the forwarddirection as you rotate the halves together.
If Your Vehicle Gets Stuck In Mudor Snow
Note:Do not rock your vehicle if the engineis not at normal operating temperature ordamage to the transmission may occur.
Note:Do not rock your vehicle for morethan a minute or damage to thetransmission and tires may occur, or theengine may overheat.
If your vehicle is stuck in mud or snow, youmay rock it out by shifting between forwardand reverse gears, stopping between shiftsin a steady pattern. Press lightly on theaccelerator in each gear.
POWER TAKE-OFF
Auxiliary equipment called power take-off,or PTO, is often added to the engine ortransmission to operate utility equipment.Examples include a wheel-lift for towtrucks, cranes, tools for construction or tireservice, and pumping fluids. PTOapplications draw auxiliary horsepowerfrom the powertrain, often while the
156
Super Duty (TFA) Canada/United States of America, enUSA, First Printing
TransmissionE163185 E163186
Page 173 of 507
PARKING BRAKE
WARNING
Always set the parking brake fullyand make sure the transmission isplaced in park (P). Failure to set theparking brake and engage park could resultin vehicle roll-away, property damage orbodily injury. Turn the ignition to the lockposition and remove the key whenever youleave your vehicle.
Apply the parking brake whenever yourvehicle is parked. Press the pedaldownward to set the parking brake. Thebrake warning lamp in the instrumentcluster will illuminate and remainsilluminated until the parking brake isreleased.
To release, pull the brake release leverlocated at the lower left side of theinstrument panel.
If you are parking your vehicle on a gradeor with a trailer, press and hold the brakepedal down, then set the parking brake.There may be a little vehicle movement asthe parking brake sets to hold the vehicle'sweight. This is normal and should be noreason for concern. If needed, press andhold the service brake pedal down, thentry reapplying the parking brake. Chock thewheels if required. If the parking brakecannot hold the weight of the vehicle, theparking brake may need to be serviced orthe vehicle may be overloaded.
HILL START ASSIST
WARNINGS
The system does not replace theparking brake. When you leave yourvehicle, always apply the parkingbrake. Failure to leave your vehicle securelyparked may lead to a crash or injury. SeeParking Brake (page 170).
WARNINGS
You must remain in your vehiclewhen the system turns on. At alltimes, you are responsible forcontrolling your vehicle, supervising thesystem and intervening, if required. Failureto take care may result in the loss ofcontrol of your vehicle, serious personalinjury or death.
The system will turn off if amalfunction is apparent or if you revthe engine excessively. Failure totake care may result in the loss of controlof your vehicle, serious personal injury ordeath.
The system makes it easier to pull awaywhen your vehicle is on a slope without theneed to use the parking brake.
When the system is active, your vehicleremains stationary on the slope for two tothree seconds after you release the brakepedal. This allows time to move your footfrom the brake to the accelerator pedal.The system releases the brakesautomatically once the engine hasdeveloped sufficient drive to prevent yourvehicle from rolling down the slope. Thisis an advantage when pulling away on aslope, for example from a car park ramp,traffic lights or when reversing uphill intoa parking space.
Note:The system only functions when youbring your vehicle to a complete standstillin an uphill gear (for example, drive whenfacing uphill or reverse when facingdownhill).
Note:There is no warning light to indicatethe system is either on or off.
Using Hill Start Assist
1. Press the brake pedal to bring yourvehicle to a complete standstill. Keepthe brake pedal pressed.
170
Super Duty (TFA) Canada/United States of America, enUSA, First Printing
Brakes
Page 201 of 507
Fixed guidelines are always shown in thedisplay, but the active guidelines onlydisplay when the steering wheel is turned.To use active guidelines, turn the steeringwheel to point the guidelines toward anintended path. If the steering wheelposition is changed while reversing, yourvehicle might deviate from the originalintended path.
The active guidelines fade in and outdepending on the steering wheel position.The active guidelines are not shown whenthe steering wheel position is straight.
Always use caution while reversing.Objects in the red zone are closest to yourvehicle and objects in the green zone arefarther away. Objects are getting closer toyour vehicle as they move from the greenzone to the yellow or red zones. Use theside view mirrors and rear view mirror toget better coverage on both sides and rearof your vehicle.
Refer to the Rear View Camera section foradditional information. See Rear ViewCamera (page 180).
Hitches
WARNING
On pick-up trucks, the trailer hitchprovided on this vehicle enhancescrash protection for the fuel system.Do not remove!
Do not use a hitch that either clamps ontothe bumper or attaches to the axle. Youmust distribute the load in your trailer sothat 10-15% for conventional towing or15-25% for fifth wheel towing of the totalweight of the trailer is on the tongue.
Weight-distributing Hitches
WARNING
Do not adjust a weight-distributinghitch to any position where the rearbumper of the vehicle is higher thanit was before attaching the trailer. Doingso will defeat the function of theweight-distributing hitch, which may causeunpredictable handling, and could resultin serious personal injury.
When hooking-up a trailer using aweight-distributing hitch, always use thefollowing procedure:
1. Park the loaded vehicle, without thetrailer, on a level surface.
2. Measure the height to the top of yourvehicle's front wheel opening on thefender. This is H1.
3.Attach the loaded trailer to your vehiclewithout the weight-distributing barsconnected.
4. Measure the height to the top of yourvehicle's front wheel opening on thefender a second time. This is H2.
5. Install and adjust the tension in theweight-distributing bars so that theheight of your vehicle's front wheelopening on the fender is approximatelyhalfway between H1 and H2.
6.Check that the trailer is level or slightlynose down toward your vehicle. If not,adjust the ball height accordingly andrepeat Steps 2-6.
Once the trailer is level or slightly nosedown toward the vehicle:
•Lock the bar tension adjuster in place.
•Check that the trailer tongue securelyattaches and locks onto the hitch.
•Install safety chains, lighting, and trailerbrake controls as required by law or thetrailer manufacturer.
198
Super Duty (TFA) Canada/United States of America, enUSA, First Printing
Towing