2016 FORD F250 SUPER DUTY ECU
[x] Cancel search: ECUPage 65 of 507

2. Move the yellow lever on the grabhandle to the unlock position and lowerthe handle.
BED EXTENDER (If Equipped)
Note:Do not use the bed extender whendriving off road.
Note:Make sure to engage the locking pinsand knobs fully before driving your vehicle.
Note:Make sure to secure all cargo.
Note:Do not exceed 150 pounds (68kilograms) on the tailgate when your vehicleis moving.
Note:Do not keep the bed extender in thetailgate mode when you are not using it forrestraining cargo. Always keep the bedextender in the grocery mode or the stowedposition with the tailgate closed.
Tailgate mode
1. Pull the locking pin toward the centerof your vehicle.
2.Open the latches to release the panels.
3. Rotate the panels toward the tailgate.Repeat Steps 1-3 on the other side ofyour vehicle.
4. Connect the two panels. Rotate bothknobs one-quarter turn clockwise tosecure the panels.
62
Super Duty (TFA) Canada/United States of America, enUSA, First Printing
TailgateE163095 E163096 E163097 E163098
Page 67 of 507

PASSIVE ANTI-THEFT
SYSTEM (If Equipped)
Note:The system is not compatible withnon-Ford aftermarket remote start systems.Use of these systems may result in vehiclestarting problems and a loss of securityprotection.
Note:Metallic objects, electronic devicesor a second coded key on the same keychain may cause vehicle starting problemsif they are too close to the key when startingthe engine. Prevent these objects fromtouching the coded key while starting theengine. Switch the ignition off, move allobjects on the key chain away from thecoded key and restart the engine if aproblem occurs.
Note:Do not leave a duplicate coded keyin the vehicle. Always take your keys andlock all doors when leaving the vehicle.
SecuriLock™
The system is an engine immobilizationsystem. It helps prevent the engine fromstarting unless you use a coded keyprogrammed to your vehicle. Using thewrong key may prevent the engine fromstarting. A message may appear in theinformation display.
If you are unable to start the engine with acorrectly coded key, the system hasmalfunctioned. A message may appear inthe information display.
Automatic Arming
The system arms immediately after youswitch the ignition off.
Automatic Disarming
Switching the ignition on with a coded keydisarms the system.
Replacement Keys
Note:Your vehicle may have two integratedkeyhead transmitters.
The integrated keyhead transmitterfunctions as a programmed ignition key. Itoperates all the locks, starts the vehicleand acts as a remote control.
If your programmed transmitters orstandard SecuriLock coded keys are lostor stolen and you do not have an extracoded key, you will need to have yourvehicle towed to an authorized dealer. Youneed to erase the key codes from yourvehicle and program new coded keys.
Store an extra programmed key away fromyour vehicle in a safe place to help preventany inconveniences. See an authorizeddealer to purchase additional spare orreplacement keys.
Programming a Spare Key
Note:You can program a maximum of eightcoded keys to your vehicle. Only four ofthese can be integrated keyheadtransmitters.
You can program your own integratedkeyhead transmitter or standardSecuriLock coded keys to your vehicle. Thisprocedure will program both the engineimmobilizer keycode and the remote entryportion of the remote control to yourvehicle.
Only use integrated keyhead transmittersor standard SecuriLock keys.
You must have two previouslyprogrammed coded keys and the newunprogrammed key readily accessible. Seean authorized dealer to have the spare keyprogrammed if two previouslyprogrammed coded keys are not available.
Read and understand the entire procedurebefore you begin.
64
Super Duty (TFA) Canada/United States of America, enUSA, First Printing
Security
Page 68 of 507

1.Insert the first previously programmedcoded key into the ignition.
2.Switch the ignition from off to on. Keepthe ignition on for at least threeseconds, but no more than 10 seconds.
3.Switch the ignition off and remove thefirst coded key from the ignition.
4. After three seconds but within 10seconds of switching the ignition off,insert the second previously coded keyinto the ignition.
5.Switch the ignition from off to on. Keepthe ignition on for at least threeseconds, but no more than 10 seconds.
6.Switch the ignition off and remove thesecond previously programmed codedkey from the ignition.
7. After three seconds but within 10seconds of switching the ignition offand removing the previouslyprogrammed coded key, insert the newunprogrammed key into the ignition.
8.Switch the ignition from off to on. Keepthe ignition on for at least six secondsuntil you hear the door locks cycle.
9.Remove the newly programmed codedkey from the ignition.
The key will start the engine ifprogramming is successful. You canoperate the remote entry system if the newkey is an integrated keyhead transmitter.
If programming was not successful, wait20 seconds and repeat Steps 1 through 8.If you are still unsuccessful, take yourvehicle to an authorized dealer.
ANTI-THEFT ALARM (If Equipped)
The system warns you of an unauthorizedentry to your vehicle. It triggers if any dooror the hood opens without using the key,remote control or keyless entry keypad.
The direction indicators flash and the hornsounds if the system triggers while thealarm is armed.
Take all remote controls to an authorizeddealer if there is any potential alarmproblem with your vehicle.
Arming the Alarm
The alarm is ready to arm when there isnot a key in the ignition. Electronically lockthe vehicle to arm the alarm.
The direction indicators flash once afteryou lock the vehicle. This indicates thealarm is in the pre-armed mode. It will fullyarm in 20 seconds.
Disarming the Alarm
Disarm the alarm by any of the followingactions:
•Press the power door unlock buttonwithin the 20-second pre-armed mode.
•Unlock the doors with the remotecontrol or keyless entry keypad.
•Switch the ignition on or start thevehicle.
•Use a key in the driver door to unlockthe vehicle, then switch the ignition onwithin 12 seconds.
Note:Pressing the panic button on theremote control will stop the horn and signalindicators, but will not disarm the system.
65
Super Duty (TFA) Canada/United States of America, enUSA, First Printing
Security
Page 94 of 507

EXHAUST FILTER
For more information, refer to the Dieselsupplement.
System check and vehicle featurecustomization
Press the SETUP button repeatedly tocycle the information display through thefollowing features:
Note:Some options may appear slightlydifferent or not at all if the items areoptional.
Note:When returning to the SETUP menuand you selected a non-English language,HOLD RESET FOR ENGLISH will display tochange back to English. Press and hold theRESET button to change back to English.
SETUP
OIL LIFEpress the RESET buttonRESET FOR SYSTEMCHECKEXHAUST FLUID LEVEL(Diesel only)
ENGINE HOURS
ENGINE IDLE HOURS
CHARGING SYSTEM
DOOR
BRAKE SYSTEM
TBC GAIN = XX.X
FUEL LEVEL
MYKEY DISTANCE
SETUP (cont’d)
MYKEY(S) PROGRAMMEDpress the RESETbuttonRESET FORSYSTEM CHECKADMIN KEYS PROGRAMMED
OIL LIFE
English or Metricpress the RESETbuttonUNITS
0 to 180 secondsAUTOLAMP (SEC)
On or OffAUTOLOCK
On or OffAUTOUNLOCK
On or OffCOURTESY WIPE
91
Super Duty (TFA) Canada/United States of America, enUSA, First Printing
Information Displays
Page 103 of 507

Compass/Transmission indicatordisplay (if equipped)
The compass heading will display in theupper right corner of the informationdisplay; the transmission gear indicatordisplays in the right side of the informationdisplay when using the SelectShiftAutomatic™ transmission feature. Thesedisplays will not be shown in all screenmodes. For example: when programmingcertain vehicle features or in certaininformation menus.
INFORMATION MESSAGES
Note:Depending on your vehicle optionsand instrument cluster type, not all of themessages will display or be available.Additionally, the information display mayabbreviate or shorten certain messages.
Press the RESET button for Type 1 displaysor the OK button for Type 2 displays toacknowledge and remove some messagesfrom the information display. Theinformation display automatically removesother messages after a short time.
You need to confirm certain messagesbefore you can access the menus.
AdvanceTrac™
ActionMessage
The system detects a condition that requires service. Havethe system checked by an authorized dealer.SERVICE ADVAN-CETRAC
The driver has disabled the stability control system. SeeUsing Stability Control (page 174).ADVANCETRAC OFF
The driver has disabled the traction control system. See UsingTraction Control (page 172).TRACTION CONTROLOFF
Alarm
ActionMessage
An unauthorized entry has triggered the alarm. See Anti-TheftAlarm (page 65).TO STOP ALARMSTART VEHICLE
The security system has detected a fault. Have the systemchecked by an authorized dealer.SECURITY SYSTEMFAULT
100
Super Duty (TFA) Canada/United States of America, enUSA, First Printing
Information Displays
Page 124 of 507

WARNINGS
Do not use the memory functionwhen your vehicle is moving.
This feature automatically recalls theposition of the following:
•Driver seat.
•Power mirrors.
•Optional adjustable pedals.
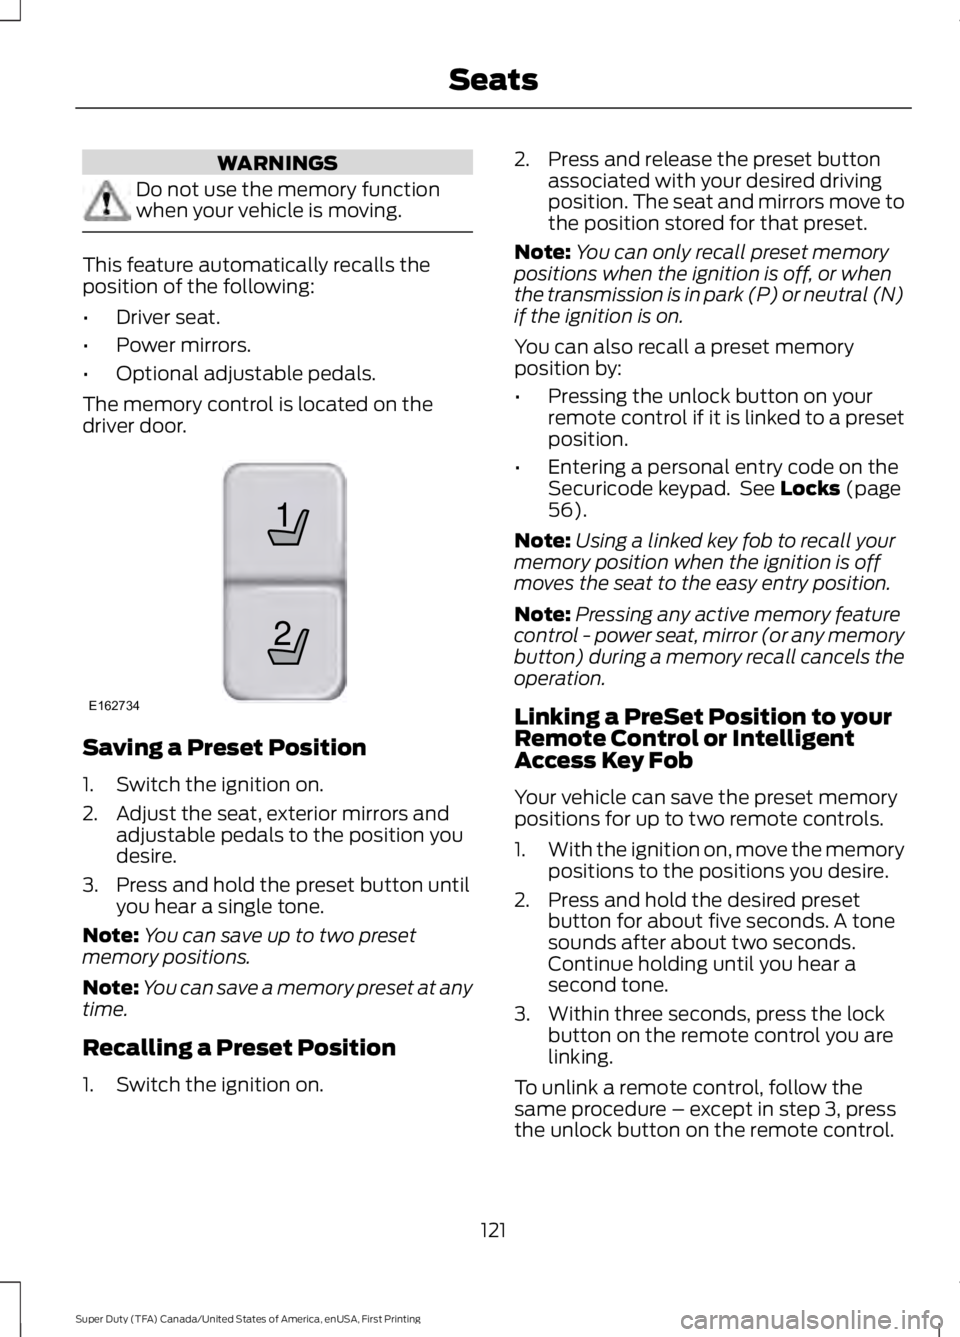
The memory control is located on thedriver door.
Saving a Preset Position
1. Switch the ignition on.
2. Adjust the seat, exterior mirrors andadjustable pedals to the position youdesire.
3. Press and hold the preset button untilyou hear a single tone.
Note:You can save up to two presetmemory positions.
Note:You can save a memory preset at anytime.
Recalling a Preset Position
1. Switch the ignition on.
2. Press and release the preset buttonassociated with your desired drivingposition. The seat and mirrors move tothe position stored for that preset.
Note:You can only recall preset memorypositions when the ignition is off, or whenthe transmission is in park (P) or neutral (N)if the ignition is on.
You can also recall a preset memoryposition by:
•Pressing the unlock button on yourremote control if it is linked to a presetposition.
•Entering a personal entry code on theSecuricode keypad. See Locks (page56).
Note:Using a linked key fob to recall yourmemory position when the ignition is offmoves the seat to the easy entry position.
Note:Pressing any active memory featurecontrol - power seat, mirror (or any memorybutton) during a memory recall cancels theoperation.
Linking a PreSet Position to yourRemote Control or IntelligentAccess Key Fob
Your vehicle can save the preset memorypositions for up to two remote controls.
1.With the ignition on, move the memorypositions to the positions you desire.
2. Press and hold the desired presetbutton for about five seconds. A tonesounds after about two seconds.Continue holding until you hear asecond tone.
3. Within three seconds, press the lockbutton on the remote control you arelinking.
To unlink a remote control, follow thesame procedure – except in step 3, pressthe unlock button on the remote control.
121
Super Duty (TFA) Canada/United States of America, enUSA, First Printing
Seats21
E162734
Page 132 of 507

The appearance of your vehicle’s universalgarage door opener varies according toyour option package. Before programming,make sure you identify which transmitteryou have by comparing it to the graphicsbelow:
Car2U Home Automation System
HomeLink
Note:Programming these two types ofuniversal garage door openers are different,and they have different instructions. Identifyyour package and refer to the instructionslisted in this chapter.
CAR2U® Home AutomationSystem (If Equipped)
WARNINGS
Make sure that the garage door andsecurity device are free fromobstruction when you areprogramming. Do not program the systemwith the vehicle in the garage.
WARNINGS
Do not use the system with anygarage door opener that does nothave the safety stop and reversefeature as required by U.S. Federal SafetyStandards (this includes any garage dooropener manufactured before April 1, 1982).
Note:Before you begin the programmingprocess, park your vehicle in front of thegarage door opener motor or other deviceyou want to program.
Note:Make sure you keep the originalremote control transmitter for use in othervehicles as well as for future systemprogramming.
Note:We recommend that, upon the saleor lease termination of your vehicle, youerase the programmed function buttons forsecurity reasons. See Erasing the FunctionButton Codes later in this section.
Note:Programming the system to acommunity gate will require a unique set ofinstructions depending on the gate systemmodel. Contact the help line at1-866-572-2728 for further information.
Note:If you accidently enter the programmode by pressing and releasing the outertwo buttons or all three buttonssimultaneously, do not press any buttonuntil the module times out after a fewseconds and resets to normal mode. Whenthe module has timed out, all three LEDlamps will flash rapidly for a few secondsthen turn off. Any settings should remain aspreviously set.
The universal garage door opener replacesthe common hand-held garage dooropener with a three-button transmitter,integrated into the driver’s sun visor.
129
Super Duty (TFA) Canada/United States of America, enUSA, First Printing
Universal Garage Door Opener (If Equipped)E164776 E142657
Page 133 of 507

The system includes two primary features,a garage door opener and a platform forremote activation of devices within thehome. This functionality allows you toprogram garage door openers as well assecurity devices and home lightingsystems.
You can find additional system informationonline at www.learcar2U.com or by callingthe toll-free help line on 1-866-572-2728.
Rolling Code Programming
Note:If you do not follow the time-sensitiveinstructions, the device will time out andyou will have to repeat the completeprocedure.
Note:It may be helpful to have anotherperson assist you in programming thetransmitter.
1. Switch the ignition on.
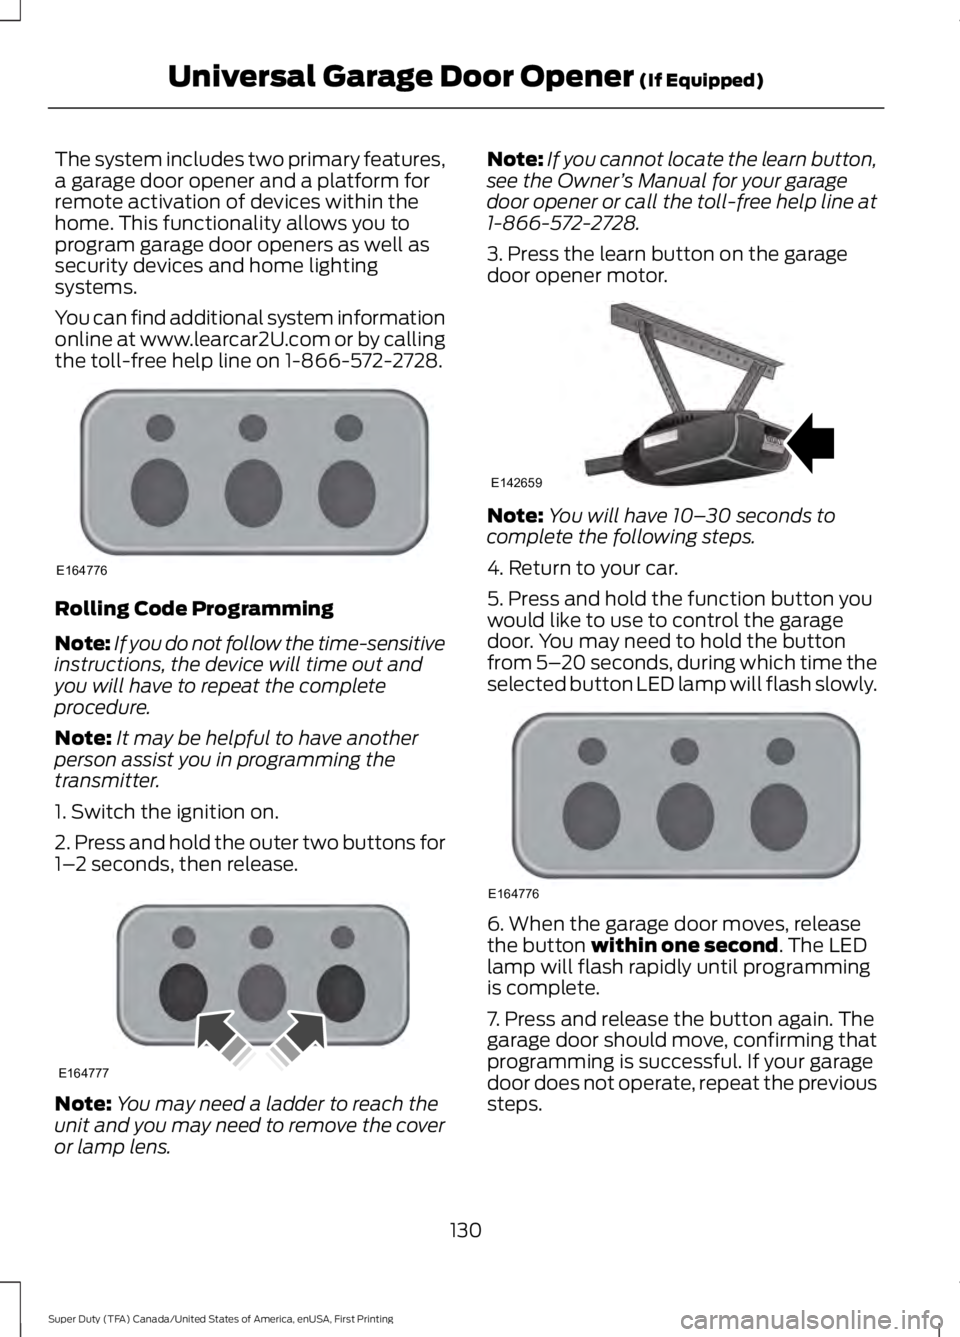
2. Press and hold the outer two buttons for1–2 seconds, then release.
Note:You may need a ladder to reach theunit and you may need to remove the coveror lamp lens.
Note:If you cannot locate the learn button,see the Owner’s Manual for your garagedoor opener or call the toll-free help line at1-866-572-2728.
3. Press the learn button on the garagedoor opener motor.
Note:You will have 10–30 seconds tocomplete the following steps.
4. Return to your car.
5. Press and hold the function button youwould like to use to control the garagedoor. You may need to hold the buttonfrom 5–20 seconds, during which time theselected button LED lamp will flash slowly.
6. When the garage door moves, releasethe button within one second. The LEDlamp will flash rapidly until programmingis complete.
7. Press and release the button again. Thegarage door should move, confirming thatprogramming is successful. If your garagedoor does not operate, repeat the previoussteps.
130
Super Duty (TFA) Canada/United States of America, enUSA, First Printing
Universal Garage Door Opener (If Equipped)E164776 E164777 E142659 E164776