2016 FORD F250 SUPER DUTY ECU
[x] Cancel search: ECUPage 26 of 507
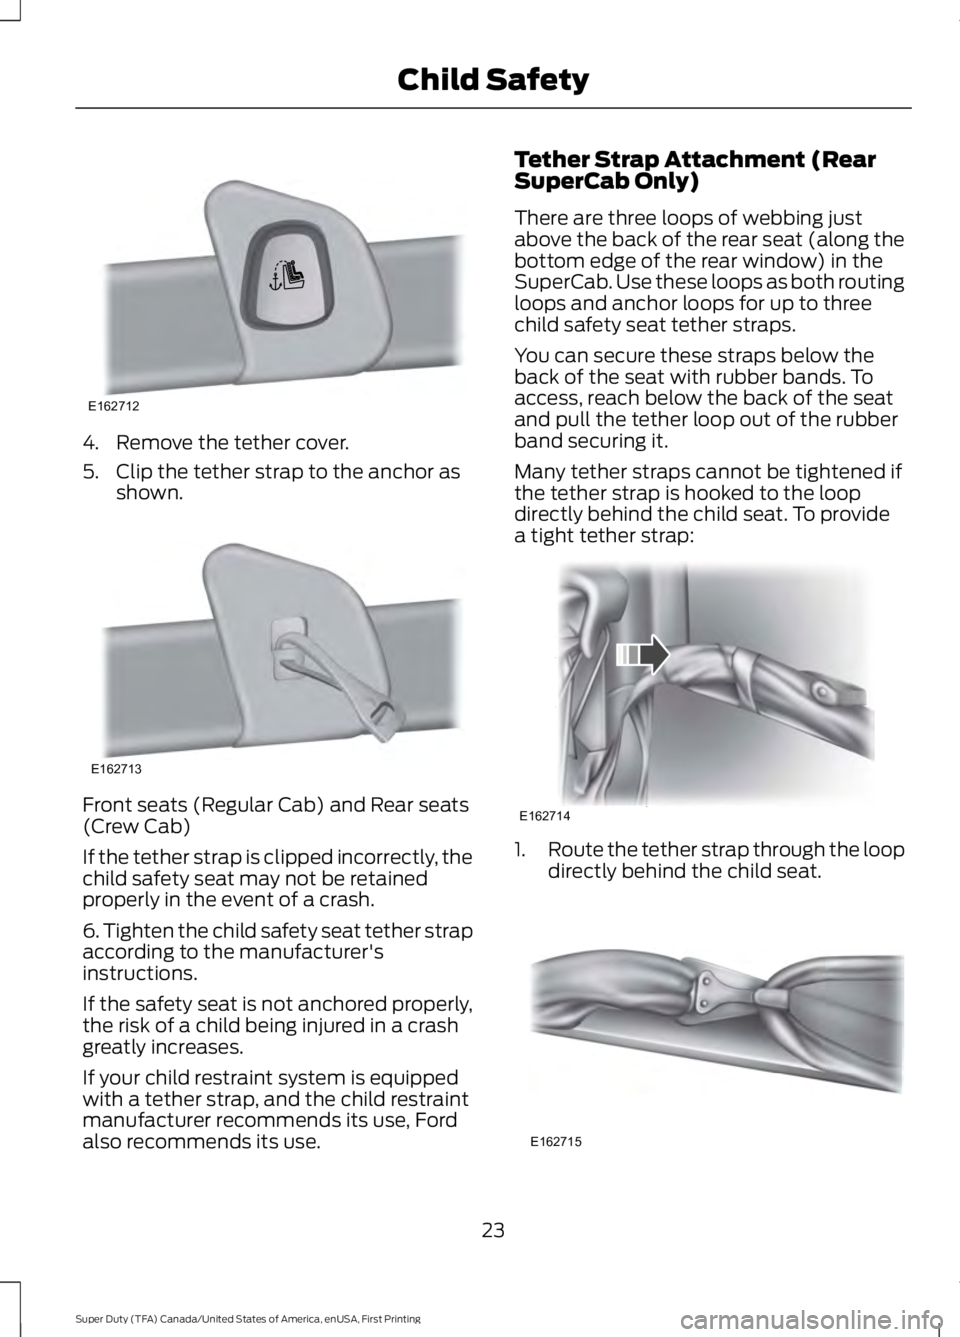
4. Remove the tether cover.
5. Clip the tether strap to the anchor asshown.
Front seats (Regular Cab) and Rear seats(Crew Cab)
If the tether strap is clipped incorrectly, thechild safety seat may not be retainedproperly in the event of a crash.
6. Tighten the child safety seat tether strapaccording to the manufacturer'sinstructions.
If the safety seat is not anchored properly,the risk of a child being injured in a crashgreatly increases.
If your child restraint system is equippedwith a tether strap, and the child restraintmanufacturer recommends its use, Fordalso recommends its use.
Tether Strap Attachment (RearSuperCab Only)
There are three loops of webbing justabove the back of the rear seat (along thebottom edge of the rear window) in theSuperCab. Use these loops as both routingloops and anchor loops for up to threechild safety seat tether straps.
You can secure these straps below theback of the seat with rubber bands. Toaccess, reach below the back of the seatand pull the tether loop out of the rubberband securing it.
Many tether straps cannot be tightened ifthe tether strap is hooked to the loopdirectly behind the child seat. To providea tight tether strap:
1.Route the tether strap through the loopdirectly behind the child seat.
23
Super Duty (TFA) Canada/United States of America, enUSA, First Printing
Child SafetyE162712 E162713 E162714 E162715
Page 33 of 507
The safety belt pretensioners at the frontseating positions are designed to tightenthe safety belts when activated. In frontaland near-frontal crashes, side crashes androllovers, the safety belt pretensioners maybe activated alone or, if the crash is ofsufficient severity, together with the frontairbags.
FASTENING THE SAFETY
BELTS
The front outboard and rear safetyrestraints in the vehicle are combinationlap and shoulder belts.
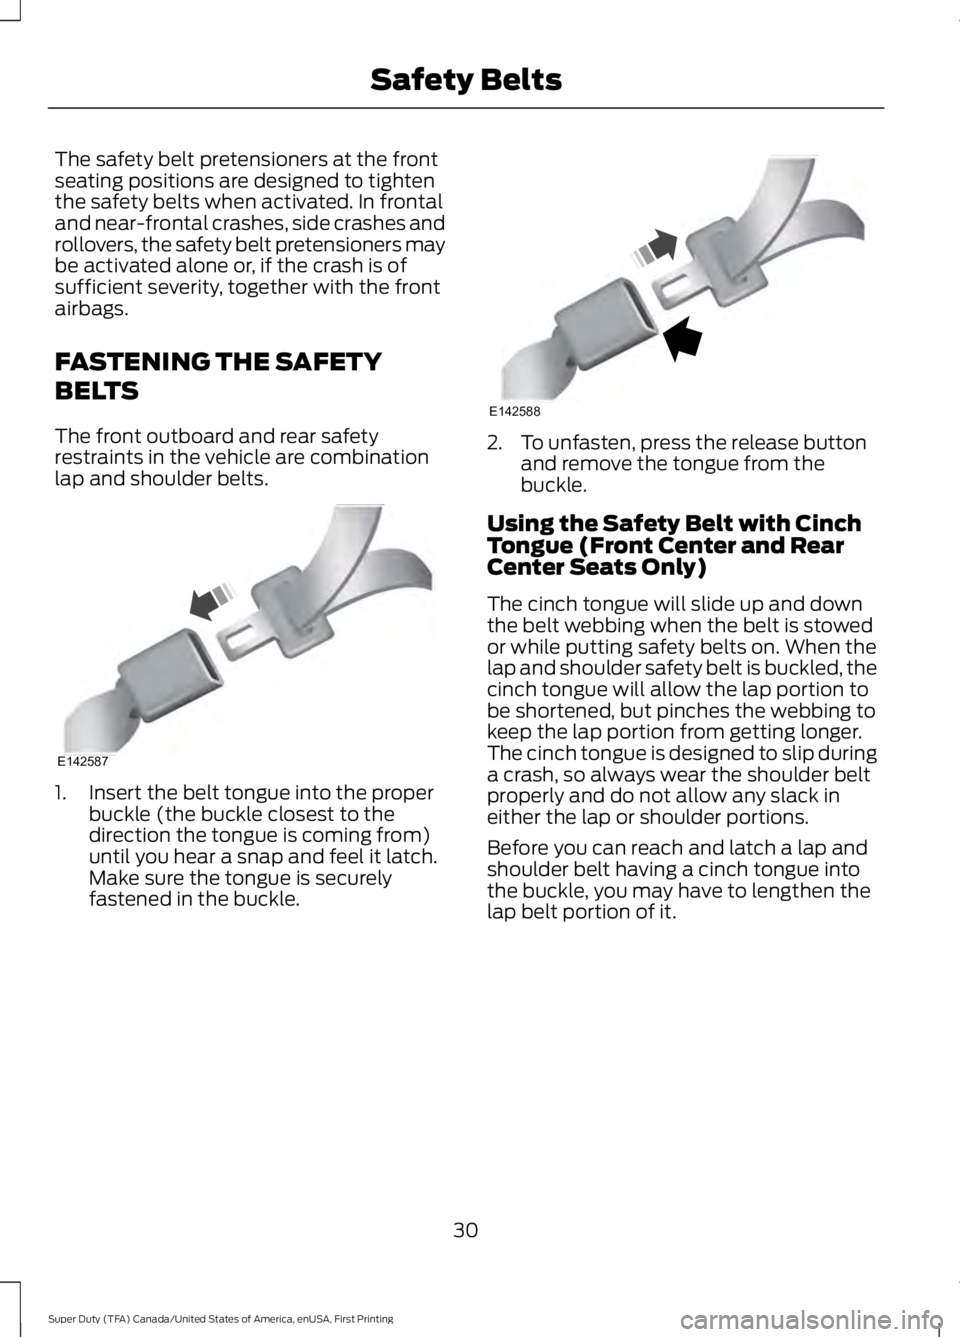
1. Insert the belt tongue into the properbuckle (the buckle closest to thedirection the tongue is coming from)until you hear a snap and feel it latch.Make sure the tongue is securelyfastened in the buckle.
2. To unfasten, press the release buttonand remove the tongue from thebuckle.
Using the Safety Belt with CinchTongue (Front Center and RearCenter Seats Only)
The cinch tongue will slide up and downthe belt webbing when the belt is stowedor while putting safety belts on. When thelap and shoulder safety belt is buckled, thecinch tongue will allow the lap portion tobe shortened, but pinches the webbing tokeep the lap portion from getting longer.The cinch tongue is designed to slip duringa crash, so always wear the shoulder beltproperly and do not allow any slack ineither the lap or shoulder portions.
Before you can reach and latch a lap andshoulder belt having a cinch tongue intothe buckle, you may have to lengthen thelap belt portion of it.
30
Super Duty (TFA) Canada/United States of America, enUSA, First Printing
Safety BeltsE142587 E142588
Page 34 of 507

1. To lengthen the lap belt, pull somewebbing out of the shoulder beltretractor.
2. While holding the webbing below thetongue, grasp the tip (metal portion)of the tongue so that it is parallel to thewebbing and slide the tongue upward.
3.Provide enough lap belt length so thatthe tongue can reach the buckle.
Fastening the Cinch Tongue
WARNING
The lap belt should fit snugly and aslow as possible around the hips, notacross the waist.
1.Pull the lap and shoulder belt from theretractor so that the shoulder beltportion of the safety belt crosses yourshoulder and chest.
2. Be sure the belt is not twisted. If thebelt is twisted, remove the twist.
3. Insert the belt tongue into the properbuckle for your seating position untilyou hear a snap and feel it latch.
4. Make sure the tongue is securelyfastened to the buckle by pulling onthe tongue.
While you are fastened in the safety belt,the lap and shoulder belt with a cinchtongue adjusts to your movement.However, if you brake hard, turn hard, or ifyour vehicle receives an impact of 5.0 mph(8 km/h) or more, the safety belt willbecome locked and help reduce yourforward movement.
Using Safety Belts DuringPregnancy
WARNING
Always ride and drive with yourseatback upright and the safety beltproperly fastened. The lap portion ofthe safety belt should fit snug and bepositioned low across the hips. Theshoulder portion of the safety belt shouldbe positioned across the chest. Pregnantwomen should also follow this practice.See the following figure.
Pregnant women should always wear theirsafety belt. Position the lap belt portion ofa combination lap and shoulder belt lowacross the hips below the belly and wornas tight as comfort will allow. Position theshoulder belt to cross the middle of theshoulder and the center of the chest.
31
Super Duty (TFA) Canada/United States of America, enUSA, First Printing
Safety BeltsE162708 E142590
Page 50 of 507
GENERAL INFORMATION ON
RADIO FREQUENCIES
This device complies with Part 15 of theFCC Rules and with Industry Canadalicense-exempt RSS standard(s).Operation is subject to the following twoconditions: (1) This device may not causeharmful interference, and (2) This devicemust accept any interference received,including interference that may causeundesired operation.
Note:Changes or modifications notexpressively approved by the partyresponsible for compliance could void theuser's authority to operate the equipment.The term IC before the radio certificationnumber only signifies that Industry Canadatechnical specifications were met.
The typical operating range for yourtransmitter is approximately 33 feet (10meters). Vehicles with the remote startfeature will have a greater range. One ofthe following could cause a decrease inoperating range:
•weather conditions
•nearby radio towers
•structures around the vehicle
•other vehicles parked next to yourvehicle
The radio frequency used by your remotecontrol can also be used by other shortdistance radio transmissions, for exampleamateur radios, medical equipment,wireless headphones, remote controls andalarm systems. If the frequencies arejammed, you will not be able to use yourremote control. You can lock and unlockthe doors with the key.
Note:Make sure to lock your vehicle beforeleaving it unattended.
Note:If you are in range, the remote controlwill operate if you press any buttonunintentionally.
Note:The remote control contains sensitiveelectrical components. Exposure to moistureor impact may cause permanent damage.
REMOTE CONTROL
Integrated Keyhead Transmitters
(If Equipped)
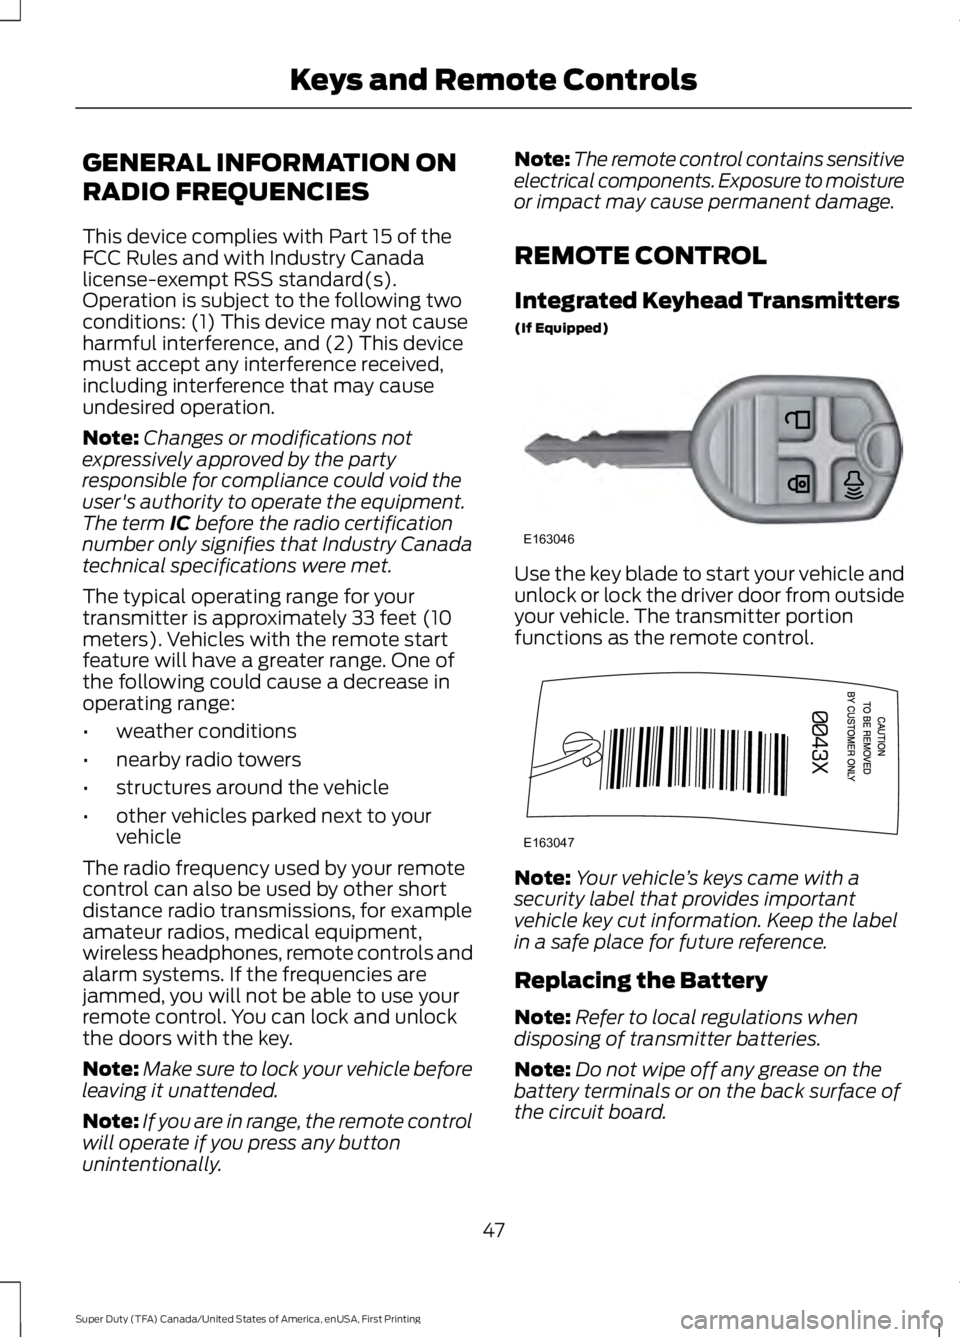
Use the key blade to start your vehicle andunlock or lock the driver door from outsideyour vehicle. The transmitter portionfunctions as the remote control.
Note:Your vehicle’s keys came with asecurity label that provides importantvehicle key cut information. Keep the labelin a safe place for future reference.
Replacing the Battery
Note:Refer to local regulations whendisposing of transmitter batteries.
Note:Do not wipe off any grease on thebattery terminals or on the back surface ofthe circuit board.
47
Super Duty (TFA) Canada/United States of America, enUSA, First Printing
Keys and Remote ControlsE163046 E163047
Page 58 of 507
USING MYKEY WITH REMOTE
START SYSTEMS
MyKey is not compatible with non
Ford-approved, aftermarket remote startsystems. If you choose to install a remotestart system, see an authorized dealer fora Ford-approved remote start system.
MYKEY TROUBLESHOOTING
Potential causesCondition
· The key used to start the vehicle does nothave admin privileges.I cannot create a MyKey.
· The key used to start the vehicle is the onlyadmin key. There always has to be at leastone admin key.· SecuriLock passive anti-theft system isdisabled or in unlimited mode.
· The key in the ignition does not have adminprivileges.I cannot program the configurable settings.
· There are no keys programmed to thevehicle. See Creating a MyKey (page 52).
· The key used to start the vehicle does nothave admin privileges.I cannot clear the MyKeys.
· No MyKeys are created. See Creating aMyKey (page 52).
· Purchase a new key from your authorizeddealer.I lost the only admin key.
· Program a spare key. See Passive Anti-Theft System (page 64).I lost a key.
· The MyKey user is not using the MyKey.MyKey distances do not accumulate.· An admin key holder cleared the MyKeysand created new MyKeys.· The key system has been reset.
55
Super Duty (TFA) Canada/United States of America, enUSA, First Printing
MyKey™
Page 60 of 507

The autolock feature will unlock all thedoors when:
•autolock has locked the doors
•you stop the vehicle and switch theignition off or to accessory mode, and
•you open the driver door within 10minutes.
Note:The doors will not autounlock if youhave electronically locked them beforeopening the driver door.
Enabling or Disabling
You can enable or disable these featuresin the information display or yourauthorized dealer can do it for you. See(page 89).
Note:You can enable or disable theautolock and autounlock featuresindependently of each other.
Illuminated Entry
The interior lamps and select exteriorlamps will illuminate when you unlock thedoors with the remote entry system.
The illuminated entry system will turn offthe lights if:
•the ignition is on
•you press the remote control lockbutton, or
•after 25 seconds of illumination.
The dome lamp will not turn on if thecontrol is set to the off position.
The lights will not turn off if:
•you turn them on with the dimmercontrol, or
•any door is open.
Battery Saver
The battery saver turns off the interiorlamps 30 minutes after you switch theignition off if a door is open and the domelamp switch is on. It turns off the interiorlamps after 10 minutes if the dome lampswitch is off.
KEYLESS ENTRY (If Equipped)
SECURICODE™ KEYLESS ENTRYKEYPAD
The keypad is located near the driverwindow.
Note:If you enter your entry code too faston the keypad, the unlock function may notwork. Re-enter your entry code more slowly.
You can use the keypad to lock or unlockthe doors without using a key.
For vehicles without intelligent access, youcan operate the keypad with thefactory-set 5-digit entry code. The code islocated on the owner’s wallet card in theglove box and is available from anauthorized dealer. You can also create upto five of your own 5-digit personal entrycodes.
For vehicles with intelligent access, you donot need to enter a 5-digit entry code.Press any button on keyless entry keypadonce to unlock all doors.
Note:You must have an intelligent accesskey within 3 ft (1 m) of your vehicle.
57
Super Duty (TFA) Canada/United States of America, enUSA, First Printing
LocksE163050
Page 61 of 507
Programming a Personal Entry Code
To create your own personal entry code:
1. Enter the factory-set code.
2. Press 1·2 on the keypad within fiveseconds.
3. Enter your personal 5-digit code. Youmust enter each number within fiveseconds of each other.
4. Press 1·2 on the keypad to savepersonal code 1.
The doors will lock then unlock to confirmthat programming was successful.
To program additional personal entrycodes, repeat Steps 1-3, then for Step 4:
•press 3·4 to save personal code 2
•press 5·6 to save personal code 3
•press 7·8 to save personal code 4
•press 9·0 to save personal code 5.
You may also program a personal entrycode through the information display.
Tips:
•Do not set a code that uses five of thesame number.
•Do not use five numbers in sequentialorder.
•The factory-set code will work even ifyou have set your own personal code.
Recalling Memory Positions (IfEquipped)
The programmed entry codes will recalldriver memory positions as follows:
•Entry code 1 will recall driver 1 memorypositions.
•Entry code 2 will recall driver 2 memorypositions.
Note:Personal entry codes 3, 4 and 5 willnot recall memory positions.
Erasing a Personal Code
1. Enter the factory-set 5-digit code.
2. Press and release 1·2 on the keypadwithin five seconds.
3. Press and hold 1·2 for two seconds.You must do this within five secondsof completing Step 2.
All personal codes will erase and only thefactory-set 5-digit code will work.
Anti-Scan Feature
The keypad will go into an anti-scan modeif you enter the wrong code seven times(35 consecutive button presses). Thismode disables the keypad for one minuteand the keypad lamp will flash.
The anti-scan feature will turn off after:
•one minute of keypad inactivity
•pressing the unlock button on theremote control
•switching the ignition on.
Displaying the Factory Set Code
Note:You will need to have twoprogrammed passive anti-theft keys for thisprocedure.
To display the factory-set code in theinformation display:
1.Insert a key into the ignition and switchthe ignition on for a few seconds.
2.Switch the ignition off and remove thekey.
3. Insert the second key into the ignitionand switch the ignition on.
The factory-set code will display for a fewseconds.
Note:The code may not display until afterany other warning messages first display.
58
Super Duty (TFA) Canada/United States of America, enUSA, First Printing
Locks
Page 63 of 507
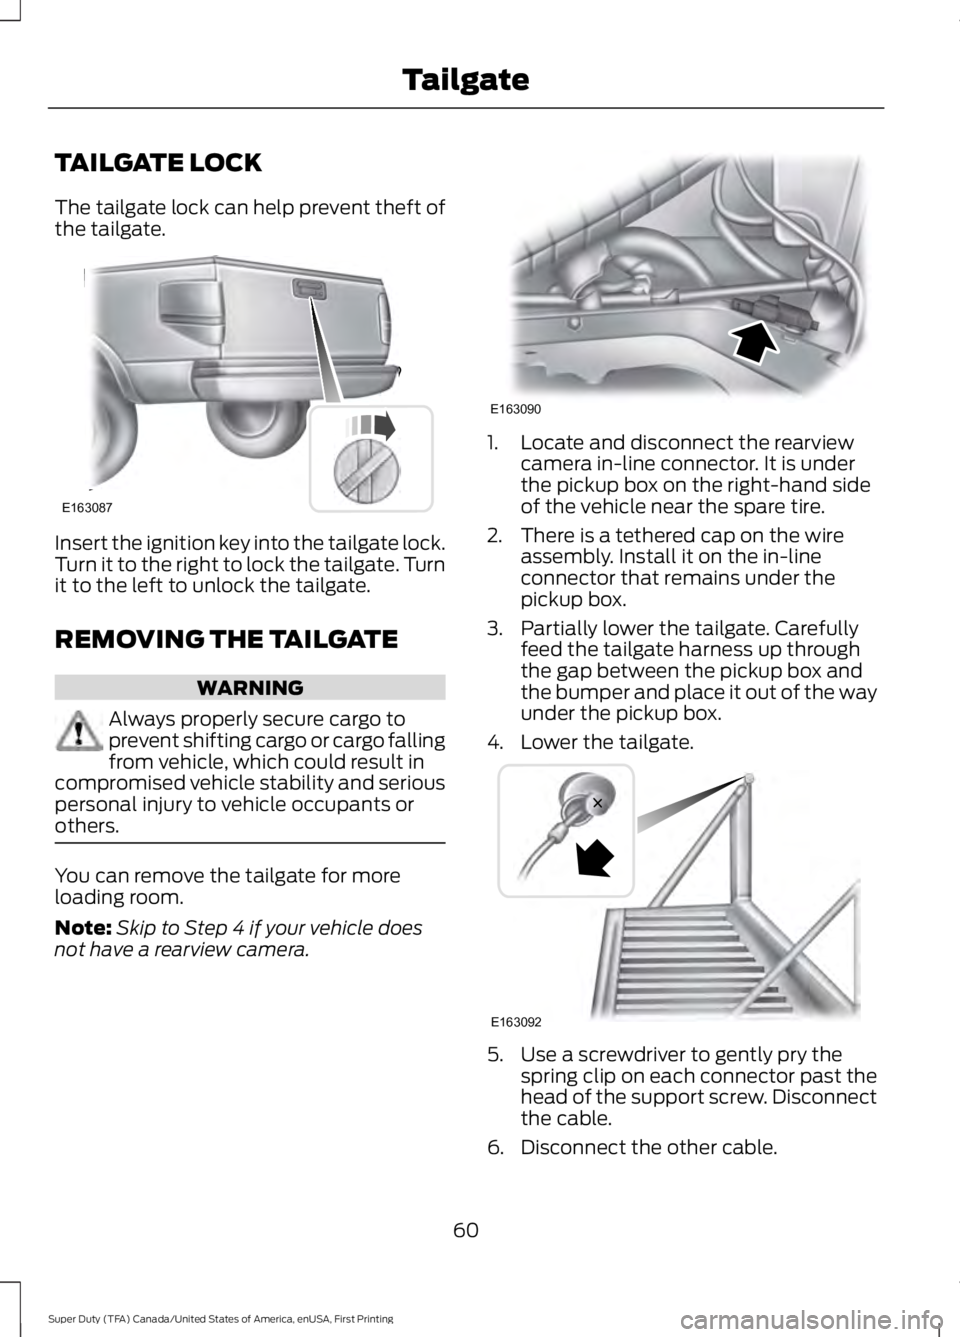
TAILGATE LOCK
The tailgate lock can help prevent theft ofthe tailgate.
Insert the ignition key into the tailgate lock.Turn it to the right to lock the tailgate. Turnit to the left to unlock the tailgate.
REMOVING THE TAILGATE
WARNING
Always properly secure cargo toprevent shifting cargo or cargo fallingfrom vehicle, which could result incompromised vehicle stability and seriouspersonal injury to vehicle occupants orothers.
You can remove the tailgate for moreloading room.
Note:Skip to Step 4 if your vehicle doesnot have a rearview camera.
1. Locate and disconnect the rearviewcamera in-line connector. It is underthe pickup box on the right-hand sideof the vehicle near the spare tire.
2. There is a tethered cap on the wireassembly. Install it on the in-lineconnector that remains under thepickup box.
3. Partially lower the tailgate. Carefullyfeed the tailgate harness up throughthe gap between the pickup box andthe bumper and place it out of the wayunder the pickup box.
4. Lower the tailgate.
5. Use a screwdriver to gently pry thespring clip on each connector past thehead of the support screw. Disconnectthe cable.
6. Disconnect the other cable.
60
Super Duty (TFA) Canada/United States of America, enUSA, First Printing
TailgateE163087 E163090 E163092