Page 185 of 312

and A in order of distance. The point A
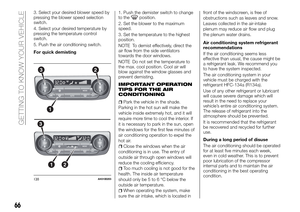
and B actually are the same distances
from the vehicle, and the point C is
farther off than the point A and B.
WARNING
228)The responsibility for parking and
other manoeuvres is always and in any
case charged to the driver. While carrying
out these manoeuvres, always make sure
that no people (especially children) or
animals are in the area concerned. The
camera is an aid for the driver, but the
driver must never allow his/her attention to
lapse during potentially dangerous
manoeuvres, even those executed at low
speeds. Always keep a slow speed, so as
to promptly brake in the case of obstacles.229)The rear-view camera is an assistance
system that enables the driver to check for
obstacles behind the vehicle. Its range of
view is limited, so you should not overly
depend on it. Please drive just as carefully
as you would if the vehicle did not have the
rear-view camera.
230)Be sure to visually confirm safety
around the vehicle with your own eyes. Do
not depend entirely on the rear-view
camera.
IMPORTANT
128)It is vital, for correct operation, that
the camera is always kept clean and free
from mud, dirt, snow or ice. Be careful not
to scratch or damage the camera while
cleaning it. Avoid using dry, rough or hard
cloths. The camera must be washed using
clean water, with the addition of car
shampoo if necessary. In washing stations
which use steam or high-pressure jets,
clean the camera quickly, keeping the
nozzle more than 10 cm away from the
sensors. Do not apply stickers to the
camera.
129)The rear-view camera has a special
lens that can make objects shown on the
screen appear to be closer or further away
than they actually are.130)Due to the number of people in the
vehicle, the fuel quantity, the weight and
positioning of luggage, and/or the condition
of the road surface, the lines in the view
from the rearview camera may not be
accurately positioned relative to the actual
road. Use the reference lines only as a
guideline, and always do a safety check of
your behind and surroundings directly while
driving.
B
A
C
C
A
B
282AHA103765
183
Page 186 of 312
IN CASE OF EMERGENCY
A punctured tyre or a burnt-out bulb?
At times, a problem may interfere with
our journey.
The pages on emergencies can help
you to deal with critical situations
independently and with calm.
In an emergency we recommend that
you call the freephone number found in
the Warranty Booklet.
It is also possible to call the
00 800 3428 0000 freephone number
to search the nearest Fiat Dealership.IF THE VEHICLE BREAKS DOWN. .185
EMERGENCY STARTING.......185
ENGINE OVERHEATING........187
BLEEDING THE FUEL SYSTEM . . .188
REMOVAL OF WATER FROM THE
FUEL FILTER...............188
TOOLS, JACK AND JACK
HANDLE..................189
HOW TO CHANGE A TYRE.....194
TOWING..................201
OPERATION UNDER ADVERSE
DRIVING CONDITIONS........204
FUSIBLE LINKS.............205
FUSES...................205
REPLACEMENT OF LAMP
BULBS...................213
184
IN CASE OF EMERGENCY
Page 187 of 312

IF THE VEHICLE
BREAKS DOWN
If the vehicle breaks down on the road,
move it to the shoulder and use the
hazard warning flashers and/or the
warning triangle etc. Refer to “Hazard
warning flasher switch”.
If the engine stops/fails
Vehicle operation and control are
affected if the engine stops. Before
moving the vehicle to a safe area, be
aware of the following:
The brake booster becomes
inoperative and the pedal effort will
increase. Press down the brake pedal
harder than usual.
Since the power steering system is
no longer operative, the steering wheel
feels heavy when turning it.
EMERGENCY
STARTING
231) 232) 233) 234) 235) 236) 237) 238) 239) 240) 241) 242)
243) 244) 245) 246) 247)
If the engine cannot be started because
the battery is weak or dead, the battery
from another vehicle can be used with
jumper cables to start the engine.
1. Get the vehicles close enough so the
jumper cables can reach, but be sure
the vehicles aren’t touching each other.
2. Turn off all lamps, heater and other
electrical loads.
3. Set the parking brake firmly on each
vehicle. Put an automatic transmission
in “P” (PARK) or a manual transmission
in “N” (Neutral). Stop the engine.
4. Make sure battery electrolyte is at the
proper level. Refer to “Battery”.
5. Connect one end of one jumper
cable (1) to the positive (+) terminal of
the discharged battery (A), and the
other end (2) to the positive (+) terminal
of the booster battery (B).
Connect one end of the other jumper
cable (3) to the negative (−) terminal of
the booster battery (B), and the other
end (4) to the engine block of the
vehicle with the discharged battery at
the point farthest from the battery.
NOTE Open the terminal cover before
connecting the jumper cable to the
positive (+) terminal of the battery. Refer
to “Battery”.Petrol-powered vehicles
Diesel-powered vehicles 4D56
A
B
1
4
23
283AHA102045
A
B
1
423
284AHA102058
185
Page 188 of 312

Diesel-powered vehicles 4N15
6. Start the engine in the vehicle which
has the booster battery, let the engine
idle a few minutes, then start the engine
in the vehicle with the discharged
battery.
7. After the engine is started,
disconnect the cables in the reverse
order and keep the engine running for
several minutes.
NOTE On vehicles with anti-lock brake
system, if the vehicle is put in motion
without fully charging the battery, it
might cause the loss of the smooth
engine operation and the antilock brake
warning lamp to illuminate. Refer to
“Anti-lock brake system (ABS)”.
WARNING
231)To start the engine using jumper
cables from another vehicle, perform the
correct procedures according to the
instruction below. Incorrect procedures
could result in a fire or explosion or
damage to the vehicles.
232)Keep sparks, cigarettes and flames
away from the battery because the battery
may produce an explosion.
233)Do not attempt to start the engine by
pulling or pushing the vehicle. It could
damage your vehicle.
234)Check the other vehicle. It must have
a 12-volt battery. If the other system isn’t
12-volt, shorting can damage both
vehicles.
235)Use the proper cables suitable for the
battery size to prevent overheating of the
cables.
236)Check the jumper cables for damage
and corrosion before use.
237)Always wear protective eye goggles
when working near the battery.
238)Keep the battery out of the reach of
children.
239)Turn off the ignition on both vehicles
beforehand. Make sure that the cables or
your clothes cannot be caught by the fan
or drive belt. Personal injury could result.
240)If electrolyte fluid is not visible, or
appears to be frozen, Do Not Attempt
Jump Starting! A battery might rupture or
explode if the temperature is below the
freezing point or if it is not filled to the
proper level.241)Electrolyte is corrosive diluted
sulphuric acid. If electrolyte (battery acid)
comes into contact with your hands, eyes,
clothes or the painted surface of your
vehicle, it should be thoroughly flushed
with water. If electrolyte gets in your eyes,
flush them with water immediately and
thoroughly, and get prompt medical
attention.
242)Make sure that the connection is
made to the appointed position (shown in
the illustration). If the connection is made
directly to the negative (−) side of the
battery, the inflammable gases generated
from the battery might catch fire and
explode.
243)When connecting the jumper cables,
do not connect the positive (+) cable to the
negative (−) terminal. Otherwise sparks
might cause explosion of the battery.
244)Use care not to get the jumper cable
caught in the cooling fan or other rotating
part in the engine compartment.
245)Keep the engine of the vehicle giving
assistance running.
246)Battery fluid is poisonous and
corrosive: avoid contact with your skin and
eyes. The battery should be charged in a
well ventilated place, away from naked
flames or possible sources of sparks:
danger of explosion and fire.
247)Do not attempt to charge a frozen
battery: it must be thawed first, otherwise it
may explode. If freezing has occurred, the
battery should be checked by skilled
personnel to make sure that the internal
elements are not damaged and that the
body is not cracked, with the risk of leaking
poisonous and corrosive acid.A
B
1
4
23
285AHA102061
186
IN CASE OF EMERGENCY
Page 189 of 312

ENGINE
OVERHEATING
When the engine is overheating,will
blink. If this occurs, take the following
corrective measures:
1. Stop the vehicle in a safe place.
2. Check whether steam is coming from
the engine compartment.
If steam does not come from the engine
compartment: with the engine still
running, raise the bonnet to ventilate
the engine compartment.
If steam is coming from the engine
compartment: stop the engine, and
when the steam stops, raise the bonnet
to ventilate the engine compartment.
Restart the engine.
248) 249) 250)
3. Confirm that the cooling fan (B) is
turning.
If the cooling fan is turning: after the
high coolant temperature warning has
gone off, stop the engine
If the cooling fan is not turning: stop the
engine immediately and contact a Fiat
dealership for assistance.A — Radiator cap
B — Cooling fan
C — Reserve tank
251)
4. Check the coolant level in the reserve
tank (C).
5. Add coolant to the radiator and/or
reserve tank if necessary (refer to the
“Maintenance” section).
252)
131)
6. Examine the radiator hoses for
coolant leakage and the drive belt for
looseness or damage.
If there is anything wrong with the
cooling system or drive belt, have the
problem corrected at a Fiat Dealership.
WARNING
248)Do not open the bonnet while steam
is coming from the engine compartment. It
could cause steam or hot water to spurt
out, causing burns. Hot water could spurt
out even when there is no steam coming
out, and some parts will be very hot. Be
very careful when opening the bonnet.
249)Be careful of hot steam, which could
be blowing off the reserve tank cap.
250)Do not attempt to remove the radiator
cap while the engine is hot.
251)Be careful not to get your hands or
clothes caught in the cooling fan.
252)Make sure that the engine has cooled
down before removing the radiator cap (A),
because hot steam or boiling water
otherwise will gush from the filler port and
may scald you.
A
C
B
286AHA104254
FULL
LOW
C
287AHA102087
187
Page 190 of 312

IMPORTANT
131)Do not add coolant while the engine is
hot. Suddenly adding cold coolant could
damage the engine. Wait for the engine to
cool down, then add coolant a little at a
time.
BLEEDING THE FUEL
SYSTEM
The fuel system should be bled to
remove air as described below if the
fuel supply is exhausted during travel.
Pump the hand pump (A) at the top of
the fuel filter until the hand pump
becomes stiff.
Then try again to start the engine. If the
engine does not start, repeat the
process above.
253) 254)
WARNING
253)Do not smoke or have any other open
flame near the vehicle while bleeding the
fuel system.
254)Be sure to carefully clean away any
spilt fuel which could ignite and cause a
fire.
REMOVAL OF WATER
FROM THE FUEL
FILTER
If the fuel filter indicator lamp in the
instrument panel illuminates during
driving, it indicates that water has
accumulated in the fuel filter. If this
occurs, remove the water as described
below.
1. Loosen the drain plug (A) of the fuel
filter.
2. Operate the hand pump (B) slowly
6 or 7 times in order to force the water
out through the drain plug (A).
A
288AHA102090
A
289AHA102104
188
IN CASE OF EMERGENCY
Page 191 of 312

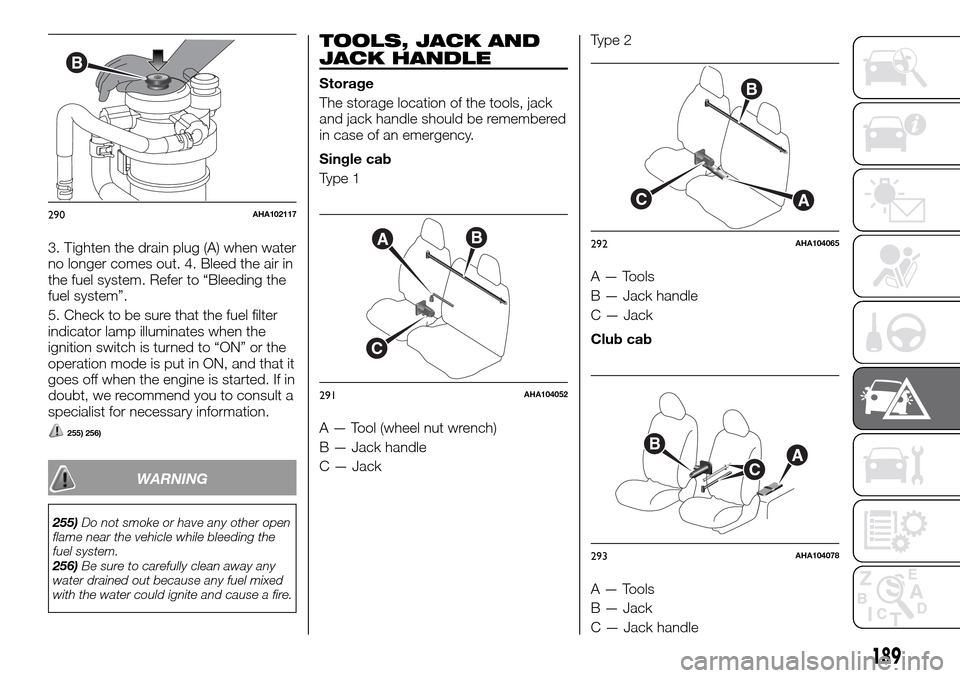
3. Tighten the drain plug (A) when water
no longer comes out. 4. Bleed the air in
the fuel system. Refer to “Bleeding the
fuel system”.
5. Check to be sure that the fuel filter
indicator lamp illuminates when the
ignition switch is turned to “ON” or the
operation mode is put in ON, and that it
goes off when the engine is started. If in
doubt, we recommend you to consult a
specialist for necessary information.
255) 256)
WARNING
255)Do not smoke or have any other open
flame near the vehicle while bleeding the
fuel system.
256)Be sure to carefully clean away any
water drained out because any fuel mixed
with the water could ignite and cause a fire.
TOOLS, JACK AND
JACK HANDLE
Storage
The storage location of the tools, jack
and jack handle should be remembered
in case of an emergency.
Single cab
Type 1
A — Tool (wheel nut wrench)
B — Jack handle
C — JackType 2
A — Tools
B — Jack handle
C — Jack
Club cab
A — Tools
B — Jack
C — Jack handle
B
290AHA102117
AB
C
291AHA104052
B
CA
292AHA104065
BAC
293AHA104078
189
Page 192 of 312
Double cab
Type 1
A — Tool (wheel nut wrench)
B — Jack handle
C — Jack
Type 2
A — Tools
B — Jack handle
C — JackTools
Type 1
1. Wheel nut wrench 2. Tool bag
3. Spanner 4. Tyre inflation pressure
gauge
Type 2
1. Tool bag 2. Wheel nut wrench
3. Plier 4. Driver 5. Spanner1. Tool bag 2. Wheel nut wrench
3. Plier 4. Driver 5. Spanner 6. Tyre
inflation pressure gauge
Removing and storing the tools,
jack and jack handle
Single cab
The tools, jack, and jack handle are
located behind the seat.
1. Tip forward the seatback (refer to
“Seats”).
2. Type 1: Remove the wheel nut
wrench (A) from the holder (B), and take
out the wrench.
Type 2: Remove the securing band (C),
and then take out the tools (D).
B
A
C
294AHA102120
A
C
B
295AHA104081
123
41
296AHA105860
1
4
5
2
3
297AHA105873
1
4
5
2
36
298AHA105886
190
IN CASE OF EMERGENCY