Page 105 of 132
OPENING THE HOOD
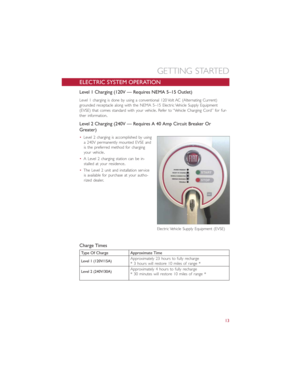
1.Pull the release lever located below the
instrument panel and in front of the
driver’s door.
2.Raise the hood and locate the safety
latch in the middle of the hood open-
ing.
3.Move the safety latch while lifting the
hood at the same time.
4.Insert the support rod that clips to the
right side (left side when standing in
front of the hood) of the engine com-
partment, into the slot on the hood.
5.To close the hood, remove the support
rod and place it in the retaining clip,
then lower the hood slowly.
WARNING!
Be sure the hood is fully latched before driving your vehicle.If the hood is not fully
latched, it could open when the vehicle is in motion and block your vision.Failure to
follow this warning could result in serious injury or death.
Hood Release Lever
MAINTAINING YOUR VEHICLE
103
Page 106 of 132
ENGINE COMPARTMENT — ELECTRIC
1.Battery Thermal Management Reservoir
2.Power Electronics Reservoir
3.Brake Fluid Reservoir
MAINTAINING YOUR VEHICLE
104
Page 107 of 132
4.Power Distribution Center #1
5.12 Volt Battery and Power Distribution Center #2
6.Washer Fluid Reservoir
MAINTAINING YOUR VEHICLE
105
Page 108 of 132

FLUID CAPACITIES
Systems
U.S. Metric
Power Electronics Cooling System 3.6 Quarts 3.5 Liters
Battery Thermal Management Cooling System 7.0 Quarts 6.7 Liters
Single-Speed Transmission 0.8 Quart 750 ml
FLUIDS, LUBES, AND GENUINE PARTS
Component Fluid, Lubricant, or Genuine Part
CoolantMOPAR Antifreeze/Coolant 10 Year/150,000 Mile
Formula OAT (Organic Additive Technology) or
equivalent meeting the requirements of FCA Mate-
rial Standard MS.90032.
Brake Master CylinderMOPAR DOT 3, SAE J1703 should be used.
If DOT 3, SAE J1703 brake fluid is not available,
then DOT 4 is acceptable.Use only recommended
brake fluids or equivalent.
Refrigerant MOPAR R134a
Compressor LubricantMOPAR POE Oil or Equivalent meeting the require-
ments of FCA Material Standard MS-12727
Single-Speed Transmission Castrol BOT 533
CAUTION!
•Mixing of coolant (antifreeze) other than specified Organic Additive Technology
(OAT) coolant (antifreeze), may result in cooling system damage and may decrease
corrosion protection.Organic Additive Technology (OAT) coolant is different and
should not be mixed with Hybrid Organic Additive Technology (HOAT) coolant
(antifreeze).If a non-OAT coolant (antifreeze) is introduced into the cooling sys-
tem in an emergency, it should be replaced with the specified coolant (antifreeze)
as soon as possible.
•Do not use water alone or alcohol-based coolant (antifreeze) products.Do not
use additional rust inhibitors or antirust products, as they may not be compatible
with the radiator coolant and may plug the radiator.
•This vehicle has not been designed for use with propylene glycol-based coolant
(antifreeze).Use of propylene glycol-based coolant (antifreeze) is not recom-
mended.
MAINTAINING YOUR VEHICLE
106
Page 109 of 132

MAINTENANCE PROCEDURES
For information on the maintenance procedures for your vehicle, please refer to “Mainte-
nance Procedures” in “Maintaining Your Vehicle” in your Owner’s Manual or applicable
supplement on the DVD for further details.
MAINTENANCE SCHEDULE
Once A Month Or Before A Trip:
•Check windshield washer fluid level
•Check the tire inflation pressures and look for unusual wear or damage
•Check the fluid levels of the coolant reservoirs and brake master cylinder
•Check function of all interior and exterior lights
Required Maintenance Intervals
Refer to the maintenance schedules on the following page for the required maintenance
intervals.
At Every Service Interval:
•Rotate the tires.Rotate at the first sign of irregular wear.
•
Inspect brake pads, shoes, rotors, drums, and hoses.
•
Inspect battery cooling system protection and hoses.
•
Check and adjust hand brake.
Maintenance Chart
Refer to the Maintenance Schedules on the following pages for the required maintenance
intervals.
MAINTAINING YOUR VEHICLE
107
Page 110 of 132

Mileage or time passed (whichever comes
first)
20,000
30,000
40,000
50,000
60,000
70,000
80,000
90,000
100,000
110,000
120,000
130,000
140,000
150,000
Or Years: 2 3 4 5 6 7 8 9 10 11 12 13 14 15
Or Kilometers:
32,000
48,000
64,000
80,000
96,000
112,000
128,000
144,000
160,000
176,000
192,000
208,000
224,000
240,000
Additional Inspections
Inspect the CV joints.XX X X X
Inspect front suspension, tie rod ends and
boot seals, and replace if necessary.
XXX X X X X
Inspect the brake linings.Replace as neces-
sary.XXX X X X X
Inspect parking brake function.Adjust as
necessary.XXX X X X X
Additional Maintenance
Replace cabin air filter.XXX X X X X
Clean and lube sun roof tracks.XX XX X X X X X X X X X X
Flush and replace the Power Electronics and
Battery Thermal Loop Systems at 10 years
or 150,000 miles (240,000 km) whichever
comes first.XX
WARNING!
•You can be badly injured working on or around a motor vehicle.Do only service work for which you have the knowledge and the
right equipment.If you have any doubt about your ability to perform a service job, take your vehicle to a competent mechanic.
•Failure to properly inspect and maintain your vehicle could result in a component malfunction and effect vehicle handling and perfor-
mance.This could cause an accident.
MAINTAINING YOUR VEHICLE
108
Page 111 of 132
MAINTENANCE RECORD
Odometer Date Signature, Authorized
Service Center
20,000 Miles
(32,000 km) or
2 Years
30,000 Miles
(48,000 km) or
3 Years
40,000 Miles
(64,000 km) or
4 Years
50,000 Miles
(80,000 km) or
5 Years
60,000 Miles
(96,000 km) or
6 Years
70,000 Miles
(112,000 km) or
7 Years
80,000 Miles
(128,000 km) or
8 Years
Odometer Date Signature, Authorized
Service Center
90,000 Miles
(144,000 km) or
9 Years
100,000 Miles
(160,000 km) or
10 Years
110,000 Miles
(176,000 km) or
11 Years
120,000 Miles
(192,000 km) or
12 Years
130,000 Miles
(208,000 km) or
13 Years
140,000 Miles
(224,000 km) or
14 Years
150,000 Miles
(240,000 km) or
15 Years
MAINTAINING YOUR VEHICLE
109
Page 112 of 132

FUSES
WARNING!
•When replacing a blown fuse, always use an appropriate replacement fuse with
the same amp rating as the original fuse.Never replace a fuse with another fuse
of higher amp rating.Never replace a blown fuse with metal wires or any other
material.Failure to use proper fuses may result in serious personal injury, fire
and/or property damage.
•Before replacing a fuse, make sure that the ignition is off and that all the other
services are switched off and/or disengaged.
•If the replaced fuse blows again, contact an authorized dealer.
•If a general protection fuse for safety systems (air bag system, braking system),
power unit systems (engine system, gearbox system) or steering system blows,
contact an authorized dealer.
Interior Fuses
The interior fuse panel is part of the Body Control Module (BCM) and is located on the
driver's side under the instrument panel.
CavityVehicle Fuse
NumberMini Fuse Description
1 F12 7.5 Amp Brown Right Low Beam
2 F32 5 Amp TanFront and Rear Ceiling Lights
Trunk and Door Courtesy Lights
3 F53 5 Amp Tan Instrument Panel Node
4 F38 20 Amp Yellow Central Door Locking
5 F36 10 Amp RedDiagnostic Socket, Climate Con-
trol System, Tire Pressure Moni-
tor, TCU
6 F43 20 Amp Yellow Bi-Directional Washer
7 F48 20 Amp Yellow Passenger Power Window
8 F13 7.5 Amp Brown Left Low Beam
9 F50 7.5 Amp Brown Airbag
10 F51 5 Amp TanClimate Control System, Stop
Light, Exterior Mirrors, Sunroof
Switch
11 F37 5 Amp TanStop Light Switch, Instrument
Panel Node
12 F49 5 Amp TanExterior Mirror, Electric Mirror,
Parking Sensor, Sunroof Switch
MAINTAINING YOUR VEHICLE
110