Page 147 of 308

145
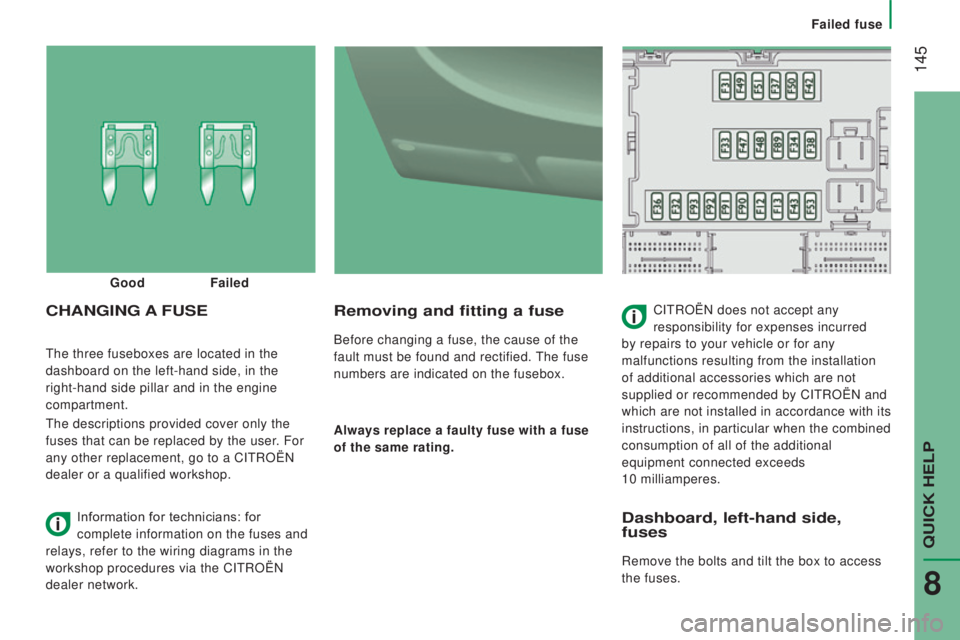
The three fuseboxes are located in the
dashboard on the left-hand side, in the
right-hand side pillar and in the engine
compartment.
The descriptions provided cover only the
fuses that can be replaced by the user. For
any other replacement, go to a CITROËN
dealer or a qualified workshop.
removing and fitting a fuse
Before changing a fuse, the cause of the
fault must be found and rectified. The fuse
numbers are indicated on the fusebox.
Always replace a faulty fuse with a fuse
of the same rating.
cHAnGInG A Fu SECITROËN does not accept any
responsibility for expenses incurred
by repairs to your vehicle or for any
malfunctions resulting from the installation
of additional accessories which are not
supplied or recommended by CITROËN and
which are not installed in accordance with its
instructions, in particular when the combined
consumption of all of the additional
equipment connected exceeds
10 milliamperes.
Good
Failed
Information for technicians: for
complete information on the fuses and
relays, refer to the wiring diagrams in the
workshop procedures via the CITROËN
dealer network.
dashboard, left-hand side,
fuses
Remove the bolts and tilt the box to access
the fuses.
QUICK HELP
8
Failed fuse
Page 155 of 308
153
rear lamps
Carry out these operations in reverse order
to fit the new bulb.
1.
Brake lamps
t
ype B,
P21W - 21W
2.
Brake/sidelamps
t
ype B,
P21/5W - 21W and 5W
3.
d
irection indicators
t
ype B,
PY 21W - 21W
4.
r
eversing lamps
t
ype A,
W16W - 16W
5.
Foglamp
t
ype A,
W16W - 16W -
Identify the failed bulb then open the
rear doors.
-
Remove the corresponding access cover
by removing the seven fixing screws
(van) or
Remove the corresponding access cover
by pulling on its grip to unclip it (combi).
-
Disconnect the electrical connector by
pressing on its central tongue.
-
Remove the two fixing nuts of the lens.
-
Pull the lens from the outside.-
Remove the six bulb holder fixing
screws.
-
Spread the three retaining tongues and
remove the bulb holder from its housing.
-
Change the bulb.
For more information on the bulbs,
refer to the table "Types of bulb or
lamp".
QUICK HELP
8
Failed bulb or lamp
Page 171 of 308
169
E
1 - CAUTION
ORIGINAL LUBRICANTS AND FLUIDS
Engine oil Transmission
Radiater Brake system
Windscreen Washer Power steering
REFER TO OWNER HANDBOOK WEAR EYE PROTECTION
2 - SAFETY
The use of original parts, fluids and original lubrificants and respecti\
ng scheduled
maintenance guarantees your cars reliability and safety overtime.
3 - DANGER
KEEP OUT OF CHILDREN'S REACH KEEP AWAY FROM
FLAMES DO NOT TOUCH
DO NOT OPEN CAP WITH ENGINE WARM EXPLOSION
CORROSIVE LIQUID
MAY START AUTOMATICALLY EVEN WITH ENGINE OFF HIGH PRESSURE GAS DO
NOT OPEN
AUTOMATIC ENGINE RESTART. EXTRACT THE KEY
FROM DASHBOARD WHEN BONNET HOOD IS OPENED HIGH VOLTAGE
QUICK HELP
8
Precautions...
Page 175 of 308
173
dIMEnSIOnS
The dimensions are given in millimetres.
This model is available in 4 lengths (L1...) and 3 heights (H1...); refer to the corresponding tables:VA
n
L1L2L3L4
H1 H2 H1 H2 H2 H3 H2 H3
L Overall length 4
9635
4135
9986
363
H Overall height 2
254 2 524 2 254 2 524 2 524 2 764 2 524 2 764
A Wheelbase 3
0003
4504
035
B Front overhang 948
cRear overhang1
0151
380
dOverall width (incl./excl. mirrors)2 508 / 2
050
E Width of front track 1
810
F Width of rear track 1
790
G Height of load floor 535 to 565
I Length of interior floor 2
6703
1203
7054
070
jMaximum interior load height1
662 1 932 1 662 1 932 1 932 2 172 1 932 2 172
K Maximum interior width 1
870
M Interior width between wheel arches 1
422
Volume (m
3) 89.5 10 11.5 13 15 15 17
9
TECHNICAL DATA
Dimensions
Page 187 of 308

185
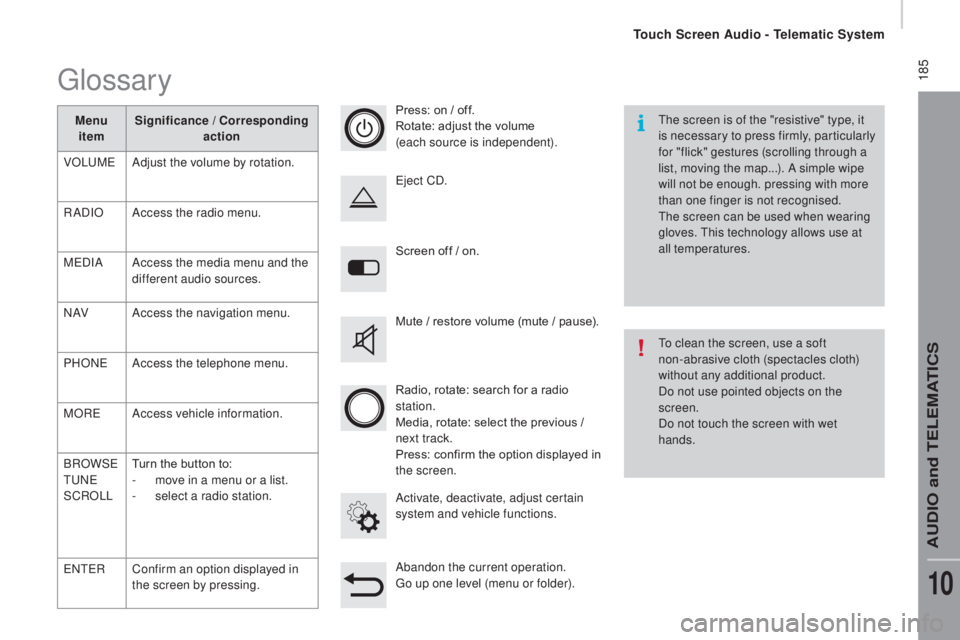
Screen off / on.
Activate, deactivate, adjust certain
system and vehicle functions. Eject CD.
Mute / restore volume (mute / pause).
Abandon the current operation.
Go up one level (menu or folder). Press: on / off.
Rotate: adjust the volume
(each source is independent).
Radio, rotate: search for a radio
station.
Media, rotate: select the previous /
next track.
Press: confirm the option displayed in
the screen.The screen is of the "resistive" type, it
is necessary to press firmly, particularly
for "flick" gestures (scrolling through a
list, moving the map...). A simple wipe
will not be enough. pressing with more
than one finger is not recognised.
The screen can be used when wearing
gloves. This technology allows use at
all temperatures.
To clean the screen, use a soft
non-abrasive cloth (spectacles cloth)
without any additional product.
Do not use pointed objects on the
screen.
Do not touch the screen with wet
hands.
Glossary
Menu
item Significance /
co rresponding
action
VOLUME Adjust the volume by rotation.
RADIO Access the radio menu.
MEDIA Access the media menu and the
different audio sources.
N AV Access the navigation menu.
PHONE Access the telephone menu.
MORE Access vehicle information.
BROWSE
TUNE
SCROLL Turn the button to:
-
m
ove in a menu or a list.
-
s
elect a radio station.
ENTER Confirm an option displayed in
the screen by pressing.
Touch Screen Audio - Telematic System
AUDIO and TELEMATICS
10
Page 191 of 308
189Level 1Level 2 Level 3co mment
rAd
IO Briefly press the buttons for an automatic search.
Press and hold the buttons for a quick search.
rAd
IO
Preset Make a long press on the button to present the
current radio station.
The current station is highlighted.
Press the "All" button to display all of the preset
radio stations in the waveband selected.
rAd
IO
n
avigate List of stations
Selection a station with a press.
Update the list according to reception.
Press these buttons to scroll through the radio
stations received.
Go directly to the desired letter in the list.
rAd
IO
AM/FM /
d
AB
ch
oose the waveband Choose the waveband
rAd
IO
Adjustment
dir
ect adjustment The screen virtual keypad can used to enter a
single number corresponding to a station.
The symbols allow precise adjustment of the
frequency.
rAd
IO
Info Information
Display information on the current radio station.
Touch Screen Audio - Telematic System
AUDIO and TELEMATICS
10
Page 195 of 308

193
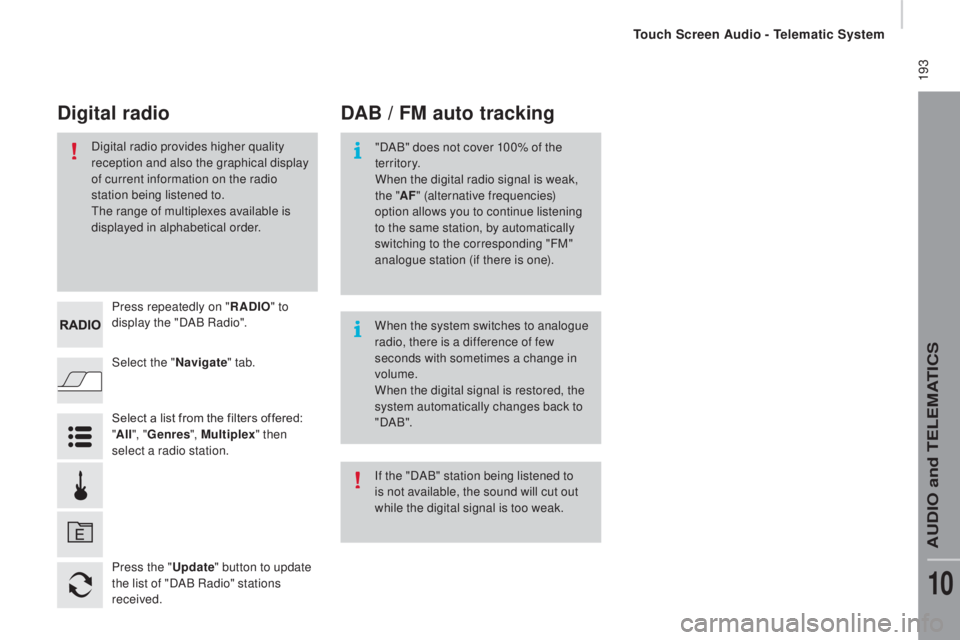
Select the "navigate" tab.
Press repeatedly on "
rAd
IO
" to
display the "DAB Radio".
Select a list from the filters offered:
" All ", "Genres ", Multiplex " then
select a radio station.
Press the "
upd
ate" button to update
the list of "DAB Radio" stations
received.
dAB / FM auto trackingdi
gital radio
"DAB" does not cover 100% of the
te r r i to r y.
When the digital radio signal is weak,
the " AF" (alternative frequencies)
option allows you to continue listening
to the same station, by automatically
switching to the corresponding "FM"
analogue station (if there is one).
When the system switches to analogue
radio, there is a difference of few
seconds with sometimes a change in
volume.
When the digital signal is restored, the
system automatically changes back to
" DA B ".
Digital radio provides higher quality
reception and also the graphical display
of current information on the radio
station being listened to.
The range of multiplexes available is
displayed in alphabetical order.
If the "DAB" station being listened to
is not available, the sound will cut out
while the digital signal is too weak.
Touch Screen Audio - Telematic System
AUDIO and TELEMATICS
10
Page 215 of 308
213Level 1Level 2 Level 3co mment
Settings
d
isplay Brightness
Set the brightness of the screen.
d
isplay mode Manual
Set the display mode.
Auto
Language Deutsch
Choose the desired language.
English
Español
Français
Italiano
Nederlands
Polski
Português
Türkçe
un
its of measurement Fuel consumption
Set the units used for the display of fuel
consumption, distance and temperature.
Distances
Temperature
to
uch screen sound On
Activate or deactivate the audible signal when
touching a screen button.
Off
di
splay trip B On
Display Trip B in the driver's screen.
Off
Touch Screen Audio - Telematic System
AUDIO and TELEMATICS
10