2016 Citroen JUMPER ignition
[x] Cancel search: ignitionPage 50 of 276

48
jumper_en_Chap03_Ergo-et-confort_ed01-2015
WIPEr cOntrOL S tALKSlow continuous wiping: 2 notches downwards.
Do not cover the rain sensor, located
at the top centre of the windscreen.
Screenwash and headlamp wash
Pull the wiper control stalk towards you,
the screenwash is accompanied by a timed
operation of the wipers.
Depending on version, the headlamp wash is
coupled with the screenwash, it is triggered if
the dipped beam headlamps are on.
Windscreen wipers
Wiping is only active when the ignition key is
in the runn I n G position.
The control stalk has five different
positions:
Wipers off.
Intermittent wiping: 1 notch downwards.
i
n this position, four wiping frequencies
can be selected by turning
the ring:
-
very slow frequency
-
slow frequency
-
standard frequency
,
-
fast frequency
.
Automatic rain sensitive windscreen
wipers
if your vehicle is fitted with this system, the
wiping speed is adapted automatically to the
intensity of the rainfall.
Automatic wiping: 1 notch downwards. This is
confirmed by one wipe. Must be reactivated
each time the ignition is switched on.
i
n this position, the sensitivity of the rain
sensor can be increased by turning the ring.
Good practice
Check that the windscreen wiper blades can
operate freely when using the wipers in icy
weather.
Use the step in the front bumper, to remove
any accumulation of snow at the base of the
windscreen and on the blades.
You can change the wiper blades.
r
efer to the "Quick help - Worn wiper
blade" section.
You can check the fluid level.
r
efer to the "Checks - Levels and
checks" section.
Fast continuous wiping: 3 notches
downwards.
Single wipe: pull the control stalk towards
the steering wheel.
With Stop & Start, when the wiper
control stalk is in the fast wipe position,
the ST
o
P mode is not available.
When washing the vehicle, switch off the
ignition or deactivate the automatic rain
sensitive wipers.
Steering mounted controls
Page 53 of 276

51
jumper_en_Chap03_Ergo-et-confort_ed01-2015
Good practice
When changing the programmed reference
speed by pressing and holding the control,
take care as the speed may increase or
decrease rapidly.
Do not use the cruise control on slippery
roads or in heavy traffic.
o
n a steep gradient, the cruise control will
not be able to prevent the vehicle from
exceeding the programmed speed.
The cruise control cannot, in any
circumstances, replace the need to comply
with speed limits or vigilance on the part of
driver.
i
t is advisable to leave your feet near the
pedals.
To prevent the mat from becoming caught
under the pedals:
-
ensure that the mat is positioned
correctly,
-
never fit one mat on top of another
.
cancelling the programmed speed
When the vehicle stops, after the ignition is
switched off, the system no longer stores
any speed.
Operating fault
in the event of a fault, the system
is switched of f and the indicator
goes off.
Contact a C
i T roën dealer or a qualified
workshop to have the system checked.
3
EASE OF uSE and cOMFOrt
Steering mounted controls
Page 56 of 276

54
jumper_en_Chap03_Ergo-et-confort_ed01-2015
There are two methods of memorising a
speed higher than the previous one:
Without using the accelerator:
-
Move the switch up (+).
A
brief press increases the speed by 1 mph
(km/h).
A maintained press increases the speed in
steps of 5 mph (km/h).
Using the accelerator:
-
exceed the memorised speed until the
speed required is reached,
-
move the switch up (+) or down (-).
T
o memorise a speed lower than the
previous one:
-
move the switch down (-).
A
brief press decreases the speed by 1 mph
(km/h).
A maintained press decreases the speed in
steps of 5 mph (km/h).
changing the
programmed
speed Switching the system off
- Place the ring in the central
O position
or switch off the ignition to switch the
system off.
When the vehicle becomes stationary, after
switching off the ignition, the system no
longer memorises a speed.
Operating fault
in the event of a fault, the system
switches of f and the indicator
goes off. Contact a C
i T roën
dealer or a qualified workshop to
have the system checked.
Good practice
When changing the programmed reference
speed by means of a maintained press,
pay attention as the speed can increase or
decrease rapidly.
Do not use the cruise control on slippery
roads or in heavy traffic.
i
n the event of a steep slope, the cruise
control cannot prevent the vehicle from
exceeding the programmed speed.
i
n any event, the cruise control cannot
replace the need to observe the speed
limits, nor can it replace the need for
vigilance on the part of the driver.
i
t is advisable to leave your feet near the
pedals.
To avoid any jamming under the pedals:
-
ensure that the mat and its fixings on the
floor are positioned correctly,
-
never place one mat on top of another
.
Steering mounted controls
Page 59 of 276

57
jumper_en_Chap03_Ergo-et-confort_ed01-2015
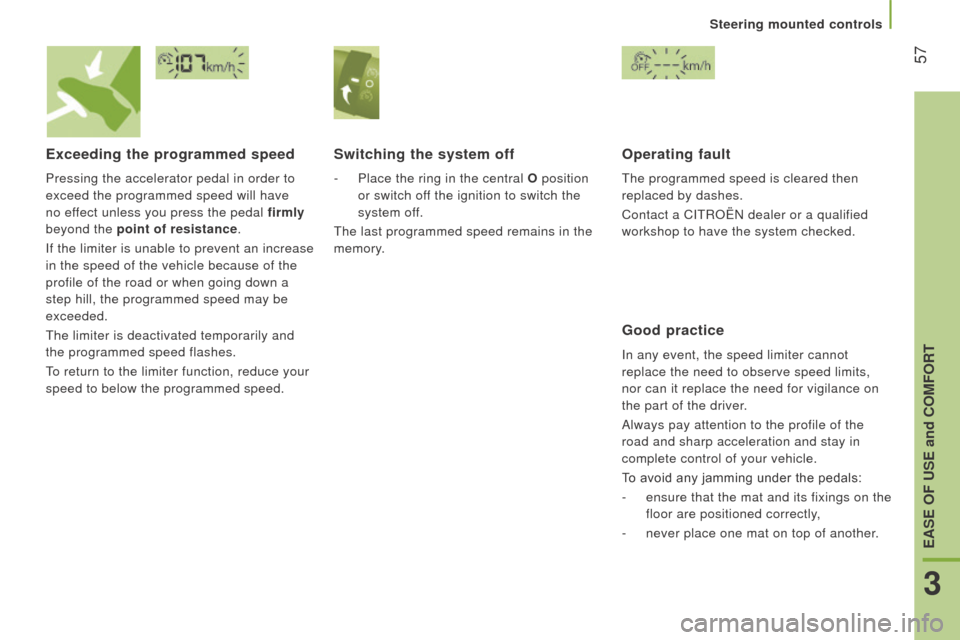
Exceeding the programmed speed
Pressing the accelerator pedal in order to
exceed the programmed speed will have
no effect unless you press the pedal firmly
beyond the point of resistance.
i
f the limiter is unable to prevent an increase
in the speed of the vehicle because of the
profile of the road or when going down a
step hill, the programmed speed may be
exceeded.
The limiter is deactivated temporarily and
the programmed speed flashes.
To return to the limiter function, reduce your
speed to below the programmed speed.
Switching the system off
- Place the ring in the central O position
or switch off the ignition to switch the
system off.
The last programmed speed remains in the
memory.
Operating fault
The programmed speed is cleared then
replaced by dashes.
Contact a C
i T roën dealer or a qualified
workshop to have the system checked.
Good practice
in any event, the speed limiter cannot
replace the need to observe speed limits,
nor can it replace the need for vigilance on
the part of the driver.
Always pay attention to the profile of the
road and sharp acceleration and stay in
complete control of your vehicle.
To avoid any jamming under the pedals:
-
ensure that the mat and its fixings on the
floor are positioned correctly,
-
never place one mat on top of another
.
3
EASE OF uSE and cOMFOrt
Steering mounted controls
Page 67 of 276

65
jumper_en_Chap03_Ergo-et-confort_ed01-2015
AddItIOnAL HEAt I n G SYS t EMS
Supplementary heating
on the 2-3 seats version, this is located
under the seat on the driver's side with air
diffusion directed forwards.
rEAr HEAt I n G A nd / O r AI r
c O nd I t IO n I n G
if your vehicle is fitted with an additional
air conditioning unit, located in the rear of
the vehicle: the distribution rail located in
the roof and the individual diffusion vents
provide a perfect diffusion of cold air.
The warm air diffused at the floor, from the
front air conditioning unit, is distributed at
the feet of the rear passengers of rows
2
and 3.
A warm air diffusion vent, located on the rear
left wheelarch, may complete the assembly
for the feet of the rear passengers of row 3.
Additional heating
This is passenger compartment heating,
additional to the standard equipment.
i
t can operate independently of the engine.
Additional heater or programmable
additional heating
This is an additional, programmable and
separate system which heats the Diesel
engine hot coolant loop to make starting
easier.
i
t improves the demisting and defrosting
performance and that of the heated seats, if
fitted to the vehicle.
The passenger compartment heating is
brought up to temperature more rapidly.
This system must be programmed to start up
before you enter the vehicle.
o
n the 5-9 seats version, it is
located at the rear. Depending
on the model version, the air
diffusion is either direct from the
rear or comes from the rail located under
each of the two rows of seats.
Press this control to activate/
deactivate the heating. The LED
is on if the heating is activated.
When rapid demisting and
defrosting is required, switch off the control.
Automatic additional heating
This is an additional system which starts
automatically when the ignition is switched
on.
i ts activation depends on the ambient
temperature and the temperature inside the
vehicle.
i
t switches off automatically once the
heating system is started manually.
Ventilation
3
EASE OF uSE and cOMFOrt
Page 82 of 276

80
jumper_en_Chap03_Ergo-et-confort_ed01-2015
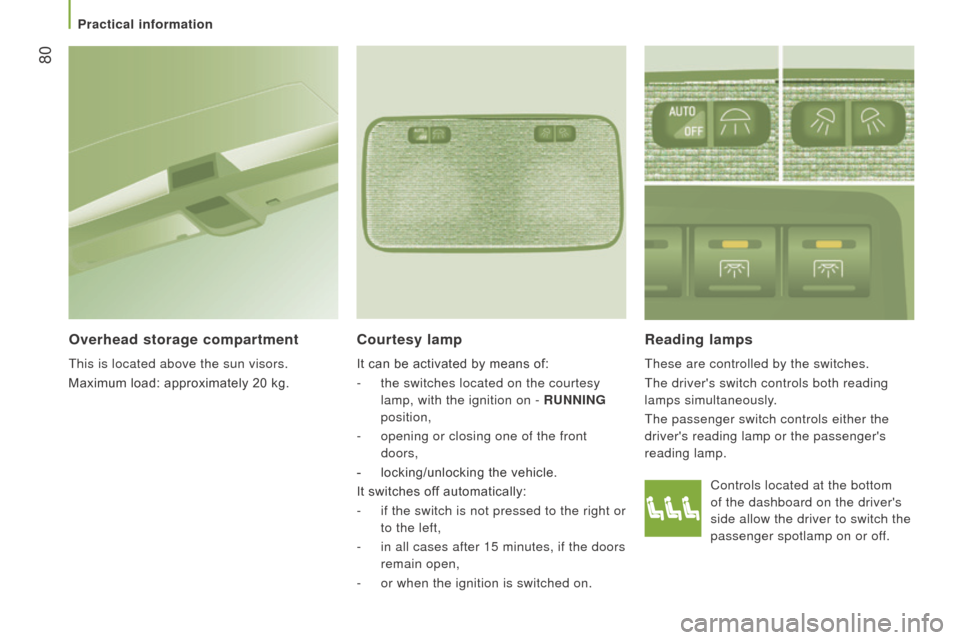
Controls located at the bottom
of the dashboard on the driver's
side allow the driver to switch the
passenger spotlamp on or off.
reading lamps
These are controlled by the switches.
The driver's switch controls both reading
lamps simultaneously.
The passenger switch controls either the
driver's reading lamp or the passenger's
reading lamp.
courtesy lamp
It can be activated by means of:
-
the switches located on the courtesy
lamp, with the ignition on -
runn I n G
position,
-
opening or closing one of the front
doors,
-
locking/unlocking the vehicle.
It switches of
f automatically:
-
if the switch is not pressed to the right or
to the left,
-
in all cases after 15 minutes, if the doors
remain open,
-
or when the ignition is switched on.
Overhead storage compartment
This is located above the sun visors.
Maximum load: approximately 20 kg.
Practical information
Page 85 of 276

83
jumper_en_Chap03_Ergo-et-confort_ed01-2015
Sliding side windows
Depending on the vehicle's equipment, the
side windows of row 2 can be opened.
Squeeze the two controls then slide the
window.
torch
if your vehicle has one, the magnetic torch is
located at the rear courtesy lamp.
A
lamp is locatred in the centre of the torch
base.
r
emove the torch from its base by
pressing the button then pivoting the torch
downwards by 90 degrees.
To switch on the torch, slide the switch
forwards.
To change the 4 batteries (
n iMH type),
remove the protective cover, located on the
torch. With the vehicle stationary, key in the
ignition switch or removed, recharging
and lighting from the torch stops after
around 15 minutes.
The torch batteries recharge automatically
while driving. To put the torch back in place, engage
it in the notches on the base and pivot it
upwards.
While driving, the window must be
closed or secured in an intermediate
position.
Do not extend long objects outside the
vehicle via the window.
Practical information
3
EASE OF uSE and cOMFOrt
Page 87 of 276

85
jumper_en_Chap03_Ergo-et-confort_ed01-2015
MIrrOrS
d
oor mirrors
These are divided into two zones:
A - Upper mirror
B - Lower mirror
The mirror glass is spherical in order to
widen the lateral field of vision.
o bjects
seen in the mirror are in reality closer than
they appear. Therefore, this must be taken
into account in order to assess the distance
correctly.
The shell incorporates the direction indicator
side repeater and the aerials, according to
the equipment available on board (GPS,
GSM,
r adio, ...).
Electrical controls
The ignition switch must be in the MAr
position.
T
urn the control to select the mirror zone.
1 Driver's mirror:
A1 - Upper mirror
B1 - Lower mirror
Then move the control in the direction of the
adjustment required.
2 Passenger mirror:
A2 - Upper mirror
B2 - Lower mirror
Then move the control in the direction of the
adjustment required.
rear view mirror
The lever located on the lower edge moves
the mirror into two positions.
For the day position, the lever is pushed.
For the night position to prevent dazzle, pull
the lever towards you.
Electric folding
Press this control.
defrosting the mirrors
Press the rear screen defrosting
button.
Mirrors and windows
3
EASE OF uSE and cOMFOrt