2016 CHEVROLET CRUZE LIMITED warning light
[x] Cancel search: warning lightPage 4 of 357
Chevrolet Cruze Limited Owner Manual (GMNA-Localizing-U.S./Canada-
9282844) - 2016 - crc - 9/3/15
Introduction 3
Danger, Warning, and
Caution
Warning messages found on vehicle
labels and in this manual describe
hazards and what to do to avoid or
reduce them.
{Danger
Danger indicates a hazard with a
high level of risk which will result
in serious injury or death.
{Warning
Warning indicates a hazard that
could result in injury or death.
Caution
Caution indicates a hazard that
could result in property or vehicle
damage.
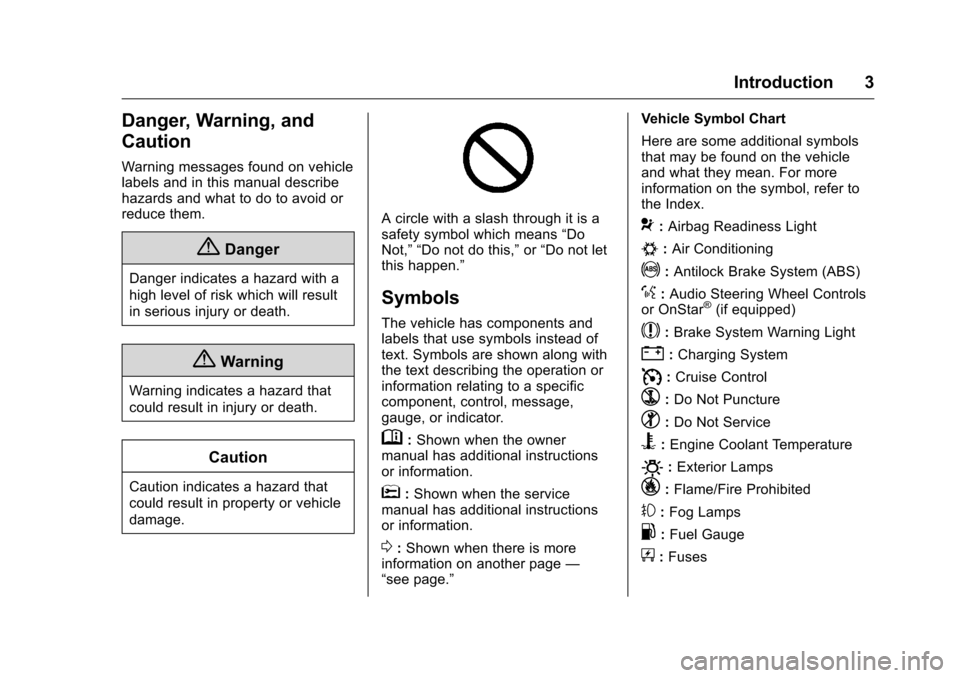
A circle with a slash through it is a
safety symbol which means“Do
Not,” “Do not do this,” or“Do not let
this happen.”
Symbols
The vehicle has components and
labels that use symbols instead of
text. Symbols are shown along with
the text describing the operation or
information relating to a specific
component, control, message,
gauge, or indicator.
M: Shown when the owner
manual has additional instructions
or information.
*: Shown when the service
manual has additional instructions
or information.
0: Shown when there is more
information on another page —
“see page.” Vehicle Symbol Chart
Here are some additional symbols
that may be found on the vehicle
and what they mean. For more
information on the symbol, refer to
the Index.
9:
Airbag Readiness Light
#:Air Conditioning
!:Antilock Brake System (ABS)
%:Audio Steering Wheel Controls
or OnStar®(if equipped)
$: Brake System Warning Light
":Charging System
I: Cruise Control
`:Do Not Puncture
^:Do Not Service
B:Engine Coolant Temperature
O:Exterior Lamps
_: Flame/Fire Prohibited
#:Fog Lamps
.:Fuel Gauge
+: Fuses
Page 8 of 357
Chevrolet Cruze Limited Owner Manual (GMNA-Localizing-U.S./Canada-
9282844) - 2016 - crc - 9/3/15
In Brief 7
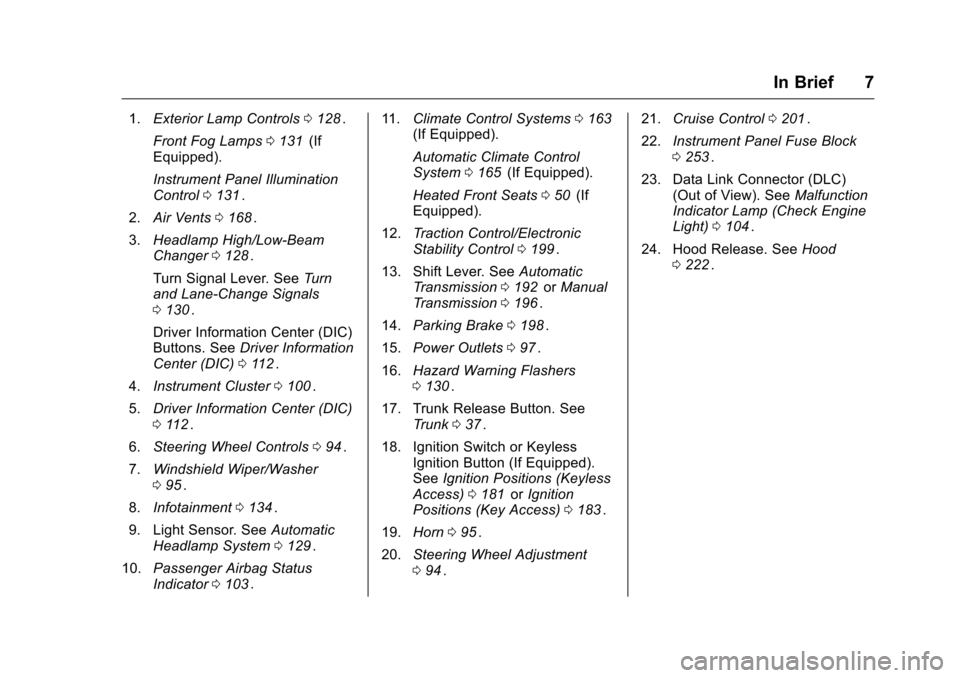
1.Exterior Lamp Controls 0128ii.
Front Fog Lamps 0131
ii(If
Equipped).
Instrument Panel Illumination
Control 0131
ii.
2. Air Vents 0168
ii.
3. Headlamp High/Low-Beam
Changer 0128
ii.
Turn Signal Lever. See Turn
and Lane-Change Signals
0 130
ii.
Driver Information Center (DIC)
Buttons. See Driver Information
Center (DIC) 0112
ii.
4. Instrument Cluster 0100
ii.
5. Driver Information Center (DIC)
0112
ii.
6. Steering Wheel Controls 094
ii.
7. Windshield Wiper/Washer
095
ii.
8. Infotainment 0134
ii.
9. Light Sensor. See Automatic
Headlamp System 0129
ii.
10. Passenger Airbag Status
Indicator 0103
ii. 11.
Climate Control Systems 0163
ii(If Equipped).
Automatic Climate Control
System 0165
ii(If Equipped).
Heated Front Seats 050
ii(If
Equipped).
12. Traction Control/Electronic
Stability Control 0199
ii.
13. Shift Lever. See Automatic
Transmission 0192
iior Manual
Transmission 0196ii.
14. Parking Brake 0198
ii.
15. Power Outlets 097
ii.
16. Hazard Warning Flashers
0130
ii.
17. Trunk Release Button. See Trunk 037
ii.
18. Ignition Switch or Keyless Ignition Button (If Equipped).
SeeIgnition Positions (Keyless
Access) 0181
iior Ignition
Positions (Key Access) 0183ii.
19. Horn 095
ii.
20. Steering Wheel Adjustment
094
ii. 21.
Cruise Control 0201
ii.
22. Instrument Panel Fuse Block
0253
ii.
23. Data Link Connector (DLC) (Out of View). See Malfunction
Indicator Lamp (Check Engine
Light) 0104
ii.
24. Hood Release. See Hood
0 222
ii.
Page 16 of 357
Chevrolet Cruze Limited Owner Manual (GMNA-Localizing-U.S./Canada-
9282844) - 2016 - crc - 9/3/15
In Brief 15
AUTO :Turns the headlamps on
automatically at normal brightness,
together with the parking lamps,
taillamps, license plate lamps,
instrument panel lights, and
sidemarker lamps.
;: Turns on the parking lamps
including all lamps, except the
headlamps.
5: Turns on the headlamps
together with the parking lamps and
instrument panel lights. A warning
chime sounds if the driver door is
opened when the ignition switch is
off and the headlamps are on.
#: If equipped with fog lamps,
press to turn the lamps on or off.
See:
. Exterior Lamp Controls 0128
ii
.
Front Fog Lamps 0131ii
Windshield Wiper/Washer
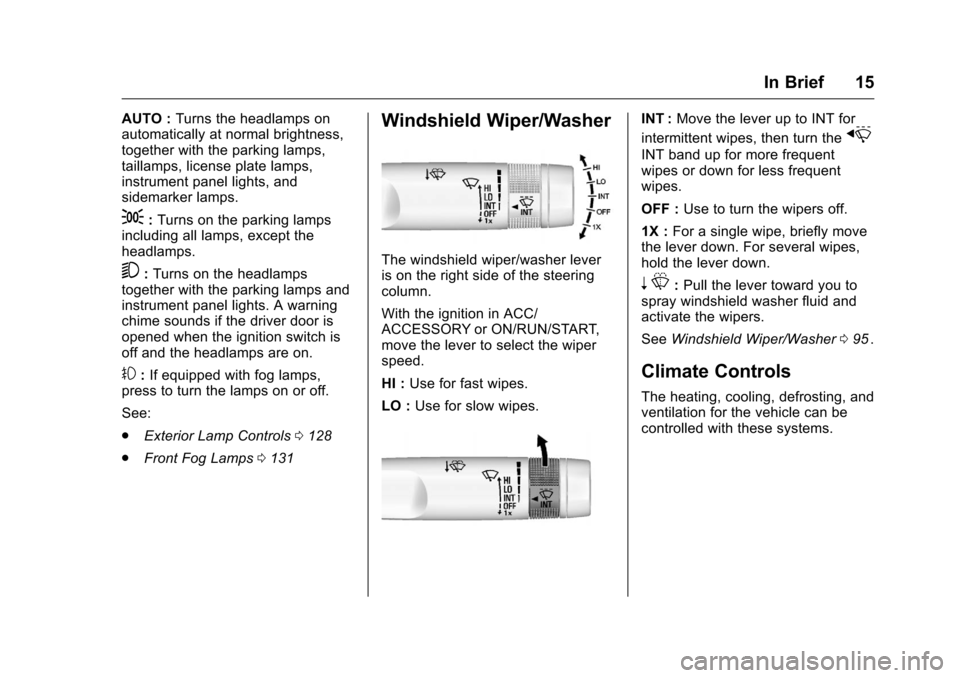
The windshield wiper/washer lever
is on the right side of the steering
column.
With the ignition in ACC/
ACCESSORY or ON/RUN/START,
move the lever to select the wiper
speed.
HI : Use for fast wipes.
LO : Use for slow wipes.
INT : Move the lever up to INT for
intermittent wipes, then turn the
x
INT band up for more frequent
wipes or down for less frequent
wipes.
OFF : Use to turn the wipers off.
1X : For a single wipe, briefly move
the lever down. For several wipes,
hold the lever down.
n L: Pull the lever toward you to
spray windshield washer fluid and
activate the wipers.
See Windshield Wiper/Washer 095
ii.
Climate Controls
The heating, cooling, defrosting, and
ventilation for the vehicle can be
controlled with these systems.
Page 23 of 357
Chevrolet Cruze Limited Owner Manual (GMNA-Localizing-U.S./Canada-
9282844) - 2016 - crc - 9/3/15
22 In Brief
.Press and release thegbutton
again to turn on both systems.
See Traction Control/Electronic
Stability Control 0199
ii.
Tire Pressure Monitor
This vehicle may have a Tire
Pressure Monitor System (TPMS).
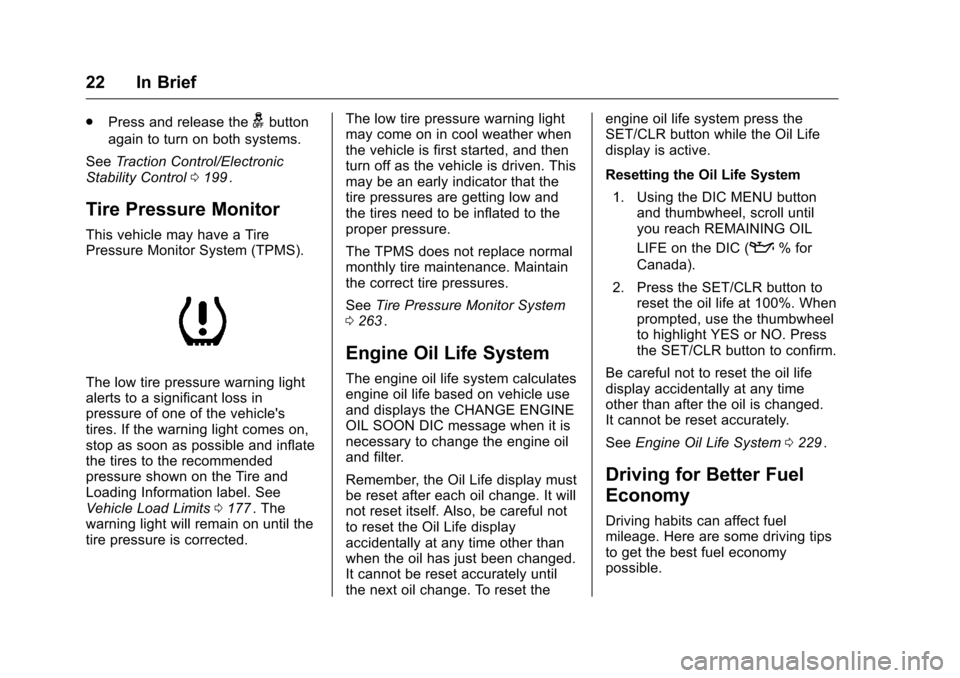
The low tire pressure warning light
alerts to a significant loss in
pressure of one of the vehicle's
tires. If the warning light comes on,
stop as soon as possible and inflate
the tires to the recommended
pressure shown on the Tire and
Loading Information label. See
Vehicle Load Limits 0177
ii. The
warning light will remain on until the
tire pressure is corrected. The low tire pressure warning light
may come on in cool weather when
the vehicle is first started, and then
turn off as the vehicle is driven. This
may be an early indicator that the
tire pressures are getting low and
the tires need to be inflated to the
proper pressure.
The TPMS does not replace normal
monthly tire maintenance. Maintain
the correct tire pressures.
See
Tire Pressure Monitor System
0 263
ii.
Engine Oil Life System
The engine oil life system calculates
engine oil life based on vehicle use
and displays the CHANGE ENGINE
OIL SOON DIC message when it is
necessary to change the engine oil
and filter.
Remember, the Oil Life display must
be reset after each oil change. It will
not reset itself. Also, be careful not
to reset the Oil Life display
accidentally at any time other than
when the oil has just been changed.
It cannot be reset accurately until
the next oil change. To reset the engine oil life system press the
SET/CLR button while the Oil Life
display is active.
Resetting the Oil Life System
1. Using the DIC MENU button and thumbwheel, scroll until
you reach REMAINING OIL
LIFE on the DIC (
:% for
Canada).
2. Press the SET/CLR button to reset the oil life at 100%. When
prompted, use the thumbwheel
to highlight YES or NO. Press
the SET/CLR button to confirm.
Be careful not to reset the oil life
display accidentally at any time
other than after the oil is changed.
It cannot be reset accurately.
See Engine Oil Life System 0229
ii.
Driving for Better Fuel
Economy
Driving habits can affect fuel
mileage. Here are some driving tips
to get the best fuel economy
possible.
Page 26 of 357
Chevrolet Cruze Limited Owner Manual (GMNA-Localizing-U.S./Canada-
9282844) - 2016 - crc - 9/3/15
Keys, Doors, and Windows 25
{Warning
If the key is unintentionally
rotated while the vehicle is
running, the ignition could be
moved out of the RUN position.
This could be caused by heavy
items hanging from the key ring,
or by large or long items attached
to the key ring that could be
contacted by the driver or
steering wheel. If the ignition
moves out of the RUN position,
the engine will shut off, braking
and steering power assist may be(Continued)
Warning (Continued)
impacted, and airbags may not
deploy. To reduce the risk of
unintentional rotation of the
ignition key, do not change the
way the ignition key and Remote
Keyless Entry (RKE) transmitter,
if equipped, are connected to the
provided key rings.
If the vehicle is equipped with a
keyed ignition, the ignition key, key
rings, and RKE transmitter,
if equipped, are designed to work
together. As a system, it reduces
the risk of unintentionally moving
the key out of the RUN position.
If replacements or additions are
required, see your dealer. Limit
added items to a few essential keys
or small, light items no larger than
an RKE transmitter.
Interference from radio-frequency
identification (RFID) tags may
prevent the key from starting the
vehicle. Keep RFID tags away from
the key when starting the vehicle.
The key that is part of the Remote
Keyless Entry (RKE) transmitter can
be used for the ignition and all locks
if the vehicle is a Key access
vehicle. If the vehicle has the
keyless ignition, the key can be
used for the locks.
Page 52 of 357
Chevrolet Cruze Limited Owner Manual (GMNA-Localizing-U.S./Canada-
9282844) - 2016 - crc - 9/3/15
Seats and Restraints 51
Warning (Continued)
heat, such as a blanket, cushion,
cover, or similar item. This may
cause the seat heater to
overheat. An overheated seat
heater may cause a burn or may
damage the seat.
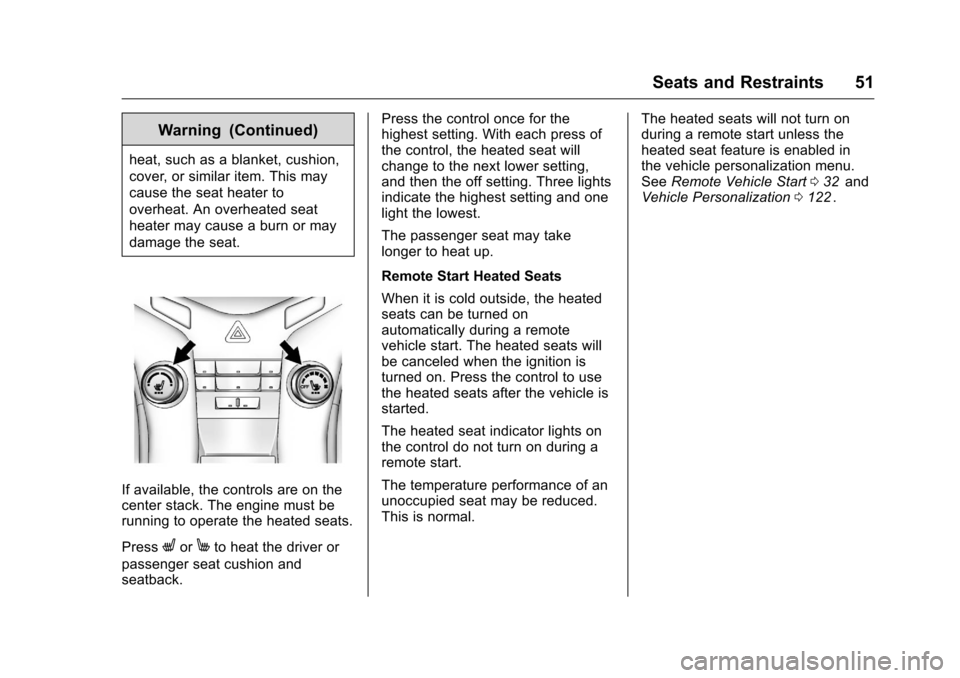
If available, the controls are on the
center stack. The engine must be
running to operate the heated seats.
Press
LorMto heat the driver or
passenger seat cushion and
seatback. Press the control once for the
highest setting. With each press of
the control, the heated seat will
change to the next lower setting,
and then the off setting. Three lights
indicate the highest setting and one
light the lowest.
The passenger seat may take
longer to heat up.
Remote Start Heated Seats
When it is cold outside, the heated
seats can be turned on
automatically during a remote
vehicle start. The heated seats will
be canceled when the ignition is
turned on. Press the control to use
the heated seats after the vehicle is
started.
The heated seat indicator lights on
the control do not turn on during a
remote start.
The temperature performance of an
unoccupied seat may be reduced.
This is normal.
The heated seats will not turn on
during a remote start unless the
heated seat feature is enabled in
the vehicle personalization menu.
See
Remote Vehicle Start 032
iiand
Vehicle Personalization 0122ii.
Page 60 of 357
Chevrolet Cruze Limited Owner Manual (GMNA-Localizing-U.S./Canada-
9282844) - 2016 - crc - 9/3/15
Seats and Restraints 59
anchorages are all working properly.
Look for any other loose or
damaged safety belt system parts
that might keep a safety belt system
from doing its job. See your dealer
to have it repaired. Torn or frayed
safety belts may not protect you in a
crash. They can rip apart under
impact forces. If a belt is torn or
frayed, get a new one right away.
Make sure the safety belt reminder
light is working. SeeSafety Belt
Reminders 0102
ii.
Keep safety belts clean and dry.
See Safety Belt Care 059
ii.
Safety Belt Care
Keep belts clean and dry.
{Warning
Do not bleach or dye safety belts.
It may severely weaken them. In
a crash, they might not be able to
provide adequate protection.
Clean safety belts only with mild
soap and lukewarm water.
Replacing Safety Belt
System Parts after a
Crash
{Warning
A crash can damage the safety
belt system in the vehicle.
A damaged safety belt system
may not properly protect the
person using it, resulting in
serious injury or even death in a
crash. To help make sure the
safety belt systems are working
properly after a crash, have them
inspected and any necessary
replacements made as soon as
possible.
After a minor crash, replacement of
safety belts may not be necessary.
But the safety belt assemblies that
were used during any crash may
have been stressed or damaged.
See your dealer to have the safety
belt assemblies inspected or
replaced. New parts and repairs may be
necessary even if the safety belt
system was not being used at the
time of the crash.
Have the safety belt pretensioners
checked if the vehicle has been in a
crash, or if the airbag readiness light
stays on after you start the vehicle
or while you are driving. See
Airbag
Readiness Light 0103
ii.
Page 62 of 357
Chevrolet Cruze Limited Owner Manual (GMNA-Localizing-U.S./Canada-
9282844) - 2016 - crc - 9/3/15
Seats and Restraints 61
{Warning
Because airbags inflate with great
force and faster than the blink of
an eye, anyone who is up
against, or very close to any
airbag when it inflates can be
seriously injured or killed. Do not
sit unnecessarily close to any
airbag, as you would be if sitting
on the edge of the seat or leaning
forward. Safety belts help keep
you in position before and during
a crash. Always wear a safety
belt, even with airbags. The driver
should sit as far back as possible
while still maintaining control of
the vehicle. The safety belts and
the front outboard passenger
airbags are most effective when
you are sitting well back and
upright in the seat with both feet
on the floor.
Occupants should not lean on or
sleep against the door or side
windows in seating positions with
seat-mounted side impact airbags
and/or roof-rail airbags.
{Warning
Children who are up against,
or very close to, any airbag when
it inflates can be seriously injured
or killed. Always secure children
properly in the vehicle. To read
how, seeOlder Children 072
iior
Infants and Young Children 073
ii.
There is an airbag readiness light
on the instrument cluster, which
shows the airbag symbol. The
system checks the airbag electrical
system for malfunctions. The light
tells you if there is an electrical
problem. See Airbag Readiness
Light 0103
iifor more information.
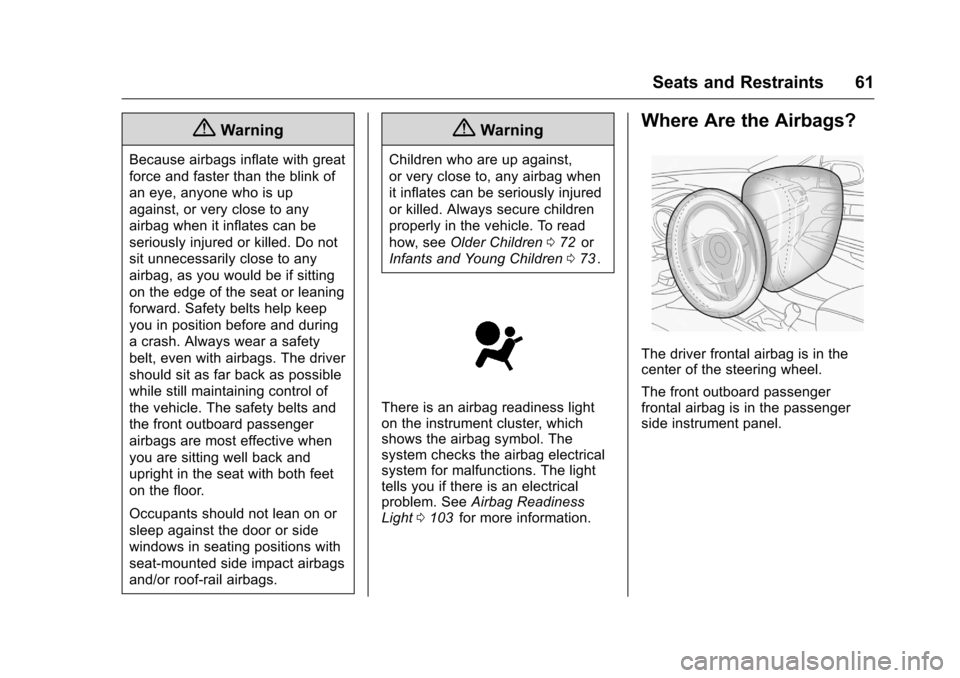
Where Are the Airbags?
The driver frontal airbag is in the
center of the steering wheel.
The front outboard passenger
frontal airbag is in the passenger
side instrument panel.