2016 CHEVROLET CRUZE LIMITED stop start
[x] Cancel search: stop startPage 23 of 357
Chevrolet Cruze Limited Owner Manual (GMNA-Localizing-U.S./Canada-
9282844) - 2016 - crc - 9/3/15
22 In Brief
.Press and release thegbutton
again to turn on both systems.
See Traction Control/Electronic
Stability Control 0199
ii.
Tire Pressure Monitor
This vehicle may have a Tire
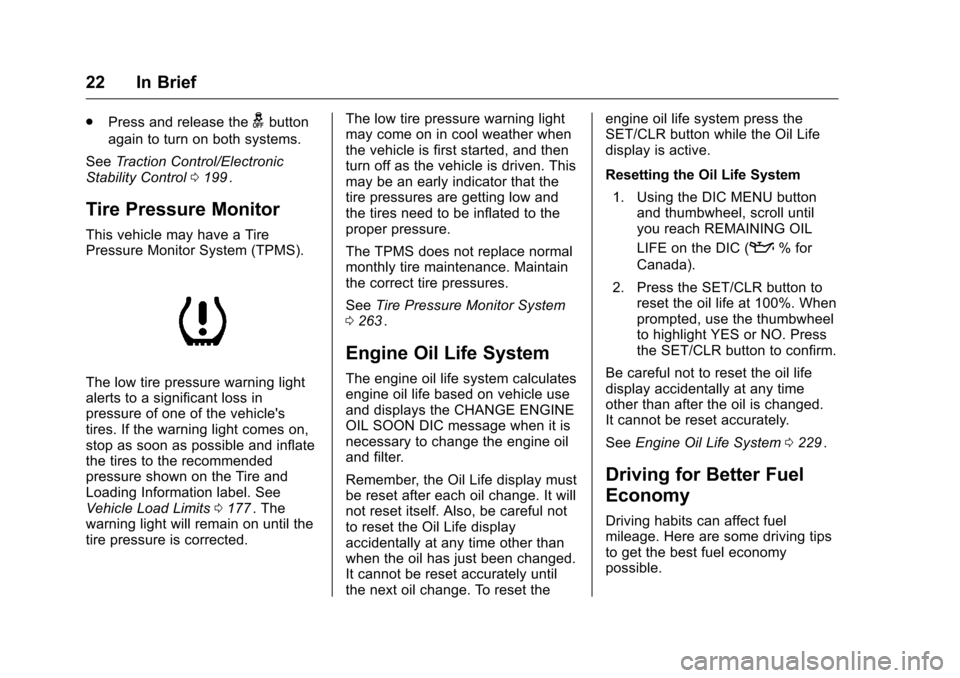
Pressure Monitor System (TPMS).
The low tire pressure warning light
alerts to a significant loss in
pressure of one of the vehicle's
tires. If the warning light comes on,
stop as soon as possible and inflate
the tires to the recommended
pressure shown on the Tire and
Loading Information label. See
Vehicle Load Limits 0177
ii. The
warning light will remain on until the
tire pressure is corrected. The low tire pressure warning light
may come on in cool weather when
the vehicle is first started, and then
turn off as the vehicle is driven. This
may be an early indicator that the
tire pressures are getting low and
the tires need to be inflated to the
proper pressure.
The TPMS does not replace normal
monthly tire maintenance. Maintain
the correct tire pressures.
See
Tire Pressure Monitor System
0 263
ii.
Engine Oil Life System
The engine oil life system calculates
engine oil life based on vehicle use
and displays the CHANGE ENGINE
OIL SOON DIC message when it is
necessary to change the engine oil
and filter.
Remember, the Oil Life display must
be reset after each oil change. It will
not reset itself. Also, be careful not
to reset the Oil Life display
accidentally at any time other than
when the oil has just been changed.
It cannot be reset accurately until
the next oil change. To reset the engine oil life system press the
SET/CLR button while the Oil Life
display is active.
Resetting the Oil Life System
1. Using the DIC MENU button and thumbwheel, scroll until
you reach REMAINING OIL
LIFE on the DIC (
:% for
Canada).
2. Press the SET/CLR button to reset the oil life at 100%. When
prompted, use the thumbwheel
to highlight YES or NO. Press
the SET/CLR button to confirm.
Be careful not to reset the oil life
display accidentally at any time
other than after the oil is changed.
It cannot be reset accurately.
See Engine Oil Life System 0229
ii.
Driving for Better Fuel
Economy
Driving habits can affect fuel
mileage. Here are some driving tips
to get the best fuel economy
possible.
Page 24 of 357
Chevrolet Cruze Limited Owner Manual (GMNA-Localizing-U.S./Canada-
9282844) - 2016 - crc - 9/3/15
In Brief 23
.Avoid fast starts and accelerate
smoothly.
. Brake gradually and avoid
abrupt stops.
. Avoid idling the engine for long
periods of time.
. When road and weather
conditions are appropriate, use
cruise control.
. Always follow posted speed
limits or drive more slowly when
conditions require.
. Keep vehicle tires properly
inflated.
. Combine several trips into a
single trip.
. Replace the vehicle's tires with
the same TPC Spec number
molded into the tire's sidewall
near the size.
. Follow recommended scheduled
maintenance.Roadside Assistance
Program
U.S.: 1-800-243-8872
TTY Users (U.S. Only):
1-888-889-2438
Canada: 1-800-268-6800
As the owner of a new Chevrolet,
you are automatically enrolled in the
Roadside Assistance program.
See Roadside Assistance Program
0 327
ii.
Page 31 of 357
Chevrolet Cruze Limited Owner Manual (GMNA-Localizing-U.S./Canada-
9282844) - 2016 - crc - 9/3/15
30 Keys, Doors, and Windows
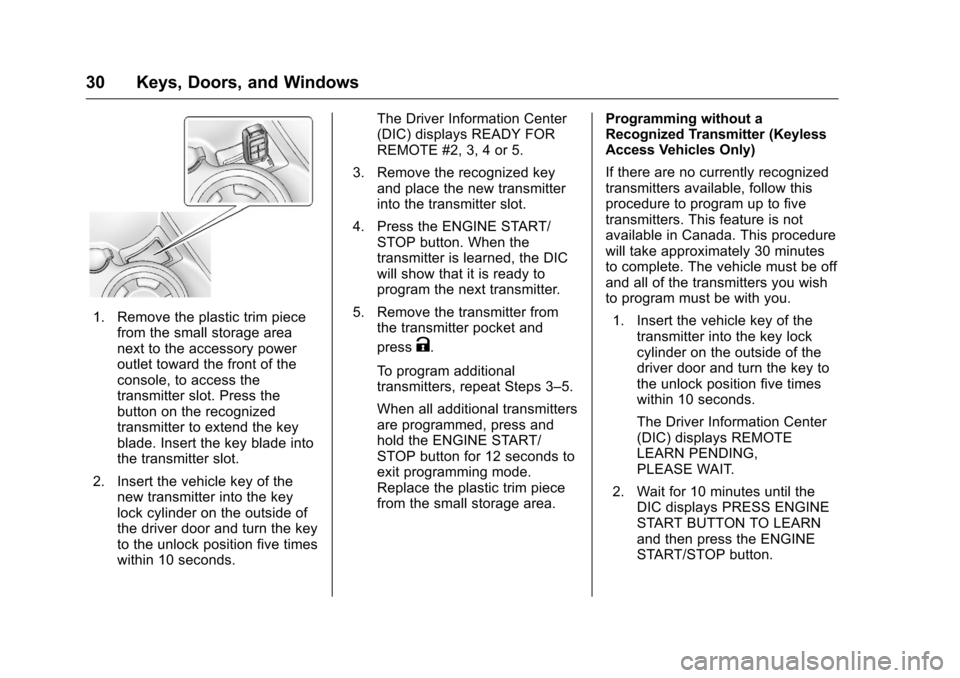
1. Remove the plastic trim piecefrom the small storage area
next to the accessory power
outlet toward the front of the
console, to access the
transmitter slot. Press the
button on the recognized
transmitter to extend the key
blade. Insert the key blade into
the transmitter slot.
2. Insert the vehicle key of the new transmitter into the key
lock cylinder on the outside of
the driver door and turn the key
to the unlock position five times
within 10 seconds. The Driver Information Center
(DIC) displays READY FOR
REMOTE #2, 3, 4 or 5.
3. Remove the recognized key and place the new transmitter
into the transmitter slot.
4. Press the ENGINE START/ STOP button. When the
transmitter is learned, the DIC
will show that it is ready to
program the next transmitter.
5. Remove the transmitter from the transmitter pocket and
press
K.
To program additional
transmitters, repeat Steps 3–5.
When all additional transmitters
are programmed, press and
hold the ENGINE START/
STOP button for 12 seconds to
exit programming mode.
Replace the plastic trim piece
from the small storage area. Programming without a
Recognized Transmitter (Keyless
Access Vehicles Only)
If there are no currently recognized
transmitters available, follow this
procedure to program up to five
transmitters. This feature is not
available in Canada. This procedure
will take approximately 30 minutes
to complete. The vehicle must be off
and all of the transmitters you wish
to program must be with you.
1. Insert the vehicle key of the transmitter into the key lock
cylinder on the outside of the
driver door and turn the key to
the unlock position five times
within 10 seconds.
The Driver Information Center
(DIC) displays REMOTE
LEARN PENDING,
PLEASE WAIT.
2. Wait for 10 minutes until the DIC displays PRESS ENGINE
START BUTTON TO LEARN
and then press the ENGINE
START/STOP button.
Page 32 of 357
Chevrolet Cruze Limited Owner Manual (GMNA-Localizing-U.S./Canada-
9282844) - 2016 - crc - 9/3/15
Keys, Doors, and Windows 31
The DIC displays will again
show REMOTE LEARN
PENDING, PLEASE WAIT.
3. Repeat Step 2 two additional times. After the third time all
previously known transmitters
will no longer work with the
vehicle. Remaining transmitters
can be relearned during the
next steps.
The DIC display should now
show READY FOR REMOTE
# 1.
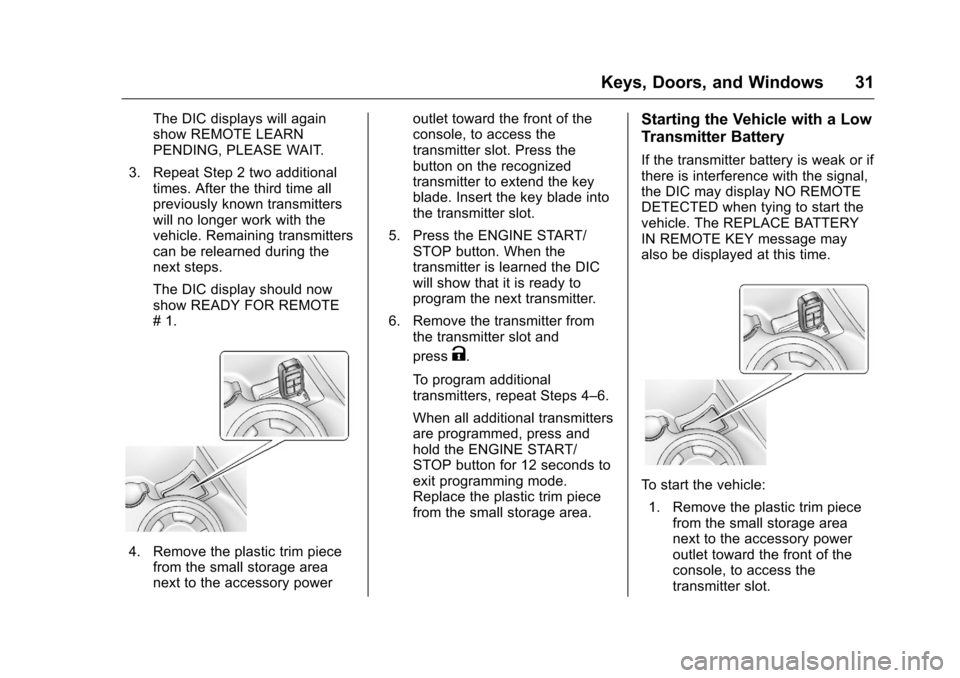
4. Remove the plastic trim piecefrom the small storage area
next to the accessory power outlet toward the front of the
console, to access the
transmitter slot. Press the
button on the recognized
transmitter to extend the key
blade. Insert the key blade into
the transmitter slot.
5. Press the ENGINE START/ STOP button. When the
transmitter is learned the DIC
will show that it is ready to
program the next transmitter.
6. Remove the transmitter from the transmitter slot and
press
K.
To program additional
transmitters, repeat Steps 4–6.
When all additional transmitters
are programmed, press and
hold the ENGINE START/
STOP button for 12 seconds to
exit programming mode.
Replace the plastic trim piece
from the small storage area.
Starting the Vehicle with a Low
Transmitter Battery
If the transmitter battery is weak or if
there is interference with the signal,
the DIC may display NO REMOTE
DETECTED when tying to start the
vehicle. The REPLACE BATTERY
IN REMOTE KEY message may
also be displayed at this time.
To start the vehicle: 1. Remove the plastic trim piece from the small storage area
next to the accessory power
outlet toward the front of the
console, to access the
transmitter slot.
Page 33 of 357
Chevrolet Cruze Limited Owner Manual (GMNA-Localizing-U.S./Canada-
9282844) - 2016 - crc - 9/3/15
32 Keys, Doors, and Windows
2. Press the button on therecognized transmitter to
extend the key blade. Insert the
key blade into the
transmitter slot.
3. With the vehicle in P (Park) or N (Neutral), press the brake
pedal and the ENGINE START/
STOP button. See Starting the
Engine 0185
iifor additional
information about the vehicle's
keyless ignition with
pushbutton start.
Replace the transmitter battery
as soon as possible.
Battery Replacement
Replace the battery if the REPLACE
BATTERY IN REMOTE KEY
message displays in the DIC. See
Key and Lock Messages 0118
ii.
Caution
When replacing the battery, do
not touch any of the circuitry on
the transmitter. Static from your
body could damage the
transmitter. The battery is not rechargeable. To
replace the battery:
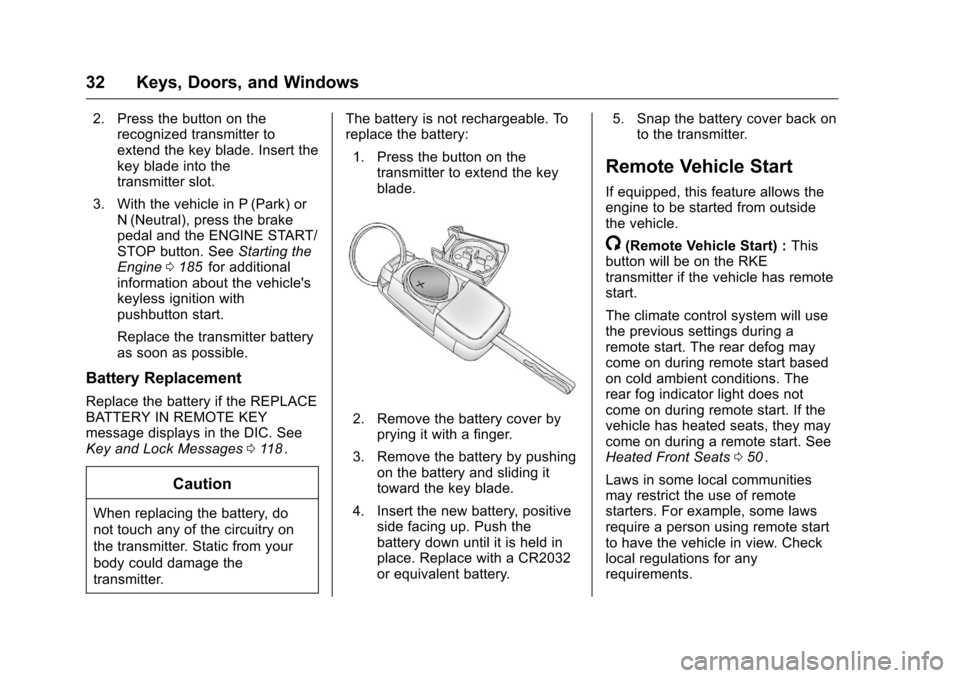
1. Press the button on the transmitter to extend the key
blade.
2. Remove the battery cover byprying it with a finger.
3. Remove the battery by pushing on the battery and sliding it
toward the key blade.
4. Insert the new battery, positive side facing up. Push the
battery down until it is held in
place. Replace with a CR2032
or equivalent battery. 5. Snap the battery cover back on
to the transmitter.
Remote Vehicle Start
If equipped, this feature allows the
engine to be started from outside
the vehicle.
/(Remote Vehicle Start) : This
button will be on the RKE
transmitter if the vehicle has remote
start.
The climate control system will use
the previous settings during a
remote start. The rear defog may
come on during remote start based
on cold ambient conditions. The
rear fog indicator light does not
come on during remote start. If the
vehicle has heated seats, they may
come on during a remote start. See
Heated Front Seats 050
ii.
Laws in some local communities
may restrict the use of remote
starters. For example, some laws
require a person using remote start
to have the vehicle in view. Check
local regulations for any
requirements.
Page 35 of 357
Chevrolet Cruze Limited Owner Manual (GMNA-Localizing-U.S./Canada-
9282844) - 2016 - crc - 9/3/15
34 Keys, Doors, and Windows
.Two remote vehicle starts, or a
single remote start with an
extension, have already
been used.
. The vehicle is not in P (Park).
Door Locks
{Warning
Unlocked doors can be
dangerous.
. Passengers, especially
children, can easily open
the doors and fall out of a
moving vehicle. The chance
of being thrown out of the
vehicle in a crash is
increased if the doors are
not locked. So, all
passengers should wear
safety belts properly and the
doors should be locked
whenever the vehicle is
driven.
(Continued)
Warning (Continued)
.Young children who get into
unlocked vehicles may be
unable to get out. A child
can be overcome by
extreme heat and can suffer
permanent injuries or even
death from heat stroke.
Always lock the vehicle
whenever leaving it.
. Outsiders can easily enter
through an unlocked door
when slowing or stopping
the vehicle. Lock the doors
to help prevent this from
happening.
To lock or unlock a door from
outside the vehicle, use the Remote
Keyless Entry (RKE) transmitter.
From inside the vehicle, use the
power door lock switch or the
manual lock knob.
If equipped with Keyless Access,
pushing down the manual lock knob
on the driver door will lock all doors. The doors can also be unlocked
from the inside by pulling the door
handle. Pulling the door handle
again unlatches the door.
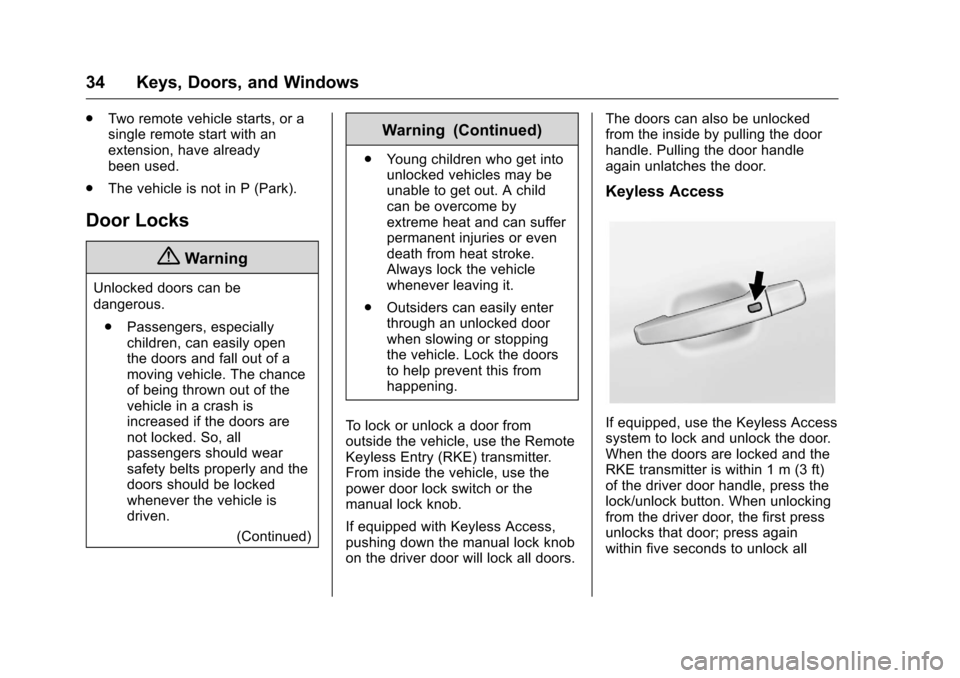
Keyless Access
If equipped, use the Keyless Access
system to lock and unlock the door.
When the doors are locked and the
RKE transmitter is within 1 m (3 ft)
of the driver door handle, press the
lock/unlock button. When unlocking
from the driver door, the first press
unlocks that door; press again
within five seconds to unlock all
Page 54 of 357
Chevrolet Cruze Limited Owner Manual (GMNA-Localizing-U.S./Canada-
9282844) - 2016 - crc - 9/3/15
Seats and Restraints 53
Warning (Continued)
seriously injured. After raising the
rear seatback, always check to be
sure that the safety belts are
properly routed and attached, and
are not twisted.
1. Make sure the safety belt is in the guide on the top of the
seatback.
2. Lift the seatback up and push it rearward until it clicks into
place. Keep the safety belts
clear of the seatback and
untwisted.
A tab near the seatback lever
retracts when the seatback is
locked in place.
The center rear safety belt may
lock when you raise the
seatback. If this happens, let
the belt go back all the way
and start again.
{Warning
If the seatback is not locked, it
could move forward in a sudden
stop or crash. That could cause
injury to the person sitting there.
Always pull forward on the top of
the seatback at the area of the
latch to be sure it is locked.
3. Push and pull on the seatback to make sure it is locked into
position.
4. Repeat Steps 1–3 for the other seatback, if necessary.
Keep the seat in the upright locked
position when not in use.
Safety Belts
This section of the manual
describes how to use safety belts
properly. It also describes some
things not to do with safety belts.
{Warning
Do not let anyone ride where a
safety belt cannot be worn
properly. In a crash, if you or your
passenger(s) are not wearing
safety belts, injuries can be much
worse than if you are wearing
safety belts. You can be seriously
injured or killed by hitting things
inside the vehicle harder or by
being ejected from the vehicle. In
addition, anyone who is not
buckled up can strike other
passengers in the vehicle.
It is extremely dangerous to ride
in a cargo area, inside or outside
of a vehicle. In a collision,
passengers riding in these areas
are more likely to be seriously
injured or killed. Do not allow (Continued)
Page 97 of 357
Chevrolet Cruze Limited Owner Manual (GMNA-Localizing-U.S./Canada-
9282844) - 2016 - crc - 9/3/15
96 Instruments and Controls
activated. SeeWasher Fluid0238iifor information on filling the
windshield washer fluid reservoir.
Clear snow and ice from the wiper
blades and windshield before using
them. If frozen to the windshield,
carefully loosen or thaw them.
Damaged blades should be
replaced. See Wiper Blade
Replacement 0243
ii.
Heavy snow or ice can overload the
wiper motor.
Wiper Parking
If the ignition is put in OFF while the
wipers are on LO, HI, or INT, they
will immediately stop.
If the windshield wiper lever is then
moved to OFF before the driver
door is opened or within 10 minutes,
the wipers will restart and move to
the base of the windshield.
If the ignition is put in OFF while the
wipers are performing wipes due to
windshield washing, the wipers
continue to run until they reach the
base of the windshield.
Compass
The vehicle may have a compass
display in the Driver Information
Center (DIC). The compass receives
its heading and other information
from the Global Positioning
System (GPS) antenna, StabiliTrak,
and vehicle speed information.
Avoid covering the GPS antenna,
located on the roof, for long periods
of time with objects that may
interfere with the antenna's ability to
receive a satellite signal. The
compass system is designed to
operate for a certain number of
miles or degrees of turn before
needing a signal from the GPS
satellites. When the compass
display shows CAL, drive the
vehicle for a short distance in an
open area where it can receive a
GPS signal. The compass system
will automatically determine when
the GPS signal is restored and
provide a heading again. See
Compass Messages 0116
iifor more
information on the messages that
may be displayed for the compass.
Clock
The infotainment system controls
are used to access the time and
date settings through the menu
system. See Operation0137
iifor
information about how to use the
menu system. For vehicles with a
connective radio or navigation
system, see the infotainment
manual.
Setting the Time and Date
To set the time and date for the
radio with CD:
1. Press CLOCK.
2. Select Set Time or Set Date.
3. Turn the MENU/SEL knob to adjust the highlighted number.
4. Press the MENU/SEL knob to select the next number.
5. To save the settings, press the MENU/SEL knob.
To set the time and date for the
radio without navigation: 1. Press CLOCK.
2. Select Set Time or Set Date.