2016 BMW M4 weight
[x] Cancel search: weightPage 58 of 228

Carrying children in safetyVehicle equipmentThis chapter describes all standard, national
and special equipment provided in the model
series. Equipment not available in the vehicle is
therefore also described, for example the se‐lected special equipment or national version.
This also applies to safety-relevant functions
and systems. Comply with the relevant na‐
tional regulations when using the correspond‐
ing functions and systems.
Important considerations
Note
WARNING
Unsupervised children or animals in the
vehicle can set the vehicle in motion and en‐
danger themselves or other road users, for ex‐
ample by the following actions:▷Pressing the start/stop button.▷Releasing the parking brake.▷Opening and closing doors or windows.▷Setting the selector lever to neutral.▷Operating vehicle equipment.
Risk of accident or injury. Do not leave children
or animals unsupervised in the vehicle. When
leaving the vehicle, take the remote control
with you and lock it.◀
Not for Australia/New Zealand: Suitable seats
Information about which child seats can be
used on the seats in question, if the child seatsare attached with a seat belt — according to
ECE-R 16 standard: GroupWeight of childApproximate
ageFront pas‐
senger's seatRear seats,
outer – b)Rear seat,
middle0Up to 10 kgUp
to 9 monthsUUX0+Up to 13 kgUp
to 18 monthsUUXI9 – 18 kgUp to 4 yearsUUXII15 – 25 kgUp to 7 yearsUUXSeite 58ControlsCarrying children in safety58
Online Edition for Part no. 01 40 2 964 013 - VI/15
Page 59 of 228

GroupWeight of childApproximate
ageFront pas‐
senger's seatRear seats,
outer – b)Rear seat,
middleIII22 – 36 kg7 years or
moreUUXU: suitable for child restraint systems in Universal category that have been approved for use in
this weight group.
X: not suitable for child restraint systems in Universal category that have been approved for use
in this weight group.
b) When using child seats on the rear seats, adapt the front/back position of the front seat if nec‐
essary, and also adjust the head restraint of the rear seat, or remove it.Always carry children at the rear
WARNING
Persons less than 150 cm, 5 ft in height
cannot put on the seat belt correctly without
using additional restraint systems. The protec‐
tive effect of the seat belts can be restricted or
they can be rendered ineffective if put on in‐
correctly. If a seat belt is not worn correctly,
additional injuries can be caused, for example
in the event of an accident or braking and eva‐
sive manoeuvres. Danger of injury or life. Per‐
sons less then 150 cm, 5 ft must be secured in
suitable restraint systems.◀
Accident research has shown that the safest
place for children is on the rear seat.
Children younger than 12 years old or less
than 150 cm, 5 ft in height are only allowed to
be transported in the rear using child restraint
systems appropriate for their age, weight and
stature.
Not for Australia/New Zealand:
Children on the front passenger's seat
When using a child restraint system on the
front passenger seat, make sure that the front
and side airbags on the passenger's side are
deactivated. Front passenger airbags can only
be deactivated with the key switch for front
passenger airbags, see page 106.Note
WARNING
Active front passenger airbags can injure
a child in a child restraint system if they are
triggered. Danger of injury. Make sure that the
front passenger airbags are deactivated and
the PASSENGER AIRBAG OFF indicator light
is illuminated.◀
WARNING
If the seat adjustment or child seat instal‐
lation is incorrect, the stability of the child re‐
straint system will be restricted or rendered in‐
effective. Danger of injury or life. Make sure the
child restraint system is firmly positioned
against the backrest. In all relevant backrests,
adapt the backrest angle if possible and set the
seats correctly. Make sure that the seats and
their backrests are correctly engaged. If possi‐
ble, adjust the height of the head restraints, or
remove them.◀
Fitting child restraints Child restraintsChild restraints for every age and weight class
are available from a Service Partner or a quali‐
fied specialist workshop.Seite 59Carrying children in safetyControls59
Online Edition for Part no. 01 40 2 964 013 - VI/15
Page 61 of 228
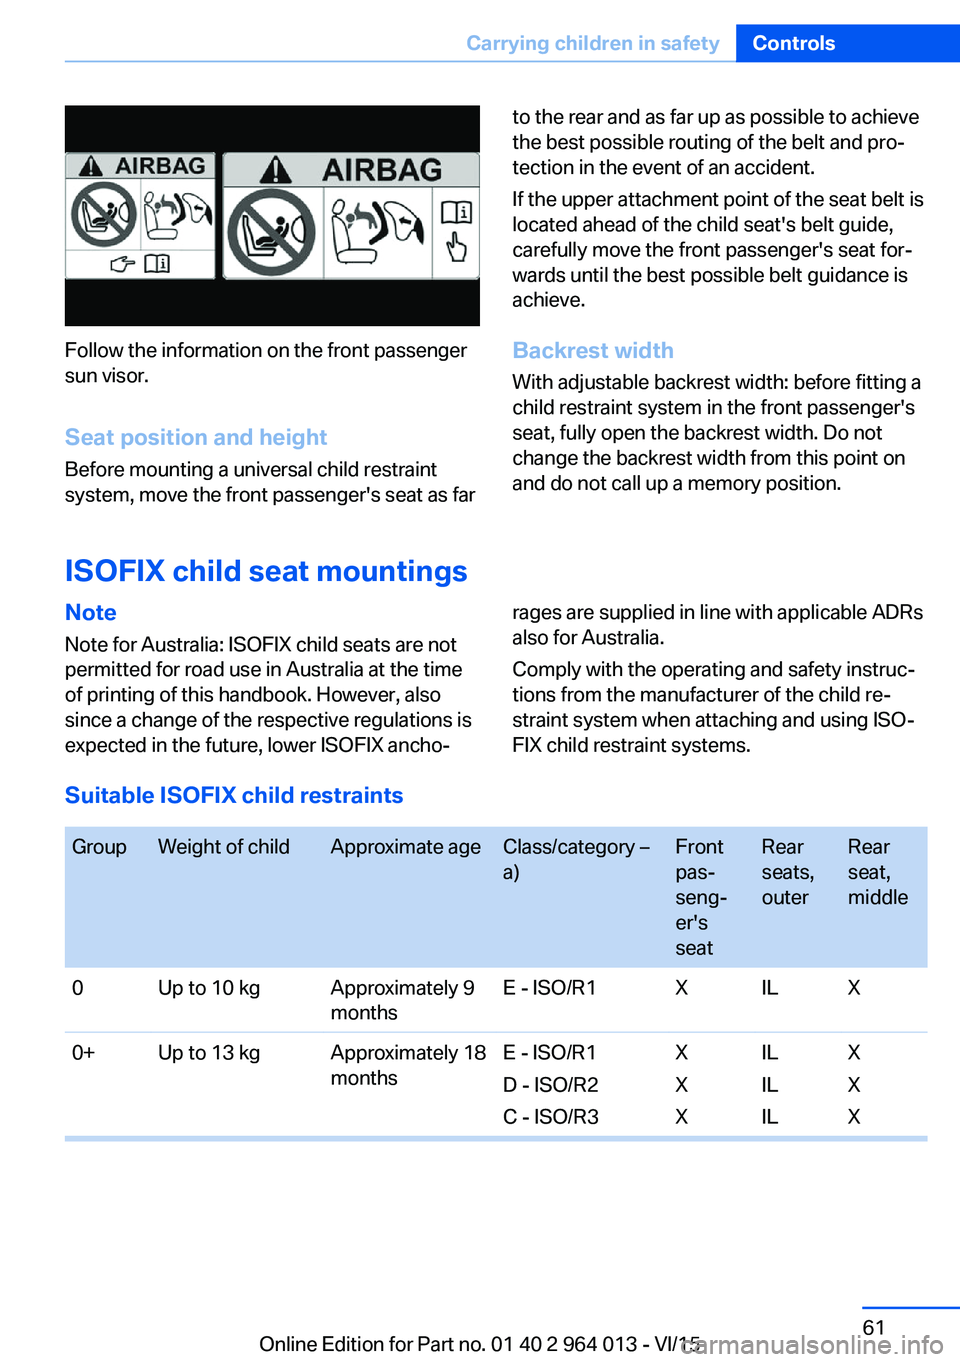
Follow the information on the front passenger
sun visor.
Seat position and height
Before mounting a universal child restraint
system, move the front passenger's seat as far
to the rear and as far up as possible to achieve
the best possible routing of the belt and pro‐
tection in the event of an accident.
If the upper attachment point of the seat belt is
located ahead of the child seat's belt guide,
carefully move the front passenger's seat for‐
wards until the best possible belt guidance is
achieve.
Backrest width With adjustable backrest width: before fitting a
child restraint system in the front passenger's
seat, fully open the backrest width. Do not
change the backrest width from this point on
and do not call up a memory position.
ISOFIX child seat mountings
Note
Note for Australia: ISOFIX child seats are not
permitted for road use in Australia at the time
of printing of this handbook. However, also
since a change of the respective regulations is
expected in the future, lower ISOFIX ancho‐rages are supplied in line with applicable ADRs
also for Australia.
Comply with the operating and safety instruc‐
tions from the manufacturer of the child re‐
straint system when attaching and using ISO‐
FIX child restraint systems.
Suitable ISOFIX child restraints
GroupWeight of childApproximate ageClass/category –
a)Front
pas‐
seng‐
er's
seatRear
seats,
outerRear
seat,
middle0Up to 10 kgApproximately 9
monthsE - ISO/R1XILX0+Up to 13 kgApproximately 18
monthsE - ISO/R1
D - ISO/R2
C - ISO/R3X
X
XIL
IL
ILX
X
XSeite 61Carrying children in safetyControls61
Online Edition for Part no. 01 40 2 964 013 - VI/15
Page 62 of 228
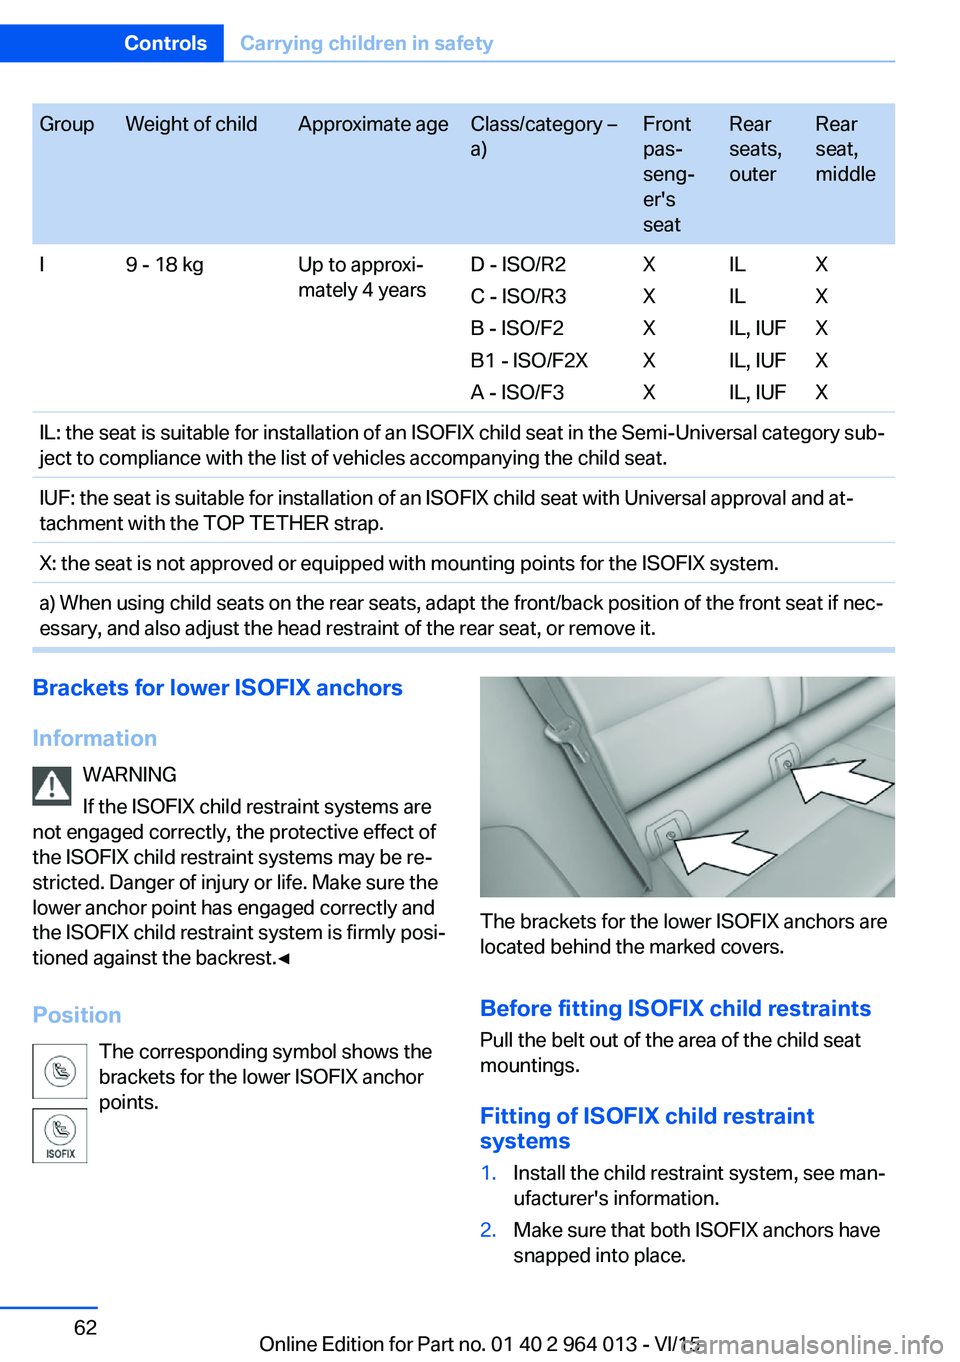
GroupWeight of childApproximate ageClass/category –
a)Front
pas‐
seng‐
er's
seatRear
seats,
outerRear
seat,
middleI9 - 18 kgUp to approxi‐
mately 4 yearsD - ISO/R2
C - ISO/R3
B - ISO/F2
B1 - ISO/F2X
A - ISO/F3X
X
X
X
XIL
IL
IL, IUF
IL, IUF
IL, IUFX
X
X
X
XIL: the seat is suitable for installation of an ISOFIX child seat in the Semi-Universal category sub‐
ject to compliance with the list of vehicles accompanying the child seat.IUF: the seat is suitable for installation of an ISOFIX child seat with Universal approval and at‐
tachment with the TOP TETHER strap.X: the seat is not approved or equipped with mounting points for the ISOFIX system.a) When using child seats on the rear seats, adapt the front/back position of the front seat if nec‐
essary, and also adjust the head restraint of the rear seat, or remove it.Brackets for lower ISOFIX anchors
Information WARNING
If the ISOFIX child restraint systems are
not engaged correctly, the protective effect of
the ISOFIX child restraint systems may be re‐
stricted. Danger of injury or life. Make sure the
lower anchor point has engaged correctly and
the ISOFIX child restraint system is firmly posi‐
tioned against the backrest.◀
Position The corresponding symbol shows the
brackets for the lower ISOFIX anchor
points.
The brackets for the lower ISOFIX anchors are
located behind the marked covers.
Before fitting ISOFIX child restraints
Pull the belt out of the area of the child seat
mountings.
Fitting of ISOFIX child restraint
systems
1.Install the child restraint system, see man‐
ufacturer's information.2.Make sure that both ISOFIX anchors have
snapped into place.Seite 62ControlsCarrying children in safety62
Online Edition for Part no. 01 40 2 964 013 - VI/15
Page 166 of 228
LoadsVehicle equipment
This chapter describes all standard, national
and special equipment provided in the model
series. Equipment not available in the vehicle is
therefore also described, for example the se‐
lected special equipment or national version.
This also applies to safety-relevant functions
and systems. Comply with the relevant na‐
tional regulations when using the correspond‐
ing functions and systems.
Notes WARNING
A high gross vehicle weight can cause
the tyres to overheat, causing internal damage
and a sudden loss of tyre pressure. Danger of
accidents. Comply with the permitted load in‐
dex of the tyre, and do not exceed the permit‐
ted gross vehicle weight.◀
WARNING
If the permitted total weight and the per‐
mitted axle loads are exceeded, operational
safety of the vehicle is not ensured anymore.
Danger of accidents. Do not exceed the per‐
mitted total weight and permitted axle loads.◀
ATTENTION
Liquids in the boot can cause damage.
Danger of damage to property. Make sure that
no liquids leak out in the boot.◀
WARNING
Loose objects in the interior can be
thrown into the interior during the journey, for
example in an accident or during braking and
evasive manoeuvres. Danger of injury. Secure
loose objects in the interior.◀Stowing transported loads▷Wrap protective material around sharp cor‐
ners and edges of the load.▷Heavy transported load: stow as far for‐
ward and as low down as possible, ideally
directly behind the rear backrests.▷Very heavy transported load: with no pas‐
sengers on the back seat, insert both outer
seat belts into the respective opposite
buckles.▷Fully fold down the rear-seat backrest if
the load is to be stowed accordingly.▷Do not stack storage goods above the up‐
per edge of the backrests.
Securing transported loads
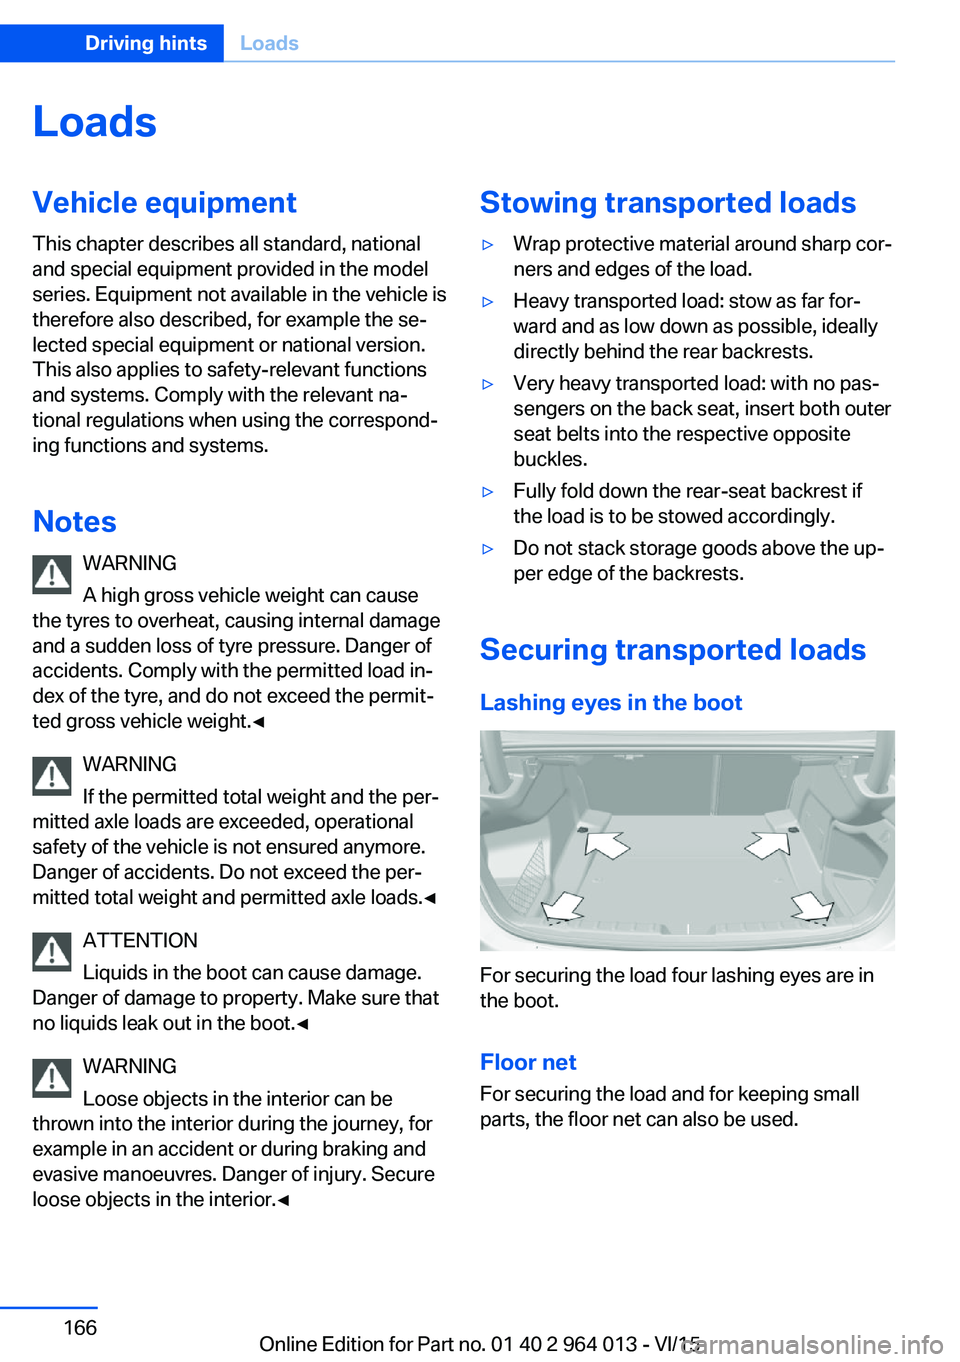
Lashing eyes in the boot
For securing the load four lashing eyes are in
the boot.
Floor net
For securing the load and for keeping small
parts, the floor net can also be used.
Seite 166Driving hintsLoads166
Online Edition for Part no. 01 40 2 964 013 - VI/15
Page 167 of 228
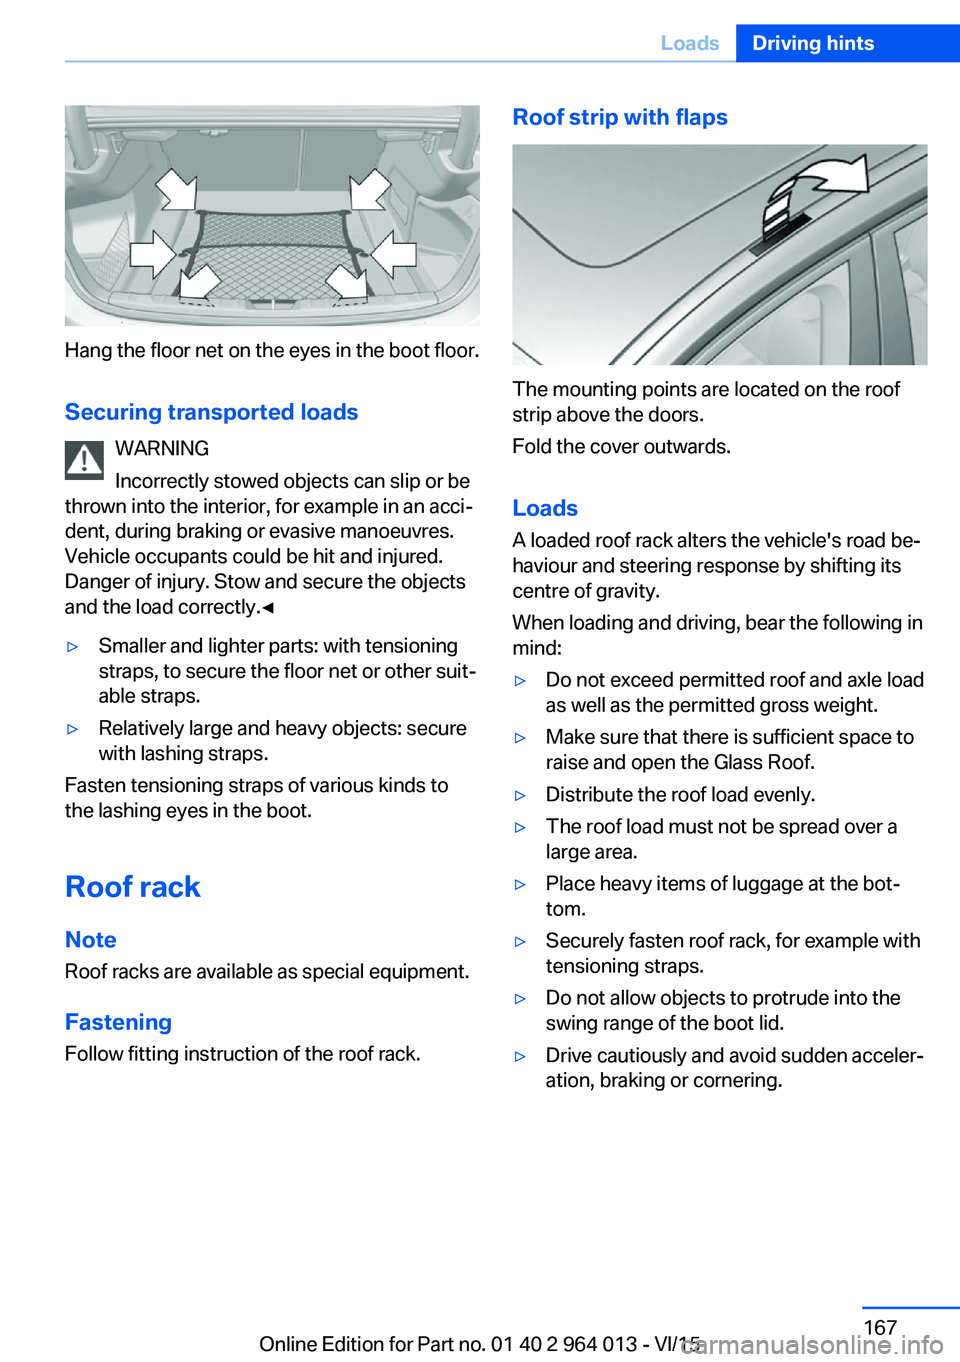
Hang the floor net on the eyes in the boot floor.Securing transported loads WARNING
Incorrectly stowed objects can slip or be
thrown into the interior, for example in an acci‐
dent, during braking or evasive manoeuvres.
Vehicle occupants could be hit and injured.
Danger of injury. Stow and secure the objects
and the load correctly.◀
▷Smaller and lighter parts: with tensioning
straps, to secure the floor net or other suit‐
able straps.▷Relatively large and heavy objects: secure
with lashing straps.
Fasten tensioning straps of various kinds to
the lashing eyes in the boot.
Roof rack Note
Roof racks are available as special equipment.
Fastening Follow fitting instruction of the roof rack.
Roof strip with flaps
The mounting points are located on the roof
strip above the doors.
Fold the cover outwards.
Loads
A loaded roof rack alters the vehicle's road be‐
haviour and steering response by shifting its
centre of gravity.
When loading and driving, bear the following in
mind:
▷Do not exceed permitted roof and axle load
as well as the permitted gross weight.▷Make sure that there is sufficient space to
raise and open the Glass Roof.▷Distribute the roof load evenly.▷The roof load must not be spread over a
large area.▷Place heavy items of luggage at the bot‐
tom.▷Securely fasten roof rack, for example with
tensioning straps.▷Do not allow objects to protrude into the
swing range of the boot lid.▷Drive cautiously and avoid sudden acceler‐
ation, braking or cornering.Seite 167LoadsDriving hints167
Online Edition for Part no. 01 40 2 964 013 - VI/15
Page 168 of 228

Saving fuelVehicle equipmentThis chapter describes all standard, national
and special equipment provided in the model
series. Equipment not available in the vehicle is
therefore also described, for example the se‐
lected special equipment or national version.
This also applies to safety-relevant functions
and systems. Comply with the relevant na‐
tional regulations when using the correspond‐
ing functions and systems.
General
Your vehicle contains wide-ranging technolo‐
gies for reducing consumption and emission
levels.
Fuel consumption depends on various factors.
A number of measures, such as a moderate
driving style and regular maintenance, can in‐
fluence fuel consumption and reduce burden
on environment.
Removing transported load that is not required
Extra weight increases fuel consumption.
Removing add-on parts after use
Remove auxiliary mirrors, roof racks and rear-
mounted racks after use.
Add-on parts on the vehicle interfere with its
aerodynamic performance and inflate fuel con‐
sumption.Closing windows and the
glass roof
An opened glass roof or opened window in‐
creases the drag coefficient and thus reduces
the range.
Tyres General Tyres can have differing effects on fuel con‐
sumption. For example, fuel consumption can
be affected by tyre size.
Checking tyre pressures regularly Check and, if necessary, correct tyre inflation
pressures at least twice a month and before
setting off on a longer journey.
Insufficient tyre inflation pressure enlarges the
rolling resistance and thus increases fuel con‐
sumption and tyre wear.
Setting off immediately Do not warm up the engine with the vehicle at
a standstill; it is preferable to set off straight
away, driving at moderate engine speeds.
This brings the cold engine to operating tem‐
perature as quickly as possible.
Driving with foresight
Avoid accelerating and braking unnecessarily.
Keep an appropriate distance from the preced‐
ing vehicle.
Anticipating the road situation and adopting a
smooth driving style will reduce fuel consump‐
tion.Seite 168Driving hintsSaving fuel168
Online Edition for Part no. 01 40 2 964 013 - VI/15
Page 206 of 228
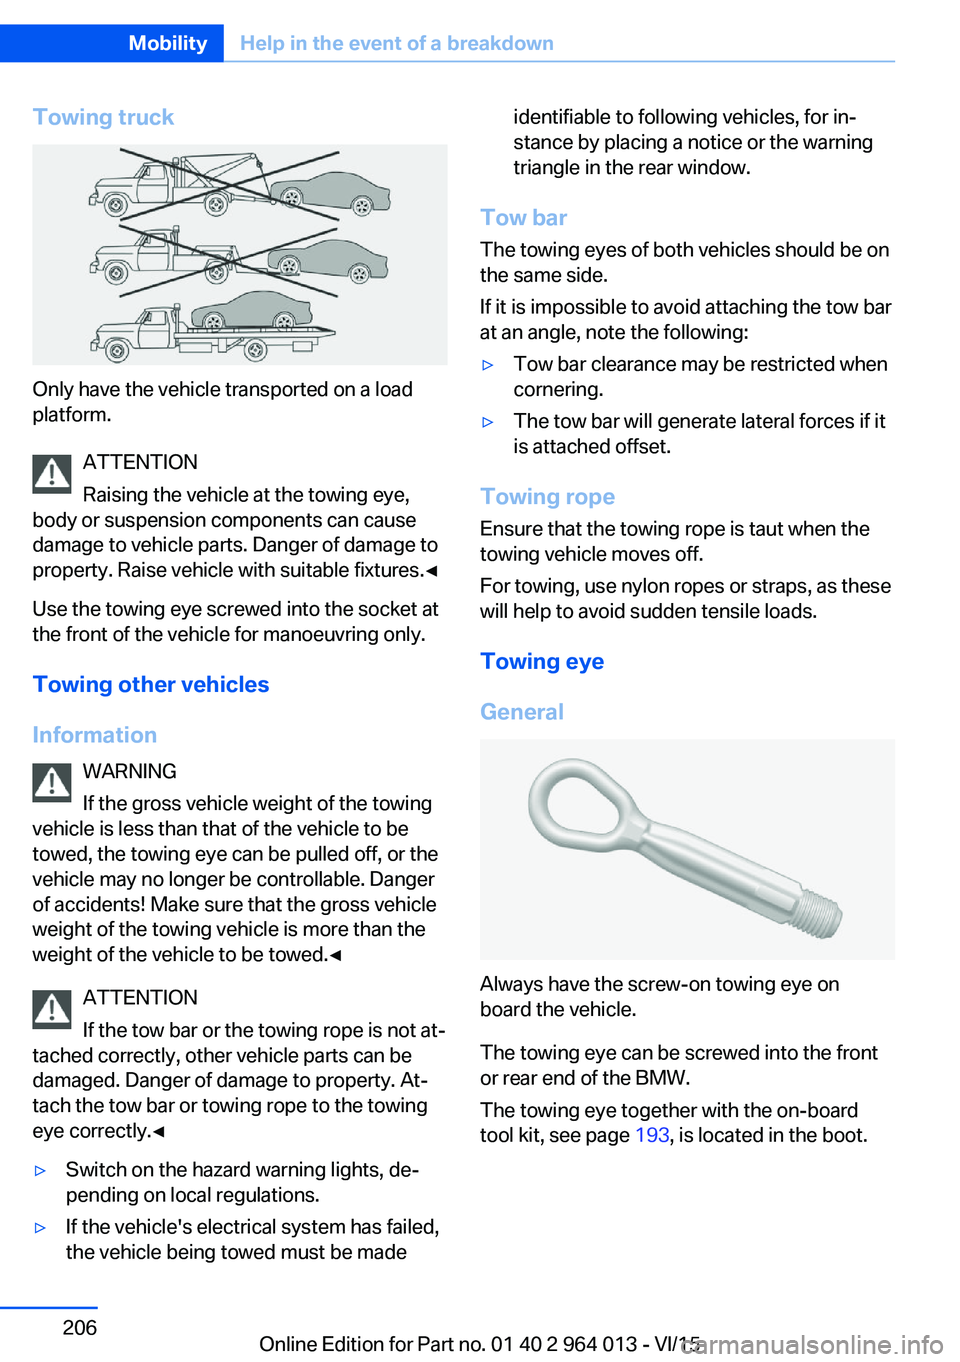
Towing truck
Only have the vehicle transported on a load
platform.
ATTENTION
Raising the vehicle at the towing eye,
body or suspension components can cause
damage to vehicle parts. Danger of damage to
property. Raise vehicle with suitable fixtures.◀
Use the towing eye screwed into the socket at
the front of the vehicle for manoeuvring only.
Towing other vehicles
Information WARNING
If the gross vehicle weight of the towing
vehicle is less than that of the vehicle to be
towed, the towing eye can be pulled off, or the
vehicle may no longer be controllable. Danger
of accidents! Make sure that the gross vehicle
weight of the towing vehicle is more than the
weight of the vehicle to be towed.◀
ATTENTION
If the tow bar or the towing rope is not at‐
tached correctly, other vehicle parts can be
damaged. Danger of damage to property. At‐
tach the tow bar or towing rope to the towing
eye correctly.◀
▷Switch on the hazard warning lights, de‐
pending on local regulations.▷If the vehicle's electrical system has failed,
the vehicle being towed must be madeidentifiable to following vehicles, for in‐
stance by placing a notice or the warning
triangle in the rear window.
Tow bar
The towing eyes of both vehicles should be on
the same side.
If it is impossible to avoid attaching the tow bar
at an angle, note the following:
▷Tow bar clearance may be restricted when
cornering.▷The tow bar will generate lateral forces if it
is attached offset.
Towing rope
Ensure that the towing rope is taut when the
towing vehicle moves off.
For towing, use nylon ropes or straps, as these
will help to avoid sudden tensile loads.
Towing eye
General
Always have the screw-on towing eye on
board the vehicle.
The towing eye can be screwed into the front
or rear end of the BMW.
The towing eye together with the on-board
tool kit, see page 193, is located in the boot.
Seite 206MobilityHelp in the event of a breakdown206
Online Edition for Part no. 01 40 2 964 013 - VI/15