Page 196 of 228

In the event of a defect, contact the Service
Centre.
Turn indicator in exterior mirror Turn indicators in the exterior mirrors are de‐
signed in the LED technology. Contact a Serv‐
ice Partner or a qualified specialist workshop in
the case of a defect.
Rear lights, replacing the bulbs
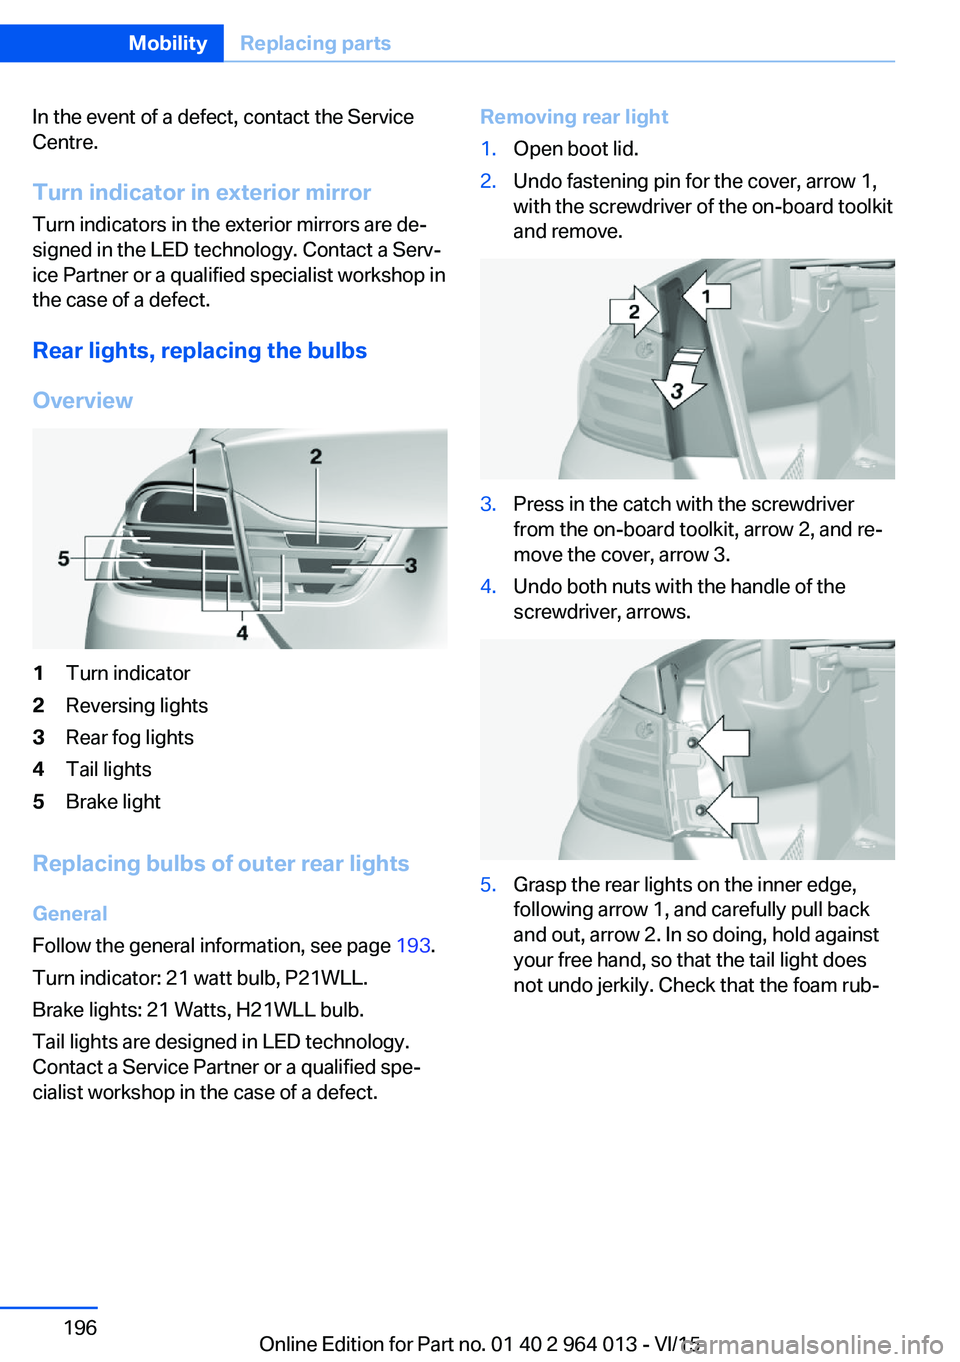
Overview1Turn indicator2Reversing lights3Rear fog lights4Tail lights5Brake light
Replacing bulbs of outer rear lights
General
Follow the general information, see page 193.
Turn indicator: 21 watt bulb, P21WLL.
Brake lights: 21 Watts, H21WLL bulb.
Tail lights are designed in LED technology.
Contact a Service Partner or a qualified spe‐
cialist workshop in the case of a defect.
Removing rear light1.Open boot lid.2.Undo fastening pin for the cover, arrow 1,
with the screwdriver of the on-board toolkit
and remove.3.Press in the catch with the screwdriver
from the on-board toolkit, arrow 2, and re‐
move the cover, arrow 3.4.Undo both nuts with the handle of the
screwdriver, arrows.5.Grasp the rear lights on the inner edge,
following arrow 1, and carefully pull back
and out, arrow 2. In so doing, hold against
your free hand, so that the tail light does
not undo jerkily. Check that the foam rub‐Seite 196MobilityReplacing parts196
Online Edition for Part no. 01 40 2 964 013 - VI/15
Page 197 of 228

ber sealing ring on the linkage of the cen‐
tring is plugged in.6.Undo upper rest on the plug of the con‐
necting cable and remove plug from the
bulb holder.
Replacing bulbs
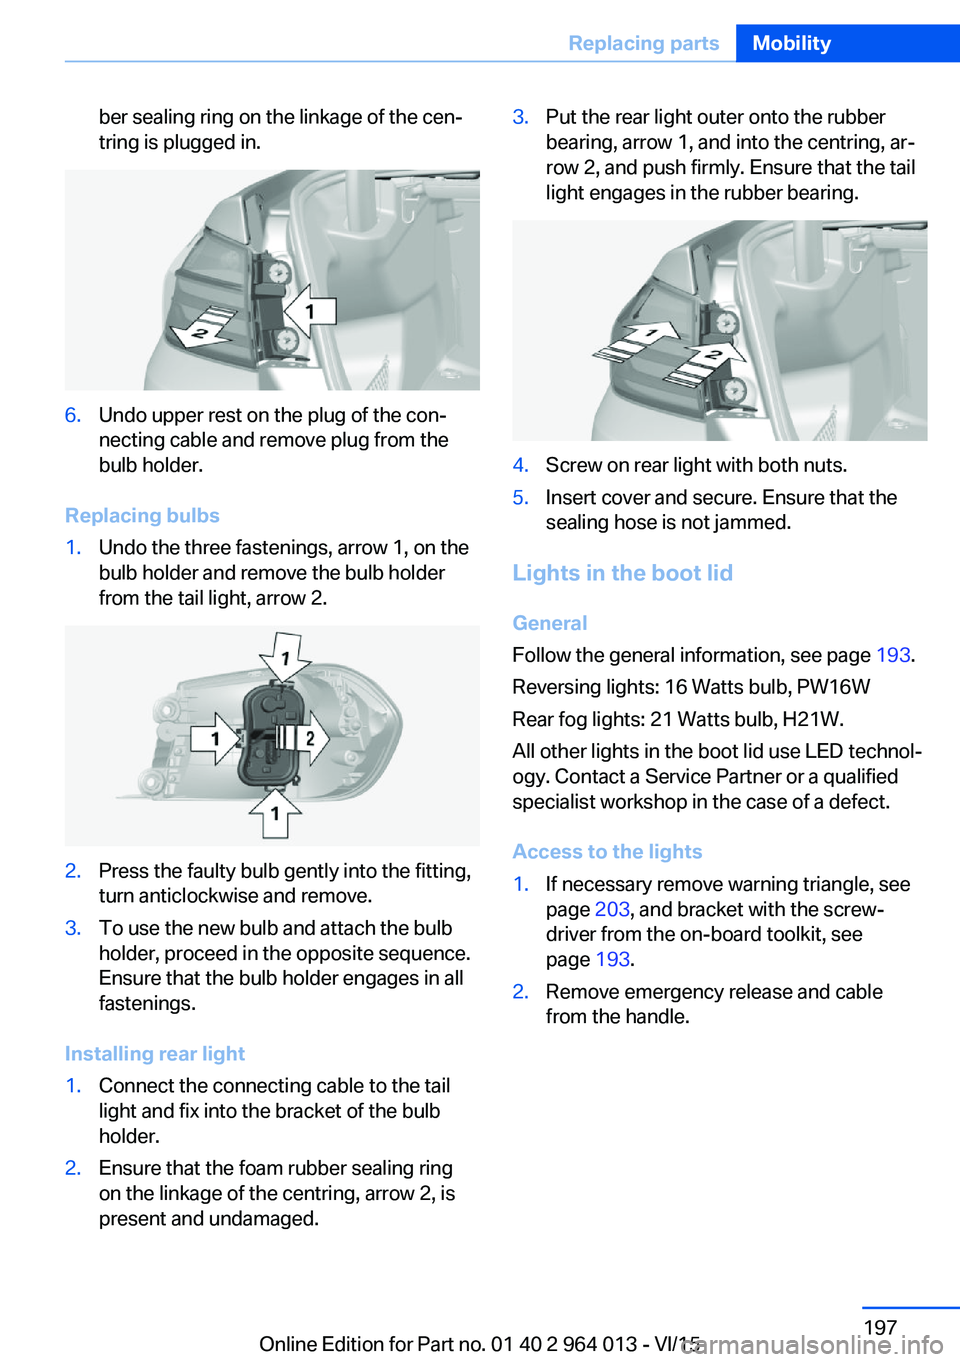
1.Undo the three fastenings, arrow 1, on the
bulb holder and remove the bulb holder
from the tail light, arrow 2.2.Press the faulty bulb gently into the fitting,
turn anticlockwise and remove.3.To use the new bulb and attach the bulb
holder, proceed in the opposite sequence.
Ensure that the bulb holder engages in all
fastenings.
Installing rear light
1.Connect the connecting cable to the tail
light and fix into the bracket of the bulb
holder.2.Ensure that the foam rubber sealing ring
on the linkage of the centring, arrow 2, is
present and undamaged.3.Put the rear light outer onto the rubber
bearing, arrow 1, and into the centring, ar‐
row 2, and push firmly. Ensure that the tail
light engages in the rubber bearing.4.Screw on rear light with both nuts.5.Insert cover and secure. Ensure that the
sealing hose is not jammed.
Lights in the boot lid
General
Follow the general information, see page 193.
Reversing lights: 16 Watts bulb, PW16W
Rear fog lights: 21 Watts bulb, H21W.
All other lights in the boot lid use LED technol‐
ogy. Contact a Service Partner or a qualified
specialist workshop in the case of a defect.
Access to the lights
1.If necessary remove warning triangle, see
page 203, and bracket with the screw‐
driver from the on-board toolkit, see
page 193.2.Remove emergency release and cable
from the handle.Seite 197Replacing partsMobility197
Online Edition for Part no. 01 40 2 964 013 - VI/15
Page 198 of 228

3.Undo the fastenings of the trim with the
screwdriver from the on-board toolkit and
pull out completely.4.Push together hinged cover, see arrows, to
undo the clips.
Firmly hold cover and pull hinged cover
down and remove.5.Carefully remove the trim from the boot lid,
first on the edge and then in the area of the
recessed handles. Ensure that the trim
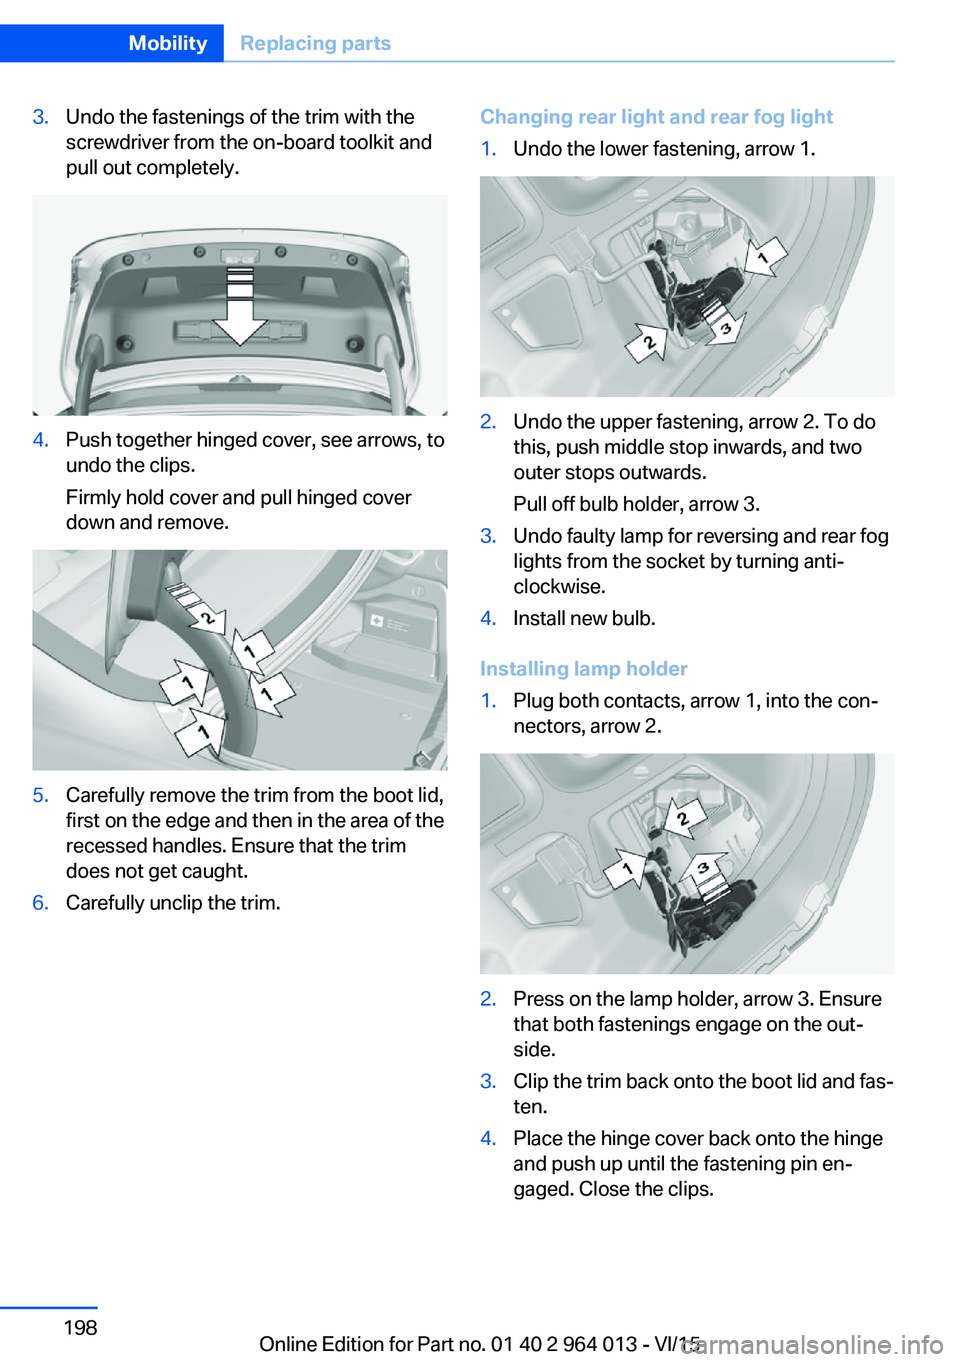
does not get caught.6.Carefully unclip the trim.Changing rear light and rear fog light1.Undo the lower fastening, arrow 1.2.Undo the upper fastening, arrow 2. To do
this, push middle stop inwards, and two
outer stops outwards.
Pull off bulb holder, arrow 3.3.Undo faulty lamp for reversing and rear fog
lights from the socket by turning anti-
clockwise.4.Install new bulb.
Installing lamp holder
1.Plug both contacts, arrow 1, into the con‐
nectors, arrow 2.2.Press on the lamp holder, arrow 3. Ensure
that both fastenings engage on the out‐
side.3.Clip the trim back onto the boot lid and fas‐
ten.4.Place the hinge cover back onto the hinge
and push up until the fastening pin en‐
gaged. Close the clips.Seite 198MobilityReplacing parts198
Online Edition for Part no. 01 40 2 964 013 - VI/15