2016 BMW M4 buttons
[x] Cancel search: buttonsPage 29 of 228

Browse back.
Browse forward.
Context-sensitive help - Owner's
Handbook for the currently selected
function
Suitable information can be displayed directly.
Calling up with iDrive operation
Switch to the Options menu directly from the
application on the Control Display:1. Press the button or tilt the Controller
repeatedly to the right until the "Options"
menu appears.2."Show Owner's Handbook"
Calling up with display of a check
control message
Directly from the check control message on
the Control Display:
"Show Owner's Handbook"
Switching between function and
Owner's Handbook
You can use the Control Display to switch from
a function, for example radio, to the Owner's
Handbook, and then back and forth between
the two displays:
1. Press the button or tilt the Controller
repeatedly to the right until the "Options"
menu appears.2."Show Owner's Handbook"3.Select the desired page in the Owner's
Handbook.4. Press the button again to switch back
to the last displayed function.5. Press the button again to switch back
to the last displayed page of the Owner's
Handbook.
To switch continuously between the last dis‐
played function and the last displayed page of
the Owner's Handbook, repeat steps 4 and 5.
As you do so, new screens are opened.
Favourites buttons
General
The Owner's Handbook can be stored in the
favourite buttons and called up directly.
Saving
1.Select "Owner's Handbook" using the
iDrive.2. Press the desired button for longer
than two seconds.
Use
Press the button.
The Owner's Handbook is displayed
immediately.
Seite 29Integrated Owner’s Handbook in the vehicleOverview29
Online Edition for Part no. 01 40 2 964 013 - VI/15
Page 32 of 228

Opening and closingVehicle equipment
This chapter describes all standard, national
and special equipment provided in the model
series. Equipment not available in the vehicle is
therefore also described, for example the se‐
lected special equipment or national version.
This also applies to safety-relevant functions
and systems. Comply with the relevant na‐
tional regulations when using the correspond‐
ing functions and systems.
Remote control/keys General The delivery specification includes two remote
controls with integrated keys.
Every remote control contains a replaceable
battery.
The functions of buttons may be set depend‐
ing on equipment and national version. Set‐
tings, see page 41.
For each remote control, personal settings are
stored in the vehicle. Personal profile, see
page 33.
Further information on servicing is also stored
in the remote controls Service data in the re‐
mote control, see page 191Overview1Unlocking2Locking3Opening the tailgate
Integrated key
Press button, arrow 1, and pull out key, ar‐
row 2.
The integrated key fits the following locks:
▷Driver's door.▷Glove box on the passenger side.Seite 32ControlsOpening and closing32
Online Edition for Part no. 01 40 2 964 013 - VI/15
Page 34 of 228

If several drivers each use their own remote
control, the vehicle will adapt to their personal
settings when it is unlocked. These settings
are also resaved if the vehicle is used in the in‐
tervening period by someone with a different
remote control.
Changes to settings are saved automatically in
the personal profile.
Three personal profiles and a guest profile can
be created.
Settings
Settings for the following systems and func‐
tions are saved in the active profile. The extent
of settings that can be saved depends on the
country and equipment.▷Unlocking and locking.▷Light.▷Air conditioning.▷Radio.▷Instrument cluster.▷Favourites buttons.▷Volumes, sound.▷Control Display.▷Navigation.▷TV.▷Park Distance Control PDC.▷Rear-view camera.▷Side view.▷Head-Up Display.▷M Drive: configurations.▷Driver's seat position, exterior mirror posi‐
tion, steering wheel position.▷Cruise Control.▷Intelligent Safety.▷Lane change warning.Profile management
Calling up profiles Independently of the remote control that is
used, another profile can be called up.
Via iDrive:1."Settings"2."Profiles"3.Select a profile.▷The settings saved in the called-up profile
are made automatically.▷The profile called up is assigned to the re‐
mote control currently used.▷If the profile has already been allocated to
another remote control, this profile applies
to both remote controls. It is no longer
possible to differentiate between the set‐
tings of both remote controls.
Renaming profiles
To avoid mixing up the profiles, each profile
can be given a personal name.
On the Control Display:
1."Settings"2."Profiles"3.Call up "Options".4."Rename current profile"
Resetting profiles Settings of the active profile are reset to fac‐
tory settings.
On the Control Display:
1."Settings"2."Profiles"3.Call up "Options".4."Reset current profile"
Exporting profiles Most of the settings of the active profile can be
exported.
Seite 34ControlsOpening and closing34
Online Edition for Part no. 01 40 2 964 013 - VI/15
Page 36 of 228

on. This function is not available if the inte‐
rior light was switched off manually.▷The welcome light is switched on if this
function was activated.▷Exterior mirrors folded in using comfort
closing are folded out.▷Anti-theft system is switched off.▷The alarm system, see page 42, is dis‐
armed.
Press the button on the remote con‐
trol twice in direct succession.
When a door is opened, the window is lowered
further to make it easier to get in. This function
must be activated in the settings, see
page 41.
Comfort opening Keep the button on the remote control
pressed after unlocking.
The windows and Glass Roof are opened for as
long as the button on the remote control is
pressed.
Locking WARNING
If the vehicle is locked from the outside, it
cannot be unlocked from the inside in some
country versions.
If persons must remain in the vehicle for an ex‐
tended period of time and are exposed to ex‐
treme heat or cold, there is a risk of injury or
life. Do not lock the vehicle from the outside
when there is someone inside it.◀
The driver's door must be closed. Press the button on the remote control.
All doors, boot lid and fuel filler flap are locked.
Anti-theft system is switched on. It prevents
the doors from being able to be unlocked using
the locking buttons or the door openers.
The alarm system, see page 42, is armed.
Comfort closing Keep the button on the remote control
pressed after locking.
The windows and the Glass Roof are closed for
as long as the button on the remote control is
pressed.
Exterior mirrors are folded in.
WARNING
Body parts can be trapped during com‐
fort closing. Danger of injury. During comfort
closing, make sure that the area of movement
is free.◀
Switching on interior light and
courtesy light
With the vehicle locked, press the button
on the remote control.
The courtesy light is only switched on at dark.
This function is not available if the interior light
was switched off manually.
If the button is pressed again within 10 sec‐
onds of locking, passenger compartment pro‐
tection and tilt alarm sensor of alarm system,
see page 43, are switched off. After locking,
wait 10 seconds before pressing the button
again.
Opening boot lid Press the button on the remote con‐
trol for approximately one second.
The boot lid opens, regardless of whether the
vehicle was locked or unlocked.
The boot lids swings rearwards and upwards
when opened. Make sure that there is suffi‐
cient space.
Depending on the equipment and country ver‐
sion it can be set whether the doors are also
locked. Adjust the settings, see page 41.Seite 36ControlsOpening and closing36
Online Edition for Part no. 01 40 2 964 013 - VI/15
Page 41 of 228

The boot lid opens, regardless of whether it
was locked or unlocked.
The hazard warning lights flash before open‐
ing.
If the remote control is within the sensor range,
the boot lid can be accidentally opened by an
unintentional or supposedly recognized foot
movement.
The sensor range extends to approx. 1.50 m,
5 ft behind the rear area.
WARNING
Operating the boot lid can lead to parts
of the body becoming trapped. Danger of in‐
jury. When opening and closing, make sure
that the area of movement of the boot lid is
free.◀
ATTENTION
The boot lids swings rearwards and up‐
wards when opened. Danger of damage to
property. When opening and closing, make
sure that the area of movement of the boot lid
is free.◀
Malfunction
Detection of the remote control by the vehicle
may be disrupted by the following circumstan‐
ces, amongst others:▷The battery of the remote control is dis‐
charged. Replacing the battery, see
page 33.▷Disruption of the radio link by transmission
masts or other equipment transmitting
powerful signals.▷Shielding of the remote control by metallic
objects.▷Disruption of the radio link by mobile tele‐
phones or other electronic devices in the
immediate vicinity.
Do not transport the remote control together
with metallic objects or electronic devices.
In case of a fault, unlock and lock the vehicle
with the buttons on the remote control or with
the integrated key, see page 37.
Settings UnlockingSettings are saved in active profile, see
page 33.
Doors1."Settings"2."Doors/key"3. Select the symbol.4.Select the desired function:▷"Driver's door only"
Only the driver's door and fuel filler flap
are unlocked. Pressing again unlocks
the entire vehicle.▷"All doors"
The entire vehicle is unlocked.▷"Comfort entry"
The entire vehicle is unlocked.
Pressing the button on the remote
control twice in direct succession cau‐
ses the window to be lowered further
when the door is subsequently opened.
Boot lid
Depending on the equipment and country ver‐
sion, these settings are not provided.
1."Settings"2."Doors/key"3. Select the symbol.4.Select the desired function:▷"Tailgate"
Boot lid is opened.▷"Tailgate + door(s)"Seite 41Opening and closingControls41
Online Edition for Part no. 01 40 2 964 013 - VI/15
Page 55 of 228

Saving1.Switch on ignition.2.Set desired position.3.Press button briefly. LED in button
is illuminated.4.Press the desired button 1 or 2 while the
LED is lit. LED turns off.
If SET button was pressed inadvertently:
Press the button again.
LED turns off.
Recalling
General
There are two possibilities of calling up the
memory function:
▷Comfort function, see page 55.▷Safety function, see page 55.
Convenience function
1.Open the driver's door.2.Switch ignition off if necessary.3.Briefly press button 1 or 2 as desired.
The relevant seat adjustment is done automat‐
ically.
The process is cancelled if a seat adjustment
switch or one of the buttons is pressed.
Safety function
1.Close the driver’s door or switch the igni‐
tion on.2.Keep button 1 or 2 pressed as desired until
the adjustment procedure has been con‐
cluded.
Calling up has been disabled
After a short time, calling up saved seat posi‐
tions is disabled to prevent the battery from
being discharged.
To reactivate calling up:
▷Open and close a door or the boot lid.▷Press a button on the remote control.▷Press the start/stop button.
Mirrors
Exterior mirrors
General Depending on the equipment, the mirror set‐
ting is saved for the profile currently in use.
When the vehicle is unlocked using the remote
control, this position is called up automatically
if the setting for this has been enabled.
Note WARNING
Objects reflected in the mirrors are
closer than they appear. The distance to road
users behind the vehicle could be incorrectly
estimated, for example when changing lane.
Danger of accidents. Look over your shoulder
to estimate the distance from following traf‐
fic.◀
Overview
1Adjusting 562Left/right, automatic parking function3Folding in and out 56Seite 55AdjustingControls55
Online Edition for Part no. 01 40 2 964 013 - VI/15
Page 90 of 228

System limits
The function may be disabled or inaccurate
under certain conditions, for example:▷In thick fog and heavy rain or snow.▷If road signs are obscured by objects.▷If the vehicle is moving too close to the ve‐
hicle ahead.▷With bright oncoming light.▷When the windscreen in front of the rear-
view mirror is covered with condensation,
dirt, stickers, etc.▷Due to possible wrong detections of the
camera.▷If the speed limits saved in the navigation
system are wrong.▷In areas not covered by the navigation sys‐
tem.▷If there are deviations in relation to the nav‐
igation, for example due to changes in the
road routing.▷On overtaking buses or trucks with speed
stickers.▷If traffic signs do not correspond to the
standard.▷During the calibration process of the cam‐
era immediately after the vehicle is sup‐
plied.
Selection lists in the
instrument cluster
Principle Depending on equipment, the following can be
displayed or operated via the buttons and the
knurled wheel on the steering wheel and using
the displays in the instrument cluster and
Head-Up Display:
▷Current audio source.▷Repeat dialling for telephone.▷Activating the voice control system.Display
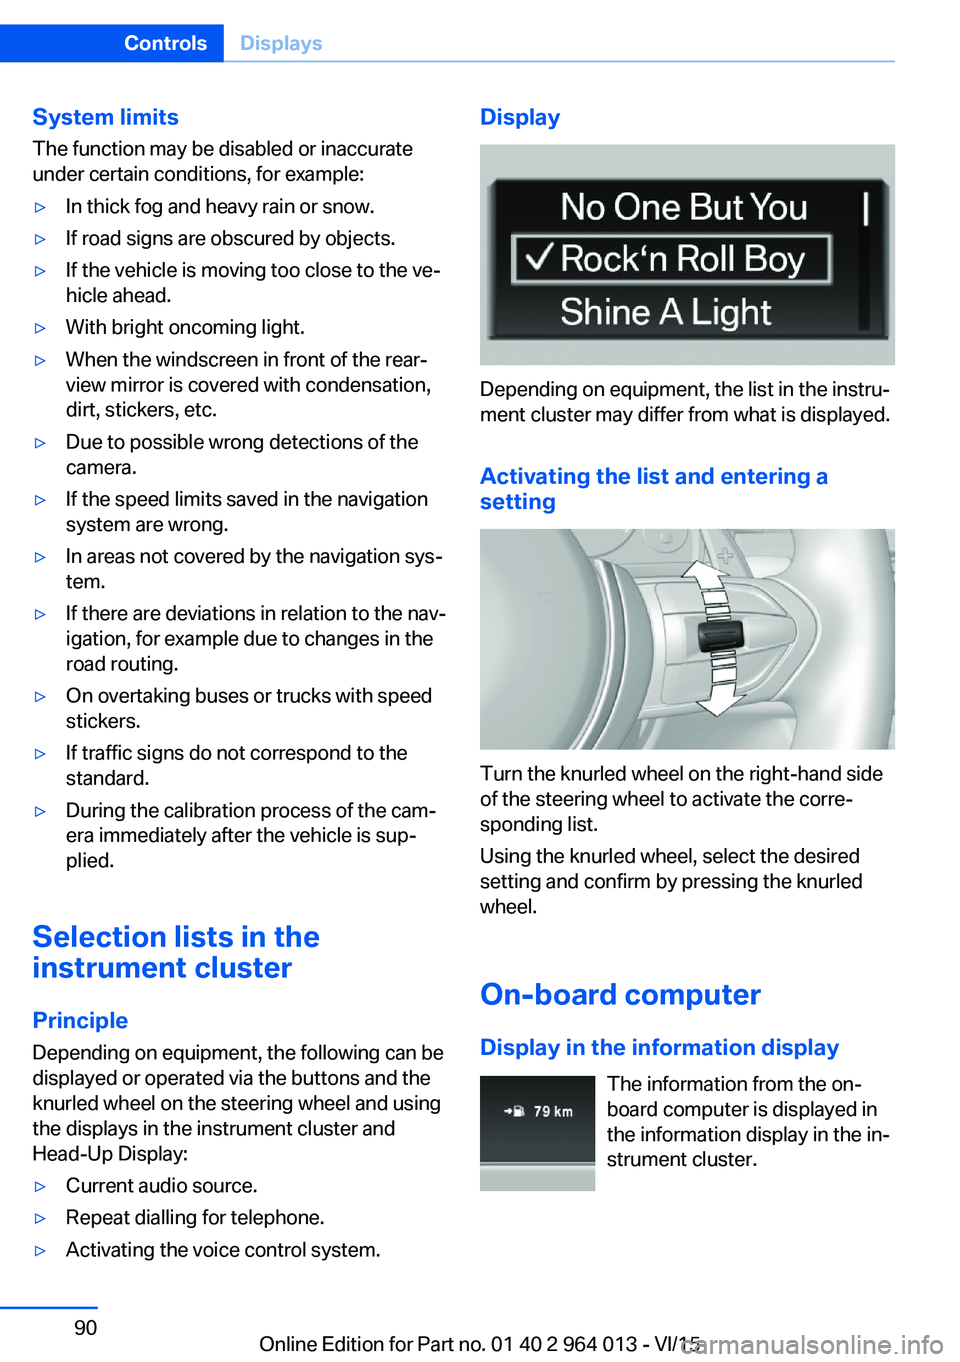
Depending on equipment, the list in the instru‐
ment cluster may differ from what is displayed.
Activating the list and entering a
setting
Turn the knurled wheel on the right-hand side
of the steering wheel to activate the corre‐
sponding list.
Using the knurled wheel, select the desired
setting and confirm by pressing the knurled
wheel.
On-board computer
Display in the information display The information from the on-
board computer is displayed in
the information display in the in‐
strument cluster.
Seite 90ControlsDisplays90
Online Edition for Part no. 01 40 2 964 013 - VI/15
Page 96 of 228

Adjusting rotation
The image of the Head-Up Display can be ro‐
tated around its axis.
On the Control Display:1."Settings"2."Head-up display"3."Rotation"4.Turn the Controller until the desired set‐
ting is reached.5.Press the Controller.
The setting is saved for the currently used pro‐
file.
Special windscreen
The windscreen constitutes part of the sys‐
tem.
The shape of the windscreen enables a precise
projection.
A film in the windscreen prevents double im‐
ages occurring.
For this reason, have the special windscreen
replaced by a Service Partner or a qualified
specialist workshop.
Shift Lights General
The display is on the Head-Up Display and in
the instrument cluster.
Shift Lights in the instrument cluster
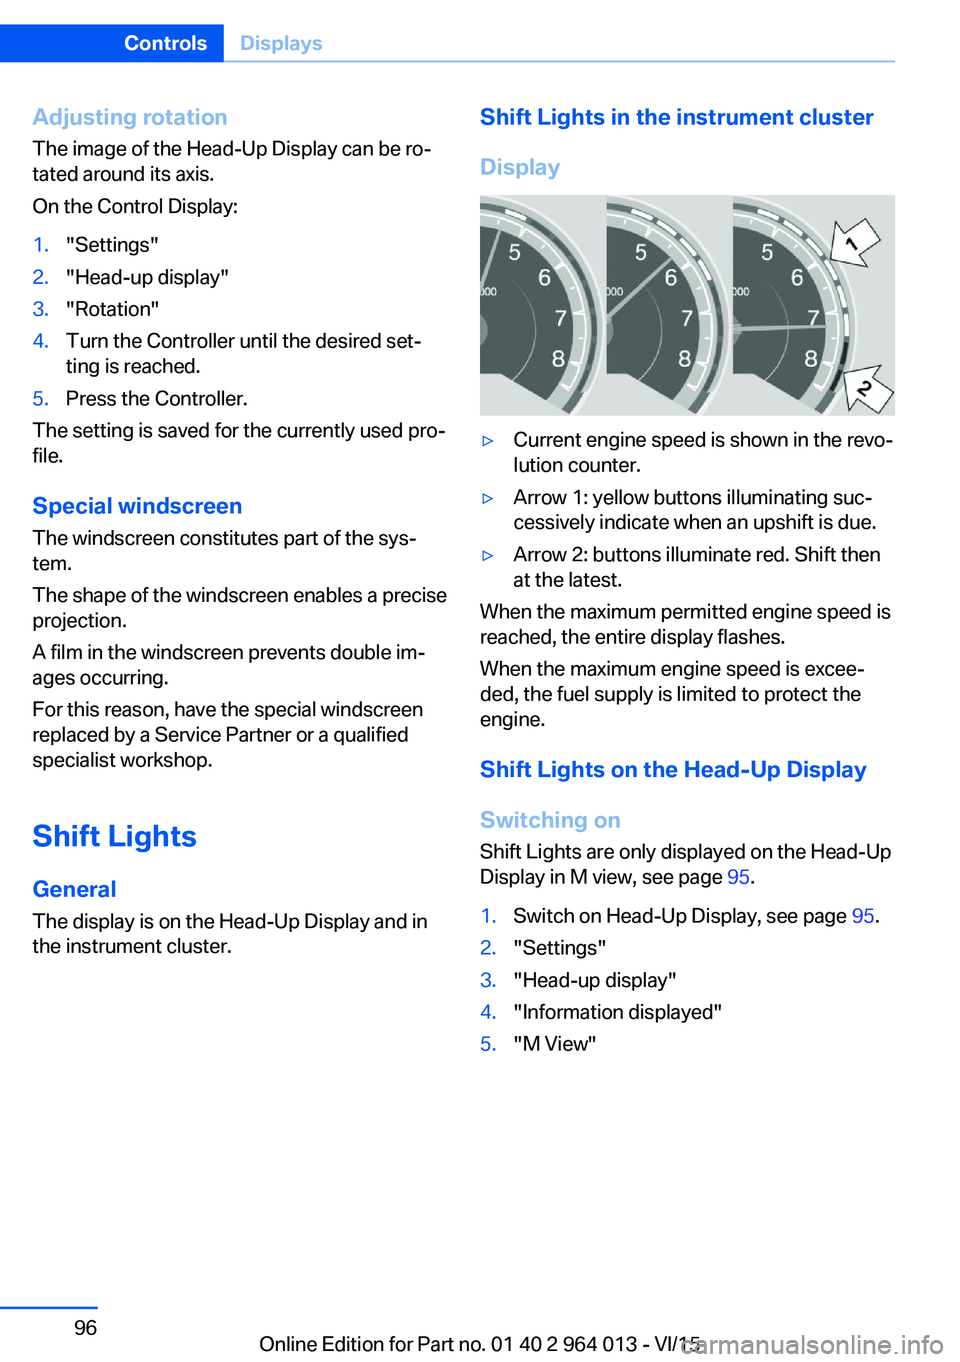
Display▷Current engine speed is shown in the revo‐
lution counter.▷Arrow 1: yellow buttons illuminating suc‐
cessively indicate when an upshift is due.▷Arrow 2: buttons illuminate red. Shift then
at the latest.
When the maximum permitted engine speed is
reached, the entire display flashes.
When the maximum engine speed is excee‐
ded, the fuel supply is limited to protect the
engine.
Shift Lights on the Head-Up DisplaySwitching on Shift Lights are only displayed on the Head-Up
Display in M view, see page 95.
1.Switch on Head-Up Display, see page 95.2."Settings"3."Head-up display"4."Information displayed"5."M View"Seite 96ControlsDisplays96
Online Edition for Part no. 01 40 2 964 013 - VI/15