2016 BMW M4 engine
[x] Cancel search: enginePage 5 of 228

ContentsFor quick access to a particular topic or item,
please consult the detailed alphabetical index,
see page 218.6Notes
Overview
12Cockpit16iDrive25Voice control system28Integrated Owner’s Handbook in the
vehicle
Controls
32Opening and closing48Adjusting58Carrying children in safety65Driving79Displays98Lights104Security123Driving stability control systems129Driving comfort144Climate149Interior equipment153Storage compartments
Driving hints
160BMW M4 Technology162Driving precautions166Loads168Saving fuelMobility172Refuelling174Fuel175Wheels and tyres182Engine compartment185Engine oil189Coolant191Maintenance193Replacing parts202Help in the event of a breakdown208General care
Reference
214Technical data216Appendix218Everything from A to Z
Online Edition for Part no. 01 40 2 964 013 - VI/15
Page 13 of 228

Automatic driving lights con‐
trol 99
Adaptive Headlights 100
High-beam assistance 100Instrument lighting 1026Steering-column lever, leftTurn indicator 70High-beam headlights, headlight
flasher 70High-beam assistance 100Parking lights 99On-board computer 907Shift paddles 768Buttons on steering wheel, leftActivate M Drive 1 123Activate M Drive 2 123Speed limiter 119Resume speed 129Cruise Control on/off, inter‐
rupt 129Rocker switch for Cruise Control 1299Instrument cluster 7910Buttons on steering wheel, rightEntertainment sourceVolume controlVoice control 25TelephoneKnurled wheel for selection lists 9011Steering-column lever, rightWiper 71Rain sensor 71Cleaning the windows and head‐
lights 7212Start/stop engine and switch igni‐
tion on/off 66Auto Start Stop function 6713Horn, total area14Steering wheel heating 5715Steering wheel adjustment 5716Unlock bonnet 183Seite 13CockpitOverview13
Online Edition for Part no. 01 40 2 964 013 - VI/15
Page 14 of 228

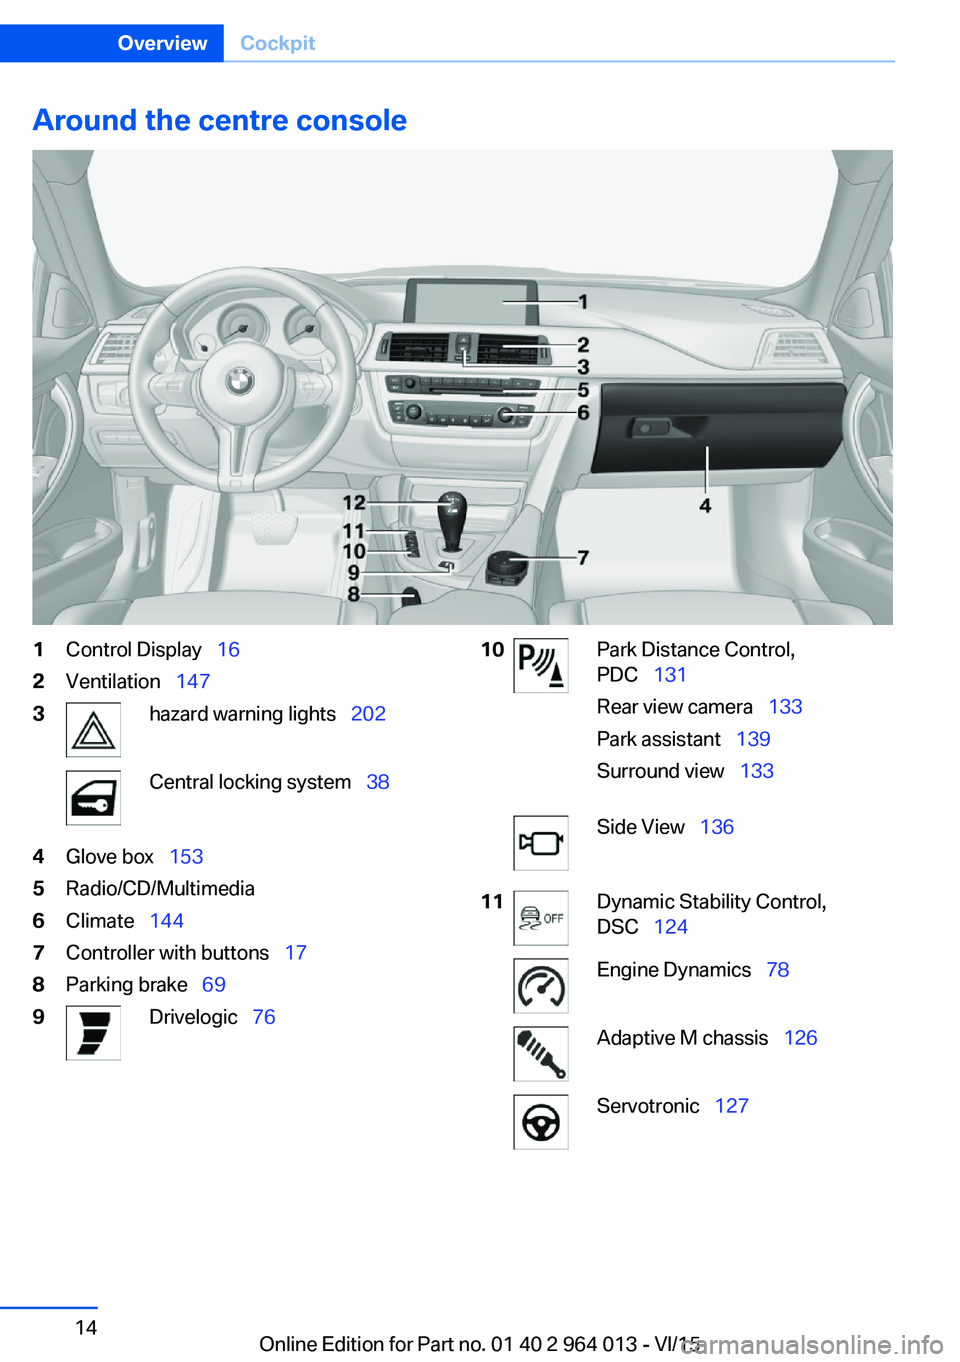
Around the centre console1Control Display 162Ventilation 1473hazard warning lights 202Central locking system 384Glove box 1535Radio/CD/Multimedia6Climate 1447Controller with buttons 178Parking brake 699Drivelogic 7610Park Distance Control,
PDC 131
Rear view camera 133
Park assistant 139
Surround view 133Side View 13611Dynamic Stability Control,
DSC 124Engine Dynamics 78Adaptive M chassis 126Servotronic 127Seite 14OverviewCockpit14
Online Edition for Part no. 01 40 2 964 013 - VI/15
Page 33 of 228

Replacing the battery1.Remove the integrated key from the re‐
mote control.2.Push in catch with the key, arrow 1.3.Remove the cover for the battery compart‐
ment, arrow 2.4.Insert a new battery of the same type with
the positive side facing upwards.5.Press the cover back into position.
Dispose of old batteries at a Service
Partner or a qualified specialist work‐
shop or hand them into an authorised
collecting point.
New remote controlsNew remote controls are available from a Serv‐
ice Partner or a qualified specialist workshop.
Loss of remote controls
A lost remote control can be blocked by a
Service Partner or a qualified specialist work‐
shop.
Special ID of the remote control The ignition can be switched on or the engine
started even in one of the following situations:
▷Interference in the radio transmission to
the remote control from external sources,
for example by radio masts.▷Flat battery in the remote control.▷Fault in radio transmission due to mobile
radio device in the immediate vicinity of the
remote control.▷Fault in radio transmission due to the
charger when charging in the vehicle, for
example for mobile devices.
If an attempt is made to switch on the ignition
or start the engine, a Check Control message
is displayed.
Starting engine with special ID ofremote control
M double clutch transmission: with the rele‐
vant Check Control message, hold the remote
control, as illustrated, to the mark on the steer‐
ing column and press the start/stop button
within 10 seconds with the brake depressed.
Manual gearbox: with the relevant Check Con‐
trol message, hold the remote control, as illus‐
trated, to the mark on the steering column and
press the start/stop button within 10 seconds
with the clutch depressed.
If the remote control is not detected: change
the height of the remote control slightly and
repeat the procedure.
Personal Profile
Principle Personal profile provides three profiles in
which personal vehicle settings can be saved.
Each remote control is allocated to one of
these profiles.
When the vehicle is unlocked with a remote
control, the allocated personal profile is activa‐
ted. All the settings saved in the profile are
made automatically.
Seite 33Opening and closingControls33
Online Edition for Part no. 01 40 2 964 013 - VI/15
Page 39 of 228

Closing
The recessed handles in the boot lid lining
make it easier to pull the boot lid down.
Emergency release
Pull the handle in the boot.
This will unlock the boot lid.
Comfort Access
Principle Access to the vehicle is possible without acti‐
vating the remote control.
It is sufficient to have the remote control with
you, for example in a trouser pocket.
The vehicle automatically recognises the re‐
mote control when it is in the immediate vicin‐
ity or the interior of the vehicle.
Comfort Access supports the following func‐
tions:
▷Unlocking/locking the vehicle.▷Comfort closing.▷Opening the boot lid separately.▷Open boot lid contactlessly.▷Start the engine.
Notes
To prevent the remote control from being locked in, do not place the remote control in
the boot.
Functional requirements
▷No external sources of interference in the
vicinity.▷To lock, the remote control must be loca‐
ted outside the vehicle in the area of the
doors.▷Approximately 2 seconds need to elapse
before the vehicle can be unlocked and
locked again.▷An engine start is only possible if the re‐
mote control is in the vehicle.
Unlocking
Firmly grab the handle on the driver's or front
passenger's door, arrow.
This corresponds to pressing the
button
on the remote control.
Seite 39Opening and closingControls39
Online Edition for Part no. 01 40 2 964 013 - VI/15
Page 47 of 228

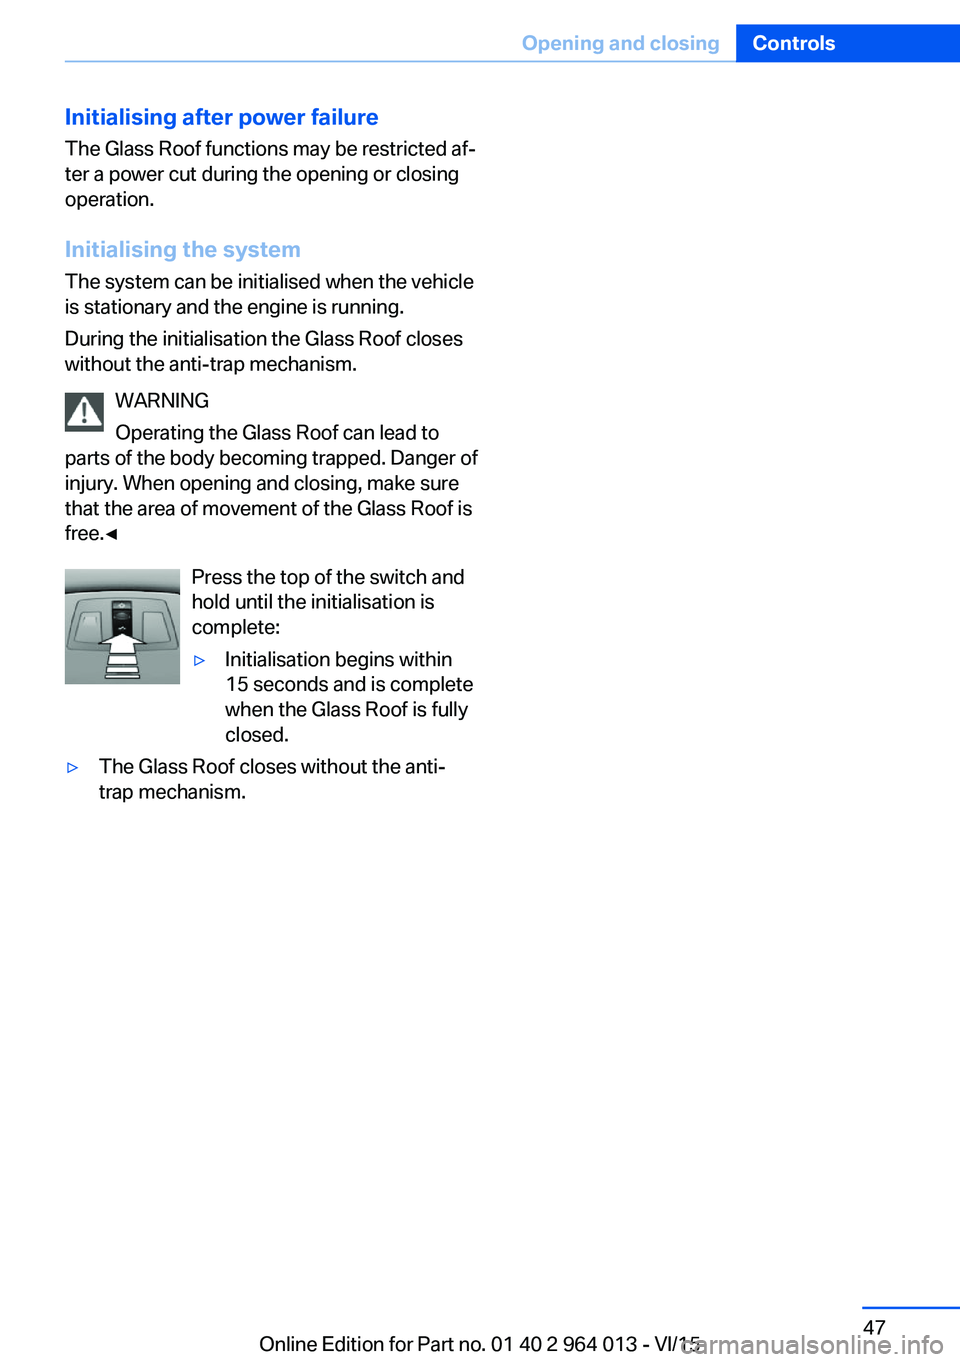
Initialising after power failureThe Glass Roof functions may be restricted af‐
ter a power cut during the opening or closing
operation.
Initialising the system
The system can be initialised when the vehicle
is stationary and the engine is running.
During the initialisation the Glass Roof closes
without the anti-trap mechanism.
WARNING
Operating the Glass Roof can lead to
parts of the body becoming trapped. Danger of
injury. When opening and closing, make sure
that the area of movement of the Glass Roof is
free.◀
Press the top of the switch and
hold until the initialisation is
complete:▷Initialisation begins within
15 seconds and is complete
when the Glass Roof is fully
closed.▷The Glass Roof closes without the anti-
trap mechanism.Seite 47Opening and closingControls47
Online Edition for Part no. 01 40 2 964 013 - VI/15
Page 53 of 228

▷Avoid bulky clothing.▷Regularly pull the seat belt in the upper-
body area taut.
Adjustment for automatic retracting
seat belts
▷Draw the buckle tongue attached to the
seat belt across the body and press it into
the buckle catch until a ‘click’ is heard.▷Adjustment of the belt length is very im‐
portant. To adjust the lap belt and check
whether the buckle has locked correctly,
pull upwards on the shoulder strap until the
lap belt fits tightly.▷The length of the diagonal shoulder strap
adjusts itself automatically to allow free‐
dom of movement.▷To release the seat belt, press the button
on the buckle catch unit.
Fastening the seat belt
The seat belt buckle must be heard to engage.
Automatically tension seat belt
If the belt is fastened, the belt strap is automat‐
ically fastened once when driving off.
Unfastening the seat belt
1.Hold onto the belt.2.Press the red button on the belt buckle.3.Guide the belt back up to the reel mecha‐
nism.Seat belt reminder for driver’s and
front seat passenger seat
A Check Control message is displayed.
Check whether the seat belt has been
fastened correctly.
The seat belt reminder is activated when the
seat belt on the driver's side is not fastened.
On some national versions, the seat belt re‐
minder is also activated above approximately
10 km/h, 6 mph if the front passenger's seat
belt is not fastened and if heavy objects are lo‐
cated on the seat.
Not for Australia/New Zealand: Seat
belt reminder for rear seats
The indicator light in the instrument
cluster is illuminated after the engine
starts.▷Green: seat belt fastened on the corre‐
sponding rear seat.▷Red: seat belt not fastened on the corre‐
sponding rear seat.
The seat belt reminder will also be activated if
a rear seat belt is unfastened during the jour‐
ney.
Damaged seat belts WARNING
The protective effect of the seat belts
can be restricted or nullified in the following
situations:
▷Belts are damaged, contaminated or have
been modified in another way.▷Belt buckle is damaged or heavily contami‐
nated.▷Belt tensioners or belt retractors have
been modified.
Seat belts can be damaged in an accident
without the damage necessarily being appa‐
rent. Danger of injury or life. Do not modify seat
belts, belt buckles, belt tensioners, belt retrac‐
tors and belt anchor points; also, keep them
Seite 53AdjustingControls53
Online Edition for Part no. 01 40 2 964 013 - VI/15
Page 56 of 228

Selecting a mirrorSwitching to other mirror:
Push switch.
Electrical adjustment Corresponding to movement of button
Saving positions
Seat and mirror position memory, see page 54.
Adjusting manually In the event of an electrical defect, for example,
press the borders of the mirror glass.
Automatic parking function
Principle
When reverse gear is engaged, mirror glass on
front passenger side is titled downwards. This
improves the view of the kerb or other obsta‐
cles near the ground, for example when park‐
ing.
Activating1. Push switch to driver's mirror posi‐
tion.2.Engage selector lever position R.
Deactivating
Push switch to front passenger's mirror posi‐
tion.
Folding in and out ATTENTION
Due to the vehicle's width, it could sus‐
tain damage in car washes. Danger of damage
to property. Fold in the mirrors manually or us‐
ing the button prior to washing.◀
Press the button.
Possible up to approximately 20 km/h, approxi‐
mately 15 mph.
Advantageous in the following situations:▷In car washes.▷In narrow streets.▷When folding mirrors back out that have
been folded in manually.
Folded-in mirrors automatically fold out at ap‐
proximately 40 km/h, approximately 25 mph.
Automatic heating Both exterior mirrors are automatically heated
with the engine running.
Automatically dimming
Both exterior mirrors are automatically dim‐
med. Photocells in the rear-view mirror, see
page 56, are used for control.
Rear-view mirror, automatic-dim
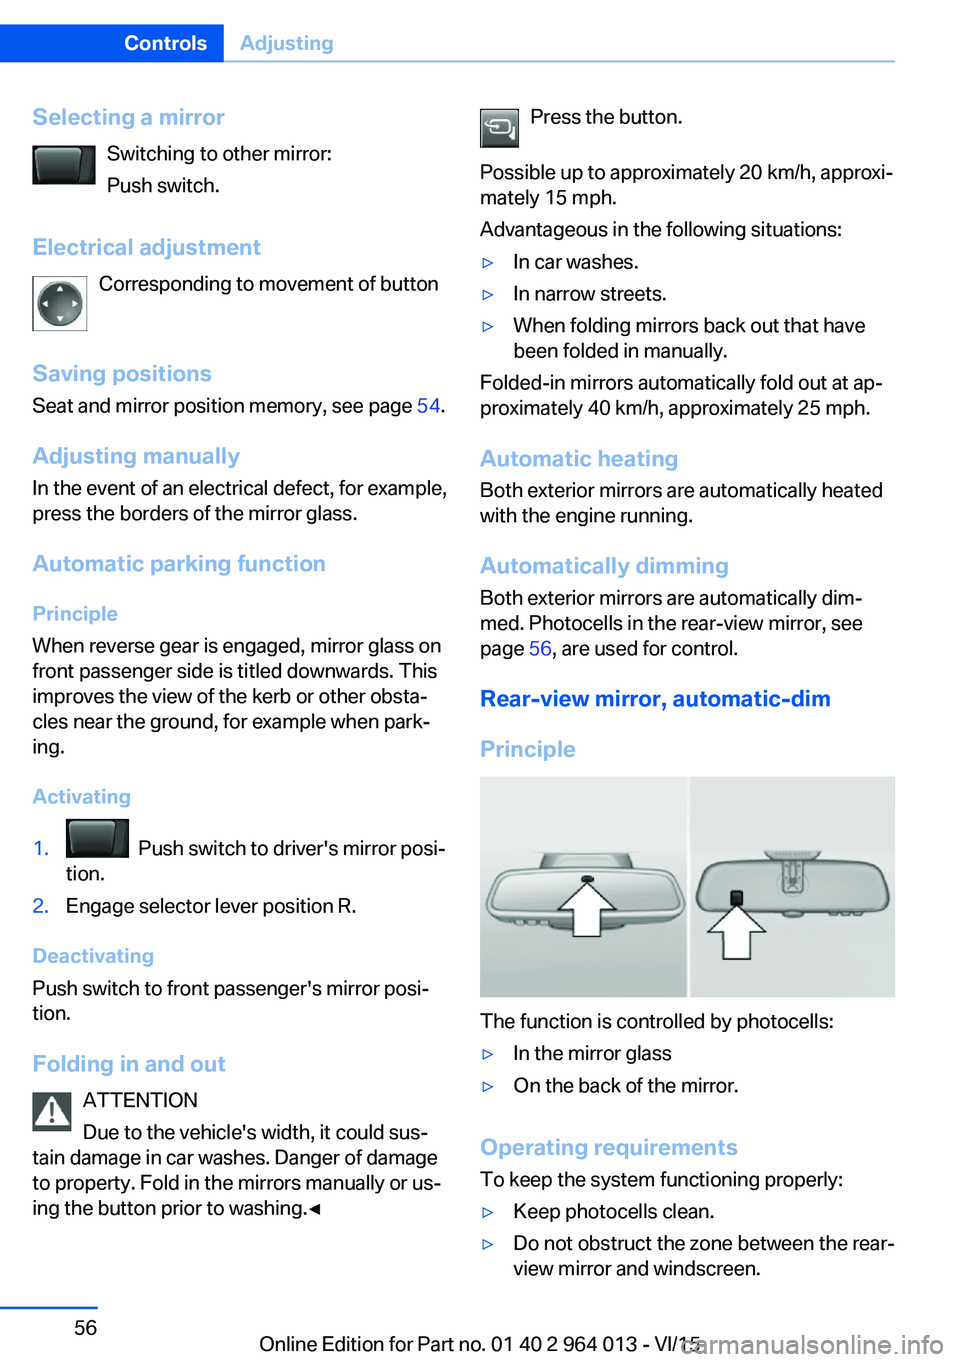
Principle
The function is controlled by photocells:
▷In the mirror glass▷On the back of the mirror.
Operating requirements
To keep the system functioning properly:
▷Keep photocells clean.▷Do not obstruct the zone between the rear-
view mirror and windscreen.Seite 56ControlsAdjusting56
Online Edition for Part no. 01 40 2 964 013 - VI/15