Page 289 of 486

m If there is a function fault in the ParkPilot, an W acoustic warning is emitted for approximately 3 seconds when switched on for the first time. The ParkPilot should be checked by a qualified work-shop immediately.
ParkPilot front and rear
Fig. 230 In the centre console: button for switch-ing the ParkPilot on and off Fig. 231 In the front bumper: ParkPilot sensors.
r'l'11 First read and observe the Introductory Information and safety warnings & on page 287.
The Park Pilot uses ultrasound sensors to deter-mine the distance from the front or rear bumpers to an obstacle. There are 4 ultrasound sensors for the ParkPilot located in both the front and rear B bumpers.
Switching ParkPilot on and off
Function What to do when the Ignition is switched on
Switching on the ParkPilot Press button once. manually
Switching off the ParkPilot Press button again. manually
Switching off the ParkPilot Press a button, e.g. (RADIO!, on the factory-fitted radio or navigation system. display manually (sound OR: touch the 0 function button. output remains active)
Switching on the ParkPilot Select reverse gear or move the selector lever to position R. automatically
Switching off the ParkPilot Accelerate forwards to a speed greater than approximately 10-15 kmlh automatically (6-9 mph).
Temporarily muting ParkPi-lot (applies to certain Touch the@) function button. equipment levels):
Switching to the rear view Select reverse gear or move the selector lever to position R. camera system picture as OR: touch function button. required
The indicator lamp in the =:o Fig. 230 lights up while the function is active.
Driver assist systems 1289
Page 290 of 486

Special features of ParkPilot
• In some cases, the ParkPilot registers water and ice on the ultrasound sensors as an obstacle.
• The acoustic warning will become quieter after a few seconds if the distance remains the same. The volume will remain constant if the signal tone is continuous.
• The intermittent signal tone switches off auto-matically as soon as the vehicle moves away from an obstacle again. If the vehicle approaches the obstade again, the acoustic warning is switched on automatically.
• No acoustic signal is given in vehicles with a dual clutch gearbox DSG® if the selector lever is in position P.
ParkPilot signal tones and displays
Fig. 232 ParkPilot screen display (colour display).
r--f"'n First read and observe the introductory L-.I=.U Information and safety warnings & on page 287.
Key to diagram
Fig. 232 Meaning
® Monitored area behind the vehide.
® Scanned area in front of the vehicle.
l J
•
0
•
290 I
The yellow segment represents an obstacle in the vehicle's path.
Red segment depicts an obstacle close to the vehicle.
The grey segment represents an obstacle outside of the vehicle's path.
Black segment depicts an obstacle (monochrome display).
While droving
• The rear ultrasound ParkPilot sensors cannot be switched on if the factory-fitted towing bracket is electrically connected to the trailer.
• A Volkswagen Commercial Vehicles dealership can adjust the volume of the acoustic warning sig-nals.
CD
Failure to observe the illuminated text messag-es can lead to the vehicle being damaged.
The areas to the front and rear of the vehicle that are scanned by ultrasound sensors are shown on the screen of the factory-fitted radio or navigation system. The positions of potential obstacles are displayed relative to the vehicle &.
The areas to the front (only with ParkPilot front and rear) and rear of the vehicle are fully scanned by the ultrasound sensors.
Acoustic signals and screen
Acoustic signals are given when the vehicle ap-proaches an obstacle located in the range of the ultrasound sensors. An intermittent signal tone is given if a sufficiently short distance between the vehicle and an obstacle is detected. The shorter the distance, the shorter the intervals. The signal tone will sound continuously if the obstacle is very close.
If you continue to drive the vehide closer to the ob-sta de despite the continuous signal tone, the sys-tem will no longer be able to measure the distance.
With some vehicle equipment levels the scanned areas may be displayed as several segments in a display. The closer the vehicle drives lowards an obstacle, the closer the segment will move to the vehicle in the display. The collision area has been reached when the penultimate segment is dis-played, if not before. Do not drive onl .,..
Page 291 of 486

Vehicles with ParkPilot at the front and rear
Segment colour if an
Area of the vehicle Distance of the vehicle Acoustic sig-obstacle has been de-from an obstacle nal tected (colour display only)
® Rear centre approx. 31 -160 cm
Rear side approx. 31 -60 cm Intermittent Yellow
® Front centre approx. 31 -120 cm tone
Front side approx. 31 -60 cm
@and@ Obstacle close approx. 0 -30 cm Constant tone Red to the vehicle8)
•) The distance range for the constant lone to the rear of the vehicle is slightly larger for vehicles w1th a factory-filled towing bracket.
When towing a trailer
In vehicles with a factory-fitted towing bracket and a trailer connected via the vehicle electrics, a cor-responding display appears on the screen of the factory-fitted radio or navigation system, depend-ing on the vehicle equipment level. The distance behind the vehicle will then no longer be shown.
Muting the ParkPilot signal tones
The acoustic signals for the ParkPilot can be mut-ed by touching the @function button on the screen (in colour display only). Touch the function button again to switch the acoustic signals back on.
Reversing camera (Rear Assist)
o:n Introduction
This chapter contains information on the following subjects:
General information ..................... . Camera.
292 293
Operating the rear view camera system . . . . . 294
....................... 2%
The reversing camera (Rear Assist)
makes it easier for the driver to see be-
hind the vehicle when parking or revers-
ing.
A camera in the tailgate 233 helps the driver when reverse parking or manoeuvring the vehicle. The camera picture and the orientation lines pro-jected by the system are displayed on the screen of the factory-fitted radio or navigation system.
The mute setting will be cancelled if the ParkPilot system is switched off and on again. Error warn-ings cannot be switched off.
If the ParkPilot display has been switched off man-ually and ParkPilot remains active, the mute set-ting is also cancelled.
A WARNING
Do not allow the Images shown on the screen to distract you from the traffic around you.
m it can take a few seconds for the acoustic or W optical signals to be given.
The functions and displays of the rear view camera system may differ between vehicles, depending on whether or not they are fitted with ParkPilot.
Additional information and warnings:
• Exterior views =>page 5
• ParkPilot 287
• Accessories, modifications, repairs and renewal of parts 394
• Radio or navigation system Radio, provision for mobile telephone, infotainment sys-tem, navigation system
A WARNING
Using the rear view camera system to esti-mate the distance from obstacles (people, ve-hicles etc.) Is Inaccurate and could cause ac-cidents and severe injuries. 11>
Driver assist systems I 291
Page 292 of 486

A WARNING (Continued)
• The camera lens enlarges and distorts the field of vision and the objects on the screen will not be depicted as precisely and accu-rately as they are In reality.
• Certain objects, for example narrow posts or railings, may be difficult or Impossible to see on the screen because of its low resolu-tion or poor light conditions.
• The rear view camera system has blind spots within which obstacles and people can-not be detected.
• Keep the camera lens clean, free of snow and Ice and do not cover it.
A WARNING
The Intelligent rear view camera system tech-nology cannot overcome the laws of physics, and functions only within the limits of the system. Careless or unintentional use of the rear view camera system can cause accl· dents and lead to serious Injury. The system is not a substitute for the full concentration of the driver.
• Always adapt your speed and driving style to suit visibility, weather, road and traffic con· ditions.
General information
r'""'('n First read and observe the Introductory L-J,::.U information and safety warnings & on page 291.
Requirements for parking and manoeuvring while using the rear view camera system
Checklist
./ The tailgate must be closed.
./ The camera must give a clear and accurate image, i.e. there must be good visibility and the camera lens must be clean =:o Fig. 233.
./ There must be a clear and unobstructed view of the area behind the vehicle.
./ The rear of the vehicle must not be heavily loaded.
2921 While driving
A WARNING (ConUnued)
• Keep looking In the direction In which you are parking and at the relevant area sur-rounding the vehicle. The front of the vehicle swings out more than the rear of the vehicle.
• Do not allow the Images shown on the screen to distract you from the traffic around you.
• Always monitor the area around the vehi· cle as small children, animals and objects will not always be detected by the rear view cam-era system.
• The rear view camera system may not be able to display all areas clearly.
• The rear view camera system should only be used when the tallgate is fully closed.
CD
• The rear view camera system shows only two-dimensional images on the screen. The lack of depth of field means that potholes and protruding objects on the ground may only be detected with difficulty, or may not be detected at all.
• The rear view camera system may notal· ways be able to detect objects such as thin rails, fences, posts, trees etc. This could result In damage to your vehicle.
./ The driver must be familiar with the system.
./ The vehicle must be undamaged. The rear view camera system must be checked by a qualified workshop if the position or angle of the camera has changed, e.g. following a rear impact.
Volkswagen Commercial Vehicles recommends that you practise parking with the reversing camera in a traffic-calmed area or car park with good visi-bility and weather conditions, so that you can famil· iarise yourself with the system, orientation lines and guiding functions in a safer environment.
Rear view camera system settings
Various settings, including brightness, contrast and colour, can be by touching the relevant function buttons 1j or G. or by moving the corre-sponding slider.
• Stop the vehicle in a safe place.
• Apply the handbrake firmly.
• Switch on the ignition.
Page 293 of 486

• Switch on radio/navigation system, if not al-ready on.
• Select reverse gear or move the selector lever to position R.
Camera
Fig. 233 In the tailgate: location of the rear view camera system.
....--r'n First read and observe the Introductory L.-J,:.U information and safety warnings & on page 291.
The reversing camera 233 provides two-di-mensional images only. Due to the lack of depth of field on the screen, potholes and dips in the ground, protruding parts on another vehicle or pro-truding objects on the ground may be difficult or impossible to see on the image.
Objects or other vehicles may appear closer or fur-ther away on the screen than they actually are.
Optical Illusions created by the rear view cam-era system (examples):
-If you drive from a level surface onto an upward or downward slope.
-If you drive from an upward or downward slope onto a level surface.
-If the vehicle Is heavily loaded towards the rear.
-When approaching protruding objects. Such ob-jects can leave the camera's field of vision while you are reversing.
• Touch the button.
• Select the required settings in the menu.
Cleaning the camera lens
Keep the camera lens 233 clean and free of ice and snow:
• Stop the vehicle in a safe place.
• Apply the handbrake firmly.
• Moisten the lens with a commercially available alcohol-based glass cleaner and clean the lens with a dry cloth
• Remove snow with a brush.
• Remove ice with a de-icer spray
CD
• Never use an abrasive cleaning product to clean the lens.
• Never use warm or hot water to remove snow and ice from the lens of the camera. This could damage the lens.
Driver assist systems 293
Page 294 of 486

Operating the rear view camera system
Key to diagram Fig. 234:
Symbol Meaning
)( Closing current display.
-*·()•oo Setting display: brightness, contrast, colour.
'lS.A With some equipment levels: switch the ParkPilot tone on and off.
Depending on the vehicle equip-ment level: switch on ParkPilot dis-Fig. 234 lnfotainment system: screen display from the switched on reversing camera.
lt> play.
Depending on the vehicle equip-
r--f'n First read and observe the introductory L-J,:.U information and safety warnings & on page 291.
t.,a::::::D"''
ment level: switch off ParkPilot dis-play.
With some equipment levels: dis-play ParkPilot.
Function
Switching on the display au-tomatically.
Switching the display off auto-matically.
Hiding the im-age from the rear view cam-era system.
Showing the rear view cam-era system im-age again.
Switching the rear view camera system on and off.
The rear view camera system switches on and off automatically.
What to do when the Ignition is switched on
Vehicles without ParkPilot I Vehicles with ParkPilot
Select reverse gear or move the selector lever to position R.
The rear view camera system display is displayed on the infotainment system screen.
I The ParkPilot miniature view is also dis-played on the left side of the infotainment system screen.
Switch off the ignition.
OR: drive forwards faster than 10 km/h (6 m ph) or for longer than 10 seconds.
OR: approximately 10 seconds after shift-I OR: immediately after shifting out of re-ing out of reverse or of gear position R. verse or of gear position R.
Press one of the infotainment system buttons or touch the 0 function button on the screen.
I OR: touch function button.
ParkPilot full-screen mode is displayed.
Take the car out of reverse or shift to another gear position then switch back into re-verse or to gear position R.
I OR: touch the (g function button.
294 I While driving
Page 295 of 486

Fig. 235 On the lnfotainment system: screen display when parking using the reversing camera.
r-111 First read and observe the introductory L-L::.I.I information and safety warnings & on page 291.
Key to diagram Fig. 235:
Meaning
Looking for a parking space.
!ID Driving into the parking space.
[£! Manoeuvring.
Lateral green lines: rearward extension of the vehicle. The displayed green lines repre-sent the area up to approximately 2 metres to the rear of the vehicle.
Horizontal red line: indicates the safety clearance. The horizontal red line ends ap--proximately 0.4 metres behind the vehicle on the road.
CD Road.
® Selected parking space.
0 Lines showing side limits of the selected parking space.
@ Rear limit of the parking space, e.g. kerb.
All references to the length of orientation lines ap-ply to a vehicle that is standing on a horizontal sur-face.
Cruise control system (CCS)
[QJ Introduction
This chapter contains information on the following subjects:
Indicator lamp . . . . . . . . . . . . . . . . . . 296 Using the cruise control system (CCS) . . 297
Parking using the rear view camera system
St Complete the following steps: ep
The requirements for parking while using 1. the rear view camera system must be fulfil-led =>page 292.
2. Position the vehicle in front of the parking space ® =>Fig. 235
3. Select reverse gear or move the selector lev-er to position R.
Reverse slowly and steer the vehicle [ID to
4.
ensure that the lateral yellow lines are aligned with the selected parking space @.
Observe the message Check road-way. => & in Introduction on page 292.
Position the vehicle in the selected parking 5. space so that the lateral green lines are aligned with the side limits @.
At the very latest, stop the vehicle[£] when 6. the horizontal red line reaches the rear limit, e.g. the kerb@.
The cruise control system (CCS) helps
to maintain a speed set by the driver.
Driver assist systems 295
Page 296 of 486

The cruise control system (CCS) is able to main-tain an individual set speed at forward speeds be-tween approx. 30 km/h (19 mph) and 180 km/h (112 mph).
The CCS slows the vehicle only by easing off the accelerator, not by actively braking. The CCS can-not maintain a constant speed when travelling downhill. The vehicle speed can Increase under its own weight. Shift down gear and brake the vehicle using the foot brake &.
Additional information and warnings:
• Changing gear 260
• Accessories, modifications, repairs and renewal of parts '*page 394
A WARNING
The use of the cruise control system (CCS) can lead to accidents and serious Injuries if traffic does not allow you to drive at a safe distance from the vehicle In front at a con-stant speed.
Indicator lamp
A WARNING (Continued)
• Never use the CCS In heavy traffic, with Insufficient distance from the vehicle ahead, on steep or winding roads, or on slippery road surfaces e.g. on snow, Ice, wet roads, loose chlpplngs or flooded roads.
• Never use the CCS when driving off-road or on unsurfaced roads.
• Adapt your speed and distance from the vehicles ahead to suit visibility, weather, road and traffic conditions.
• Always switch cruise control off after use to avoid unintentional operation.
• it Is dangerous to use a set speed that is too high for the prevailing road, traffic or weather conditions.
• The CCS cannot maintain a constant speed when travelling downhill. The vehicle speed can Increase under its own weight. Shift down a gear or brake the vehicle using the foot brake.
ro First read and observe the Introductory information and safety warnings & on page 295.
Lit up Possible cause
Cruise control system (CCS) is controlling the speed.
Several warning and indicator lamps will light up briefly as a functional check when the ignition is switched on. They will go out after a few seconds.
A WARNING
Failure to observe illuminated warning lamps and text messages can lead to your vehicle breaking down in traffic, and can cause acci-dent and serious injury.
• Never ignore any illuminated warning lamps or text messages.
296 I While drivrng
A WARNING (Continued)
• Stop the vehicle as soon as possible and when safe to do so.
CD
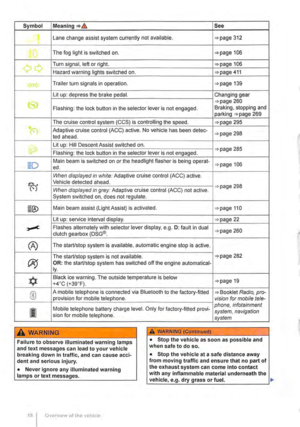
Failure to observe Illuminated Indicator lamps and text messages can lead to your vehicle be-Ing damaged.