2015 TATA SAFARI light
[x] Cancel search: lightPage 11 of 161

11
TERMS AND CONDITIONS TERMS AND CONDITIONSTERMS AND CONDITIONS TERMS AND CONDITIONS
TERMS AND CONDITIONSWARRANTY
services viz. oils & fluid changes, head
lamps focussing, fastener
retightening, wheel balancing, tyre
rotation, adjustment of valve
clearance, fuel timing, ignition timing
and consumables like bulbs, fuel
filters and oil filters etc. This warranty
shall not apply to any damage or
deterioration caused by
environmental pollution or bird
droppings. This warranty shall not
apply to V-belts, hoses and gas
leaks in case of air conditioned
vehicle. Slight irregularities not
recognised as affecting the
function or quality of the vehicle
or parts such as slight noise or
vibration and defects appearing
only under particular or irregular
operations or items considered
characteristic of the vehicle.
7. This warranty shall be null and
void if the vehicle is subjected to
abnormal use such as rallying,
racing or participation in any
other competitive sports. This
warranty shall not apply to anyrepairs or replacement as a result
of accident or collision.
8. This warranty is expressly in lieu of
all warranties, whether by law or
otherwise, expressed or implied,
and all other obligations or
liabilities on our part and we
neither assume nor authorise any
person to assume on our behalf,
any other liability arising from the
sale of the vehicle or any
agreement in relation thereto.
9. The buyer shall have no other
rights except those set out above
and have, particular, no right to
repudiate the sale, or any
agreement or to claim any
reduction in the purchase price
of the vehicle, or to demand any
damages or compensation for
losses, incidental or indirect, or
inconvenience or consequential
damages, loss of vehicle, or loss
of time, otherwise, incurred or
accrued.10. Any claim arising from this
warranty shall be recognised only
if it is notified in writing to us or
to our concerned dealer without
any delay soon after such defect
as covered and ascertained under
this warranty.
11. This warranty shall stand
terminated if the vehicle is
transferred or otherwise alienated
by the buyer without our prior
written consent.
12. We reserve our rights to make any
change or modification in the
design of the vehicle or its parts
or to introduce any improvement
therein or to incorporate in the
vehicle any additional part or
accessory at any time without
incurring any obligation to
incorporate the same in the
vehicles previously sold.
ProCarManuals.com
Page 24 of 161
24
Y O U R S A F E T YAIR BAGS (IF FITTED) AIR BAGS (IF FITTED)AIR BAGS (IF FITTED) AIR BAGS (IF FITTED)
AIR BAGS (IF FITTED)
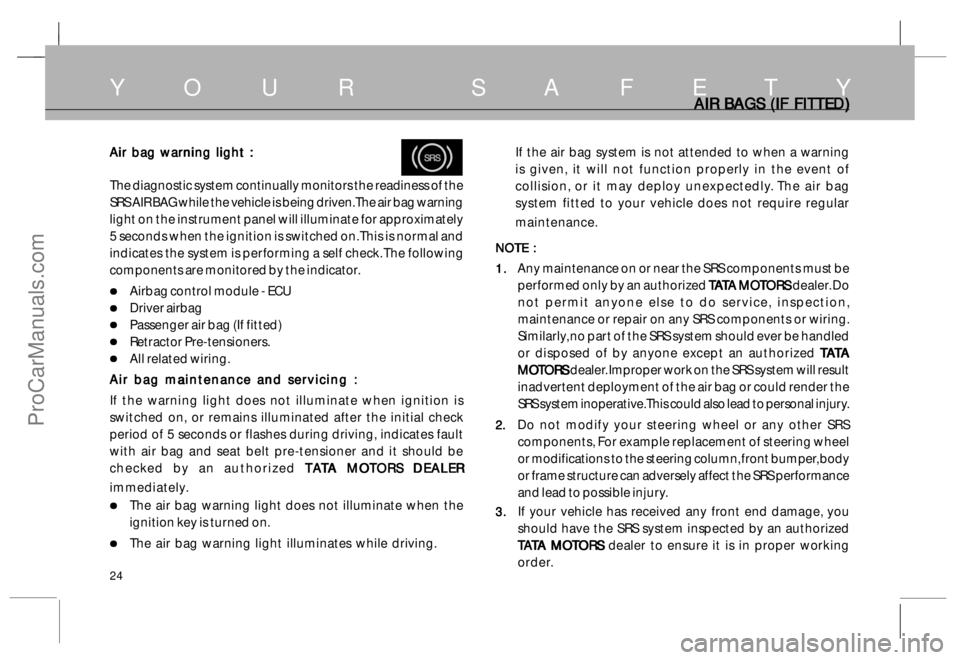
Air bag warning light : Air bag warning light :Air bag warning light : Air bag warning light :
Air bag warning light :
The diagnostic system continually monitors the readiness of the
SRS AIR BAG while the vehicle is being driven. The air bag warning
light on the instrument panel will illuminate for approximately
5 seconds when the ignition is switched on. This is normal and
indicates the system is performing a self check. The following
components are monitored by the indicator.
• •• •
•Airbag control module - ECU
• •• •
•Driver airbag
• •• •
•Passenger air bag (If fitted)
• •• •
•Retractor Pre-tensioners.
• •• •
•All related wiring.
Air bag maintenance and servicing : Air bag maintenance and servicing :Air bag maintenance and servicing : Air bag maintenance and servicing :
Air bag maintenance and servicing :
If the warning light does not illuminate when ignition is
switched on, or remains illuminated after the initial check
period of 5 seconds or flashes during driving, indicates fault
with air bag and seat belt pre-tensioner and it should be
checked by an authorized
TA TATA TA
TA
T TT T
T
A MO A MOA MO A MO
A MO
T TT T
T
ORS DEALER ORS DEALERORS DEALER ORS DEALER
ORS DEALER
immediately.
• •• •
•The air bag warning light does not illuminate when the
ignition key is turned on.
• •• •
•The air bag warning light illuminates while driving.If the air bag system is not attended to when a warning
is given, it will not function properly in the event of
collision, or it may deploy unexpectedly. The air bag
system fitted to your vehicle does not require regular
maintenance.
NOTE : NOTE :NOTE : NOTE :
NOTE :
1. 1.1. 1.
1.
Any maintenance on or near the SRS components must be
performed only by an authorized
T TT T
T
A AA A
A
T TT T
T
A MO A MOA MO A MO
A MO
T TT T
T
ORS ORS ORS ORS
ORS dealer. Do
not permit anyone else to do service, inspection,
maintenance or repair on any SRS components or wiring.
Similarly, no part of the SRS system should ever be handled
or disposed of by anyone except an authorized
T TT T
T
A AA A
A
T TT T
T
A AA A
A
MO MOMO MO
MO
T TT T
T
ORS ORS ORS ORS
ORS dealer. Improper work on the SRS system will result
inadvertent deployment of the air bag or could render the
SRS system inoperative. This could also lead to personal injury.
2. 2.2. 2.
2.Do not modify your steering wheel or any other SRS
components, For example replacement of steering wheel
or modifications to the steering column, front bumper, body
or frame structure can adversely affect the SRS performance
and lead to possible injury.
3. 3.3. 3.
3.If your vehicle has received any front end damage, you
should have the SRS system inspected by an authorized
T TT T
T
A AA A
A
T TT T
T
A MO A MOA MO A MO
A MO
T TT T
T
ORS ORS ORS ORS
ORS dealer to ensure it is in proper working
order.
SRS SRSSRS SRS
SRS
ProCarManuals.com
Page 30 of 161
30
D R I V I N G C O N T R O L S
ON ONON ON
ON
By turning key to this position all the remaining electrical systems
become operative. The glow plug indicator lights up. After a few seconds
depending on the ambient temperature it goes off. The engine is ready
for cranking.
ST STST ST
ST
AR ARAR AR
AR
T TT T
T
Turn the key further clockwise to the START position (spring loaded) to
start the engine. As soon as the engine starts release the ignition key to
ON position.
NOTICE NOTICENOTICE NOTICE
NOTICE
Do not crank the engine more than 10 secs. continuously. If the
engine does not start wait for 30 secs. before cranking it again.
Release the key immediately after starting the engine otherwise
starter motor/ flywheel ring may get damaged.
By turning the ignition key from ON position to ACC or LOCK position,
engine can be stopped.
STEERING L STEERING LSTEERING L STEERING L
STEERING L
OCK AND IGNITION SWIT OCK AND IGNITION SWITOCK AND IGNITION SWIT OCK AND IGNITION SWIT
OCK AND IGNITION SWIT
CH CHCH CH
CH
ProCarManuals.com
Page 32 of 161
32
D R I V I N G C O N T R O L SP PP P
P
ARKING BR ARKING BRARKING BR ARKING BR
ARKING BR
AKE AND GEAR SHIFT LE AKE AND GEAR SHIFT LEAKE AND GEAR SHIFT LE AKE AND GEAR SHIFT LE
AKE AND GEAR SHIFT LE
VER VERVER VER
VER
Parking Brake Parking BrakeParking Brake Parking Brake
Parking Brake
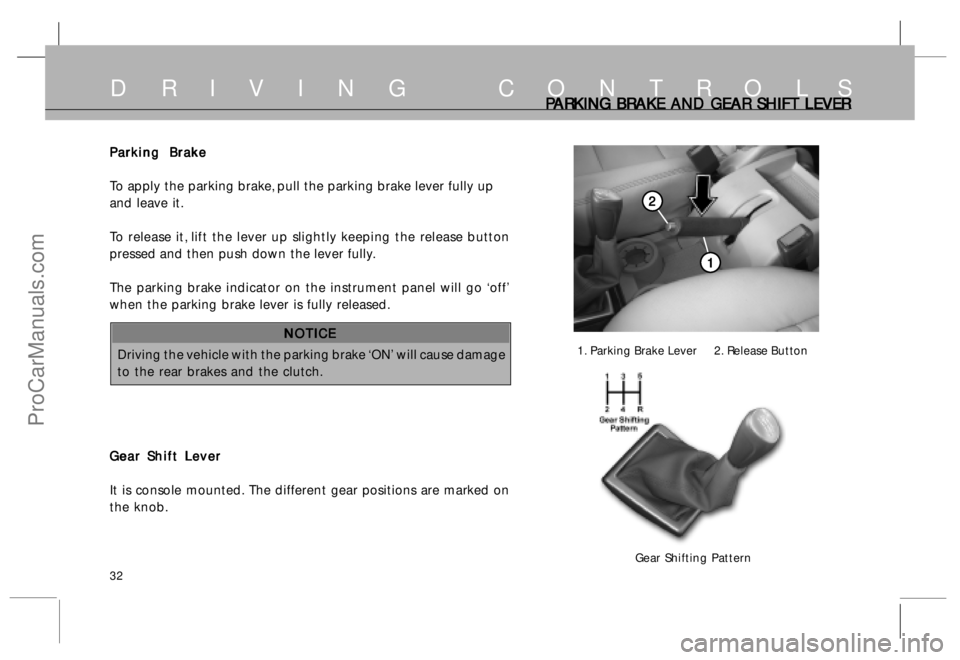
To apply the parking brake, pull the parking brake lever fully up
and leave it.
To release it, lift the lever up slightly keeping the release button
pressed and then push down the lever fully.
The parking brake indicator on the instrument panel will go ‘off’
when the parking brake lever is fully released.
NOTICE NOTICENOTICE NOTICE
NOTICE
Driving the vehicle with the parking brake ‘ON’ will cause damage
to the rear brakes and the clutch.
Gear Shift Lever Gear Shift LeverGear Shift Lever Gear Shift Lever
Gear Shift Lever
It is console mounted. The different gear positions are marked on
the knob.
1. Parking Brake Lever 2. Release Button
Gear Shifting Pattern
1 11 1
1
2 22 2
2
ProCarManuals.com
Page 33 of 161
33
C CC C
C
OMBI SWIT OMBI SWITOMBI SWIT OMBI SWIT
OMBI SWIT
CH CHCH CH
CH
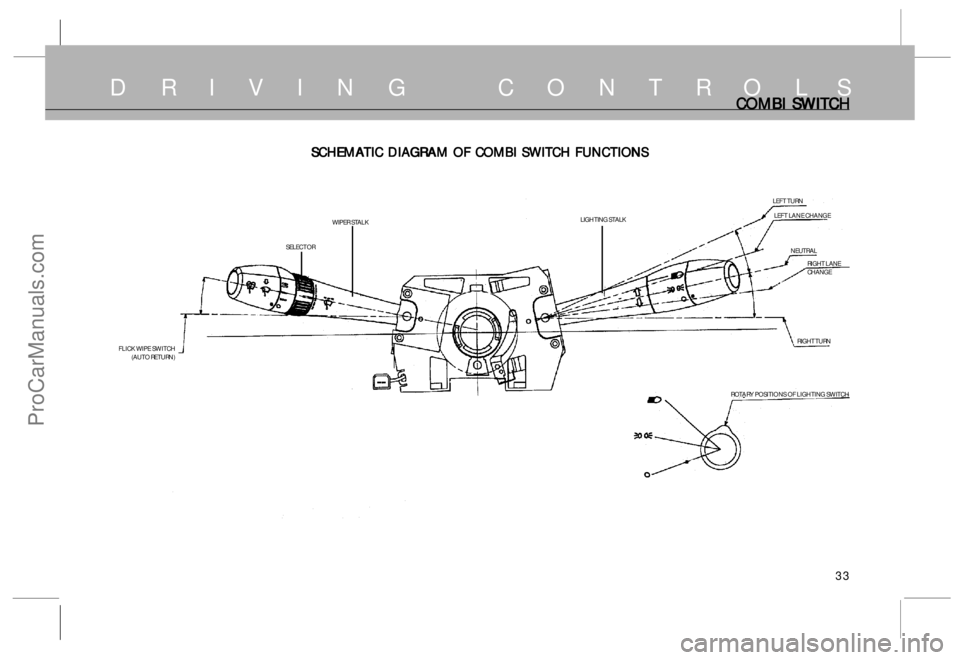
SCHEMA SCHEMASCHEMA SCHEMA
SCHEMA
TIC DIA TIC DIATIC DIA TIC DIA
TIC DIA
GR GRGR GR
GR
AM OF C AM OF CAM OF C AM OF C
AM OF C
OMBI SWIT OMBI SWITOMBI SWIT OMBI SWIT
OMBI SWIT
CH FUNCTIONS CH FUNCTIONSCH FUNCTIONS CH FUNCTIONS
CH FUNCTIONS
ROTARY POSITIONS OF LIGHTING SWITCHLEFT TURN
LEFT LANE CHANGE
NEUTRAL
RIGHT LANE
CHANGE
RIGHT TURN
FLICK WIPE SWITCH
(AUTO RETURN)LIGHTING STALK
WIPER STALK
SELECTOR
D R I V I N G C O N T R O L S
ProCarManuals.com
Page 37 of 161
37
D R I V I N G C O N T R O L SSTEERING STEERING STEERING STEERING
STEERING
WHEEL POSITION ADJUST WHEEL POSITION ADJUSTWHEEL POSITION ADJUST WHEEL POSITION ADJUST
WHEEL POSITION ADJUST
MENT MENTMENT MENT
MENT
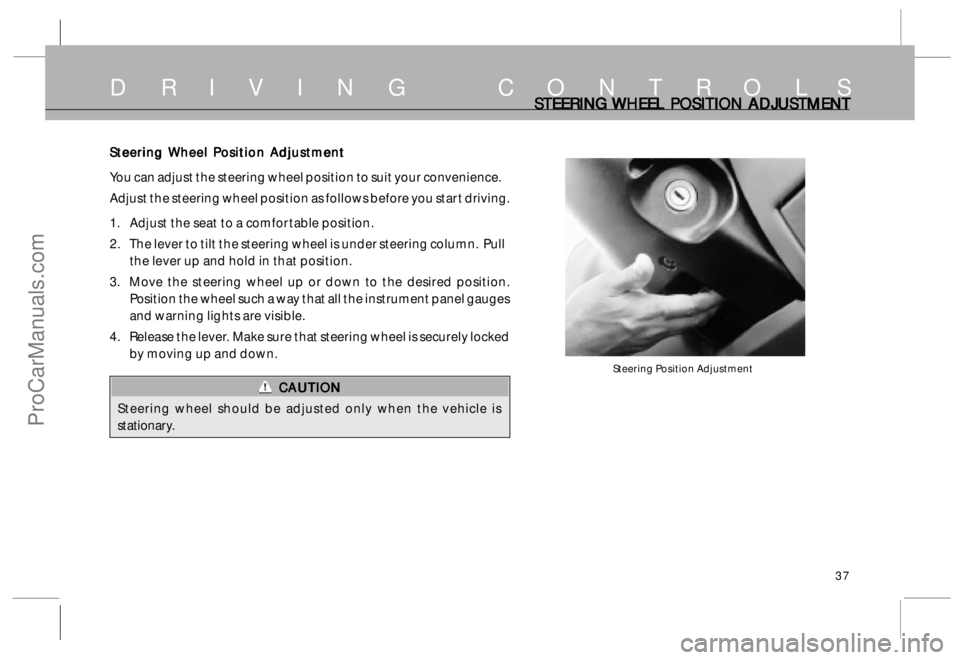
Steering Position Adjustment
Steering Wheel Position Adjustment Steering Wheel Position AdjustmentSteering Wheel Position Adjustment Steering Wheel Position Adjustment
Steering Wheel Position Adjustment
You can adjust the steering wheel position to suit your convenience.
Adjust the steering wheel position as follows before you start driving.
1. Adjust the seat to a comfortable position.
2. The lever to tilt the steering wheel is under steering column. Pull
the lever up and hold in that position.
3. Move the steering wheel up or down to the desired position.
Position the wheel such a way that all the instrument panel gauges
and warning lights are visible.
4. Release the lever. Make sure that steering wheel is securely locked
by moving up and down.
CAUTION CAUTIONCAUTION CAUTION
CAUTION
Steering wheel should be adjusted only when the vehicle is
stationary.
ProCarManuals.com
Page 39 of 161
39
D R I V I N G C O N T R O L SREAR REAR REAR REAR
REAR
WINDSHIELD DEMISTER AND HAZARD WINDSHIELD DEMISTER AND HAZARD WINDSHIELD DEMISTER AND HAZARD WINDSHIELD DEMISTER AND HAZARD
WINDSHIELD DEMISTER AND HAZARD
W WW W
W
ARNING ARNINGARNING ARNING
ARNING
Rear Windshield & Outside Rear View Mirror Demister (if fitted) Rear Windshield & Outside Rear View Mirror Demister (if fitted)Rear Windshield & Outside Rear View Mirror Demister (if fitted) Rear Windshield & Outside Rear View Mirror Demister (if fitted)
Rear Windshield & Outside Rear View Mirror Demister (if fitted)
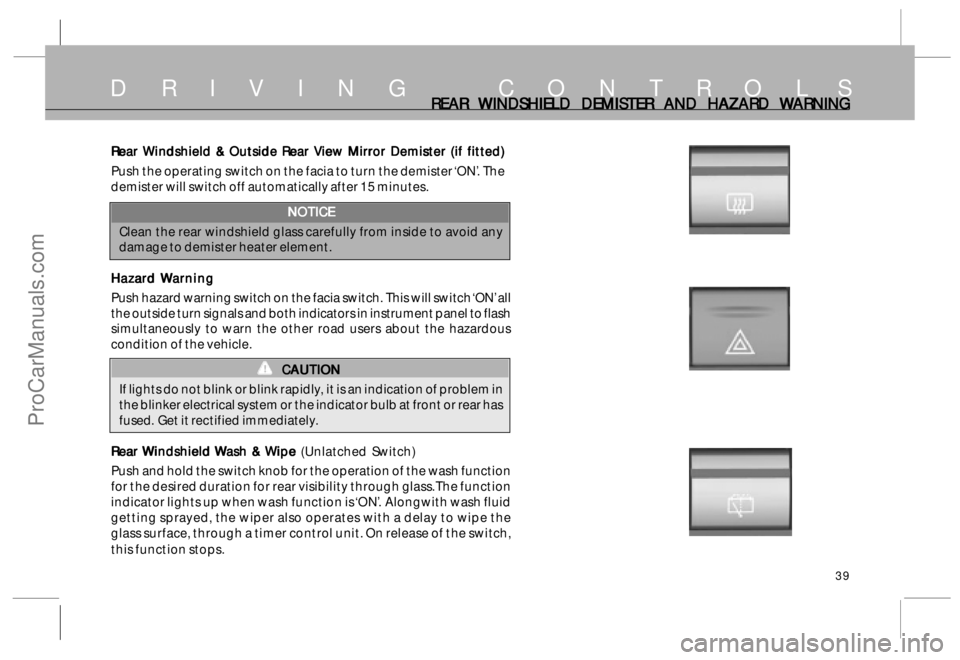
Push the operating switch on the facia to turn the demister ‘ON’. The
demister will switch off automatically after 15 minutes.
NOTICE NOTICENOTICE NOTICE
NOTICE
Clean the rear windshield glass carefully from inside to avoid any
damage to demister heater element.
Hazar HazarHazar Hazar
Hazar
d d d d
d
W WW W
W
ar arar ar
ar
ning ningning ning
ning
Push hazard warning switch on the facia switch. This will switch ‘ON’ all
the outside turn signals and both indicators in instrument panel to flash
simultaneously to warn the other road users about the hazardous
condition of the vehicle.
CAUTION CAUTIONCAUTION CAUTION
CAUTION
If lights do not blink or blink rapidly, it is an indication of problem in
the blinker electrical system or the indicator bulb at front or rear has
fused. Get it rectified immediately.
R RR R
R
ear ear ear ear
ear
W WW W
W
indshield indshield indshield indshield
indshield
W WW W
W
ash & ash & ash & ash &
ash &
W WW W
W
ip ipip ip
ip
e e e e
e (Unlatched Switch)
Push and hold the switch knob for the operation of the wash function
for the desired duration for rear visibility through glass. The function
indicator lights up when wash function is ‘ON’. Alongwith wash fluid
getting sprayed, the wiper also operates with a delay to wipe the
glass surface, through a timer control unit. On release of the switch,
this function stops.
ProCarManuals.com
Page 40 of 161
40
D R I V I N G C O N T R O L SREAR REAR REAR REAR
REAR
WINDSHIELD WINDSHIELD WINDSHIELD WINDSHIELD
WINDSHIELD
WASH & WASH & WASH & WASH &
WASH &
WIPE AND HEAD L WIPE AND HEAD LWIPE AND HEAD L WIPE AND HEAD L
WIPE AND HEAD L
AMP LE AMP LEAMP LE AMP LE
AMP LE
VELLING SWIT VELLING SWITVELLING SWIT VELLING SWIT
VELLING SWIT
CH CHCH CH
CH
Rear Windshield Wiper Rear Windshield Wiper Rear Windshield Wiper Rear Windshield Wiper
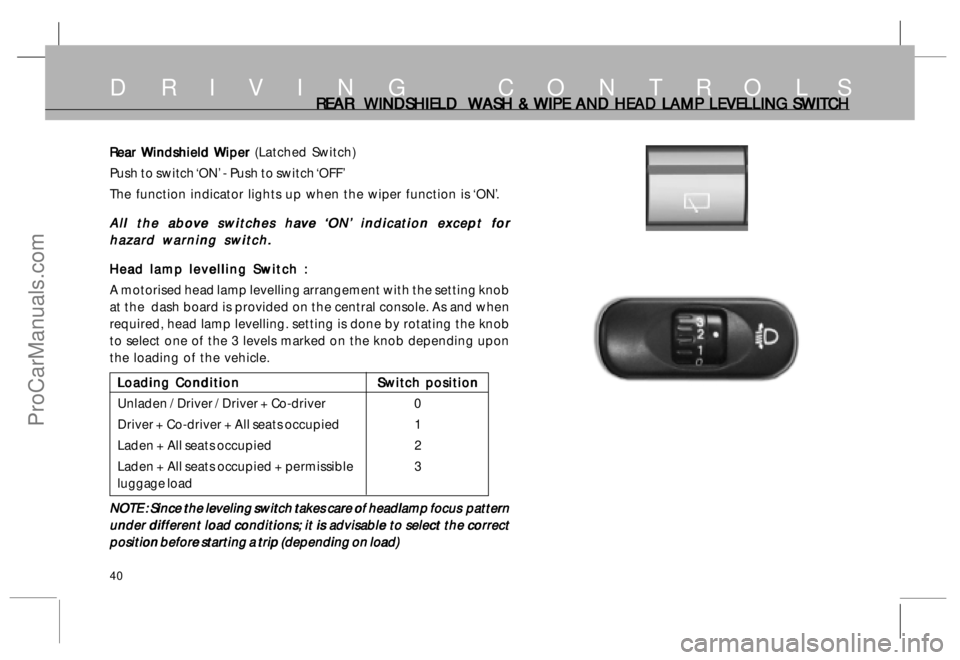
Rear Windshield Wiper (Latched Switch)
Push to switch ‘ON’ - Push to switch ‘OFF’
The function indicator lights up when the wiper function is ‘ON’.
A AA A
A
ll the ab ll the abll the ab ll the ab
ll the ab
o oo o
o
v vv v
v
e swit e swite swit e swit
e swit
ches ha ches haches ha ches ha
ches ha
v vv v
v
e e e e
e
‘‘ ‘‘
‘
ON’ ON’ON’ ON’
ON’
indic indic indic indic
indic
a aa a
a
tion e tion etion e tion e
tion e
x xx x
x
c cc c
c
ept f ept fept f ept f
ept f
or oror or
or
hazard warning switch. hazard warning switch.hazard warning switch. hazard warning switch.
hazard warning switch.
Head lamp levelling Switch Head lamp levelling Switch Head lamp levelling Switch Head lamp levelling Switch
Head lamp levelling Switch
:: ::
:
A motorised head lamp levelling arrangement with the setting knob
at the dash board is provided on the central console. As and when
required, head lamp levelling. setting is done by rotating the knob
to select one of the 3 levels marked on the knob depending upon
the loading of the vehicle.
Loading Condition Loading ConditionLoading Condition Loading Condition
Loading Condition
Switch position Switch positionSwitch position Switch position
Switch position
Unladen / Driver / Driver + Co-driver 0
Driver + Co-driver + All seats occupied 1
Laden + All seats occupied 2
Laden + All seats occupied + permissible 3
luggage load
NOTE : Since the leveling switch takes care of headlamp focus pattern NOTE : Since the leveling switch takes care of headlamp focus patternNOTE : Since the leveling switch takes care of headlamp focus pattern NOTE : Since the leveling switch takes care of headlamp focus pattern
NOTE : Since the leveling switch takes care of headlamp focus pattern
under different load conditions; it is advisable to select the correct under different load conditions; it is advisable to select the correctunder different load conditions; it is advisable to select the correct under different load conditions; it is advisable to select the correct
under different load conditions; it is advisable to select the correct
position before starting a trip (depending on load) position before starting a trip (depending on load)position before starting a trip (depending on load) position before starting a trip (depending on load)
position before starting a trip (depending on load)
ProCarManuals.com