Page 14 of 341
12
208_en_Chap02_ Acces-Demarrage_ed01-2015
F A press switches on the vehicle's
lighting and flashes the direction
indicators for a few seconds to
help you locate your vehicle in a
car park.
Locating your vehicle
Guide-me-home lighting
Make a long press on this button to
operate the guide-me-home lighting
(switching on the sidelamps, dipped
beams and number plate lamps).
A second press before the end of the timed
period cancels the guide-me-home lighting.
Access to the rear seats
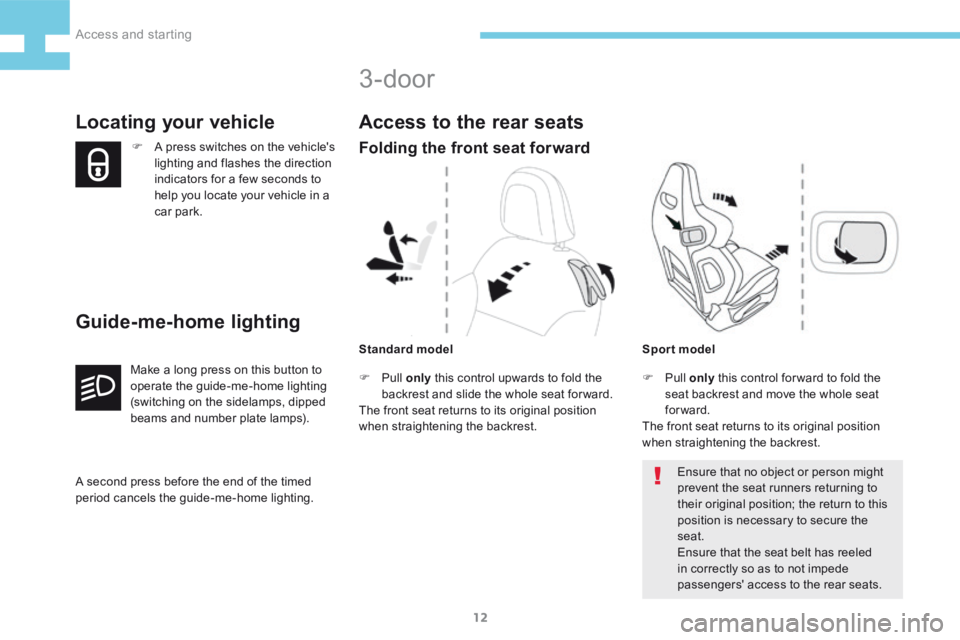
Folding the front seat forward
Ensure that no object or person might
prevent the seat runners returning to
their original position; the return to this
position is necessary to secure the
seat.
Ensure that the seat belt has reeled
in correctly so as to not impede
passengers' access to the rear seats.
Sport model
3-door
Standard model
F Pull
only this control upwards to fold the
backrest and slide the whole seat for ward.
The front seat returns to its original position
when straightening the backrest. F Pull
only this control for ward to fold the
seat backrest and move the whole seat
forward.
The front seat returns to its original position
when straightening the backrest.
Access and starting
Page 59 of 341
57
208_en_Chap03_Indicateurs_ed01-2015
Oil level
PrincipleAdvice
Dipstick
Refer to the "Checks" section to locate the
dipstick and the oil filler cap on your engine.
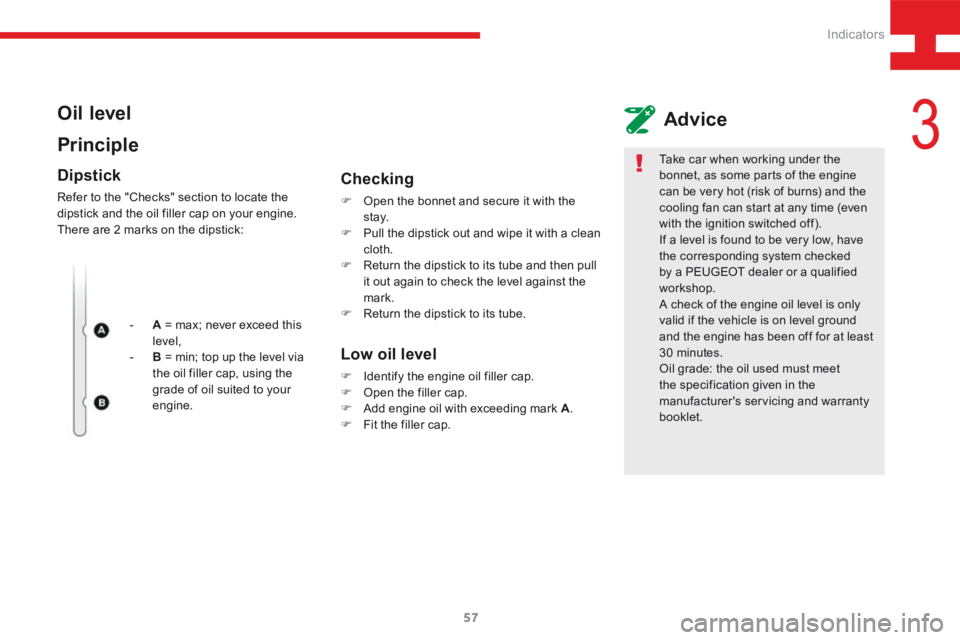
There are 2 marks on the dipstick:
- A = max; never exceed this
level,
- B = min; top up the level via
the oil filler cap, using the
grade of oil suited to your
engine.
Checking
F Open the bonnet and secure it with the
st ay.
F Pull the dipstick out and wipe it with a clean
cloth.
F Return the dipstick to its tube and then pull
it out again to check the level against the
mark.
F Return the dipstick to its tube.
Low oil level
F Identify the engine oil filler cap.
F Open the filler cap.
F Add engine oil with exceeding mark A .
F Fit the filler cap. Take car when working under the
bonnet, as some parts of the engine
can be very hot (risk of burns) and the
cooling fan can start at any time (even
with the ignition switched off).
If a level is found to be very low, have
the corresponding system checked
by a PEUGEOT dealer or a qualified
workshop.
A check of the engine oil level is only
valid if the vehicle is on level ground
and the engine has been off for at least
30 minutes.
Oil grade: the oil used must meet
the specification given in the
manufacturer's servicing and warranty
booklet.
3
Indicators
Page 70 of 341
68
208_en_Chap04_confort_ed01-2015
When folding the seat, the centre seat
belt should not be fastened, but laid out
flat on the seat.
The rear seat cushion does not fold,
just the seat backrest can be folded to
increase the boot loading space.Head restraints
These have one position for use (up) and a
stowed position (down).
They can be removed and are interchangeable
side to side.
To remove a head restraint:
F pull the head restraint fully up,
F then, press the lug A . When repositioning the seat backrest,
take care not to trap the seat belts.
Repositioning the seat backrest
F
Raise the seat backrest 2 .
F Secure it, checking that the red indicator in
the control 1 is no longer visible.
F Unbuckle and reposition the seat belts
ready for use.
F Refit the head restraint(s). Never drive with the head restraints
removed; they must be fitted and
correctly adjusted.
Comfort
Page 88 of 341
86
208_en_Chap04_confort_ed01-2015
Maintenance
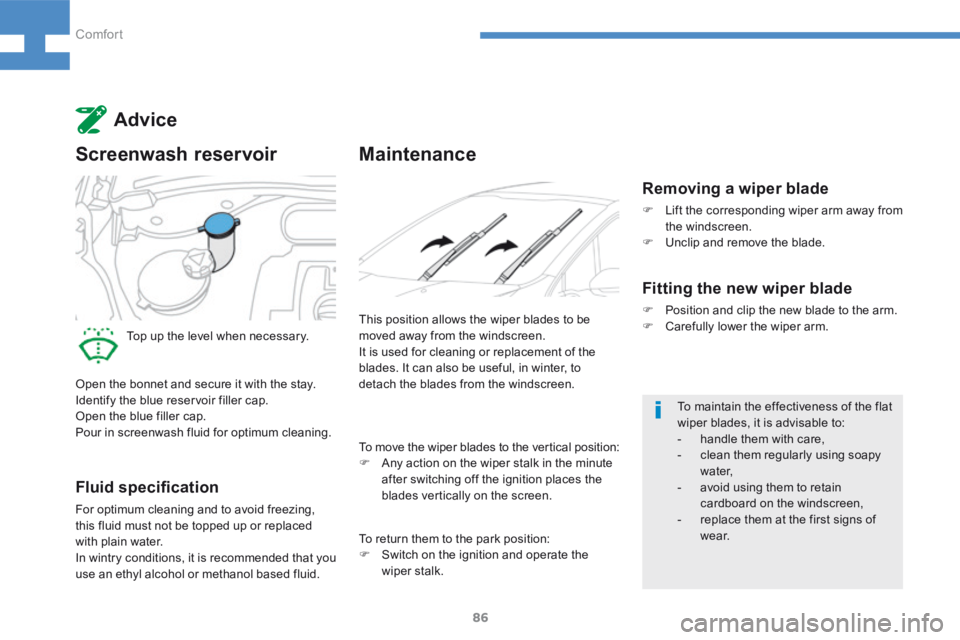
This position allows the wiper blades to be
moved away from the windscreen.
It is used for cleaning or replacement of the
blades. It can also be useful, in winter, to
detach the blades from the windscreen.To maintain the effectiveness of the flat
wiper blades, it is advisable to:
- handle them with care,
- clean them regularly using soapy
water,
- avoid using them to retain
cardboard on the windscreen,
- replace them at the first signs of
w e a r.
To move the wiper blades to the vertical position:
F
Any action on the wiper stalk in the minute
after switching off the ignition places the
blades vertically on the screen.
Advice
Screenwash reservoir
Top up the level when necessary.
Open the bonnet and secure it with the stay.
Identify the blue reservoir filler cap.
Open the blue filler cap.
Pour in screenwash fluid for optimum cleaning.
Fluid specification
For optimum cleaning and to avoid freezing,
this fluid must not be topped up or replaced
with plain water.
In wintry conditions, it is recommended that you
use an ethyl alcohol or methanol based fluid.
Removing a wiper blade
F Lift the corresponding wiper arm away from
the windscreen.
F Unclip and remove the blade.
Fitting the new wiper blade
F Position and clip the new blade to the arm.
F Carefully lower the wiper arm.
To return them to the park position:
F Switch on the ignition and operate the
wiper stalk.
Comfort
Page 95 of 341
93
208_en_Chap04_confort_ed01-2015
Secured by a 3-point seat belt
Group 0+: from bir th to 13 kgL1
"RÖMER Baby-Safe Plus"
Installed in the rearward facing position.
Groups 2 and 3: from 15 to 36 kg L4
"KLIPPAN Optima"
From 22 kg (approximately 6 years), the booster is used on its own.
L5
"RÖMER KIDFIX"
Can be fitted to the vehicle's ISOFIX mountings. The child is restrained by the seat belt.
PEUGEOT offers a range of recommended child seats which are secured using a three point seat
belt
.
4
Comfort
Page 96 of 341
94
208_en_Chap04_confort_ed01-2015
Locations for child seats
Weight of the child / indicative age
Seat Less than 13 kg
(groups 0 (b) and 0+) Up to 1 year approx From 9 to 18 kg
(g r o u p 1)
From 1 to 3 years approx
From 15 to 25 kg
(group 2)
From 3 to 6 years approx From 22 to 36 kg
(group 3)
From 6 to 10 years approx
Front passenger seat (c), (e)
- with height adjustment U(R) U(R) U(R)U(R)
- without height adjustment U* U* U* U*
Outer rear seats (d) UUUU
Centre rear seat (d) U (f )U (f ) UU
Child seats secured with the seat belt
In accordance with the European regulation, this table indicates the options for the installation of child seats secured using the seat belt and universally
approved (a) in relation to the weight of the child and the seat in the vehicle.
Comfort
Page 97 of 341
95
208_en_Chap04_confort_ed01-2015
U: seat suitable for the installation of a child
seat secured using the seat belt and
universally approved rear ward facing and/or
forward facing.
U(R) : as for U , the vehicle seat must be
adjusted to the highest and fully back
position.
U* : as for U , straightening the backrest. (a)
universal child seat: child seat which can be
installed in all vehicles using the seat belt.
(b) group 0: from birth to 10 kg. Infant car seats
and "car cots" cannot be installed on the
front passenger seat.
(c) consult the legislation in force in your
country before installing your child on this
seat.
(d) to install a child seat on a rear seat,
rear ward or for ward facing, move the front
seat for ward, then straighten the backrest to
allow enough room for the child seat and the
child's legs.
(e) When a rear ward facing child seat is
installed on the front passenger seat, the
passenger's airbag must be deactivated.
Otherwise, the child risks being seriously
injured or killed if the airbag is deployed.
When a for ward facing child seat is installed
on the front passenger seat, the passenger's
airbag must remain activate.
(f) A child seat with support leg must never be
installed on this passenger seat.
4
Comfort
Page 98 of 341
96
208_en_Chap04_confort_ed01-2015
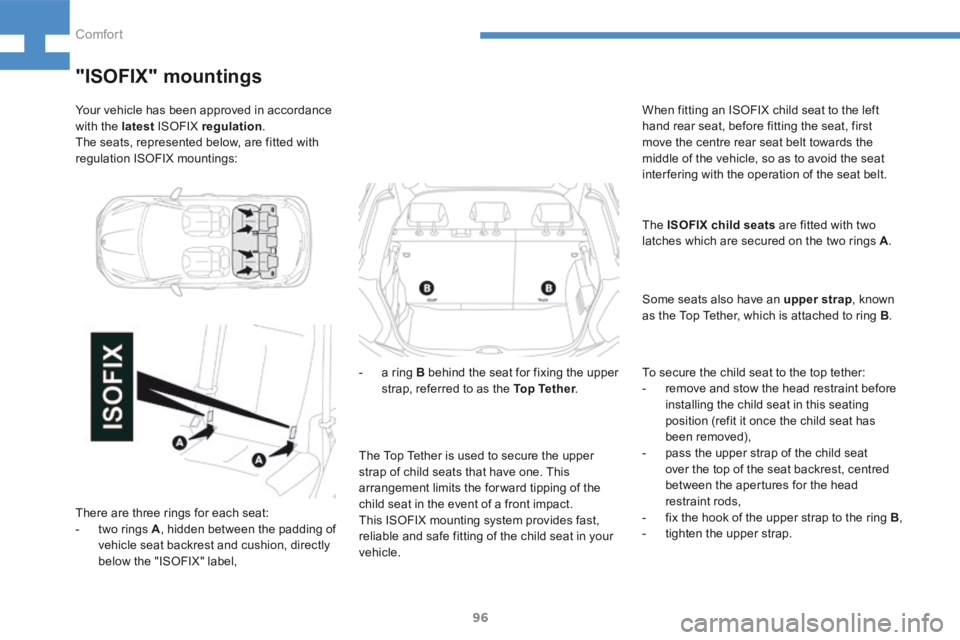
Your vehicle has been approved in accordance
with the latest ISOFIX regulation .
The seats, represented below, are fitted with
regulation ISOFIX mountings:
"ISOFIX" mountings
There are three rings for each seat:
- two rings A , hidden between the padding of
vehicle seat backrest and cushion, directly
below the "ISOFIX" label, The Top Tether is used to secure the upper
strap of child seats that have one. This
arrangement limits the forward tipping of the
child seat in the event of a front impact.
This ISOFIX mounting system provides fast,
reliable and safe fitting of the child seat in your
vehicle. -
a ring B behind the seat for fixing the upper
strap, referred to as the Top Tether .When fitting an ISOFIX child seat to the left
hand rear seat, before fitting the seat, first
move the centre rear seat belt towards the
middle of the vehicle, so as to avoid the seat
interfering with the operation of the seat belt.
The ISOFIX child seats are fitted with two
latches which are secured on the two rings A
.
Some seats also have an upper strap , known
as the Top Tether, which is attached to ring B .
To secure the child seat to the top tether:
- remove and stow the head restraint before
installing the child seat in this seating
position (refit it once the child seat has
been removed),
- pass the upper strap of the child seat
over the top of the seat backrest, centred
between the apertures for the head
restraint rods,
- fix the hook of the upper strap to the ring B ,
- tighten the upper strap.
Comfort