2015 MITSUBISHI OUTLANDER SPORT wheel
[x] Cancel search: wheelPage 134 of 384
Cruise control (if so equipped) Features and controls 5-71
5
N00546300031 N00518301600
Cruise control is an automatic speed control system that keeps a set speed. It can be acti- vated at speeds from about 25 mph(40 km/h). Cruise control does not work at speeds below about 25 mph (40 km/h).To w i n g
CAUTION When towing the vehicle with only the front wheels or only the rear wheels raised off the ground, do not place the ignition switch in the “ON” position or do not put the operationmode in ON. Placing the ignition switch in the “ON” position or putting the operation mode in ON could cause the ASC to operate,resulting in an accident. Note that the correct towing method depends on the transmission type and the vehicle’sdrive configuration. For details, refer to “Towing” on page 8-12.
Cruise control (if so equipped)
CAUTION When you do not wish to drive at a set speed, turn off the cruise control for safety.
Do not use cruise control when driving con- ditions will not allow you to stay at the same speed, such as in heavy traffic or on roads that are winding, icy, snow-covered, wet, slippery, on a steep downhill slope. On vehicles equipped with manual transaxle, do not move the gearshift lever to the “N”(Neutral) position while driving at a set speed without depressing the clutch pedal. The engine will run too fast and might bedamaged.NOTE
Cruise control may not be able to keep your speed on uphills or downhills. Your speed may decrease on a steep uphill. You may use the accelerator pedal if you want to stay at your set speed. Your speed may increase to more than the set speed on a steep downhill. You have to usethe brake to control your speed. As a result, the set speed driving is deactivated.CAUTION
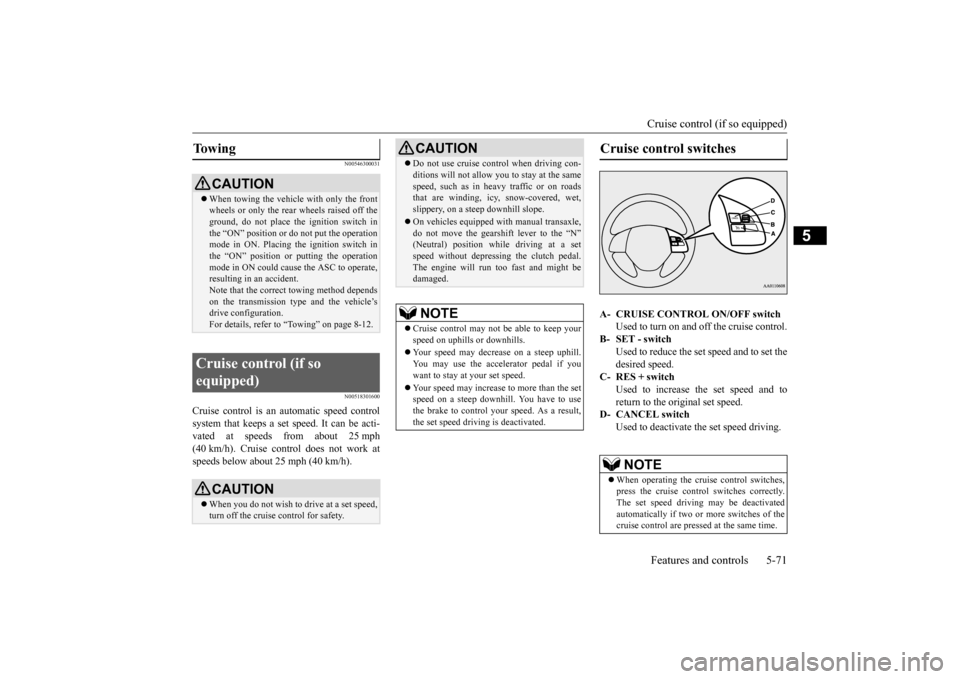
Cruise control switches A- CRUISE CONTROL ON/OFF switch
Used to turn on and off the cruise control.
B- SET - switch
Used to reduce the set speed and to set the desired speed.
C- RES + switch
Used to increase the set speed and toreturn to the original set speed.
D- CANCEL switch
Used to deactivate the set speed driving.NOTE
When operating the cruise control switches, press the cruise control switches correctly.The set speed driving may be deactivated automatically if two or more switches of the cruise control are pressed at the same time.
BK0206700US.bo
ok 71 ページ 2014年3月25日 火曜日 午後4時42分
Page 138 of 384
Tire pressure monitoring system
Features and controls 5-75
5
When the active stability control (ASC) starts operating. Refer to “Active stability control (ASC)” on page 5-68.
Also, the set speed driving may be deacti- vated as follows: When the engine speed rises and approaches the tachometer’s red zone (the red-colored part of the tachometer dial).
N00518901329
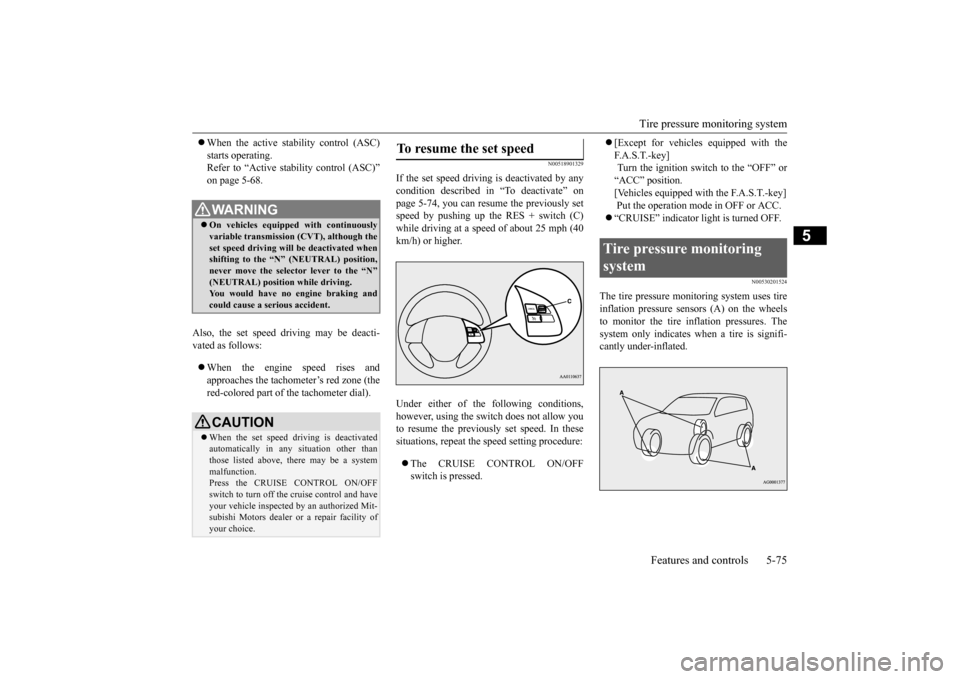
If the set speed driving is deactivated by any condition described in “To deactivate” onpage 5-74, you can resume the previously set speed by pushing up the RES + switch (C) while driving at a speed of about 25 mph (40km/h) or higher. Under either of the following conditions, however, using the switch does not allow you to resume the previously set speed. In thesesituations, repeat the speed setting procedure: The CRUISE CONTROL ON/OFF switch is pressed.
[Except for vehicles equipped with the F. A . S . T. - k e y ] Turn the ignition switch to the “OFF” or “ACC” position.[Vehicles equipped with the F.A.S.T.-key] Put the operation mode in OFF or ACC. “CRUISE” indicator light is turned OFF.
N00530201524
The tire pressure monitoring system uses tire inflation pressure sensors (A) on the wheels to monitor the tire inflation pressures. Thesystem only indicates when a tire is signifi- cantly under-inflated.
WA R N I N G On vehicles equipped with continuously variable transmission (CVT), although theset speed driving will be deactivated when shifting to the “N” (NEUTRAL) position, never move the selector lever to the “N”(NEUTRAL) position while driving. You would have no engine braking and could cause a serious accident.CAUTION When the set speed driving is deactivated automatically in any situation other than those listed above, there may be a system malfunction.Press the CRUISE CONTROL ON/OFF switch to turn off the cruise control and have your vehicle inspected by an authorized Mit-subishi Motors dealer
or a repair facility of
your choice.
To resume the set speed
Tire pressure monitoring system
BK0206700US.bo
ok 75 ページ 2014年3月25日 火曜日 午後4時42分
Page 139 of 384
Tire pressure monitoring system 5-76 Features and controls
5
N00532700281
When the ignition switch is turned to the “ON” position or the operation mode is put in ON, the tire pressure monitoring system
warning light normally illuminates and goes off a few seconds later. If one or more of the vehicle tires (except for the spare tire) is significantly under-inflated, the warning light will remain illuminatedwhile the ignition switch or the operation mode is in ON. Refer to “If the warning light / display illumi-nates while driving” on page 5-78 and take the necessary measures. Ty p e 1 Ty p e 2
WA R N I N G The compact spare wheel does not have a tire inflation pressure sensor. When the spare tire is used, the tire pres- sure monitoring system will not work properly.See an authorized Mitsubishi Motors dealer as soon as possible to replace or repair the original tire.NOTE
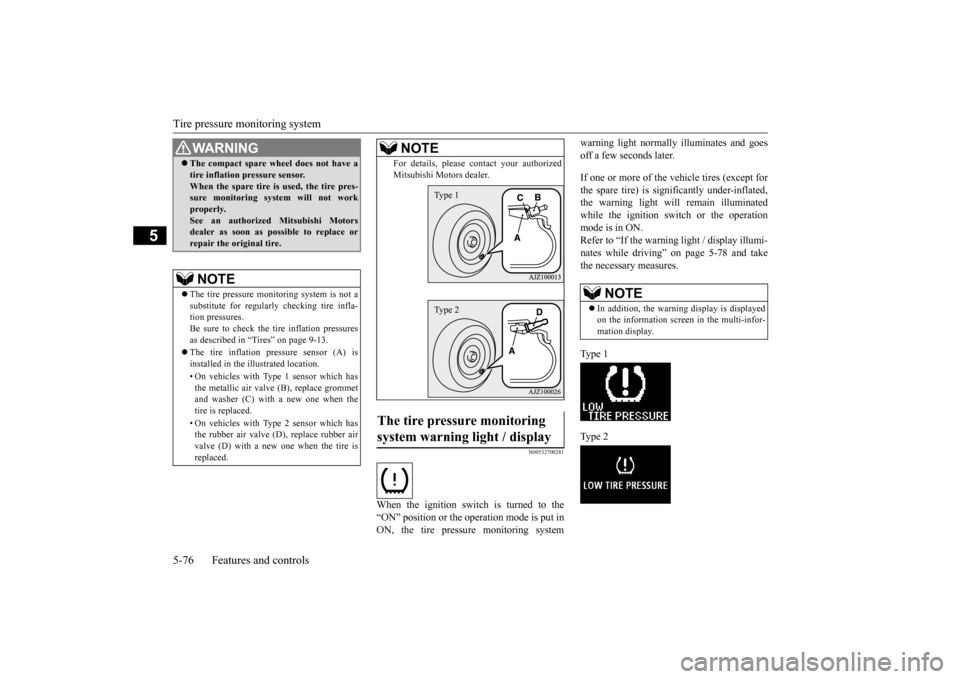
The tire pressure monitoring system is not a substitute for regularly checking tire infla- tion pressures.Be sure to check the tire inflation pressures as described in “Tires” on page 9-13. The tire inflation pressure sensor (A) is installed in the illustrated location. • On vehicles with Type 1 sensor which has the metallic air valve (B), replace grommet and washer (C) with a new one when thetire is replaced. • On vehicles with Type 2 sensor which has the rubber air valve (D), replace rubber air valve (D) with a new one when the tire is replaced.
For details, please contact your authorized Mitsubishi Motors dealer.
The tire pressure monitoring system warning light / display
NOTE
Type 1Type 2
NOTE
In addition, the warning display is displayed on the information screen in the multi-infor- mation display.
BK0206700US.bo
ok 76 ページ 2014年3月25日 火曜日 午後4時42分
Page 141 of 384
Tire pressure monitoring system 5-78 Features and controls
5
TPMS malfunctions may occur for a variety of reasons, including the installation of replacement or alternate tires or wheels on the vehicle that prevent the TPMS from function-ing properly. Always check the TPMS mal- function telltale after replacing one or more tires or wheels on your vehicle to ensure thatthe replacement or alternate tires and wheels allow the TPMS to continue to function prop- erly.
N00532801524
1. If the tire pressure monitoring systemwarning light illuminates, avoiding hardbraking, sharp steering maneuvers and high speeds. You should stop and adjust the tires to the proper inflation pressure assoon as possible. Adjust the spare tire at the same time. Refer to “Tires” on page 9-13.
2. If the tire pressure monitoring system warning light remains illuminated after you have been driving for about 20 min- utes after you adjust the tire inflation pres-sure, one or more of the tires may have a puncture. Inspect the tire and if it has a puncture, have it repaired by an autho-rized Mitsubishi Motors dealer as soon as possible.
The tire pressure monitoring system may not work normally in the following circum- stances: A wireless facility or device using the same frequency is near the vehicle. Snow or ice is stuck inside the fenders and/or on the wheels. The tire inflation pressure sensor’s battery is dead.
If the warning light/display illu- minates while driving
NOTE
In addition, the warning display is displayed on the information screen in the multi-infor- mation display. When inspecting or adjusting the tire pres- sure, do not apply excessive force to the valve stem to avoid breakage.
After inspecting or adjusting the tire pres- sure, always reinstall the valve cap on the valve stem. Without the valve cap, dirt or moisture could get into the valve, resulting in damage to thetire inflation pressure sensor. Do not use metal valve caps, which may cause a metal reaction, resulting in corrosion and damage of the tire inflation pressure sen- sors. Once adjustments have been made, the warn- ing light will go off after a few minutes ofdriving.WA R N I N G If the warning light/display illuminates while you are driving, avoid hard braking, sharp steering maneuvers and high speeds.Driving with an under-inflated tire adversely affects vehicle performance and can result in an accident.NOTE
CAUTION If a tire has a puncture, replace that tire with the spare tire. Driving on a punctured tire could lead to an accident. The warning light/display may not illuminate immediately in the event of a tire blowout or rapid leak.NOTE
To avoid the risk of damage to the tire infla- tion pressure sensors, have any punctured tire repaired by an authorized Mitsubishi Motors dealer. If the tire repair is not done byan authorized Mitsubishi Motors dealer, it is not covered by your warranty. Do not use an aerosol puncture-repair spray on any tire. Such a spray could damage the tire inflationpressure sensors. Have any puncture repaired by an authorized Mitsubishi Motors dealer.
BK0206700US.bo
ok 78 ページ 2014年3月25日 火曜日 午後4時42分
Page 142 of 384
Rear-view camera (if so equipped)
Features and controls 5-79
5
Wheels other than Mitsubishi genuine wheels are being used. Wheels that are not fitted with tire infla- tion pressure sensors are being used. Wheels whose ID codes are not memo- rized by the vehicle are used. Compact spare tire is fitted on a road wheel. A window tint that affects the radio wave signals is installed.
N00532901192
If new wheels with new tire inflation pressure sensors are installed, their ID codes must be programmed into the tire pressure monitoringsystem. Have the tire and wheel replacement performed by an authorized Mitsubishi Motors dealer to avoid the risk of damagingthe tire inflation pressure sensors. If the
wheel replacement is not done by an autho- rized Mitsubishi Motors dealer, it is not cov- ered by your warranty.
N00533001246
Your tire pressure monitoring system oper- ates on a radio frequency subject to Federal Communications Commission (FCC) Rules (For vehicles sold in U.S.A.) and IndustryCanada Rules (For vehicles sold in Canada). This device complies with part 15 of FCC Rules and Industry Canada licence-exemptRSS standard(s). Operation is subject to
the following two con-
ditions. This device may not cause harmful inter- ference. This device must accept any interference received, including interference that maycause undesired operation.
N00546201183
When the gearshift lever or the selector lever is in the “R” position with the ignition switch or the operation mode is in ON, the rear-viewimage will be displayed on the screen of the Mitsubishi Multi-Communication System or the DISPLAY AUDIO in the center panel.When the gearshift lever or the selector lever is shifted out of the “R” position, the rear- view image will go off.
NOTE
Tire inflation pressures vary with the ambi- ent temperature. If the
vehicle is subjected to
large variations in ambient temperature, the tire inflation pressures may be under-inflated (causing the warning light/display to comeon) when the ambient temperature is rela- tively low. If the warning light/display comes on, adjust the tire inflation pressure.
Whenever the tires and wheels are replaced with new ones
CAUTION The use of non-genuine wheels will prevent the proper fit of the tire inflation pressure sensors, resulting air leakage or damage of the sensors.
General information
CAUTION Changes or modifications not expressly approved by the manufacturer for compli- ance could void the user’s authority to oper- ate the equipment.
Rear-view camera (if so equipped)
WA R N I N G Never rely solely on the rear-view camera to clear the area behind your vehicle. Always check visually behind and all around your vehicle for persons, animals, obstructions or other vehicles. Failure todo so can result in vehicle damage, serious injury or death. The rear-view camera is an aid system for backing up, but it is not a substitute for your visual confirmation.
BK0206700US.bo
ok 79 ページ 2014年3月25日 火曜日 午後4時42分
Page 146 of 384
Multi-information display
Features and controls 5-83
5
N00555000265
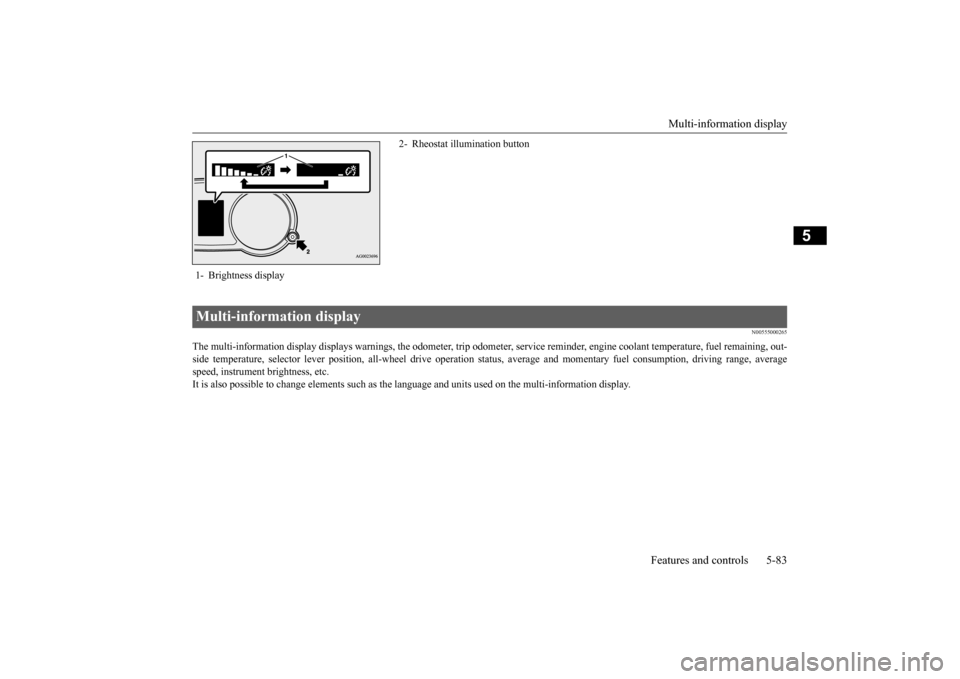
The multi-information display displays warnings, the odometer, tr
ip odometer, service reminder, engine coolant temperature, fue
l remaining, out-
side temperature, selector lever position, all-wheel drive opera
tion status, average and momentar
y fuel consumption, driving ra
nge, average
speed, instrument brightness, etc.It is also possible to change elements such as the
language and units used on the multi-information display.
1- Brightness display
2- Rheostat illumination button
Multi-information display
BK0206700US.bo
ok 83 ページ 2014年3月25日 火曜日 午後4時42分
Page 190 of 384
Headlight leveling switch (if so equipped)
Features and controls 5-127
5
N00537100105
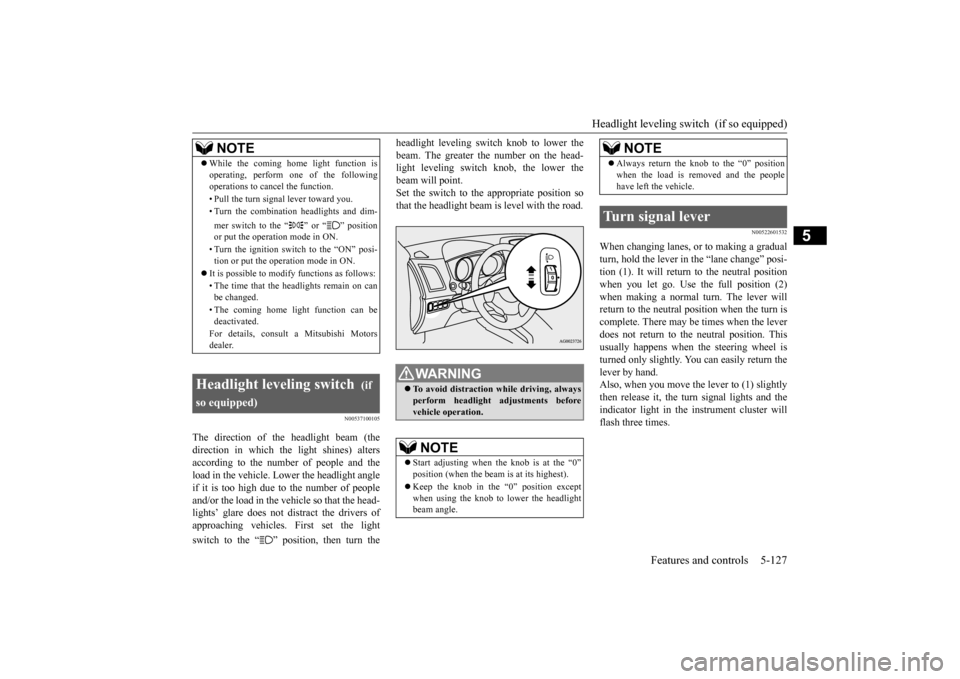
The direction of the headlight beam (the direction in which the light shines) altersaccording to the number of people and the load in the vehicle. Lower the headlight angle if it is too high due to the number of peopleand/or the load in the vehicle so that the head- lights’ glare does not distract the drivers of approaching vehicles. First set the light switch to the “ ” position, then turn the
headlight leveling switch knob to lower the beam. The greater the number on the head- light leveling switch knob, the lower the beam will point.Set the switch to the appropriate position so that the headlight beam is level with the road.
N00522601532
When changing lanes, or to making a gradual turn, hold the lever in
the “lane change” posi-
tion (1). It will return to the neutral positionwhen you let go. Use
the full position (2)
when making a normal turn. The lever will return to the neutral position when the turn iscomplete. There may be times when the lever does not return to the neutral position. This usually happens when the steering wheel isturned only slightly. You can easily return the lever by hand. Also, when you move the lever to (1) slightlythen release it, the turn signal lights and the indicator light in the instrument cluster will flash three times.
NOTE
While the coming home light function is operating, perform one of the following operations to cancel the function. • Pull the turn signal lever toward you.• Turn the combination headlights and dim- mer switch to the “ ” or “ ” position or put the operation mode in ON. • Turn the ignition switch to the “ON” posi- tion or put the operation mode in ON.
It is possible to modify functions as follows: • The time that the headlights remain on can be changed. • The coming home light function can be deactivated. For details, consult a Mitsubishi Motors dealer.
Headlight leveling switch
(if
so equipped)
WA R N I N G To avoid distraction while driving, always perform headlight adjustments beforevehicle operation.NOTE
Start adjusting when
the knob is at the “0”
position (when the beam is at its highest). Keep the knob in the “0” position except when using the knob to lower the headlightbeam angle.
Always return the knob to the “0” position when the load is removed and the people have left the vehicle.
Turn signal lever
NOTE
BK0206700US.book
127 ページ 2014年3月25日 火曜日 午後4時42分
Page 197 of 384
Electric rear window defogger switch 5-134 Features and controls
5
N00523700373
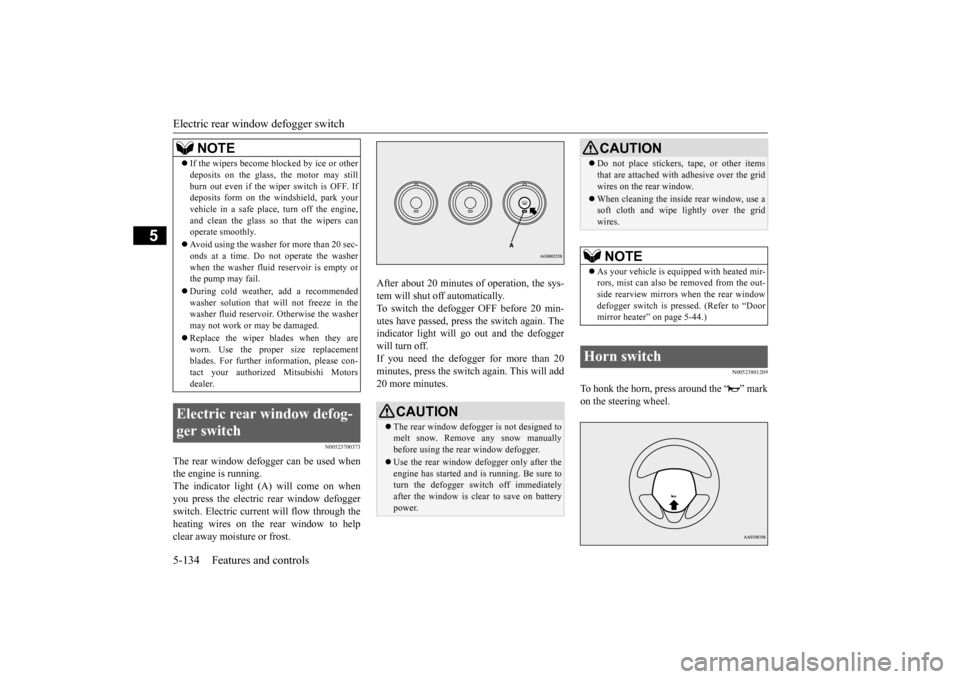
The rear window defogger can be used when the engine is running.The indicator light (A) will come on when you press the electric rear window defogger switch. Electric current will flow through theheating wires on the rear window to help clear away moisture or frost.
After about 20 minutes of operation, the sys- tem will shut off automatically. To switch the defogger OFF before 20 min-utes have passed, press the switch again. The indicator light will go out and the defogger will turn off.If you need the defogger for more than 20minutes, press the switch again. This will add 20 more minutes.
N00523801209
To honk the horn, press around the “ ” mark on the steering wheel.
If the wipers become blocked by ice or other deposits on the glass, the motor may still burn out even if the wiper switch is OFF. If deposits form on the windshield, park your vehicle in a safe place, turn off the engine,and clean the glass so that the wipers can operate smoothly. Avoid using the washer for more than 20 sec- onds at a time. Do not operate the washer when the washer fluid reservoir is empty orthe pump may fail. During cold weather, add a recommended washer solution that will not freeze in the washer fluid reservoir. Otherwise the washer may not work or may be damaged. Replace the wiper blades when they are worn. Use the proper size replacementblades. For further information, please con- tact your authorized Mitsubishi Motors dealer.
Electric rear window defog- ger switch
NOTE
CAUTION The rear window defogger is not designed to melt snow. Remove any snow manuallybefore using the rear window defogger. Use the rear window defogger only after the engine has started and is running. Be sure to turn the defogger switch off immediately after the window is clear to save on batterypower.
Do not place stickers, tape, or other items that are attached with adhesive over the grid wires on the rear window. When cleaning the inside rear window, use a soft cloth and wipe lightly over the grid wires.NOTE
As your vehicle is equipped with heated mir- rors, mist can also be removed from the out-side rearview mirrors when the rear window defogger switch is pressed. (Refer to “Door mirror heater” on page 5-44.)
Horn switch
CAUTION
BK0206700US.book
134 ページ 2014年3月25日 火曜日 午後4時42分