2015 MITSUBISHI OUTLANDER SPORT wheel
[x] Cancel search: wheelPage 104 of 384
Steering wheel height and reach adjustment
Features and controls 5-41
5
N00511500228
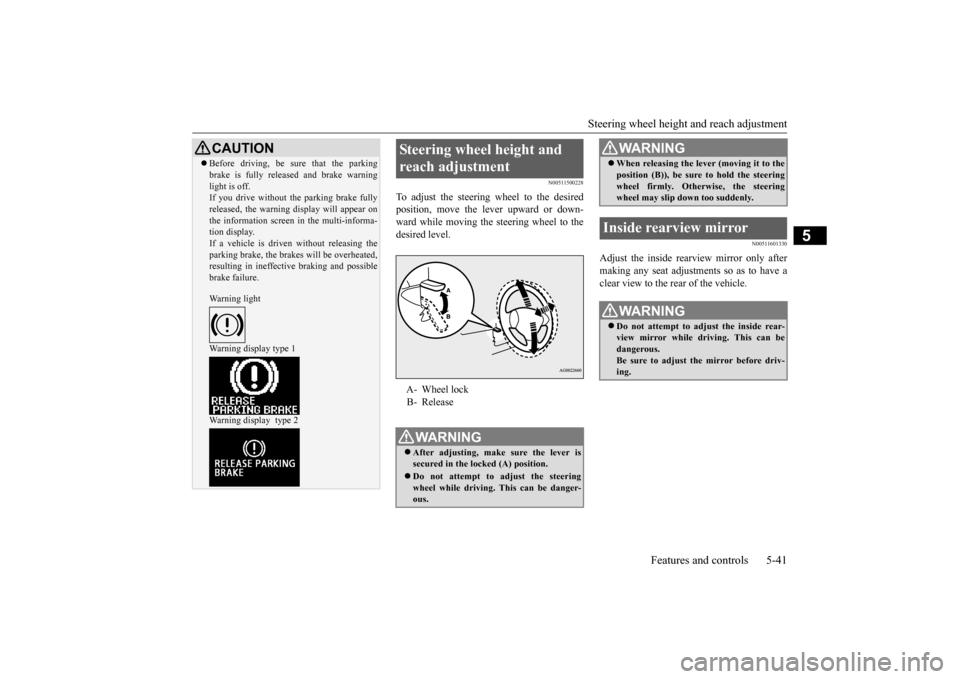
To adjust the steering wheel to the desired position, move the lever upward or down-ward while moving the steering wheel to the desired level.
N00511601330
Adjust the inside rearview mirror only after making any seat adjustments so as to have a clear view to the rear of the vehicle.
CAUTION Before driving, be sure that the parking brake is fully released and brake warning light is off. If you drive without the parking brake fully released, the warning display will appear onthe information screen in the multi-informa- tion display. If a vehicle is driven without releasing theparking brake, the brakes will be overheated, resulting in ineffective braking and possible brake failure. Warning light Warning display type 1 Warning display type 2
Steering wheel height and reach adjustment A- Wheel lock B- ReleaseWA R N I N G After adjusting, make sure the lever is secured in the locked (A) position. Do not attempt to adjust the steering wheel while driving. This can be danger-ous.
When releasing the lever (moving it to the position (B)), be sure to hold the steering wheel firmly. Otherwise, the steering wheel may slip down too suddenly.
Inside rearview mirror
WA R N I N G Do not attempt to adjust the inside rear- view mirror while driving. This can bedangerous. Be sure to adjust the mirror before driv- ing.WA R N I N G
BK0206700US.bo
ok 41 ページ 2014年3月25日 火曜日 午後4時42分
Page 109 of 384
Starting the engine 5-46 Features and controls
5
Do not operate the starter motor continu- ously for longer than
15 seconds as this
could run the battery down or damage thestarter motor. If the engine does not start, turn the ignition switch back to the “OFF” position, wait a few seconds, and then tryagain. Trying repeatedly with the engine or starter motor still turning will damage the starter mechanism. If the engine will not start because the bat- tery is weak or discharged, refer to “Jump-starting the engine” (on page 8-2) for instructions. A longer warm up period will only con- sume extra fuel. The
engine is warmed up
enough for driving when the bar graph ofengine coolant temperature display starts to move. Refer to “Interrupt display screen (With ignition switch or operationmode in ON)” on page 5-93.
This model is equipped with an electronically controlled fuel injection system. This is a sys-tem that automatically controls fuel injection. There is usually no need to depress the accel- erator pedal when starting the engine.The starter should not be run for more than 15 seconds at a time. To prevent battery drain, wait a few secondsbetween attempts to restart the engine. 1. Make sure all occupants are properly seated with seat belts fastened. 2. Insert the ignition key.3. Make sure the parking brake is applied. 4. Press and hold the brake pedal down with your right foot.5. Press and hold the clutch pedal all the way down (manual transaxle).
6. On vehicles equipped with manual trans- axle, place the gearshift lever in the “N” (Neutral) position. On vehicles equipped with continuouslyvariable transmission (CVT), make sure the selector lever is in the “P” (PARK) position. 7. Turn the ignition switch to the “ON” posi- tion and make certain that all warning lights are functioning properly beforestarting the engine. 8. Turn the ignition switch to the “START” position without pressing the acceleratorpedal. Release the key when the engine starts.
Tips for starting
WA R N I N G Never run the engine in a closed or poorly ventilated area any longer than is needed to move your vehicle out of the area. Car-bon monoxide gas, which is odorless and extremely poisonous, could build up and cause serious injury or death.
CAUTION Do not push-start the vehicle.Do not run the engine
at high rpms or drive
at high speeds until the engine has had a chance to warm up. Release the ignition switch as soon as the engine starts. Otherwise, the starter motorwill be damaged.
Starting the engine
NOTE
On vehicles equipped with CVT, the starter will not operate unless the selector lever is in the “P” (PARK) or “N” (NEUTRAL) posi- tion.For safety reasons, start the engine in the “P” (PARK) position so that the wheels are locked.NOTE
Minor noises may be heard on engine start- up. These will disappear as the engine warms up.
BK0206700US.bo
ok 46 ページ 2014年3月25日 火曜日 午後4時42分
Page 116 of 384
Continuously variable transmission (CVT) (if so equipped)
Features and controls 5-53
5
Move the lever to this position only after the vehicle has come to a complete stop. At this position, the transmission is disen- gaged. It is the same as the neutral position ona manual transaxle and
should be used when
the vehicle is not moving for an extended length of time during driving, such as in atraffic jam.
This position is used for most city and high- way driving. The transmission will automati- cally and continuously change its gear ratio depending on road and driving conditions.
N00560701078
Whether the vehicle is stationary or inmotion, sports mode is selected by pushingthe selector lever from the “D” (DRIVE) position into the manual gate (A). To return to
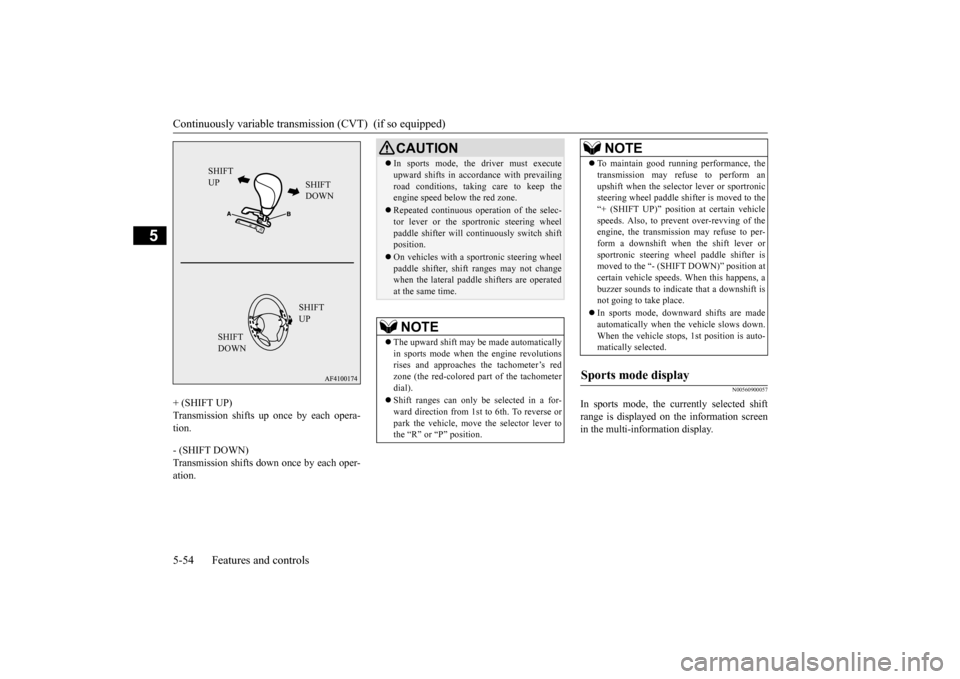
“D” (DRIVE) operation, push the selector lever back into the main gate (B). In sports mode, rapid sh
ifting is possible sim-
ply by operating the selector lever or spor-tronic steering wheel paddle shifter. Unlike the manual transaxle, sports mode allows shifting with the accelerator pedaldepressed.
“R” REVERSE
CAUTION Never shift into the “P” (PARK) or “R” (REVERSE) position while the vehicle is inmotion. If the lever is shifted into the “P” (PARK) or “R” (REVERSE) position while the vehicle is in motion, the transmissionmay be damaged.
“N” NEUTRAL
WA R N I N G Never move the selector lever to the “N” (NEUTRAL) position while driving since you could accidentally slip it into the “P”(PARK) or “R” (REVERSE) position, damaging the transmission.
To prevent the vehicle from rolling when stopped on a slope, the engine should be started in the “P” (PARK) position, not in “N” (NEUTRAL) position. To prevent rolling, always keep your foot on the brake pedal when the vehicle is in “N” (NEUTRAL) position, or when shift-ing into or out of “N” (NEUTRAL) posi- tion.
“D” DRIVE
CAUTION To prevent transmission damage, never shift into the “D” (DRIVE) position from the “R” (REVERSE) position while the vehicle is inmotion.
Sports mode
WA R N I N G
NOTE
For vehicles equipped with the sportronic steering wheel paddle shifter, sports mode can be operated even when the selector leveris in the main gate (B). Also, you can return to the “D” operation in any of following ways. When returning to “D” operation, theselector lever position display will change to “D” (DRIVE) position. • Pull the + (SHIFT UP) side sportronic steering wheel paddle shifter forward (toward the driver) for over 2 seconds. • Stop the vehicle • Push the selector lever from the “D” (DRIVE) position into the manual gate (A) and push the selector lever back into themain gate (B).
BK0206700US.bo
ok 53 ページ 2014年3月25日 火曜日 午後4時42分
Page 117 of 384
Continuously variable transmis
sion (CVT) (if so equipped)
5-54 Features and controls
5
+ (SHIFT UP) Transmission shifts up once by each opera- tion. - (SHIFT DOWN) Transmission shifts down once by each oper-ation.
N00560900057
In sports mode, the currently selected shift range is displayed on the information screen in the multi-information display.
SHIFT UP
SHIFT DOWN SHIFT UP
SHIFT DOWN
CAUTION In sports mode, the driver must execute upward shifts in accordance with prevailing road conditions, taking care to keep the engine speed below the red zone. Repeated continuous operation of the selec- tor lever or the sportronic steering wheel paddle shifter will continuously switch shiftposition. On vehicles with a sportronic steering wheel paddle shifter, shift ranges may not change when the lateral paddle shifters are operated at the same time.NOTE
The upward shift may be made automatically in sports mode when the engine revolutions rises and approaches the tachometer’s redzone (the red-colored part of the tachometer dial). Shift ranges can only be selected in a for- ward direction from 1st to 6th. To reverse or park the vehicle, move the selector lever tothe “R” or “P” position.
To maintain good running performance, the transmission may refuse to perform an upshift when the selector lever or sportronic steering wheel paddle shifter is moved to the “+ (SHIFT UP)” position at certain vehiclespeeds. Also, to prevent over-revving of the engine, the transmission may refuse to per- form a downshift when the shift lever orsportronic steering wheel paddle shifter is moved to the “- (SHIFT DOWN)” position at certain vehicle speeds. When this happens, abuzzer sounds to indicate that a downshift is not going to take place. In sports mode, downward shifts are made automatically when the vehicle slows down. When the vehicle stops, 1st position is auto-matically selected.
Sports mode display
NOTE
BK0206700US.bo
ok 54 ページ 2014年3月25日 火曜日 午後4時42分
Page 119 of 384
Electronically controlled 4WD system (if so equipped) 5-56 Features and controls
5
To park the vehicle, first bring it to a com- plete stop, fully engage the parking brake,and then move the selector lever to the “P” (PARK) position. If the CVT does not shift while driving, or your vehicle does not pick up enough speedwhen starting on an uphill slope, it may be that there is something unusual happening in the transmission, causing a safety device toactivate. Have your vehicle checked at an authorized Mitsubishi Motors dealer or a repair facility of your choice as soon as possi-ble.
N00517201178
The electronically controlled 4WD system isan all-wheel drive system that allows one of three drive modes to be selected with a switch, in accordance with the driving condi-tions. The following drive modes are available.
4-wheel drive operation requires special driv- ing skills. Carefully read the “4-wheel drive operation”section on page 5-58
and take care to drive
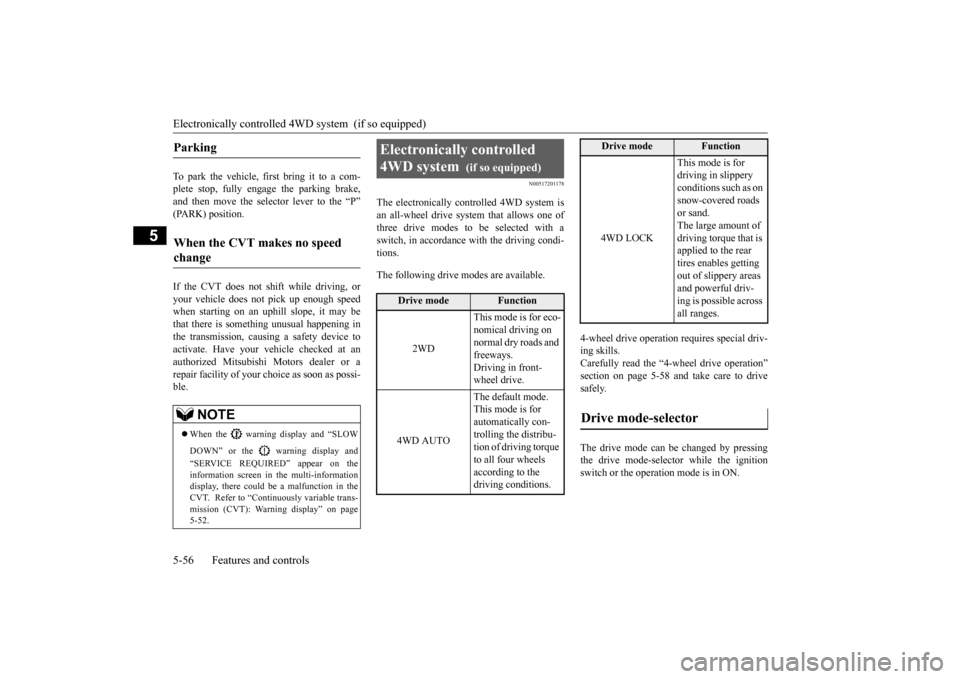
safely. The drive mode can be changed by pressing the drive mode-selector while the ignition switch or the operation mode is in ON.
Parking
When the CVT makes no speed change
NOTE
When the warning display and “SLOW DOWN” or the warning display and “SERVICE REQUIRED” appear on the information screen in the multi-informationdisplay, there could be a malfunction in the CVT. Refer to “Continuously variable trans- mission (CVT): Warning display” on page5-52.
Electronically controlled 4WD system
(if so equipped)
Drive mode
Function
2WD
This mode is for eco- nomical driving on normal dry roads and freeways. Driving in front-wheel drive.
4WD AUTO
The default mode. This mode is for automatically con-trolling the distribu- tion of driving torque to all four wheels according to the driving conditions.
4WD LOCK
This mode is for driving in slippery conditions such as on snow-covered roads or sand. The large amount of driving torque that is applied to the rear tires enables getting out of slippery areas and powerful driv- ing is possible across all ranges.
Drive mode-selector
Drive mode
Function
BK0206700US.bo
ok 56 ページ 2014年3月25日 火曜日 午後4時42分
Page 120 of 384
Electronically controlled 4WD system (if so equipped)
Features and controls 5-57
5
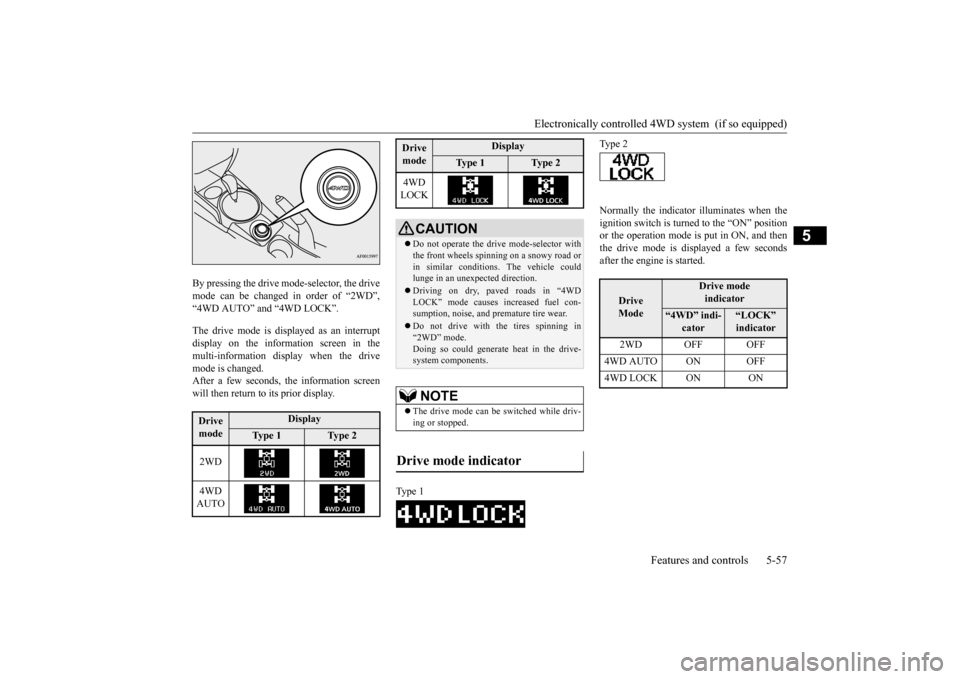
By pressing the drive mode-selector, the drive mode can be changed in order of “2WD”,“4WD AUTO” and “4WD LOCK”. The drive mode is displayed as an interrupt display on the information screen in the multi-information display when the drivemode is changed.After a few seconds, the information screen will then return to its prior display.
Normally the indicator illuminates when the ignition switch is turned to the “ON” position or the operation mode is put in ON, and then the drive mode is displayed a few secondsafter the engine is started.
Drive mode
Display
Ty p e 1
Ty p e 2
2WD 4WD AUTO
4WD LOCK
CAUTION Do not operate the drive mode-selector with the front wheels spinning on a snowy road or in similar conditions. The vehicle couldlunge in an unexpected direction. Driving on dry, paved roads in “4WD LOCK” mode causes increased fuel con- sumption, noise, and premature tire wear. Do not drive with the tires spinning in “2WD” mode. Doing so could generate heat in the drive-system components.NOTE
The drive mode can be switched while driv- ing or stopped.
Drive mode indicator
Type 1Drive mode
Display
Ty p e 1
Ty p e 2
Type 2
Drive Mode
Drive modeindicator
“4WD” indi-
cator
“LOCK” indicator
2WD OFF OFF
4WD AUTO ON OFF4WD LOCK ON ON
BK0206700US.bo
ok 57 ページ 2014年3月25日 火曜日 午後4時42分
Page 121 of 384
4-wheel drive operation 5-58 Features and controls
5
N00530600156
Your vehicle has been designed primarily for use on pavement.But its unique 4 -wheel drive system allows you to occasionally travel on unpaved roads, to campgrounds, picnic sites, and similarlocations. Not only does this ensure better handling on dry, paved roads but also permits better trac-tion when driving on slippery, wet or snow-covered roads and when moving out of mud. But it is not suitable for heavy off road use or towing in rough conditions.It is particularly important to note that 4- wheel drive may not give sufficient hill climbing ability and engine braking on steepslopes. You should try to avoid driving on steep slopes. Also, you must exercise caution when drivingon sand and mud and when driving through water because sufficient traction may not be available in certain circumstances.Please avoid driving the vehicle through areas where the tires may get stuck in deep sand or mud.
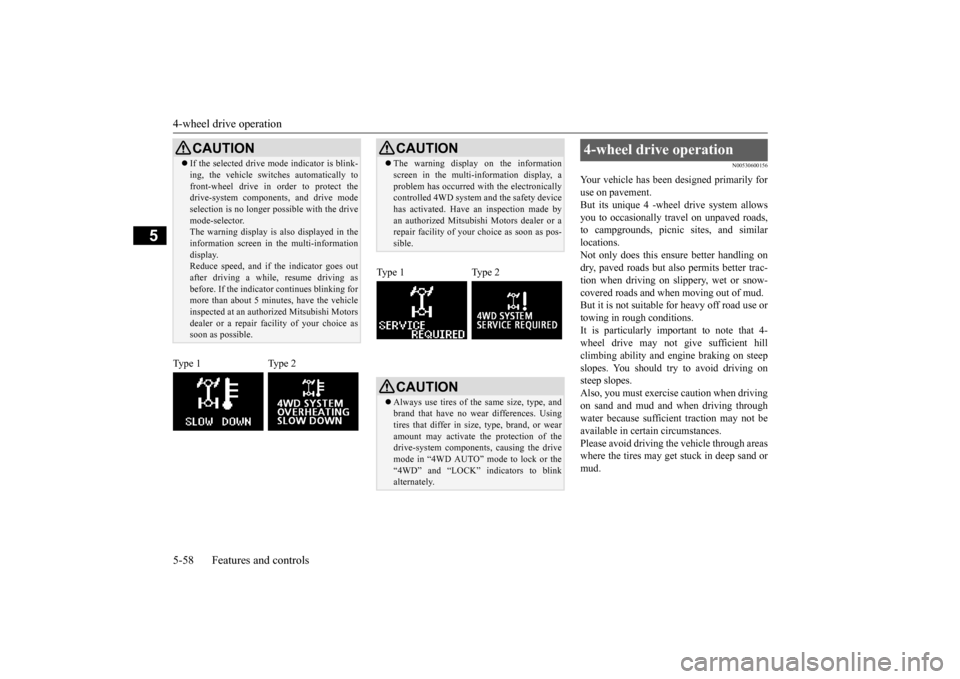
CAUTION If the selected drive mode indicator is blink- ing, the vehicle switches automatically to front-wheel drive in order to protect the drive-system components, and drive mode selection is no longer possible with the drivemode-selector. The warning display is also displayed in the information screen in the multi-informationdisplay. Reduce speed, and if the indicator goes out after driving a while, resume driving asbefore. If the indicator continues blinking for more than about 5 minutes, have the vehicle inspected at an authorized Mitsubishi Motorsdealer or a repair fa
cility of your choice as
soon as possible.
Type 1 Type 2
CAUTION The warning display on the information screen in the multi-information display, a problem has occurred with the electronically controlled 4WD system and the safety device has activated. Have an inspection made byan authorized Mitsubishi Motors dealer or a repair facility of your choice as soon as pos- sible.
Type 1 Type 2
CAUTION Always use tires of the same size, type, and brand that have no wear differences. Using tires that differ in size, type, brand, or wearamount may activate the protection of the drive-system components, causing the drive mode in “4WD AUTO” mode to lock or the“4WD” and “LOCK” indicators to blink alternately.
4-wheel drive operation
BK0206700US.bo
ok 58 ページ 2014年3月25日 火曜日 午後4時42分
Page 122 of 384
4-wheel drive operation
Features and controls 5-59
5
When turning a sharp corner in “4WD LOCK” or “LOCK” position at low speed, a slight difference in steering may be experi-enced similar to feeling as if the brakes were
applied. This is called tight corner braking and results from each of the four tires being at a different distance from the corner. The phe- nomenon is typical of 4-wheel drive vehicles.If this occurs, either straighten out the steer- ing wheel or change to another mode. Set the drive mode-selector to “4WD AUTO”, “4WD LOCK” or “SNOW” in accordance with the road conditions, and then gradually depress the accelerator pedal for asmooth start.
WA R N I N G Do not over-rely on the 4-wheel drive vehi- cles. Even 4-wheel drive vehicles have lim- its to the system and ability to maintain control and traction. Reckless driving may lead to accidents. Always drive carefully,taking account of the road conditions. Improperly operating this vehicle on or off-pavement can cause an accident or rollover in which you and your passengers could be seriously injured or killed.• Follow all instructio
ns and guidelines in
the owner’s manual.• Keep your speed low and do not drivefaster than conditions.NOTE
Driving on rough roads can be hard on a vehicle. Before you leave the pavement, be sure all scheduled maintenance and servicehas been done, and that you have inspected your vehicle. Pay special attention to the condition of the tires, and check the tire pres-sures. Mitsubishi Motors is not responsible to the operator for any damage or injury caused or liability incurred by improper and negligentoperation of a vehicle. All techniques of vehicle operation depend on the skill and experience of the operator and other partici-pating parties. Any deviation from the rec- ommended operating instructions above is at their own risk.
Note that the stopping distance required of the 4-wheel drive vehicle differs very little from that of the front-wheel drive vehicle. When driving on a snow-covered road or a slippery, muddy surface, make sure that youkeep a sufficient distance between your vehi- cle and the one ahead of you. The driving posture should be more upright; adjust the seat to a good position for easy steering and pedal operation. Be sure to wearthe seat belt. After driving on rough roads, check each part of the vehicle and wash it thoroughly with water. Refer to the “Inspection and maintenance following rough road opera-tion” section and “Vehicle care and Mainte- nance” sections.CAUTION Setting the drive mode-selector to “4WD LOCK” or “LOCK” position to drive on drypaved road will increase fuel consumption, with possible noise generation.
Turning sharp corners
NOTE
On snowy or icy roads
NOTE
The use of snow tires is recommended. Maintain a safe distance between vehicles, avoid sudden braking, and use engine brak-ing (downshifting).CAUTION Avoid sudden braking, sudden acceleration and sharp turning. Skidding occurs and con- trol of the vehicle could be lost.
BK0206700US.bo
ok 59 ページ 2014年3月25日 火曜日 午後4時42分