2015 MERCEDES-BENZ SPRINTER key
[x] Cancel search: keyPage 110 of 334

Switching the rear window wiper on/
off Combination switch
0043
00C5 Rear window wiper switch
0048 00E2 To wipe with washer fluid
0049 ITo switch on intermittent wiping
004A 0To switch off intermittent wiping
004B 00E2 To wipe with washer fluid
X Turn the key to position 1or 2in the ignition
lock.
X Turn switch 0043to the corresponding posi-
tion
The rear window wiper switches on automat-
ically if you engage reverse gear and the wind-
shield wipers are on. Replacing the wiper blades
G
WARNING
If the windshield wipers begin to move while
you are changing the wiper blades, you could be trapped by the wiper arm. There is a risk of
injury.
Always switch off the windshield wipers and
ignition before changing the wiper blades.
! Never open the hood if a windshield wiper
arm has been folded away from the wind-
shield.
Never fold a windshield wiper arm without a
wiper blade back onto the windshield/rear window. Hold the windshield wiper arm firmly when
you change the wiper blade. If you release
the windshield wiper arm without a wiper
blade and it falls onto the windshield, the
windshield may be damaged by the force of
the impact.
We recommend that you have the wiper
blades replaced at a qualified specialist
workshop.
! Only hold the wiper blade by the wiper
arm. You could otherwise damage the
wiper rubber.
The windshield will no longer be wiped prop-
erly if the wiper blades are worn. Replace the
wiper blades twice a year, ideally in spring and
fall. Front windshield wiper arm with wiper blade
X Fold wiper arm 0087away from the wind-
shield.
X Set wiper blade 0043at right angles to the
wiper arm.
X Press both retaining clips 0044together in
the direction of the arrow and swing wiper
blade 0043away from wiper arm 0087.
X Pull wiper blade 0043up and out of the
retainer on wiper arm 0087.
X Slide new wiper blade 0043into the retainer
on wiper arm 0087.
X Press new wiper blade 0043onto wiper arm
0087 until you hear retaining clips 0044engage.
X Fold wiper arm 0087back onto the windshield
again. 108
Windshield wipersLights and windshield wipers
Page 111 of 334

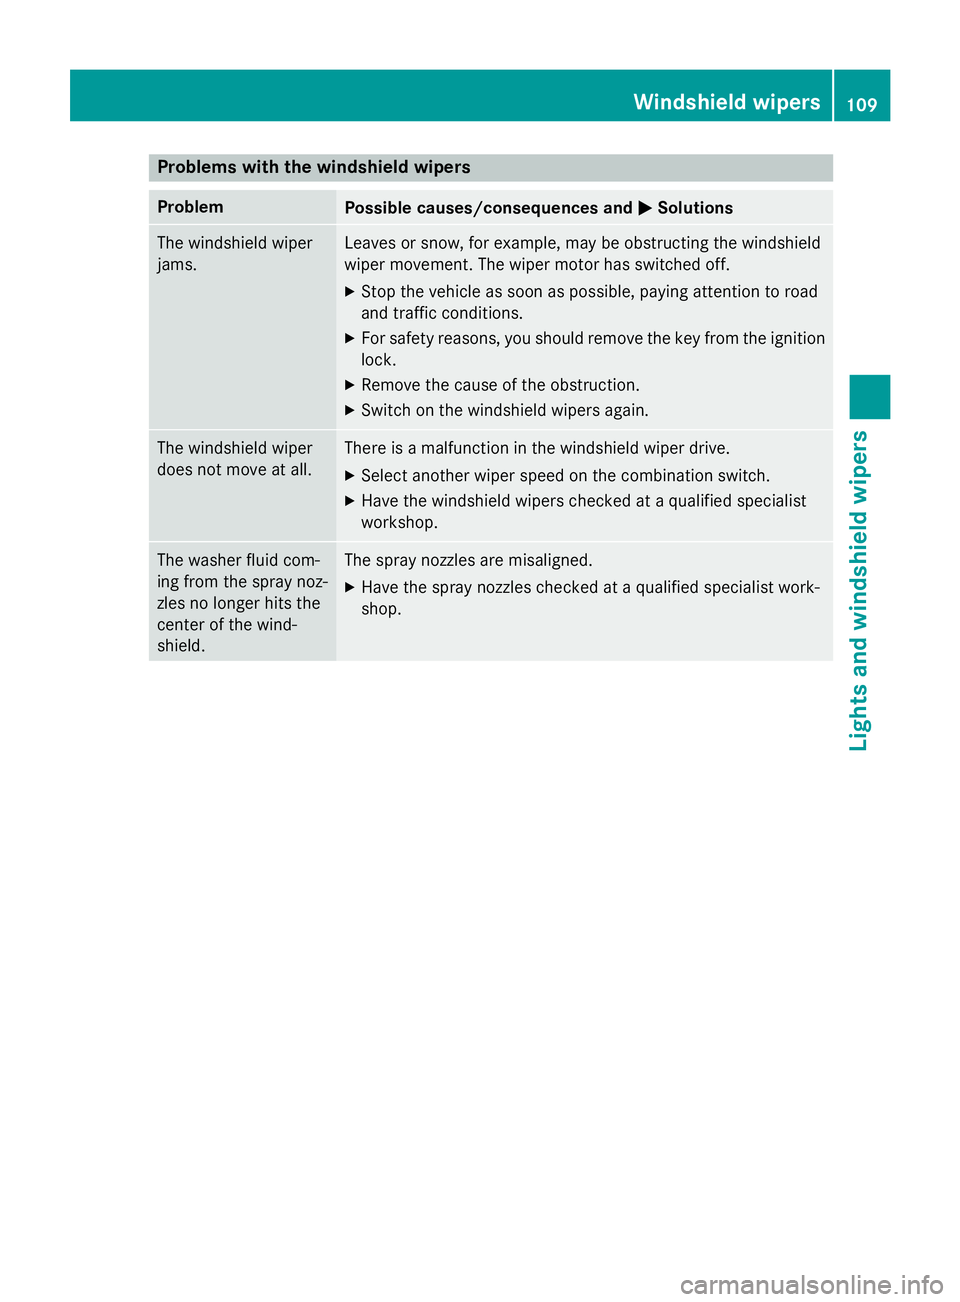
Problems with the windshield wipers
Problem
Possible causes/consequences and
0050
0050Solutions The windshield wiper
jams. Leaves or snow, for example, may be obstructing the windshield
wiper movement. The wiper motor has switched off.
X Stop the vehicle as soon as possible, paying attention to road
and traffic conditions.
X For safety reasons, you should remove the key from the ignition
lock.
X Remove the cause of the obstruction.
X Switch on the windshield wipers again. The windshield wiper
does not move at all. There is a malfunction in the windshield wiper drive.
X Select another wiper speed on the combination switch.
X Have the windshield wipers checked at a qualified specialist
workshop. The washer fluid com-
ing from the spray noz-
zles no longer hits the
center of the wind-
shield. The spray nozzles are misaligned.
X Have the spray nozzles checked at a qualified specialist work-
shop. Windshield wipers
109Lights and windshield wipers Z
Page 118 of 334

Control panel for rear-compartment air-conditioning system
0043
Sets the airflow (Y page 118)
0097 Increases the airflow
0095 Reduces the airflow
0044 Sets the temperature (Y page 117)
0087 Blower setting bar display
0085 0074 Switches the rear-compartment air conditioning on/off (Y page 116)Information on rear-compartment air
conditioning
For optimum climate control, set the temper- ature control to the middle level. Only change
the temperature in small increments. Operating the climate control system
Switching the climate control on/off
Important information When the climate control is switched off, air
intake and air circulation also stop. Only use
this setting for a brief period. Otherwise, the
windows could fog up. Activating/deactivating climate con-
trol via the control panel X
Turn the key to position 2in the ignition
lock.
Vehicle with heating
X To switch on: set airflow control 0044down
to at least level 1(Y page 114).
X To switch off: set airflow control 0044up to
the 0position (Y page 114).
Vehicle with air conditioning
X To switch on: press the0097button.
The blower speeds are shown in bars next
to the button.
X To switch off: press the0095button and,
after reaching the lowest blower speed,
press it again. 116
Operating the climate control systemClimate control
Page 119 of 334

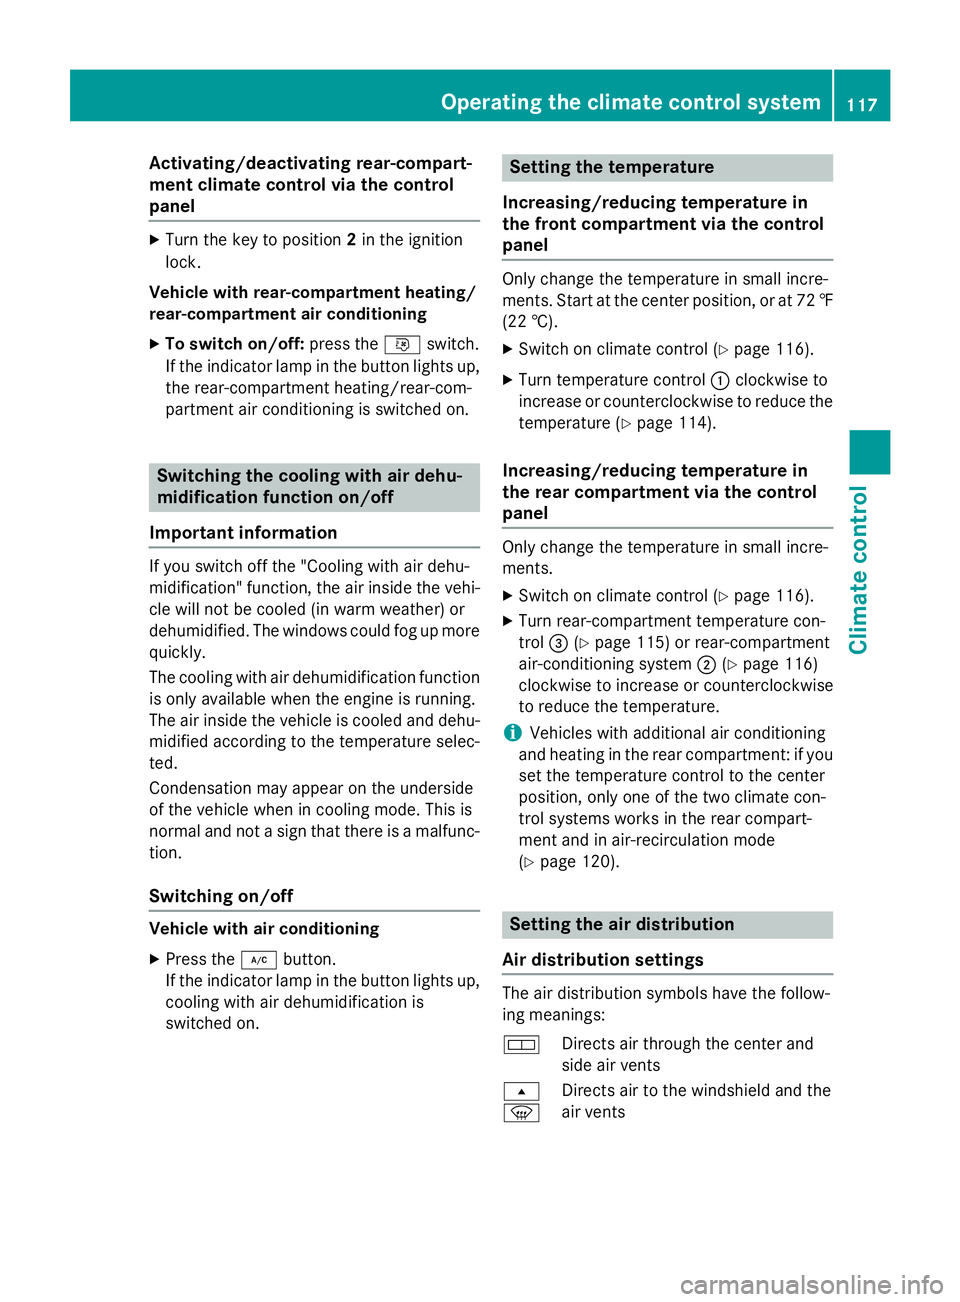
Activating/deactivating rear-compart-
ment climate control via the control
panel X
Turn the key to position 2in the ignition
lock.
Vehicle with rear-compartment heating/
rear-compartment air conditioning
X To switch on/off: press the0074switch.
If the indicator lamp in the button lights up, the rear-compartment heating/rear-com-
partment air conditioning is switched on. Switching the cooling with air dehu-
midification function on/off
Important information If you switch off the "Cooling with air dehu-
midification" function, the air inside the vehi- cle will not be cooled (in warm weather) or
dehumidified. The windows could fog up morequickly.
The cooling with air dehumidification function
is only available when the engine is running.
The air inside the vehicle is cooled and dehu- midified according to the temperature selec-
ted.
Condensation may appear on the underside
of the vehicle when in cooling mode. This is
normal and not a sign that there is a malfunc- tion.
Switching on/off Vehicle with air conditioning
X Press the 005Abutton.
If the indicator lamp in the button lights up, cooling with air dehumidification is
switched on. Setting the temperature
Increasing/reducing temperature in
the front compartment via the control
panel Only change the temperature in small incre-
ments. Start at the center position, or at 72 ‡
(22 †).
X Switch on climate control (Y page 116).
X Turn temperature control 0043clockwise to
increase or counterclockwise to reduce the temperature (Y page 114).
Increasing/reducing temperature in
the rear compartment via the control
panel Only change the temperature in small incre-
ments.
X Switch on climate control (Y page 116).
X Turn rear-compartment temperature con-
trol 0087(Ypage 115) or rear-compartment
air-conditioning system 0044(Ypage 116)
clockwise to increase or counterclockwise
to reduce the temperature.
i Vehicles with additional air conditioning
and heating in the rear compartment: if you set the temperature control to the center
position, only one of the two climate con-
trol systems works in the rear compart-
ment and in air-recirculation mode
(Y page 120). Setting the air distribution
Air distribution settings The air distribution symbols have the follow-
ing meanings:
0078
Directs air through the center and
side air vents
007E
0085 Directs air to the windshield and the
air vents Operating the climate control system
117Climate control
Page 126 of 334

i
Switch the heater booster function on or
off with the 006Abutton (Y page 130).
X To activate the auxiliary heating sys-
tem: press and hold the upper section of
the 0084 switch for longer than 2 seconds.
The red indicator lamp in the button lights
up. The auxiliary heating heats or ventilates the interior to the temperature that you
have set. The blower switches to the first
level.
X To switch off auxiliary heating: press the
upper section of the 0084button.
or
X Turn the key in the ignition lock to posi-
tion 0.
The red indicator lamp in the button goes
out. The auxiliary heating operates for
another 2 minutes and then switches off
automatically. Selecting a switch-on time
Important information You can use the on-board computer to define
up to three switch-on times, one of which canbe selected.
The yellow indicator lamp in the 0084button
goes out after 30 minutes, if you:
R have selected the switch-on time and
R turn the key to position 0in the ignition lock
On-board computer without steering
wheel buttons X
Turn the key to position 2in the ignition
lock.
X Press the 0084button.
The 0084 symbol flashes in the display.
or
X Press the 0079menu button on the instru-
ment cluster repeatedly until the 0084
symbol flashes in the display.
X Use the 0074or0075 buttons on the instrument
cluster to select the switch-on time 1 1to 3
3. The switch-on time selected is displayed.
X Wait 10 seconds for the standard display to
appear.
The switch-on time is selected. The yellow
indicator lamp in the 0084button lights up.
If you do not preselect a switch-on time,
and --:-- --:-- is shown in the display, this
means that the automatic switch-on mode
is switched off. The yellow indicator lamp in the 0084 button goes out.
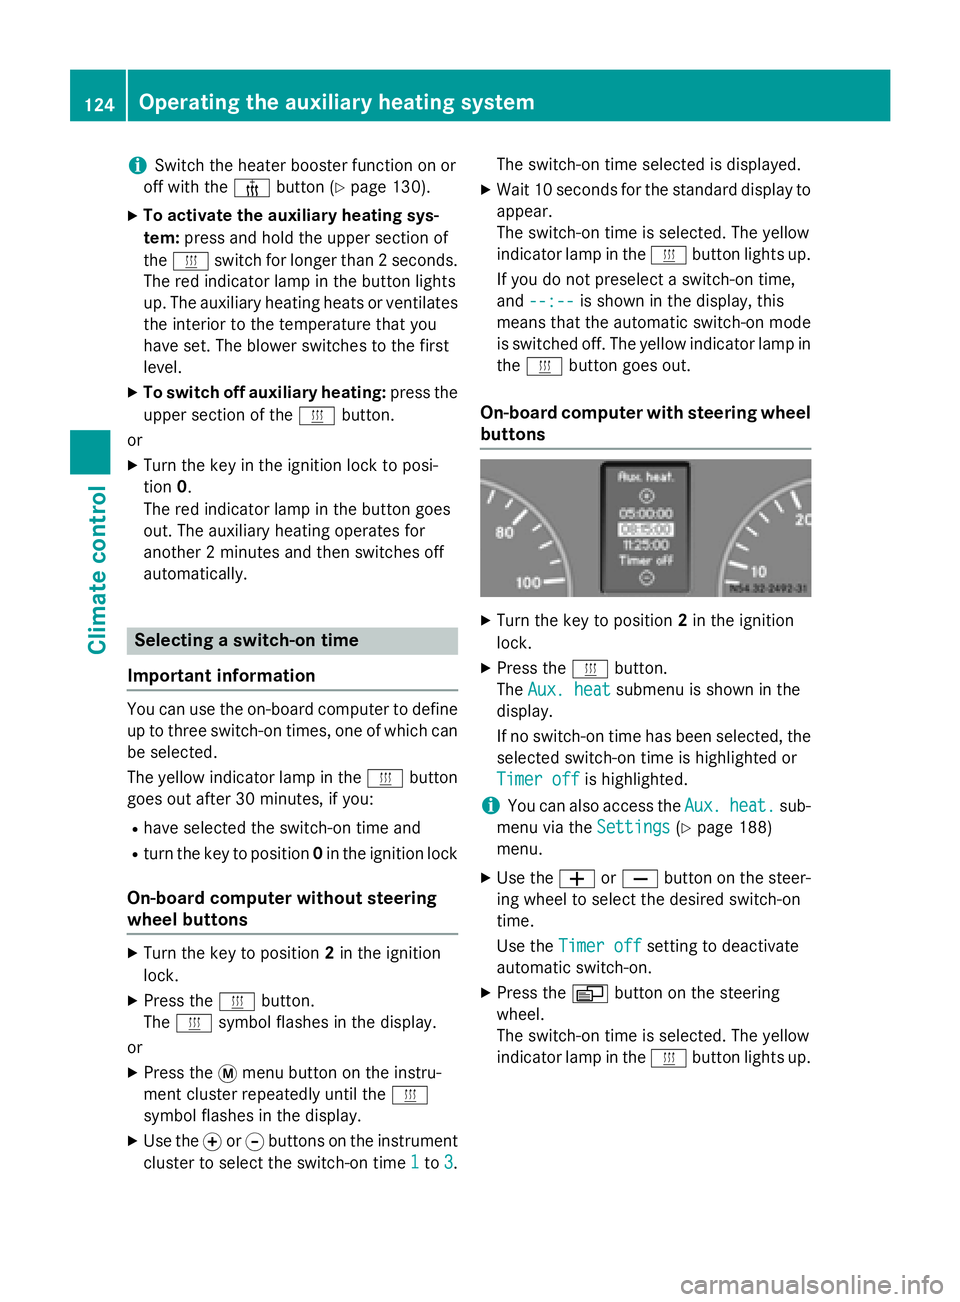
On-board computer with steering wheel
buttons X
Turn the key to position 2in the ignition
lock.
X Press the 0084button.
The Aux. heat Aux. heat submenu is shown in the
display.
If no switch-on time has been selected, the
selected switch-on time is highlighted or
Timer off Timer off is highlighted.
i You can also access the
Aux.
Aux.heat.
heat. sub-
menu via the Settings
Settings(Ypage 188)
menu.
X Use the 0081or0082 button on the steer-
ing wheel to select the desired switch-on
time.
Use the Timer off Timer off setting to deactivate
automatic switch-on.
X Press the 0080button on the steering
wheel.
The switch-on time is selected. The yellow
indicator lamp in the 0084button lights up. 124
Operating the auxiliary heating systemClimate control
Page 135 of 334

Problem
Possible causes/consequences and
0050
0050Solutions The low-voltage protection system integrated in the control unit
switches off the auxiliary heating because the on-board voltage is
less than 10 V.
X Have the alternator and battery checked.
or The fuse is blown.
X Replace the fuse; see the "Fuse allocation" supplement.
X Have the cause of the blown fuse determined at a qualified spe-
cialist workshop.
or A malfunction has occurred.
X Switch the ignition on and off twice.
If the auxiliary heating still cannot be switched on, the heating
device is faulty.
X Have the auxiliary heating checked at a qualified specialist
workshop. The auxiliary heating is
overheated. The coolant level is too low.
X Check the coolant level and add more coolant if necessary
(Y page 253). Operating the cargo compartment air
vents If your vehicle is equipped with a roof venti-
lator, you can ventilate and extract air from
the cargo compartment. X
Turn the key to position 2in the ignition
lock.
X To activate and extract air: press the
upper section of the 00A8switch.
The roof ventilator removes used air from
the cargo compartment.
X To activate and ventilate: press the lower
section of the 00A7switch.
The roof ventilator feeds fresh air into the
cargo compartment.
X To switch off: set the switch to the middle
position. Operating the cargo compartment air vents
133Climate control Z
Page 139 of 334

Battery isolating switch
Important safety notes !
Make sure that the key is in position
0in
the ignition lock and wait at least 20 sec-
onds before disconnecting or connecting
the battery isolating switch. You could oth-
erwise damage electrical system compo-
nents.
You can use the battery isolating switch to
disconnect the power supply to all your vehi- cle's consumers. This will prevent uncontrol-
led battery discharge caused by off-load cur-
rent consumption.
If your vehicle is equipped with an auxiliary
battery in the engine compartment, you will
need to disconnect both batteries. Only then
is the electrical system fully disconnected
from the power supply.
i Only switch the vehicle to de-energized
using the battery main switch if:
R the vehicle is stationary for a lengthy
period
R it is absolutely necessary
After the power supply has been activated,
you will need to reset the side windows
(Y page 79).
Switching off the power supply !
When you clamp the connector under the
accelerator pedal, make sure that the con- nector does not become damaged or dirty.
It may otherwise not be possible to restore
the electrical connection when the parts
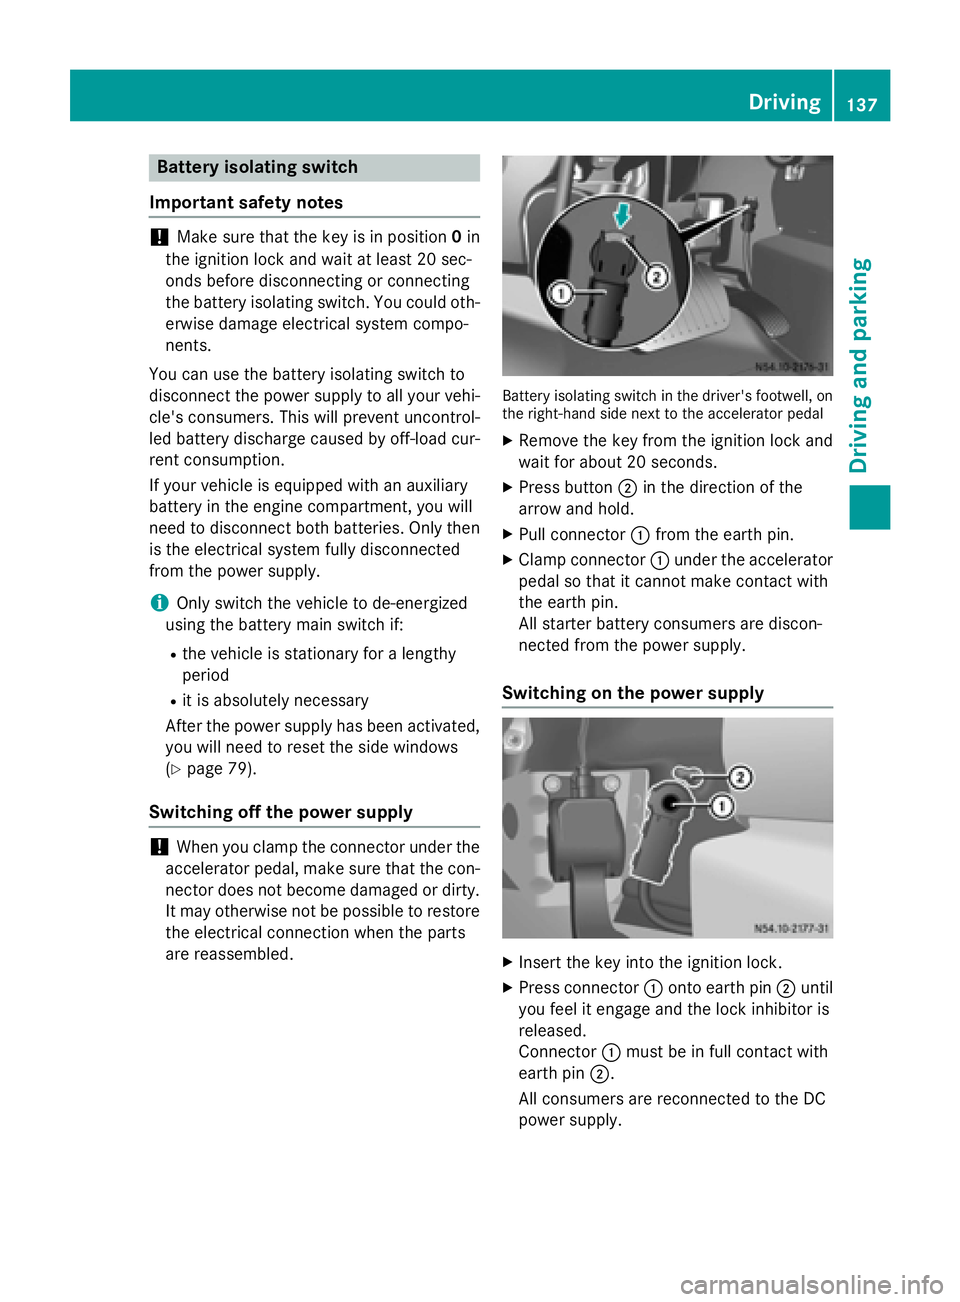
are reassembled. Battery isolating switch in the driver's footwell, on
the right-hand side next to the accelerator pedal
X Remove the key from the ignition lock and
wait for about 20 seconds.
X Press button 0044in the direction of the
arrow and hold.
X Pull connector 0043from the earth pin.
X Clamp connector 0043under the accelerator
pedal so that it cannot make contact with
the earth pin.
All starter battery consumers are discon-
nected from the power supply.
Switching on the power supply X
Insert the key into the ignition lock.
X Press connector 0043onto earth pin 0044until
you feel it engage and the lock inhibitor is
released.
Connector 0043must be in full contact with
earth pin 0044.
All consumers are reconnected to the DC
power supply. Driving
137Driving an d parking Z
Page 140 of 334

Key positions
005A
To insert/remove the key, to lock the
steering wheel
0047 To unlock the steering wheel, power sup-
ply for some consumers (e.g. the radio)
0048 To switch on the ignition. Power supply for
all consumers, preglow and drive position
0049 To start the engine
On vehicles with a battery main switch, you
must first switch on the power supply
(Y page 137).
i To unlock the steering, move the steering
wheel slightly while turning the key to posi- tion 1. Preparing for a journey
Visual check of the vehicle exterior X
In particular, check the following compo-
nents on the vehicle, and on the trailer as
necessary:
R license plates, vehicle lighting, turn sig-
nals, brake lamps and wiper blades for
dirt and damage
R tires and wheels for firm seating, correct
tire pressure and general condition
R trailer tow hitch for play and security
The trailer coupling is one of the most
important vehicle parts with regard to
road safety. The separate instructions
issued by the manufacturer pertaining to operation, care and maintenance should
be observed.
X Rectify any noticeable defects before com-
mencing the journey.
Checks in the vehicle Emergency equipment/first-aid kit
X Check the equipment to make sure that it is
accessible, complete and ready for use.
The first aid and breakdown assistance equip-
ment is in the front door stowage compart-
ments and behind the driver's seat.
Vehicle lighting
X Turn the key to position 2in the ignition
lock.
X Check the lighting system with the aid of a
second person.
X Replace defective bulbs (Y page 99). Before driving off
G
WARNING
Objects in the driver's footwell may restrict
the clearance around the pedals or block a
depressed pedal. This jeopardizes the oper-
ating and road safety of the vehicle. There is a risk of an accident.
Stow all objects securely in the vehicle so that
they do not get into the driver's footwell.
When using floormats or carpets, make sure
that they are properly secured so that they do not slip or obstruct the pedals. Do not place
several floormats or carpets on top of one
another. G
WARNING
Unsuitable footwear can hinder correct usage of the pedals, e.g.:
R shoes with thick soles
R shoes with high heels
R slippers
There is a risk of an accident. 138
DrivingDriving and pa
rking