2015 MERCEDES-BENZ SLS AMG GT ROADSTER fuse
[x] Cancel search: fusePage 10 of 290
Emissions control
Servic eand warranty informatio n....19
Engine
Display message ............................ 177
Engin enumber .............................. .281
Starting .......................................... 120
Starting the engine with the
SmartKey ....................................... 120
Starting with the KEYLESS-GO
start function ................................. 120
Switching off .................................. 132
Engine diagnostics warning lamp .... 195
Engine oil Adding .......................................... .220
Additives ........................................ 284
Checking the oil leve l..................... 219
Checking the oil leve lusing the
dipstick .......................................... 219
Display message .................... 178, 179
Filling capacity ............................... 284
Notes about oil grades ................... 283
Notes on oil level/consumption .... 219
Temperature (on-board computer) .. 160
Temperature gauge ........................ 150
Viscosity ........................................ 284
E-SELECT lever ................................... 121
ESP ®
(Electronic Stability Pro-
gram) Deactivating/activating ................... 56
Display message ............................ 170
Function/notes ................................ 56
Important safety information ........... 55
Warning lamp ................................. 193
Exhaus tcheck ................................... 135
Exhaus tpipe (cleaning instruc-
tions) ................................................. .229
Exterior lighting Setting options ................................ 96
see Lights
Exterior mirrors
Adjusting ......................................... 90
Dipping (automatic) ......................... 91
Folding in/ou t(au tomatically). ........ 91
Folding in/out (electrically) ............. 91
Folding in when locking (on-board
computer) ...................................... 160
Ou tofp osition (troubleshooting )..... 91 Setting ............................................. 91
Storing settings (memory function) .. 92
Storing the parking position ............. 91 F
Filler cap see Fue lfille rflap
First-ai dkit......................................... 234
Flat tire Preparing the vehicl e..................... 235
Raising the vehicl e......................... 272
TIREFIT kit ...................................... 235
Floormats ........................................... 214
Fuel Additives ........................................ 283
Consumption statistics .................. 153
Displaying the rang e...................... 153
Driving tip s.................................... 135
E10 ................................................ 282
Fue lgauge ....................................... 27
Grade (gasoline )............................ 282
Important safety notes .................. 282
Problem (malfunction) ................... 131
Refueling ........................................ 128
Tank content/reserve fue l............. 282
Fue lfille rflap ,opening/closing ....... 129
Fue llevel
Calling up the rang e(on-board
computer) ...................................... 153
Fue ltank
Capacity ........................................ 282
Problem (malfunction) ................... 131
Fus ebox
Front-passenger footwell ............... 247
Rear compartment ......................... 247
Fuses
Allocation chart ............................. 247
Before changing ............................. 247
Important safety notes .................. 246 G
Garag edooro pener
Clearing the memory ..................... 214
Important safety notes .................. 211 8
Index
Page 206 of 290
matically cut. This ensures that there is suf-
ficient powe rtostart the vehicle.
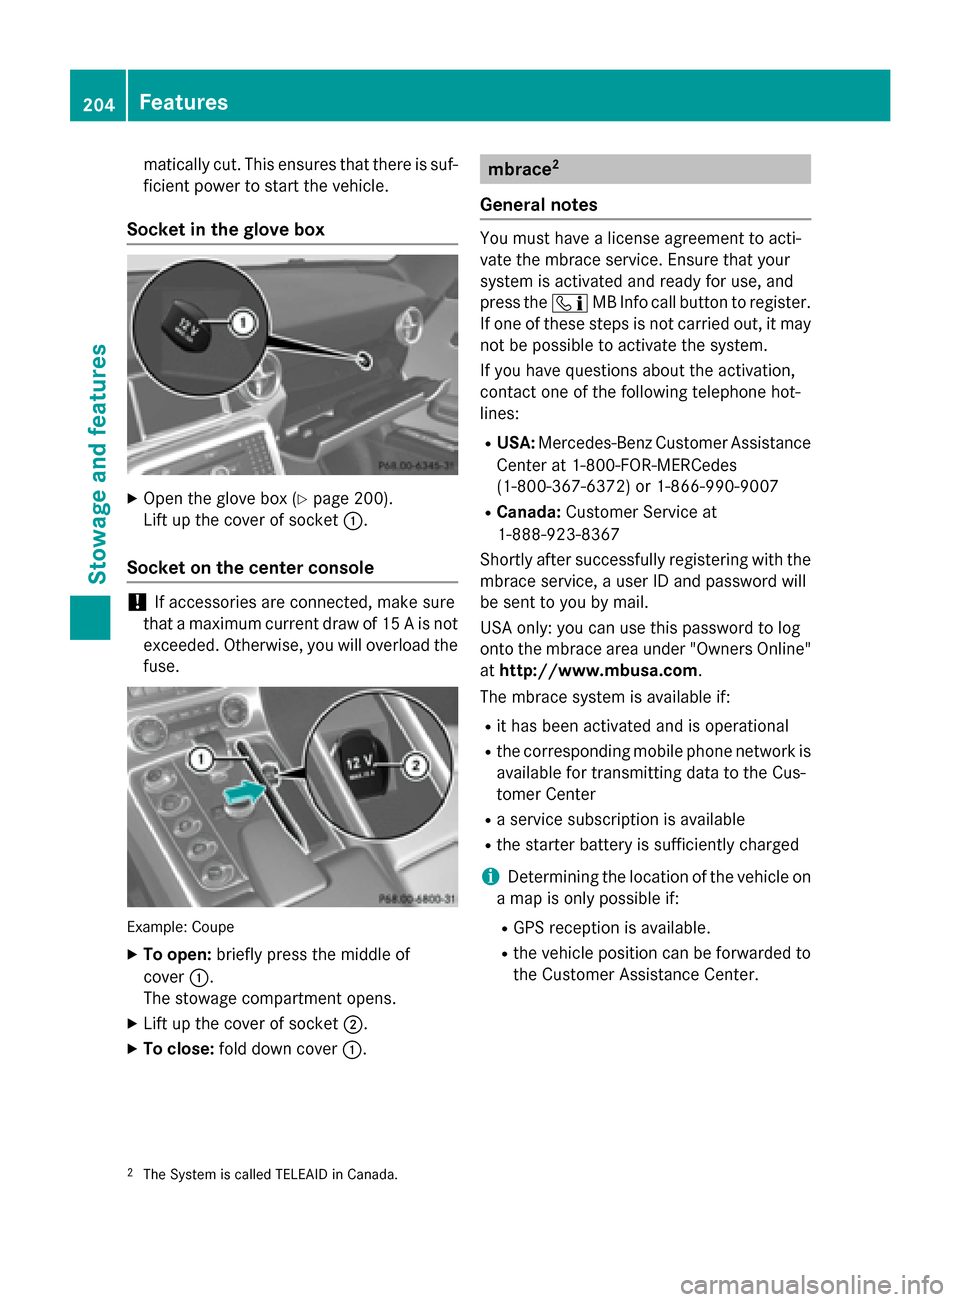
Socket in the glove box X
Open the glove box (Y page200).
Lift up the cover of socket 0043.
Socket on the center console !
If accessories are connected, make sure
that amaximu mcurrent draw of 15 Aisnot
exceeded. Otherwise, you will overload the fuse. Example: Coupe
X To open: briefly press the middle of
cover 0043.
The stowage compartment opens.
X Lift up the cover of socket 0044.
X To close: fold down cover 0043. mbrace
2
General notes You must have
alicense agreement to acti-
vate the mbrace service. Ensure that your
system is activated and ready for use, and
press the 00D9MB Info call button to register.
If one of these steps is not carried out, it may not be possible to activate the system.
If you have questions aboutt he activation,
contact one of the following telephone hot-
lines:
R USA: Mercedes-Benz Customer Assistance
Center at 1-800-FOR-MERCedes
(1-800-367-6372) or 1-866-990-9007
R Canada: Customer Service at
1-888-923-8367
Shortly after successfully registering with the
mbrace service, auser ID and password will
be sent to you by mail.
USA only: you can use this password to log
onto the mbrace area under "Owners Online"
at http://www.mbusa.com.
The mbrace system is available if:
R it has been activated and is operational
R the corresponding mobile phone network is
available for transmitting data to the Cus-
tomer Center
R as ervice subscription is available
R the starter battery is sufficiently charged
i Determining the location of the vehicle on
am ap is only possible if:
R GPS reception is available.
R the vehicle position can be forwarded to
the Customer Assistance Center.
2 The System is called TELEAID in Canada. 204
FeaturesStowage and features
Page 235 of 290
Useful information
............................234
Wher ewillIfind...? ........................... 234
Flat tire .............................................. 235
Batter y(vehicle) ................................ 238
Jump-starting .................................... 242
Towing and tow-starting ..................244
Fuses .................................................. 246 233Breakdown assistance
Page 248 of 290
X
Switch on the hazard warning lamps
(Y page 98).
X Make sure tha tthe SmartKey is in position
2 in the ignition and tha tthe engine is run-
ning throughout the towing procedure.
X Mov ethe transmissio ntoNwith the E-
SELECT lever. Check the transmissio nposi-
tion in the instrument cluster. Towin
gavehicle with both axles on
the ground
It is important tha tyou observe the safety
instructions when towing away your vehicle
(Y page 244).
X Switch on the hazard warning lamps
(Y page 98).
i Whe
ntowing with the hazard warning
flashers switche don, us ethe combination
switch as usua ltosignal in which direction
yo ua re changing. In this case, onl ythe
indicator lamps for the direction of travel
flash. Whe nyou reset the combination
switch, the hazard warning flashers start
flashing again.
X Insert the SmartKey into the ignition lock
(Y page 119).
X Start the engine and leave the SmartKey in
the ignition.
X Mov ethe transmissio ntoNwith the E-
SELECT lever.
X Check the transmissio nposition in the
instrument cluster display (Y page 123).
X Leave the engine running throughout the
entir etowing procedure Transporting the vehicle
The towing ey ecan be used to pull the vehicle
onto atraile rort ransporter for transporting
purposes.
! Yo
um ay onl ysecure the vehicl ebythe
wheels, not by parts of the vehicl esuchas axl
eors teering components .Otherwise,
the vehicl ecould be damaged.
X Start the engine.
X Make sure tha tthe SmartKey is in position
2 in the ignition and tha tthe engine is run-
ning during the entir eloadin goperation.
X Mov ethe transmissio ntoNwith the E-
SELECT lever. Check the transmissio nposi-
tion in the instrument cluster.
As soon as the vehicle has been loaded: X Prevent the vehicl efrom rolling away by
applying the electri cparking brake.
X Shift the transmissio ntoPwith the button
in the center console.
X Turn the SmartKey to position 0in the igni-
tion lock and remove the SmartKey from
the ignition lock.
X Secure the vehicle. Fuses
Important safety notes
G
WARNING
If yo umanipulate or bridge afaulty fus eorif
yo ur eplace it with afusew ithah ighe ramper-
age, the electri ccable scould be overloaded.
Thi scould resul tinafire. There is ariskofan
accident and injury.
Alway sreplace faulty fuses with the specified
new fuses having the correct amperage.
! Only us
efuses tha thaveb eena pproved
for Mercedes-Benz vehicles and which
have the correct fus erating for the system
concerned. Otherwise, components or sys-
tems could be damaged.
The fuses in your vehicl eserve to close down
faulty circuits. If afuseb lows ,allthe compo-
nents on the circuit and thei rfunctions stop
operating.
Blown fuses mus tbereplaced with fuses of
the same rating, which yo ucan recognize by 246
FusesBreakdown assistance
Page 249 of 290
the color and value. Th
efuser ating sarelisted
in the fuse allocation chart.
If an ewly inserte dfusea lsob lows ,havet he
cause traced and rectifie dataqualified spe-
cialist workshop ,e.g.ana uthorized
Mercedes-Benz Center. Before changin
gafuse
X Park the vehicl eand appl ythe electric park-
ing brake.
X Switch off al lelectrica lconsumers.
X Remov ethe SmartKe yfromt he ignition
lock.
Th ef uses arel oc ate dinv arious fuse boxes:
R fuse bo xinthe footwell on the front-
passenge rside
R fuse bo xinthe rear
Th e" Rela yand fuse information sheet" is
locate dwitht he wheel-chang etoolki tinthe
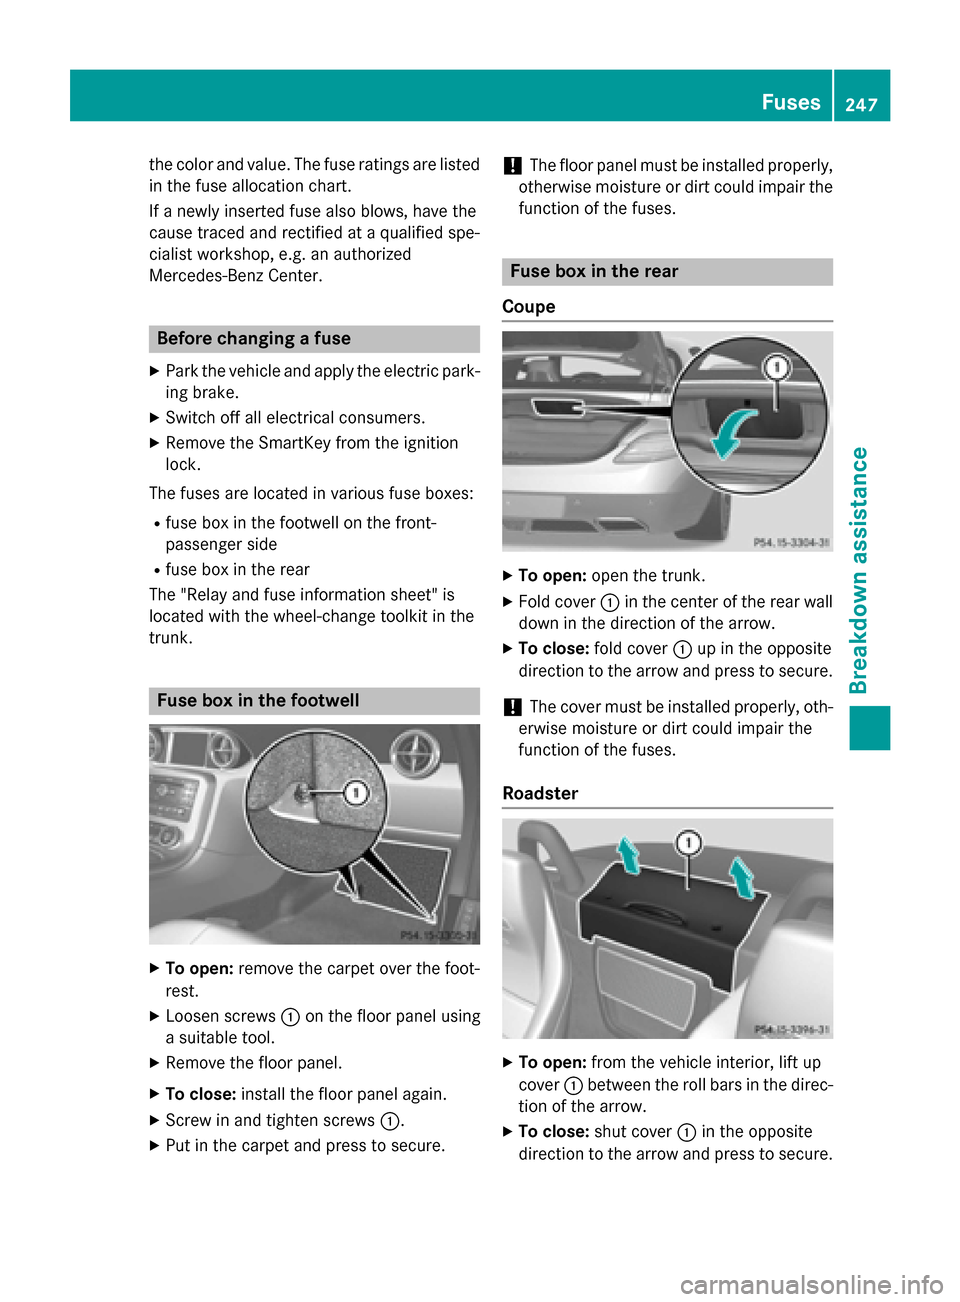
trunk. Fuse bo
xinthe footwell X
To open: remove the carpe toverthe foot-
rest.
X Loose nscrews 0043on the floo rpanel using
as uitabl etool.
X Remov ethe floo rpanel.
X To close: installthe floo rpanel again.
X Scre wina nd tighte nscrews 0043.
X Pu tint he carpe tand press to secure. !
Th
efloor panel must be installe dproperly,
otherwis emoisture or dirt could impair the
functio nofthe fuses. Fuse bo
xinthe rear
Coupe X
To open: open the trunk.
X Fol dcover 0043in the cente rofthe rea rwall
down in the directio nofthe arrow.
X To close: foldc over 0043up in the opposite
directio ntothe arrow and press to secure.
! Th
ec ove rmustbei nstalle dproperly, oth-
erwis emoisture or dirt could impair the
functio nofthe fuses.
Roadster X
To open: fromt he vehicl einterior, lift up
cover 0043between the rol lbarsint he direc-
tio noft he arrow.
X To close: shutcover 0043in the opposite
directio ntothe arrow and press to secure. Fuses
247Breakdow nassistance Z
Page 250 of 290
!
The cover must be installed properly,o
th-
erwise moisture or dirt could impairt he
function of the fuses. 248
FusesBreakdown assistance