2015 MERCEDES-BENZ SLS AMG GT ROADSTER interior lights
[x] Cancel search: interior lightsPage 8 of 290
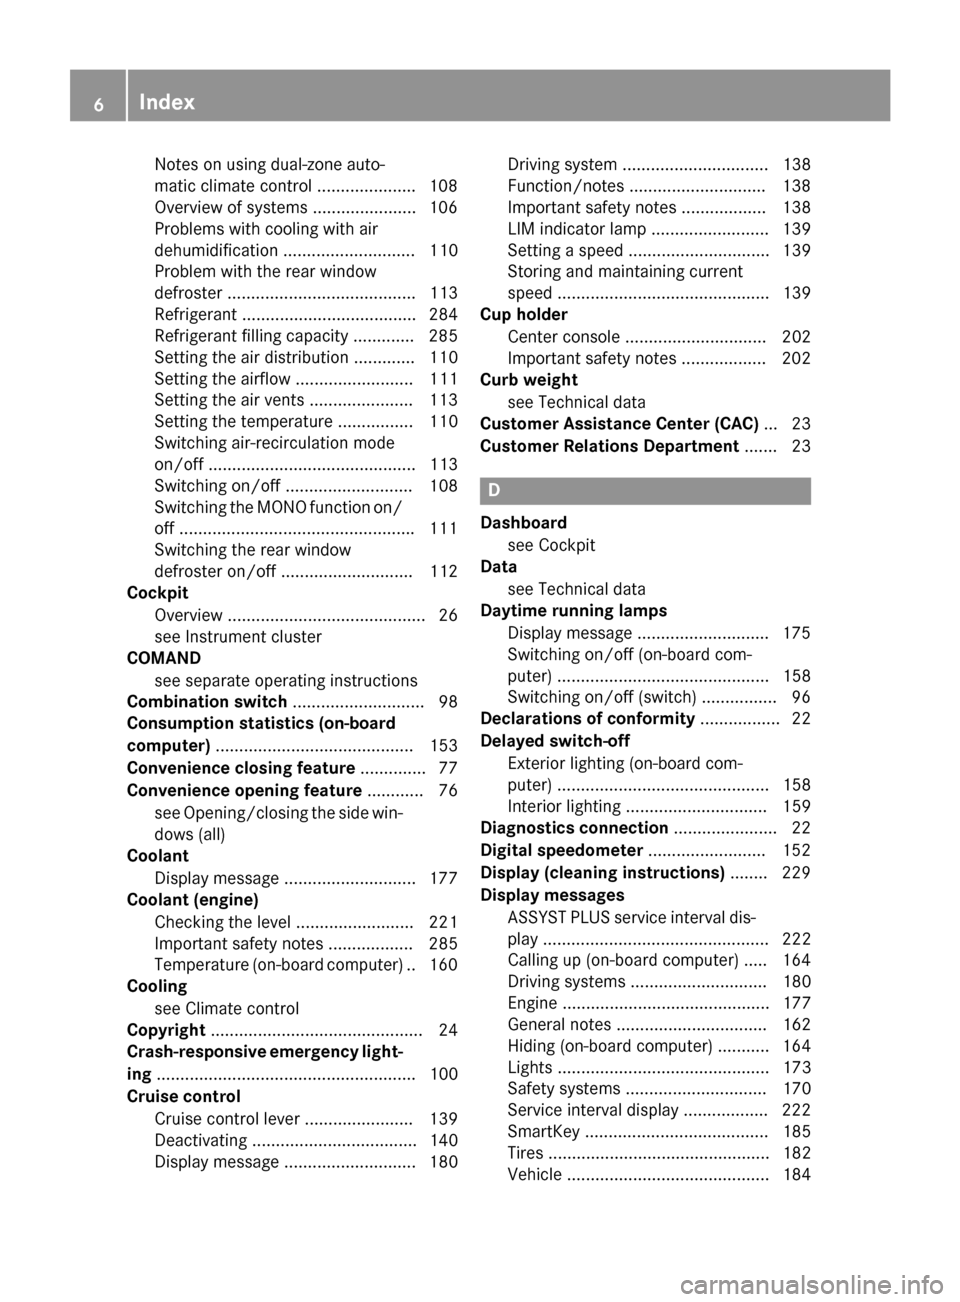
Notes on using dual-zone auto-
matic climate control .....................1
08
Overview of systems ..................... .106
Problems with cooling with air
dehumidification ............................ 110
Problem with the rear window
defroster ........................................ 113
Refrigerant ..................................... 284
Refrigerant filling capacity ............. 285
Setting the aird istribution ............. 110
Setting the airflow ......................... 111
Setting the airv ents ..................... .113
Setting the temperature ................ 110
Switching air-recirculation mode
on/off ............................................ 113
Switching on/off ........................... 108
Switching the MONO function on/
off ................................................. .111
Switching the rear window
defroster on/off ............................ 112
Cockpit
Overview .......................................... 26
see Instrument cluster
COMAND
see separate operating instructions
Combination switch ............................ 98
Consumptio nstatistic s(on -board
computer) .......................................... 153
Convenience closing feature .............. 77
Convenience opening feature ............ 76
see Opening/closing the sid ewin-
dow s(all)
Coolant
Display message ............................ 177
Coolan t(en gine)
Checking the leve l......................... 221
Important safety notes .................. 285
Temperature (on-board computer) .. 160
Cooling
see Climate control
Copyright ............................................. 24
Crash-responsive emergency light-
ing ....................................................... 100
Cruis econtrol
Cruise control leve r....................... 139
Deactivating ................................... 140
Display message ............................ 180 Driving system ............................... 138
Function/notes ............................
.138
Important safety notes .................. 138
LIM indicator lamp ......................... 139
Setting aspee d.............................. 139
Storing and maintaining current
spee d............................................. 139
Cup holder
Center console .............................. 202
Important safety notes .................. 202
Curb weight
see Technical data
Customer Assistanc eCenter (CAC) ... 23
Customer Relations Department ....... 23 D
Dashboard see Cockpit
Data
see Technical data
Daytime runnin glamps
Display message ............................ 175
Switching on/off (on-board com-
puter) ............................................. 158
Switching on/off (switch) ................ 96
Declarations of conformity ................. 22
Delaye dswitch-off
Exterior lighting (on-board com-
puter) ............................................. 158
Interior lighting .............................. 159
Diagnostic sconnection ..................... .22
Digital speedometer .........................152
Display (cleaning instructions) ........229
Display messages ASSYST PLUS service interva ldis-
pla y................................................ 222
Calling up (on-board computer) ..... 164
Driving system s............................. 180
Engine ............................................ 177
Genera lnotes ................................ 162
Hiding (on-board computer) ........... 164
Lights ............................................. 173
Safety systems .............................. 170
Service interva ldisplay .................. 222
SmartKey ....................................... 185
Tires ............................................... 182
Vehicl e........................................... 184 6
Index
Page 11 of 290
Opening/closing the garage door .. 213
Programming (button in the rear-
view mirror) ................................... 212
Gasoline ............................................. 282
Gear indicator .................................... 123
Gear or selector lever (cleaning
guidelines) ......................................... 229
Genuine parts ...................................... 18
Glove box ...........................................2 00H
Hazard warning lamps ........................ 98
Head bags ............................................ 42
Headlamp cleaning system Notes ............................................. 286
Headlamps
Adding fluid to cleaning system ..... 221
Cleaning system (capacity )............ 286
Cleaning system (function) .............. 99
Cleaning system (notes) ................ 286
Fogging up ....................................... 99
see Automati cheadlamp mode
Hea dlevel heatin g(AIRSCARF) .......... 88
Heating see Climate control
High-beam headlamps
Switching on/of f.............................. 98
High-beam headlamps (display
message) ............................................ 175
Hil lstart assist .................................. 121
Hood Closing ........................................... 219
Displa ymessage ............................ 184
Important safety notes .................. 218
Opening ......................................... 218
Hydroplaning ..................................... 137 I
Ignitio nlock ....................................... 119
see Key positions
Immobilizer .......................................... 58
Indicator lamps see Warning and indicator lamps
Indicators
see Turn signals Instrument cluster
Overview .......................................... 27
Setting s......................................... 157
Warning and indicator lamps ........... 28
Instrument cluste rlighting .............. 158
Interior lighting Automati ccontrol ............................ 99
Delayed switch-off (on-board
computer) ...................................... 159
Emergency lighting ........................ 100
Manua lcontrol ............................... 100
Overview .......................................... 99
Reading lamp ................................... 99 J
Jack Storage location ............................ 234
Using ............................................. 272
Jump starting (engine) ...................... 242 K
KEYLESS-GO start function Displa ymessage ............................ 185
Start/Sto pbutton .......................... 119
Starting the engine ........................ 120
Ke yp ositions
SmartKey ....................................... 119
Kickdown ........................................... 124
Driving tip s.................................... 124
Knee bag .............................................. 41 L
Lamps see Warning and indicator lamps
Lap time (RACETIMER) ...................... 161
License plate lamp Changing bulb s.............................. 101
License plate lamp (display mes-
sage) ................................................... 175
Lights Activating/deactivating the inter-
iorl ighting delaye dswitch-off ........ 159
Automati cheadlamp mod e.............. 96
Displa ymessage ............................ 173
Driving abroa d................................. 96 Index
9
Page 39 of 290
SRS (Supplementa
lRestraint System)
Introduction SRS reduces the risk of occupants coming
into contact with the vehicle's interior in the
event of an accident. It can also reduce the
effect of the forces to which occupants are
subjected during an accident.
SRS consistso f:
R 0075 SRS warning lamp
R air bags
R air bag control unit (with crash sensors)
R Emergency Tensioning Devices
R seat belt force limiters
SRS warning lamp G
WARNING
If SRS is malfunctioning, restraint system
components may be triggered unintentionally
or might not be triggered at all in the event of
an accident with ahigh rate of vehicle decel-
eration. There is an increased risk of injury,
possibly even fatal.
Have SRS checked and repaired immediately
at aq ualified specialist workshop.
SRS functions are checked regularly when
you switch on the ignition and when the
engine is running. Therefore, malfunctions
can be detected in good time.
The 0075 SRS warning lamp in the instrument
cluster lights up when the ignition is switched on. It goes out no later than afew seconds
after the engine is started.
The SRS components are in operational read-
iness when the 0075SRS indicator lamp goes
out while the engine is running. There is
amalfunction if:
R the 0075 SRS warning lamp does not light
up when the ignition is switched on
R the engine is running and the 0075SRS
warning lamp does not go out after afew
seconds
R the engine is running and the 0075SRS
warning lamp lights up again
Safety guidelines for seat belts, Emer-
gency Tensioning Devices (ETDs) and
air bags G
WARNING
R Damaged seat belts or seat belts that have
been subjected to stress in an accident
must be replaced. Their anchoring points
must also be checked. Only use seat belts
installed or suppliedbyana uthorized
Mercedes-Benz Center.
R Air bags and pyrotechnic Emergency Ten-
sioning Devices (ETDs) contain perchlorate
material, which may require special han-
dling and regard for the environment.
Check your national disposal guidelines.
California residents, see
www.dtsc.ca.gov/HazardousWaste/
Perchlorate/index.cfm .
R Air bags and ETDs are designed to function
on aone-time-only basis. An air bag or ETD
that has deployedm ust be replaced.
R Do not pass seat belts over sharp edges.
They could tear.
R Do not make any modification that could
change the effectiveness of the seat belts.
R Do not bleach or dye seat belts as this may
severely weaken them. In acrash they may
not be able to provide adequate protection.
R No modifications of any kind may be made
to any components or wiring of the SRS.
R Do not change or remove any componen tor
part of the SRS.
R Do not install additional trim material, seat
covers, badges, etc. over the steering
wheel hub, front-passenger front air bag Occupant safety
37Safety
Z
Page 97 of 290
Useful information
..............................96
Exterior lighting .................................. 96
Interior lighting ................................... 99
Replacing bulbs ................................. 100
Windshield wipers ............................101 95Lights and windshield wipers
Page 101 of 290
The hazard warning lamps switch off auto-
matically if the vehicle exceeds aspeed of
6m ph(10 km/h) again after afull brake appli-
cation.
i The hazard warning lamps still operate if
the ignition is switched off. Headlam
pcleaning system
The headlamps are cleaned automatically if
the "Wipe with washer fluid" function is oper-
ated five times (Y page 101) while the lights
are on and the engine is running. When you
switch off the ignition ,the automatic head-
lamp cleaning system is reset and counting is
resumed from 0. Headlamps fogged up on the inside
The headlamps may fog up on the inside if
there is high atmospheric humidity.
X Drive with the headlamps switched on.
The level of moisture diminishes, depend-
ing on the length of the journey and the
weather conditions (humidity and temper-
ature).
If the level of moisture does not diminish:
X Have the headlamps checked at aqualified
specialist workshop. Interior lighting
Overview of interior lighting
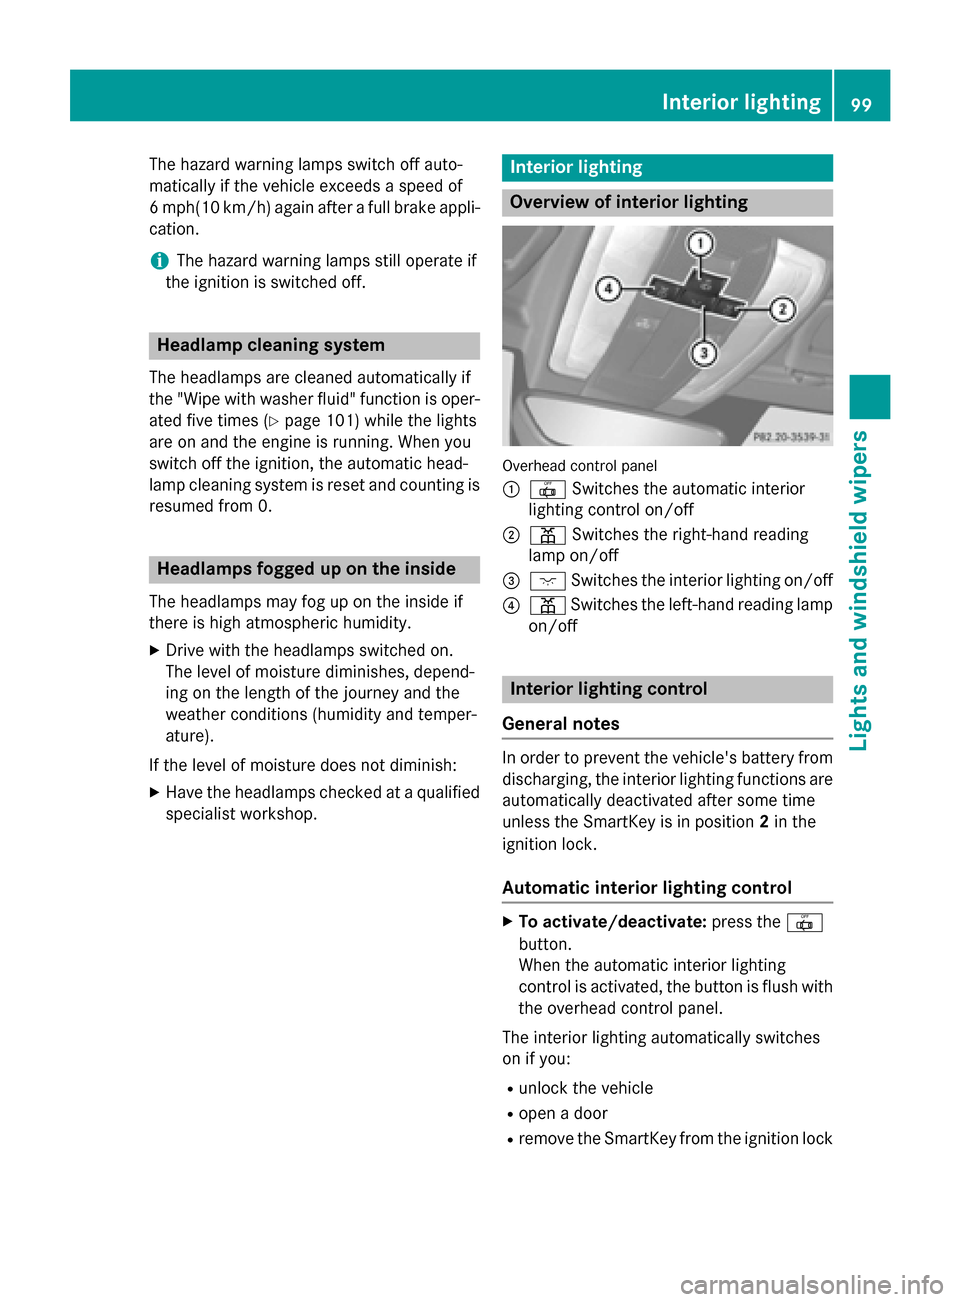
Overhead control panel
0043
0033 Switches the automatic interior
lighting control on/off
0044 003D Switches the right-hand reading
lamp on/off
0087 004A Switches the interior lighting on/off
0085 003D Switches the left-hand reading lamp
on/off Interior lighting control
General notes In order to prevent the vehicle's battery from
discharging, the interior lighting functions are
automatically deactivated after some time
unless the SmartKey is in position 2in the
ignition lock.
Automatic interior lighting control X
To activate/deactivate: press the0033
button.
When the automatic interior lighting
control is activated, the button is flush with
the overhead control panel.
The interior lighting automatically switches
on if you:
R unlock the vehicle
R open adoor
R remove the SmartKey from the ignition lock Interior lighting
99Lights and windshield wipers Z
Page 102 of 290
The interior light is activated for
ashort while
when the SmartKey is removed from the igni-
tion lock. You can activat ethis delayed
switch-off using the on-board computer
(Y page 159).
Manua linterior lighting control X
To switch the interior lighting on/off:
press the 004Abutton.
X To switch the reading lampso n/off:
press the 003Dbutton. Crash-responsive emergency lighting
The interior lighting is activated automatically
if the vehicle is involved in an accident.
X To switch off the crash-responsive
emergency lighting: press the hazard
warning lamp button.
or X Lock and then unlock the vehicle using the
key. Replacing bulbs
Important safety notes
Xenon bulbs G
DANGER
Xenon bulbs carry ahigh voltage. You can get
an electric shock if you remove the cover of
the Xenon bulb and touch the electrical con-
tacts. There is arisk of fatal injury.
Never touch the parts or the electrical con-
tactsoft he Xenon bulb. Always have work on
the Xenon bulbs carried out at aqualified spe-
cialist workshop.
Your vehicle is equipped with Xenon bulbs.
You can recognize this by the following: the
cone of light from the Xenon bulbs moves
from the top to the bottom and back again
when you start the engine. For this to be observed, the lights must be switched on
before starting the engine.
Bulbs and lamps are an importan
taspect of
vehicle safety. You must therefore make sure that these function correctly at all times.
Have the headlamp setting checked regularly.
Other bulbs G
WARNING
Bulbs, lamps and connector scan get very hot
when operating. If you change abulb, you
could burn yourself on these components.
There is arisk of injury.
Allow these components to cool down before changin gabulb.
There are bulbs other than the Xenon bulbs
that you cannot replace. Replace only the
bulbs listed (Y page 101). Have the bulbs that
you cannot replace yourself changed at a
qualified specialist workshop.
If you require assistance changin gbulbs, con-
sult aqualified specialist workshop.
Do not touch the glass tube of new bulbs with
your bare hands. Even minor contamination
can burn into the glass surface and reduce
the service life of the bulbs. Always use alint-
free cloth or only touch the base of the bulb
when installing.
Only use bulbs of the correc ttype.
If the new bulb still does not light up, consult
aq ualified specialist workshop.
Bulbs and lamps are an importan taspect of
vehicle safety. You must therefore make sure that these function correctly at all times.
Have the headlamp setting checked regularly. Changing the front bulbs
You cannot replace the bulbs at the front
yourself. Contact aqualified specialist work-
shop which has the necessary specialist
knowledge and tools to carry out the work
required. Mercedes-Benz recommends that 100
Replacing bulbsLights and windshield wipers
Page 112 of 290
Problems with the "Cooling with air dehumidification" function
Problem
Possible causes/consequences and
0050
0050Solutions The indicator lamp in
the
005A button
flashes three times or
remains off. The "Cool-
ing with air dehumidifi-
cation" function cannot
be switched on. Cooling with air dehumidification has been deactivated due to a
malfunction.
X Visit aqualified specialist workshop. Setting climate control to automatic
General notes In automatic mode, the set temperature is
controlled automatically. The system auto-
matically regulates the temperature of the
dispensed air, the airflow and the air distri-
bution.
The automatic mode functions optimally
when the "Cooling with air dehumidification"
function is activated. If necessary, cooling
with air dehumidification can be deactivated.
If you deactivate the "Cooling with air-dehu-
midification" function, the air inside the vehi- cle will not be cooled. The air inside the vehi-
cle will also not be dehumidified. The win-
dows can fog up more quickly. Therefore,
deactivate the cooling with air-dehumidifica-
tion function only briefly.
Activating/switching X
Select key position 2with the Start/Stop
button (Y page 119).
X Set the desired temperature.
X To activate: press the0058button.
The indicator lamp in the 0058button lights
up. Automatic air distribution and airflow
are activated.
X To switch to manualm ode:press the
0058 button.
The indicator lamp in the 0058button goes
out. Automatic air distribution and airflow
are deactivated. Setting the temperature
Differentt emperatures can be set for the
driver's and front-passenger sides.
X Select key position 2with the Start/Stop
button (Y page 119).
X To increase/reduce: turn controls0043and
006C clockwise or counter-clockwise
(Y page 107).
Only change the temperature settingin
small increments. Start at 72 ‡(22 †). Setting the air distribution
Air distribution settings 0061
Directsa ir through the defroster vents
009C Directsa ir through the center and side
air vents
009B Directsa ir through the footwell air
vents
009F Directsa ir through the center, side and
footwell vents
008F Directst he airflow to the entire vehicle
interior
0087 Directsa ir through the defroster,
center and side air vents
0086 Directsa ir through the defroster and
footwell vents 110
Operating the climate control systemsClimatec
ontrol
Page 115 of 290
Problems with the rear window defroster
Problem
Possible causes/consequences and
0050
0050Solutions The rear window
defroster has deacti-
vated prematurely or
cannot be activated. The on-board voltage is too low because too many electrical con-
sumers are switched on.
X Switch off any consumers that are not required, e.g. reading
lamps, interior lighting or the seat heating.
When the battery is sufficiently charged, the rear window
defroster can be activated again. Activating/deactivating air-recircula-
tion mode
General notes You can deactivate the flow of fresh air if
unpleasant odors are enteringt
he vehicle
from outside. The air already inside the vehi-
cle will then be recirculated.
If you switch on air-recirculation mode, the
windows can fog up more quickly, in particu-
lar at low temperatures. Only use air-recircu-
lation mode briefly to prevent the windows
from fogging up.
Activating/deactivating X
Select key position 2with the Start/Stop
button (Y page 119).
X To activate: press the0072button.
The indicator lamp in the 0072button lights
up.
i Air-recirculation mode is activated auto-
matically at high outside temperatures.
When air-recirculation mode is activated
automatically, the indicator lamp in the
0072 button is not lit.
Outside air is added after about 30
minutes.
X To deactivate: press the0072button.
The indicator lamp in the 0072button goes
out. i
Air-recirculation mode deactivates auto-
matically:
R after approximately five minutes at out-
side temperatures below approximately
41 ‡(5†)
R after approximately five minutes if cool-
ing with air dehumidification is deacti-
vated
R after approximately 30 minutes at out-
side temperatures above approximately
41 ‡(5†)ift he "Cooling with air dehu-
midification" function is activated Setting the air vents
Important safety notes
G
WARNING
Very hot or very cold air can flow from the air vents. This could result in burns or frostbitein the immediate vicinity of the air vents. There
is ar isk of injury.
Make sure that all vehicle occupants always
maintain asufficient distance to the air out-
lets. If necessary, redirect the airflow to
another area of the vehicle interior. Setting the air vents
113Climatecontrol Z