2015 MERCEDES-BENZ SLS AMG GT ROADSTER fuel cap
[x] Cancel search: fuel capPage 10 of 290
Emissions control
Servic eand warranty informatio n....19
Engine
Display message ............................ 177
Engin enumber .............................. .281
Starting .......................................... 120
Starting the engine with the
SmartKey ....................................... 120
Starting with the KEYLESS-GO
start function ................................. 120
Switching off .................................. 132
Engine diagnostics warning lamp .... 195
Engine oil Adding .......................................... .220
Additives ........................................ 284
Checking the oil leve l..................... 219
Checking the oil leve lusing the
dipstick .......................................... 219
Display message .................... 178, 179
Filling capacity ............................... 284
Notes about oil grades ................... 283
Notes on oil level/consumption .... 219
Temperature (on-board computer) .. 160
Temperature gauge ........................ 150
Viscosity ........................................ 284
E-SELECT lever ................................... 121
ESP ®
(Electronic Stability Pro-
gram) Deactivating/activating ................... 56
Display message ............................ 170
Function/notes ................................ 56
Important safety information ........... 55
Warning lamp ................................. 193
Exhaus tcheck ................................... 135
Exhaus tpipe (cleaning instruc-
tions) ................................................. .229
Exterior lighting Setting options ................................ 96
see Lights
Exterior mirrors
Adjusting ......................................... 90
Dipping (automatic) ......................... 91
Folding in/ou t(au tomatically). ........ 91
Folding in/out (electrically) ............. 91
Folding in when locking (on-board
computer) ...................................... 160
Ou tofp osition (troubleshooting )..... 91 Setting ............................................. 91
Storing settings (memory function) .. 92
Storing the parking position ............. 91 F
Filler cap see Fue lfille rflap
First-ai dkit......................................... 234
Flat tire Preparing the vehicl e..................... 235
Raising the vehicl e......................... 272
TIREFIT kit ...................................... 235
Floormats ........................................... 214
Fuel Additives ........................................ 283
Consumption statistics .................. 153
Displaying the rang e...................... 153
Driving tip s.................................... 135
E10 ................................................ 282
Fue lgauge ....................................... 27
Grade (gasoline )............................ 282
Important safety notes .................. 282
Problem (malfunction) ................... 131
Refueling ........................................ 128
Tank content/reserve fue l............. 282
Fue lfille rflap ,opening/closing ....... 129
Fue llevel
Calling up the rang e(on-board
computer) ...................................... 153
Fue ltank
Capacity ........................................ 282
Problem (malfunction) ................... 131
Fus ebox
Front-passenger footwell ............... 247
Rear compartment ......................... 247
Fuses
Allocation chart ............................. 247
Before changing ............................. 247
Important safety notes .................. 246 G
Garag edooro pener
Clearing the memory ..................... 214
Important safety notes .................. 211 8
Index
Page 131 of 290
You must avoid fire, open flames
,creating
spark sand smoking. Switch off the engine
and, if applicable, the auxiliary heatin gbefore
refueling. G
WARNING
Fuel is poisonous and hazardous to health.
There is arisk of injury.
You must make sure that fuel does not come int oc ontac twith your skin ,eyes or clothing
and that it is not swallowed. Do not inhale fuel
vapors .Keep fuel away from children.
If you or others com eintoc ontac twith fuel,
observ ethe following:
R Wash away fuel from skin immediately
using soap and water.
R If fuel comes int ocontac twith your eyes,
immediately rinse the mthoroughly with
clean water. Seek medical assistanc ewith-
out delay.
R If fuel is swallowed, seek medical assis-
tance without delay. Do not induc evomit-
ing.
R Immediately change out of clothing which
has com eintoc ontac twith fuel. G
WARNING
Electrostatic buildup can create spark sand
ignit efuel vapors .There is arisk of fire and
explosion.
Always touc hthe vehicle body befor eopening
the fuel filler flap or touching the fuel pump
nozzle. An yexisting electrostatic buildup is
thereby discharged.
! Do not use diesel to refuel vehicles with a
gasolin eengine. Do not switc honthe igni-
tion if you accidentally refuel with the
wron gfuel. Otherwise, the fuel will enter
the fuel system. Even small amount softhe
wron gfuel could result in damage to the
fuel syste mand the engine. Notify aquali-
fied specialis tworkshop and have the fuel
tan kand fuel lines draine dcompletely. !
Overfilling the fuel tan
kcould damage the
fuel system.
! Take care not to spill any fuel on painted
surfaces. You could otherwise damage the paintwork.
! Use
afilter when refuelin gfrom afuel can.
Otherwise, the fuel lines and/or injection
syste mcould be blocked by particles from
the fuel can.
If you overfill the fuel tank, fuel could spray
out when the fuel pump nozzle is removed.
Further information on fuel and on fuel grades can be foun dinthe "Fuel" section
(Y page 282). Refueling
Fuel filler flap When you open or close the vehicle with the
SmartKey, the fuel filler flap is automatically
unlocked or locked.
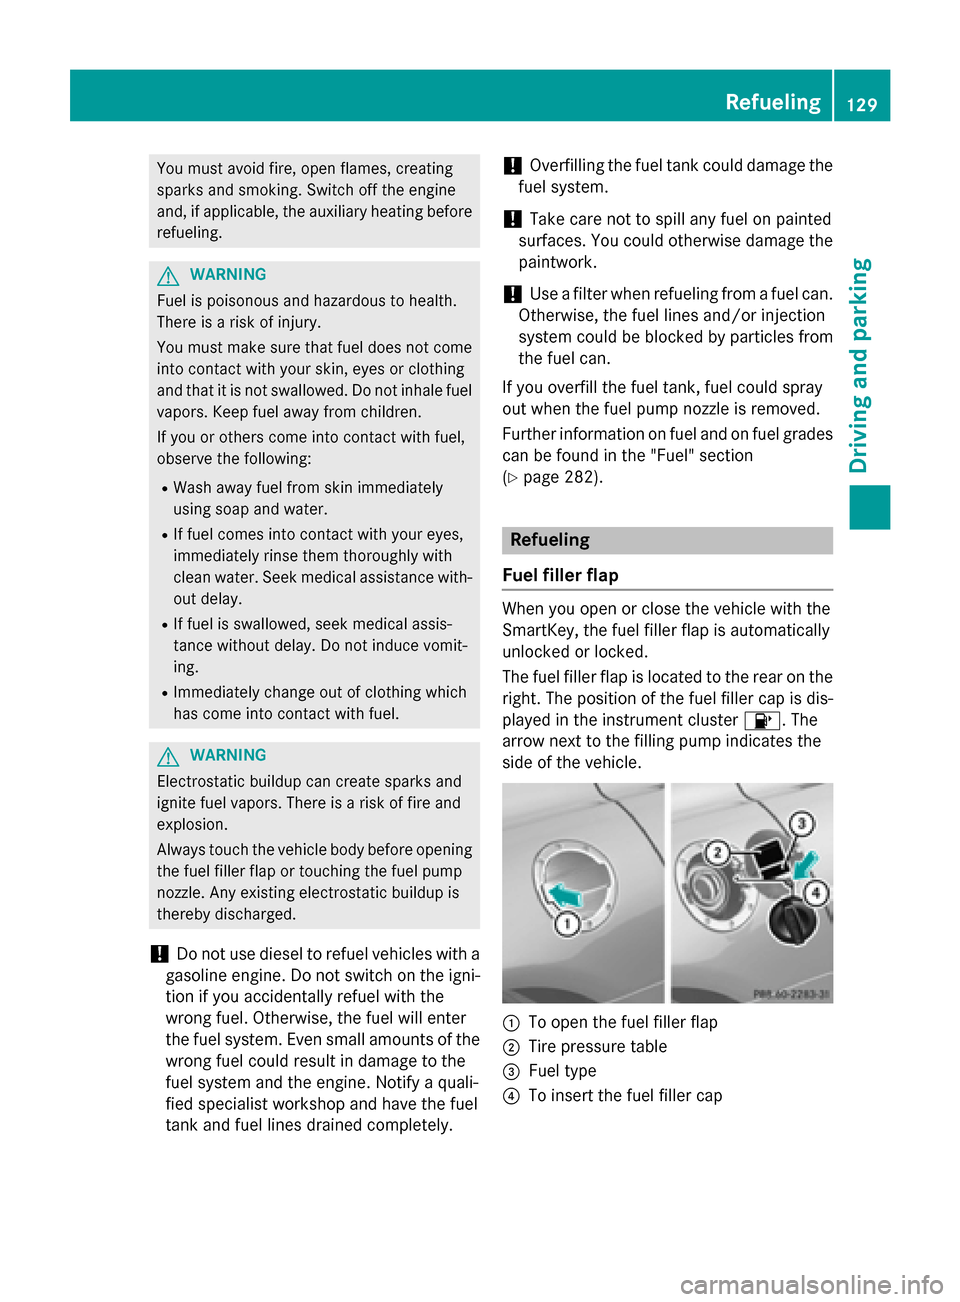
The fuel filler flap is located to the rear on the right .The position of the fuel filler cap is dis-
played in the instrumen tcluster 00B6.T he
arrow nex ttothe filling pump indicates the
side of the vehicle. 0043
To open the fuel filler flap
0044 Tire pressure table
0087 Fuel type
0085 To inser tthe fuel filler cap Refueling
129Driving and parking Z
Page 132 of 290
Opening
X
Switc hoff the engine.
i When the engin
eisrunning and the fuel
filler flap is open, the engin ediagnostics
warning lamp 00B9may light up.
Further information can be found in the
"Warning and indicator lamps in the instru-
ment cluster "chapter (Y page 195).
X Open the driver's door. This switches the
ignition to position 0,which corresponds to
having removed the SmartKey. The driver’s
door can be closed again.
X Press the fuel filler flap in the direction of
arrow 0043.
The fuel filler flap opens slightly.
X Open the fuel filler flap.
X Turn the fuel filler cap counter-clockwise
and remove it.
X Inser tthe fuel filler cap intot he holder
bracket on the inside of filler flap 0085.
X Completely insert the fuel pump nozzle into
the filler necka nd refuel.
X Only fill the tank until the pump nozzle
switches off.
! Overfilling the fuel tank could damage the
fuel system.
Closing X
Replace the fuel filler cap and turn it clock-
wise. The fuel filler cap audibly engages.
X Close the fuel filler flap. 130
RefuelingDriving and parking
Page 182 of 290
Display messages
Possible causes/consequences and
0050
0050Solutions 00B6
Gas Cap Loose Gas Cap Loose The fuel system pressur
eistoolow. The fuel filler cap is no tclosed
correctl yorthefue lsystem is leaking.
X Chec kthatthe fuel filler cap is correctl yclosed.
If th efuelfiller cap is not correctl yclosed:
X Clos ethe fuel filler cap.
If th efuelfiller cap is correctl yclosed:
X Visit aqualified specialist workshop. 009E
Replac
eAir Filter
Replac eAir Filter The air filte
risdirty and mus tbereplaced.
X Visit aqualified specialist workshop. Driving systems
Display messages
Possible causes/consequences and
0050 0050Solutions Cruise Control
Cruise Control
Inoperative Inoperative Cruis
econtro lisdefective.
Aw arnin gtonea lso sounds.
X Visit aqualified specialist workshop. Cruise Control
Cruise Control
---m
ph
---m ph Ac
onditi on foractivatin gcruise control has no tbeen fulfilled.
You hav etried to store aspeed belo w20m ph(30 km/ h),for
example.
X Activat eESP®
(Y page 56).
X If condition spermit ,drive faster than 20 mph (3 0km/ h)and
store th espeed.
X Chec kthe activation condition sfor cruise control (Y page 138).180
Display messagesOn-boar
dcomputer and displays
Page 198 of 290
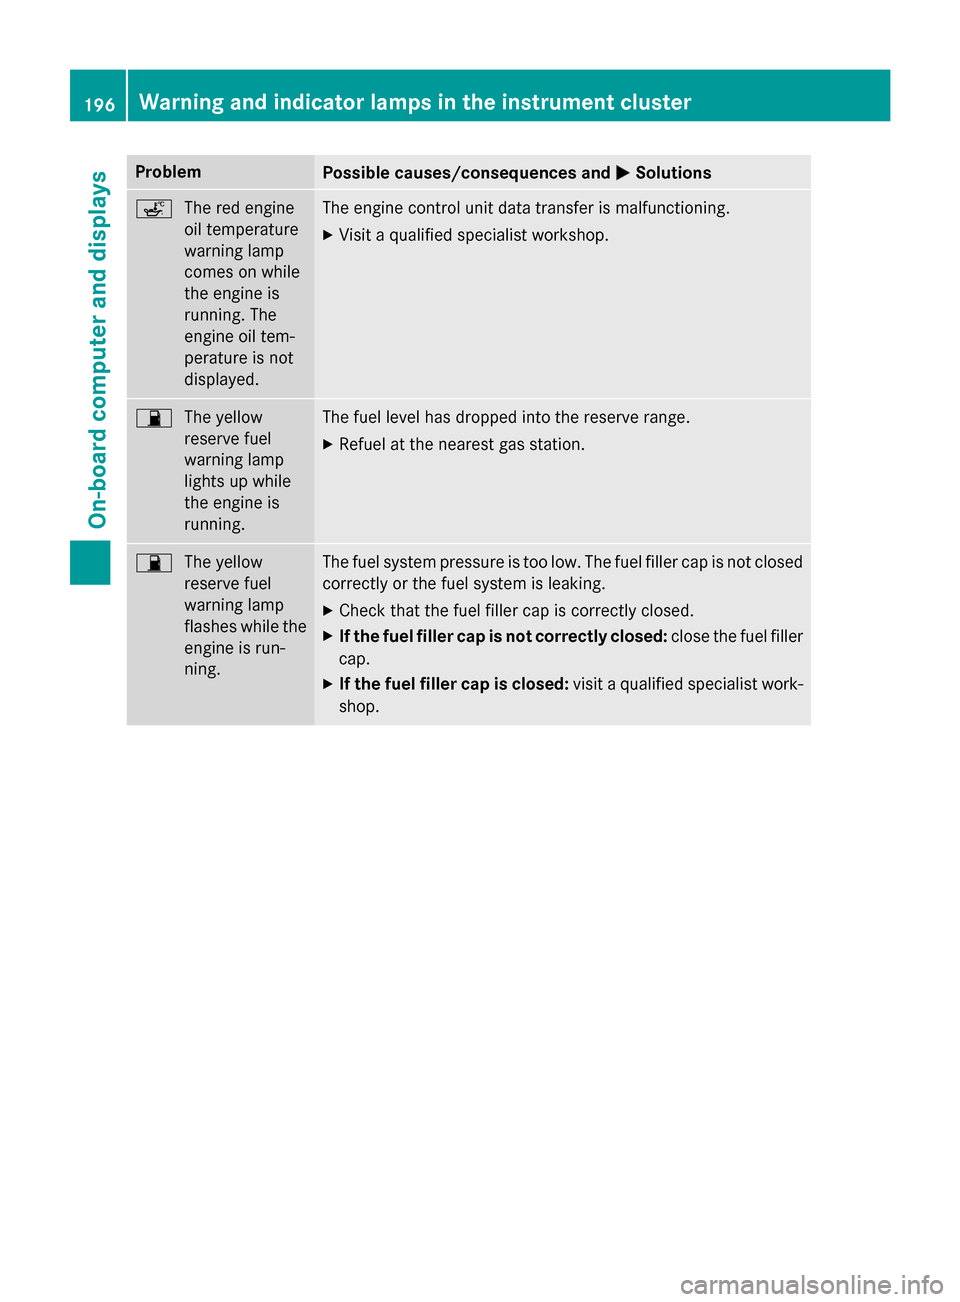
Problem
Possible causes/consequences and
0050
0050Solutions 00E4
The red engine
oil temperature
warning lamp
comes on while
the engine is
running. The
engine oil tem-
perature is not
displayed. The engine control unit data transfer is malfunctioning.
X Visit aqualified specialist workshop. 00B5
The yellow
reserve fuel
warning lamp
lights up while
the engine is
running. The fuel level has dropped into the reserve range.
X Refuel at the nearest gas station. 00B5
The yellow
reserve fuel
warning lamp
flashes while the
engine is run-
ning. The fuel system pressure is too low. The fuel filler cap is not closed
correctly or the fuel system is leaking.
X Check that the fuel filler cap is correctly closed.
X If the fuel filler cap is not correctly closed: close the fuel filler
cap.
X If the fuel filler cap is closed: visitaqualified specialist work-
shop. 196
Warning and indicator lampsint
he instrument clusterOn-board computer and displays
Page 244 of 290
Jump-starting
G
WARNING
Battery acid is caustic. There is arisk of injury.
Avoid contact with the skin, eyes or clothing. Do not inhale any battery gases. Do not lean over the battery. Keep children away from batteries. Wash battery acid immediately with water and seek
medical attention. G
WARNING
During charging and jump-starting, explosive gases can escape from the battery. There is arisk
of an explosion.
Particularly avoid fire, open flames, creating sparks and smoking. Ensure there is sufficient ven-
tilation while charging and jump-starting. Do not lean over abattery. G
WARNING
During the charging process, abattery produces hydrogen gas. If ashort circuit occurs or sparks
are created, the hydrogen gas can ignite. There is arisk of an explosion.
R Make sure that the positive terminal of aconnected battery does not come into contact with
vehicle parts.
R Never place metal objects or tools on abattery.
R It is important that you observe the described order of the battery terminals when connecting
and disconnecting abattery.
R When jump-starting, make sure that the battery poles with identical polarity are connected.
R It is particularly important to observe the described order when connecting and disconnecting
the jumper cables.
R Never connect or disconnectt he battery terminals while the engine is running.G
WARNING
Ad ischarged battery can freeze at temperatures below freezing point. When jump-starting the
vehicle or charging the battery, gases can escape from the battery. There is arisk of an explosion.
Allow the frozen battery to thaw out before charging it or jump-starting.
! Avoid repeated and lengthy startinga
ttempts. Otherwise, the catalytic converter could be
damaged by the non-combusted fuel.
Do not start the vehicle using arapid charging device. If your vehicle's battery is discharged,
the engine can be jump-started from another vehicle or from asecond battery using jumper
cables. Observe the following points:
R The battery is not accessible in all vehicles. If the other vehicle's battery is not accessible,
jump-start the vehicle using asecond battery or ajump-starting device.
R You may only jump-start the vehicle when the engine and exhaust system are cold.
R Do not start the engine if the battery is frozen.L et the battery thaw first.
R Only jump-start from batteries with a12Vvoltage rating.
R Only use jumper cables which have asufficient cross-section and insulated terminal clamps. 242
Jump-startingBreakdown assistance
Page 257 of 290
If the tire pressure is not set correctly, this
can leadtoane xcessive build up of heat and
as udden loss of pressure.
For more information, contact aqualified spe-
cialist workshop. Important notes on tire pressure
G
WARNING
If the tire pressure drops repeatedly,t he
wheel, valve or tire may be damaged. Tire
pressure that is too low may resultina tire
blow-out. There is arisk of an accident.
R Check the tire for foreign objects.
R Check whether the wheelisl osing air or the
valve is leaking.
If you are unabletor ectify the damage, con-
tact aqualifieds pecialist workshop. G
WARNING
If you fit unsuitable accessorie sonto tire
valves ,the tire valves may be overloaded and
malfunction, which can cause tire pressure
loss. Due to their design, retrofitted tire pres- sure monitors keep the tire valve open. This
can also resultint ire pressure loss. There is a
risk of an accident.
Only screw the standard valve cap or other
valve caps approved by Mercedes-Benz for
yourv ehicle onto the tire valve.
Use asuitable pressure gauge to check the
tire pressure. The outer appearance of atire
does not permit any reliable conclusion about the tire pressure. On vehicle sequippedw ith
the electronic tire pressure monitor, the tire
pressure can be checked in the on-board
computer.
The tire temperature and pressure increase
when the vehicle is in motion. This is depend-
ent on the driving speed and the load.
Therefore ,you shouldo nly correct tire pres-
sures when the tires are cold. The tires are cold:
R if the vehicle has been parked without
direct sunlight on the tires for at least three
hours and
R if the vehicle has not been driven further
than 1mile (1.6 km)
The tire temperature changes depending on
the outsid etemperature ,the vehicle speed
and the tire load. If the tire temperature
changes by 18 ‡(10 †), the tire pressure
changes by approximately 10 kPa (0.1 bar/
1.5 psi).T ake this into account when check-
ing the pressure of warm tires. Only correct
the tire pressure if it is too low for the current
operating conditions. If you check the tire
pressure when the tires are warm, the result- ing valuew illbeh igherthan if the tires were
cold. This is normal. Do not reduce the tire
pressure to the values pecified for cold tires.
The tire pressure would otherwis ebetoo low.
Observe the recommended tire pressures for
cold tires:
R on the Tire and Loading Information placard
on the B-pilla ronthe driver's side
R in the tire pressure table on the inside of the
fuel filler flap Underinflated or overinflated tires
Underinflated tires G
WARNING
Tires with pressure that is too low can over-
heat and burst as aconsequence. In addition,
they also suffer from excessive and/or irreg-
ularw ear, which can severel yimpair the brak-
ing propertie sand the driving characteristics.
There is arisk of an accident.
Avoid tire pressures that are too low in all the
tires, including the spare wheel.
Underinflated tires may:
R overheat, leading to tire defects
R adversely affect handling Tire pressure
255Wheelsand tires Z
Page 258 of 290
R
wear excessively and/or unevenly
R have an adverse effect on fuel consumption
Overinflated tires G
WARNING
Tires with excessively high pressure can burst
because they are damage dmoree asily by
road debris, potholes etc .Inaddition ,they
also suffer fro mirregular wear, whic hcan
severely impair th ebraking properties and the
driving characteristics. Ther eisarisk of an
accident.
Avoid tir epressures that are to ohigh in all the
tires, including th espare wheel.
Overinflated tires may: R increase th ebraking distance
R adversely affect handling
R wear excessively and/or unevenly
R have an adverse effect on ride comfort
R be mor esusceptible to damage
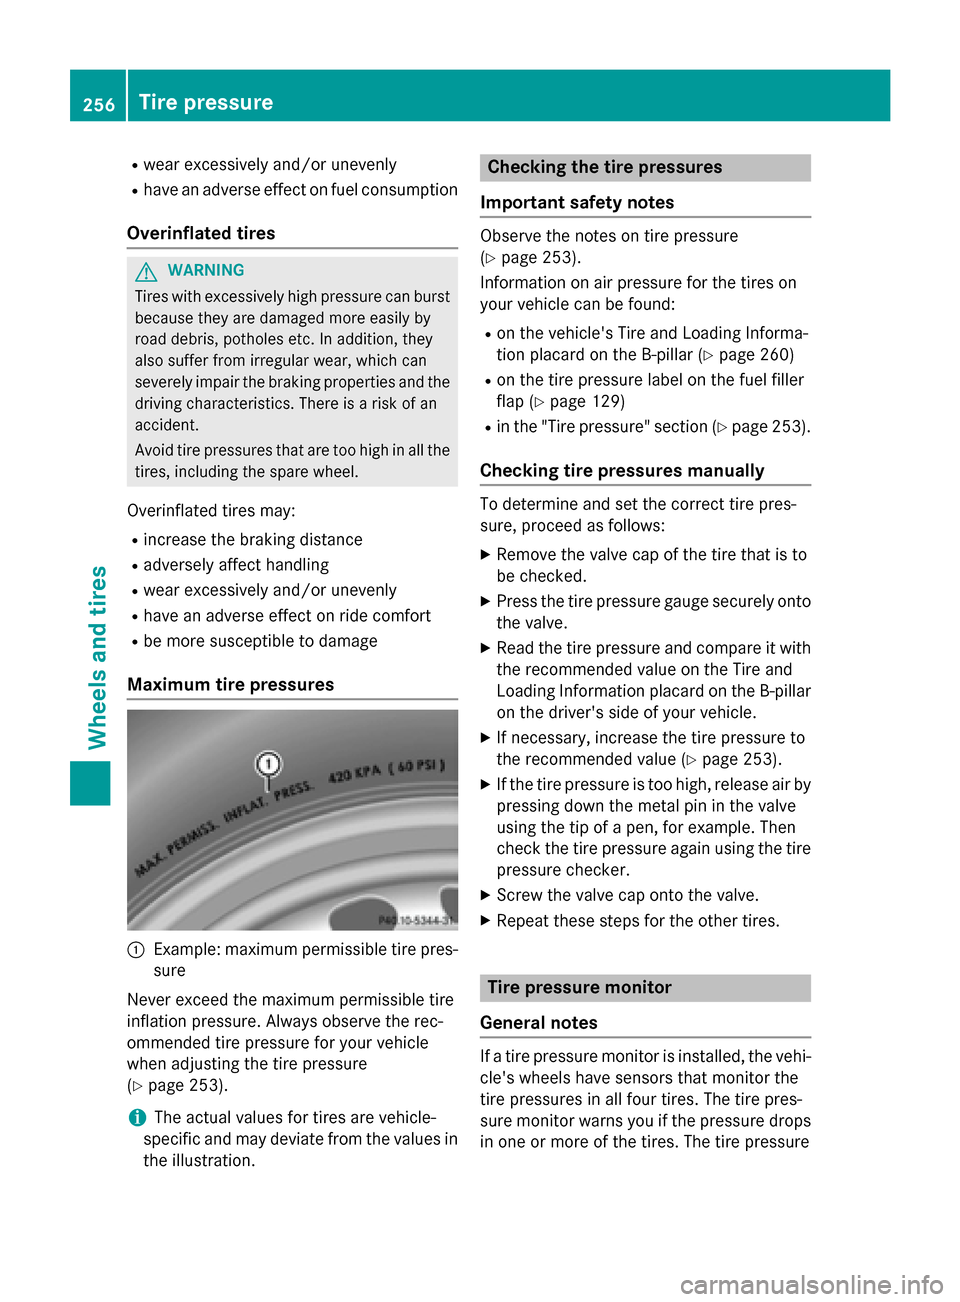
Maximum tir epressures 0043
Example: maximum permissible tir epres-
sure
Never exceed th emaximum permissible tire
inflatio npressure. Always observe th erec-
ommended tir epressure for your vehicle
when adjustin gthe tirep ressure
(Y page 253).
i The actual values for tires are vehicle-
specific and may deviat efromt hevalues in
th ei llustration. Checkin
gthe tirep ressures
Important safety notes Observe th
enotes on tir epressure
(Y page 253).
Information on air pressure for th etires on
your vehicle can be found:
R on th evehicle' sTire and Loadin gInforma-
tio np lacar dont heB-pillar (Y page 260)
R on th etirep ressure label on th efuel filler
flap (Y page 129)
R in th e"Tire pressure" sectio n(Ypage 253).
Checkin gtirep ressures manually To determine and set th
ecorrec ttirep res-
sure, proceed as follows:
X Remov ethe valve cap of th etiret hatisto
be checked.
X Pres sthe tirep ressure gauge securely onto
th ev alve.
X Read th etirep ressure and compare it with
th er ecommended value on th eTire and
Loadin gInformation placar dontheB-pillar
on th edriver' sside of your vehicle.
X If necessary, increase th etirep ressure to
th er ecommended value (Y page 253).
X If th etirep ressure is to ohigh, releas eair by
pressin gdown th emetal pin in th evalve
usin gthe tip of apen,for example. Then
check th etirep ressure again usin gthe tire
pressure checker.
X Screw th evalve cap ont othe valve.
X Repeat these steps for th eother tires. Tir
ep ressur emonitor
General notes If
at irep ressure monito risinstalled, th evehi-
cle' swheels have sensor sthatm onito rthe
tir ep ressures in all four tires. The tir epres-
sure monito rwarn syou if th epressure drops
in one or mor eofthetires. The tir epressure 256
Tir
ep ressureWheels and tires