2015 MERCEDES-BENZ S-COUPE oil level
[x] Cancel search: oil levelPage 11 of 286
Break-in period .............................. 114
DISTRONIC PLUS ........................... 135
Downhill gradient ........................... 128
Drinking and driving ....................... 127
Driving abroad ............................... 102
Driving in winter ............................. 128
Driving on flooded roads ................ 128
Driving on wet roads ...................... 128
Exhaust check ............................... 127
Fuel ................................................ 127
General .......................................... 127
Hydroplaning ................................. 128
Icy road surfaces ........................... 128
Limited braking efficiency on sal-
ted roads ....................................... 128
Snow chains .................................. 242
Symmetrical low beam.................. 102
The first 1000 miles (1500 km) ..... 114
Wet road surface ........................... 128
DVD video
Operating (on-board computer) ..... 164
see also Digital Operator's Man-
ual .................................................. 188
E
EASY-ENTRY featureFunction/note s................................ 99
EASY-EXIT feature
Function/note s................................ 99
EBD (electronic brake force distri-
bution)
Display message ............................ 169
Function/note s................................ 73
ECO display
Function/note s............................. 128
ECO start/stop function
General information ....................... 119
Electronic Stability Program
see ESP ®
(Electronic Stability Program)
Emergency
Automatic measures after an acci-
dent ................................................. 60
Emergency release
Driver's door .................................... 83
Trunk ............................................... 89
Vehicle ............................................. 83 Emergency Tensioning Devices
Activation ......................................... 57
Emissions control
Service and warranty information .... 24
Engine
Check Engine warning lamp ........... 176
Display message ............................ 174
ECO start/stop function ................ 119
Engine number ............................... 275
Irregular running ............................ 119
Jump-starting ................................. 229
Starting problems .......................... 119
Starting the engine with the
SmartKey ....................................... 118
Starting with the Start/Stop but-
ton ................................................. 118
Switching off .................................. 126
Switching off with the Start/Stop
button ............................................ 126
Switching off with the vehicle key .. 126
Tow-starting (vehicle) ..................... 234
Engine electronics
Problem (malfunction) ................... 119
Engine emergency stop .................... 237
Engine oil
Adding ........................................... 213
Additives ........................................ 278
Checking the oil level ..................... 211
Checking the oil level using the
dipstick .......................................... 211
Checking the oil level using the
on-board computer ........................ 213
Display message ............................ 165
Filling capacity ............................... 278
Notes about oil grade s................... 277
Notes on oil level/consumption .... 211
Viscosity ........................................ 278
Entering an address
see also Digital Operator's Man-
ual .................................................. 188
ESP ®
(Electronic Stability Pro-
gram)
Characteristics ................................. 71
Deactivating/activating ................... 72
Display message ............................ 166
ETS/4ETS ........................................ 71
Function/note s................................ 71
General notes .................................. 71
Index9
Page 213 of 286
!Make sure that the windshield wipers are
not folded away from the windshield. You
could otherwise damage the windshield
wipers or the hood.
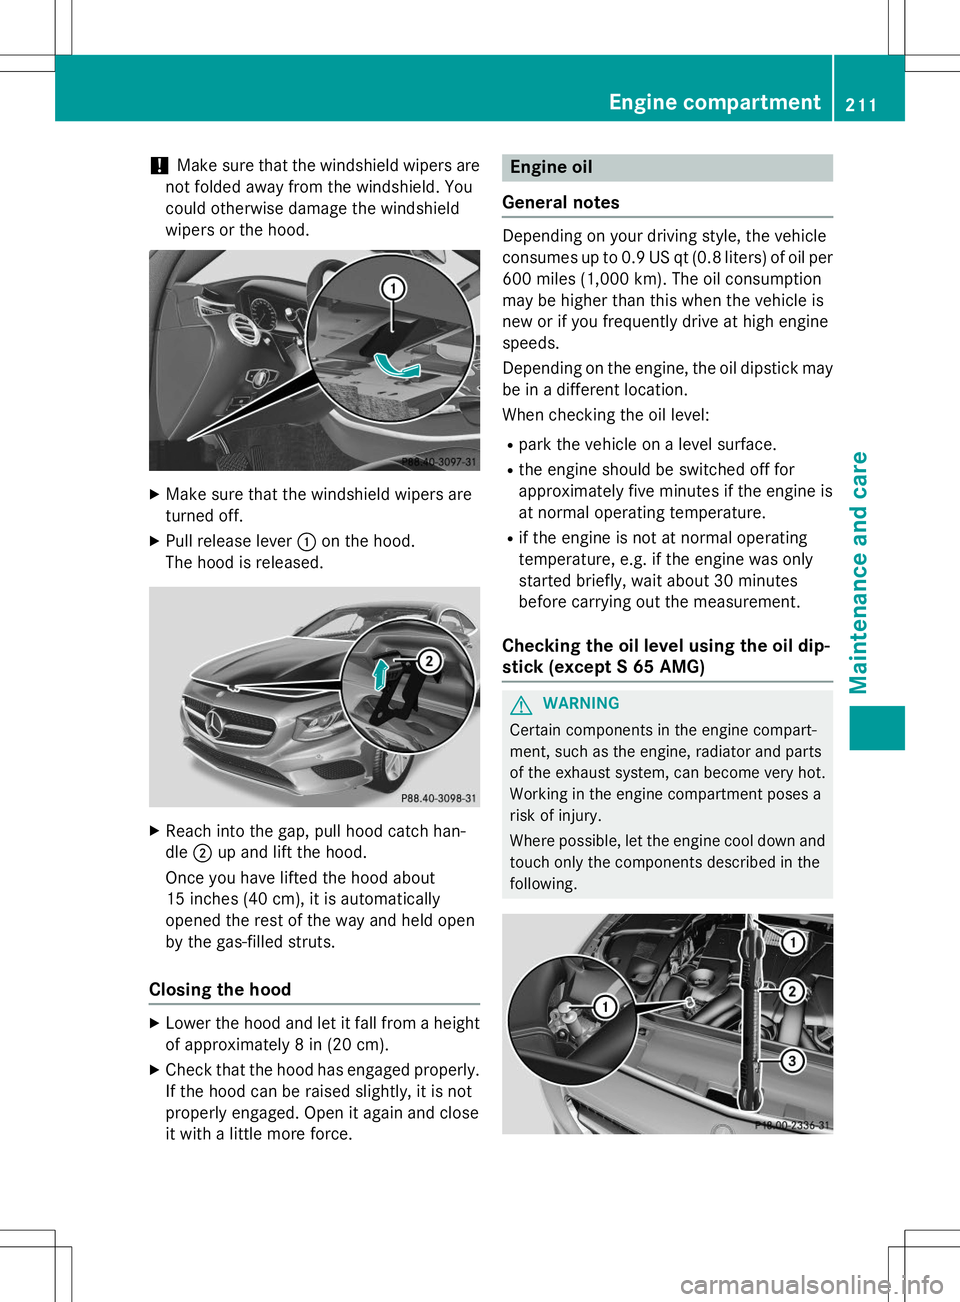
X Make sure that the windshield wipers are
turned off.
X Pull release lever :on the hood.
The hood is released.
X Reach into the gap, pull hood catch han- dle ;up and lift the hood.
Once you have lifted the hood about
15 inches (40 cm), it is automatically
opened the rest of the way and held open
by the gas-filled struts.
Closing the hood
X Lower the hood and let it fall from a height
of approximately 8 in (20 cm).
X Check that the hood has engaged properly.
If the hood can be raised slightly, it is not
properly engaged. Open it again and close
it with a little more force.
Engine oil
General notes
Depending on your driving style, the vehicle
consumes up to 0.9 US qt (0.8 liters) of oil per 600 miles (1,000 km). The oil consumption
may be higher than this when the vehicle is
new or if you frequently drive at high enginespeeds.
Depending on the engine, the oil dipstick maybe in a different location.
When checking the oil level:
R park the vehicle on a level surface.
R the engine should be switched off for
approximately five minutes if the engine is
at normal operating temperature.
R if the engine is not at normal operating
temperature, e.g. if the engine was only
started briefly, wait about 30 minutes
before carrying out the measurement.
Checking the oil level using the oil dip-
stick (except S 65 AMG)
GWARNING
Certain components in the engine compart-
ment, such as the engine, radiator and parts
of the exhaust system, can become very hot.
Working in the engine compartment poses a
risk of injury.
Where possible, let the engine cool down and
touch only the components described in the
following.
Engine compartment211
Maintenance and care
Z
Page 214 of 286
Example
X Pull oil dipstick :out of the dipstick guide
tube.
X Wipe off oil dipstick :.
X Slowly slide oil dipstick :into the guide
tube to the stop, and take it out again.
If the level is between MIN mark =and
MAX mark ;, the oil level is correct.
X If the oil level has dropped to MIN mark =
or below, add 1.1 US qt (1.0 liter) of engine oil.
212Engine compartment
Maintenance and care
Page 215 of 286
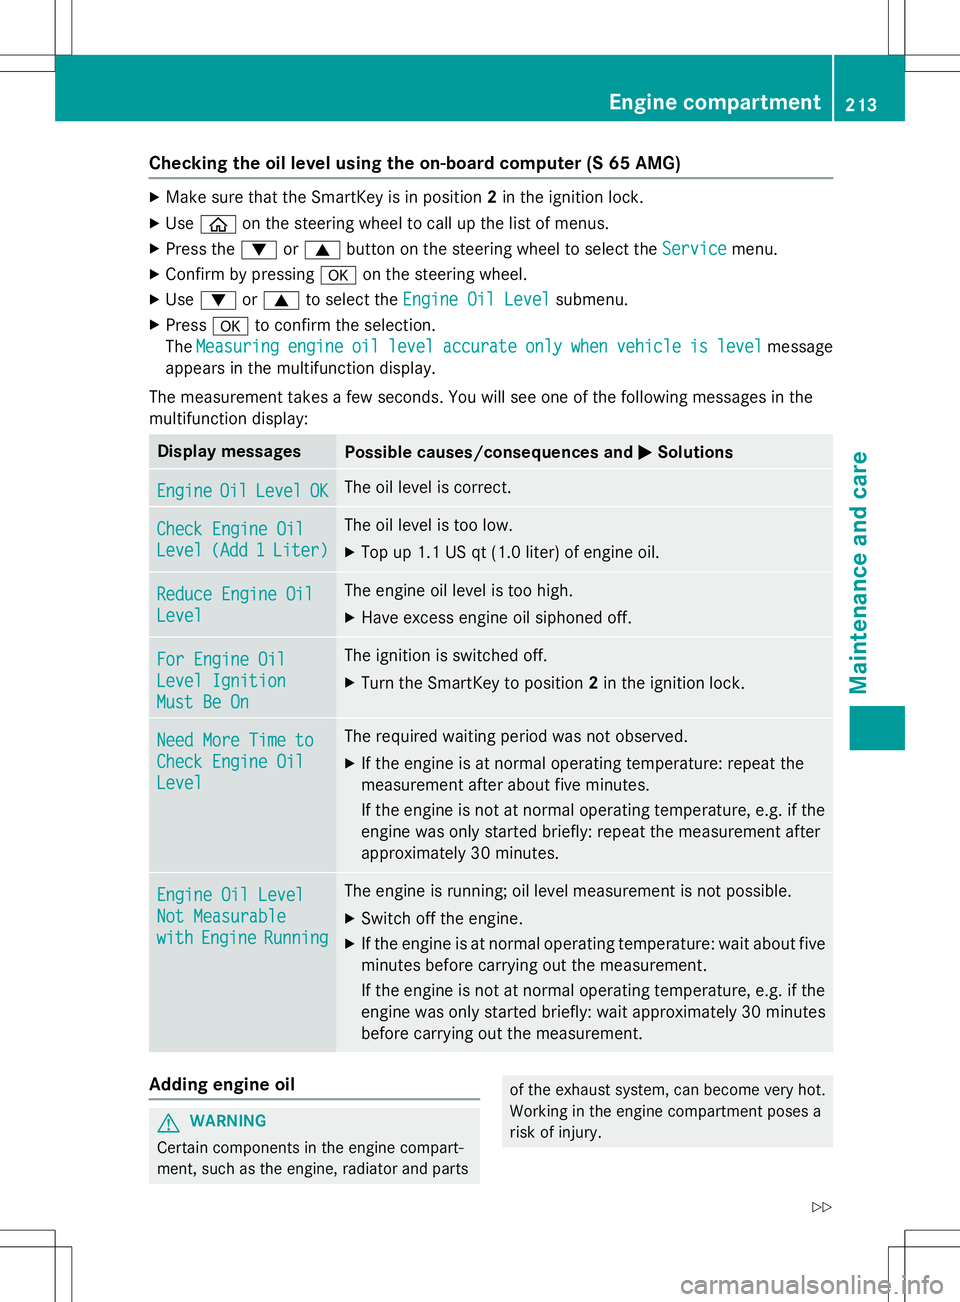
Checking the oil level using the on-board computer (S 65 AMG)
XMake sure that the SmartKey is in position 2in the ignition lock.
X Use ò on the steering wheel to call up the list of menus.
X Press the :or9 button on the steering wheel to select the
Servicemenu.
X Confirm by pressing aon the steering wheel.
X Use : or9 to select the
Engine Oil Levelsubmenu.
X Press ato confirm the selection.
The
Measuringengineoillevelaccurateonlywhenvehicleislevelmessage
appears in the multifunction display.
The measurement takes a few seconds. You will see one of the following messages in the
multifunction display:
Display messagesPossible causes/consequences and MSolutions
EngineOilLevelOKThe oil level is correct.
Check Engine Oil
Level(Add1Liter)
The oil level is too low.
X Top up 1.1 US qt (1.0 liter) of engine oil.
Reduce Engine Oil
Level
The engine oil level is too high.
X Have excess engine oil siphoned off.
For Engine Oil
Level Ignition
Must Be On
The ignition is switched off.
X Turn the SmartKey to position 2in the ignition lock.
Need More Time to
Check Engine Oil
Level
The required waiting period was not observed.
X If the engine is at normal operating temperature: repeat the
measurement after about five minutes.
If the engine is not at normal operating temperature, e.g. if the
engine was only started briefly: repeat the measurement after
approximately 30 minutes.
Engine Oil Level
Not Measurable
withEngineRunning
The engine is running; oil level measurement is not possible.
X Switch off the engine.
X If the engine is at normal operating temperature: wait about five
minutes before carrying out the measurement.
If the engine is not at normal operating temperature, e.g. if the
engine was only started briefly: wait approximately 30 minutes before carrying out the measurement.
Adding engine oil
GWARNING
Certain components in the engine compart-
ment, such as the engine, radiator and parts
of the exhaust system, can become very hot.
Working in the engine compartment poses a
risk of injury.
Engine compartment213
Maintenance and care
Z
Page 216 of 286
Where possible, let the engine cool down andtouch only the components described in the following.
GWARNING
If engine oil comes into contact with hot com- ponents in the engine compartment, it may
ignite. There is a risk of fire and injury.
Make sure that engine oil is not spilled next to
the filler neck. Let the engine cool down and
thoroughly clean the engine oil off the com-
ponents before starting the engine.
HEnvironmental note
When adding oil, take care not to spill any. If
oil enters the soil or waterways, it is harmful to the environment.
!Only use engine oils and oil filters that
have been approved for vehicles with a ser-
vice system. You can obtain a list of the
engine oils and oil filters tested and
approved in accordance with the
Mercedes-Benz Specifications for Service
Products at any Mercedes-Benz Service
center.
Damage to the engine or exhaust system is
caused by the following:
R using engine oils and oil filters that have
not been specifically approved for the
service system
R replacing engine oil and oil filters after
the interval for replacement specified by
the service system has been exceeded
R using engine oil additives.
!Do not add too much oil. adding too much
engine oil can result in damage to the
engine or to the catalytic converter. Have
excess engine oil siphoned off.
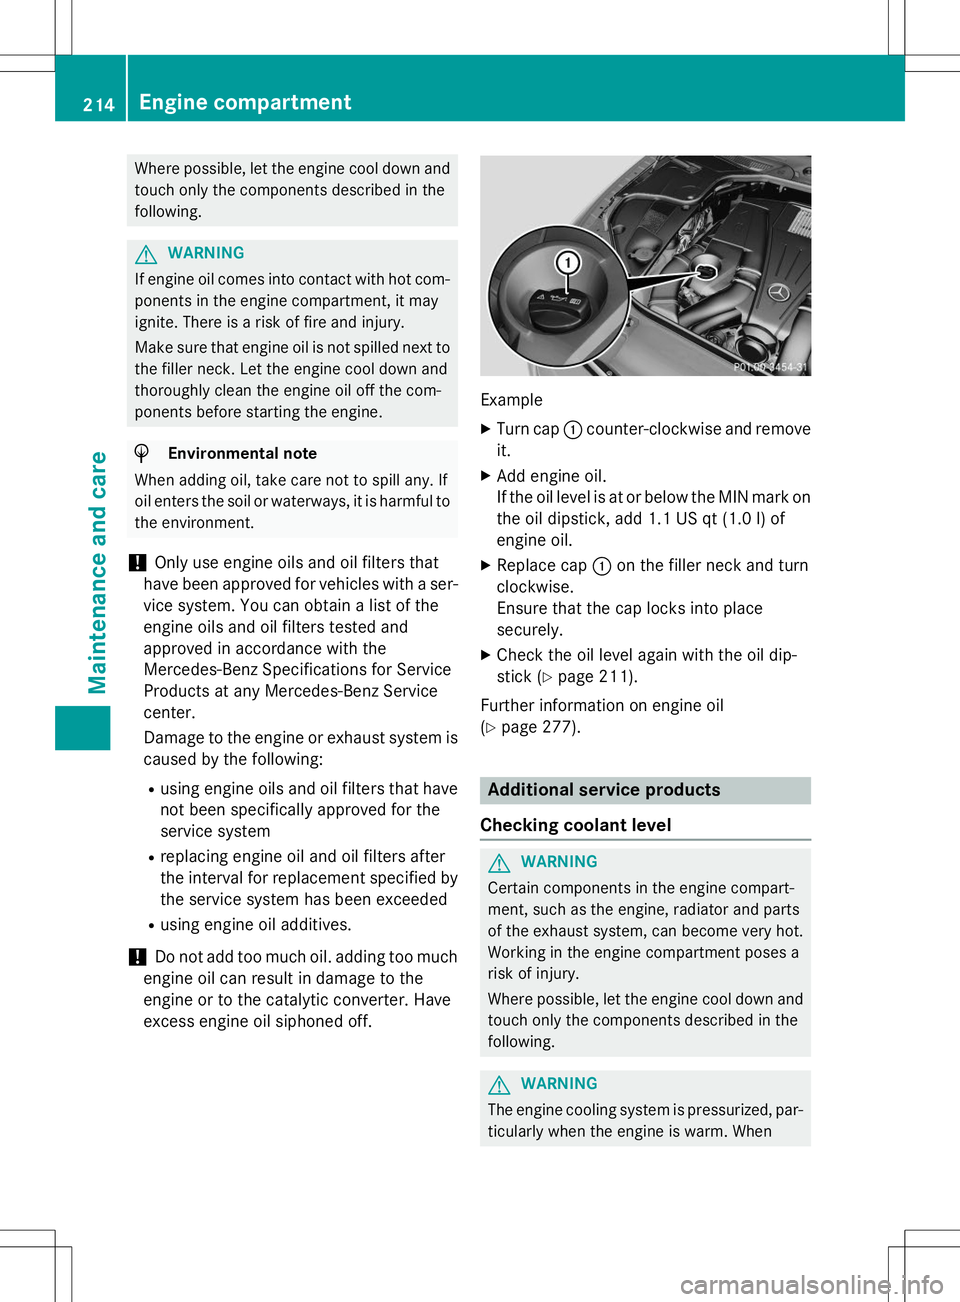
Example
X Turn cap :counter-clockwise and remove
it.
X Add engine oil.
If the oil level is at or below the MIN mark on
the oil dipstick, add 1.1 US qt (1.0 l)of
engine oil.
X Replace cap :on the filler neck and turn
clockwise.
Ensure that the cap locks into placesecurely.
X Check the oil level again with the oil dip-
stick ( Ypage 211).
Further information on engine oil( Y page 277).
Additional service products
Checking coolant level
GWARNING
Certain components in the engine compart-
ment, such as the engine, radiator and parts
of the exhaust system, can become very hot.
Working in the engine compartment poses a
risk of injury.
Where possible, let the engine cool down and touch only the components described in the following.
GWARNING
The engine cooling system is pressurized, par-ticularly when the engine is warm. When
214Engine compartment
Maintenance and care
Page 264 of 286
Rotate the wheels before a clear wear pattern
has formed on the tires. Front tires typically
wear more on the shoulders and the rear tiresin the center.
If your vehicle's tire configuration allows, you
can rotate the wheels according to the inter-
vals in the tire manufacturer's warranty book in your vehicle documents. If no warranty
book is available, the tires should be rotated
every 3,000 to 6,000 miles (5,000 to
10,000 km), or earlier if tire wear requires.
Ensure the direction of rotation is maintained.
Clean the contact surfaces of the wheel and
the brake disc thoroughly every time a wheel
is rotated. Check the tire pressure and reac-
tivate the tire pressure monitor if necessary( Y page 248).
Direction of rotation
Tires with a specified direction of rotation
have additional benefits, e.g. if there is a risk
of hydroplaning. These advantages can only
be gained if the tires are installed correspond-ing to the direction of rotation.
An arrow on the sidewall of the tire indicates
its correct direction of rotation.
Storing wheels
Store wheels that are not being used in a cool, dry and preferably dark place. Protect the
tires from oil, grease, gasoline and diesel.
Mounting a wheel
Preparing the vehicle
X Stop the vehicle on solid, non-slippery and
level ground.
X Apply the electric parking brake manually.
X Bring the front wheels into the straight-
ahead position.
X Shift the transmission to position P. X
Make sure that "normal" level is selected
for AIRMATIC ( Ypage 140).
X Switch off the engine.
X Open the driver's door.
The on-board electronics now have status0. This is the same as the SmartKey having
been removed.
X Remove Start/Stop button from ignition
lock ( Ypage 115).
or, if the SmartKey is inserted in the ignition
lock: X Remove the SmartKey from the ignition
lock.
X If included in the vehicle equipment,
remove the tire-change tool kit from the
vehicle.
X Secure the vehicle to prevent it from rolling
away.
Securing the vehicle to prevent it from
rolling away
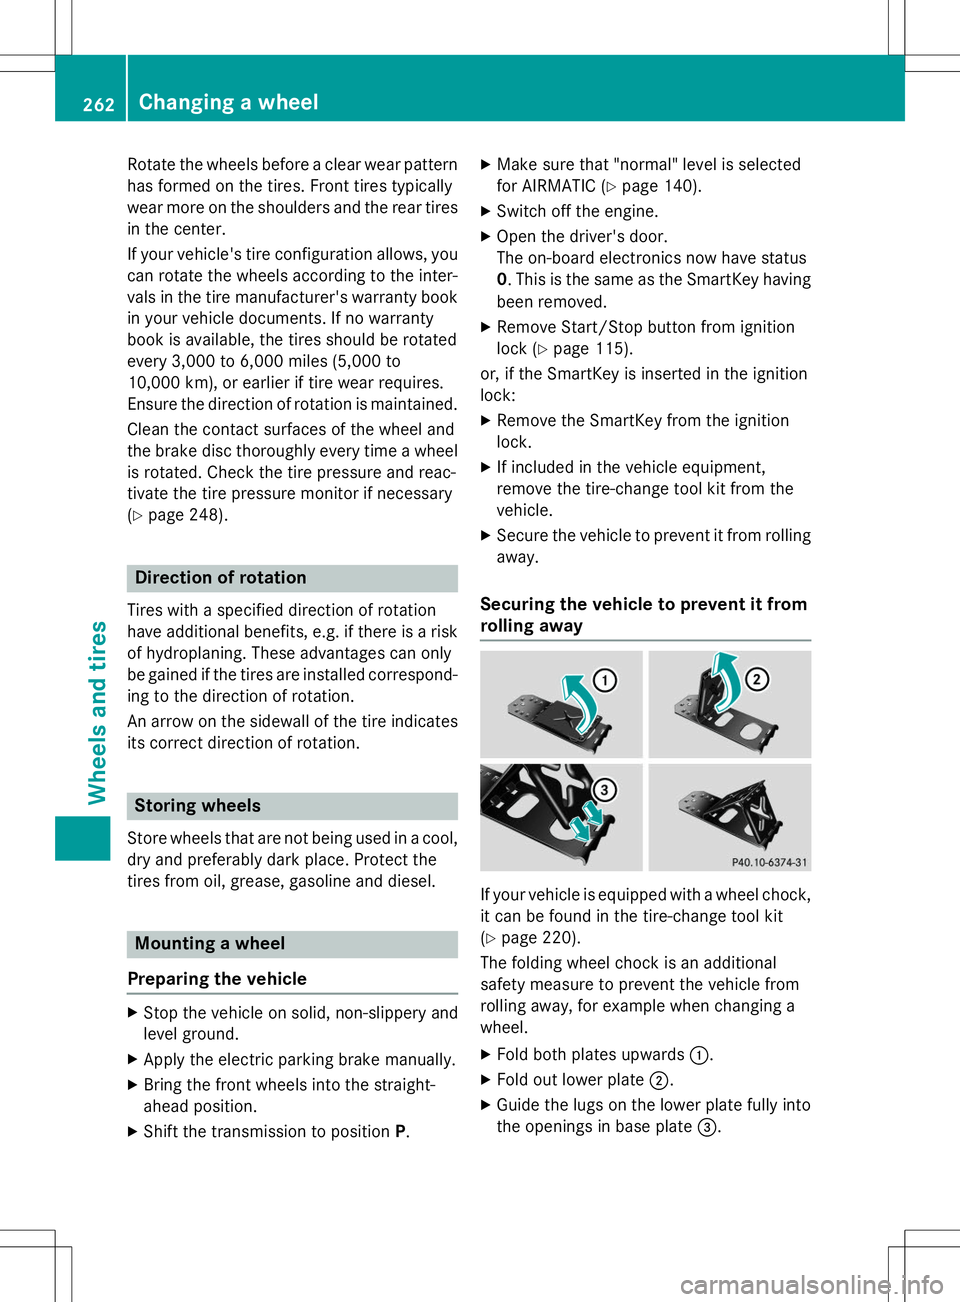
If your vehicle is equipped with a wheel chock, it can be found in the tire-change tool kit ( Y page 220).
The folding wheel chock is an additional
safety measure to prevent the vehicle from
rolling away, for example when changing a
wheel.
X Fold both plates upwards :.
X Fold out lower plate ;.
X Guide the lugs on the lower plate fully into
the openings in base plate =.
262Changing a wheel
Wheels and tires
Page 267 of 286
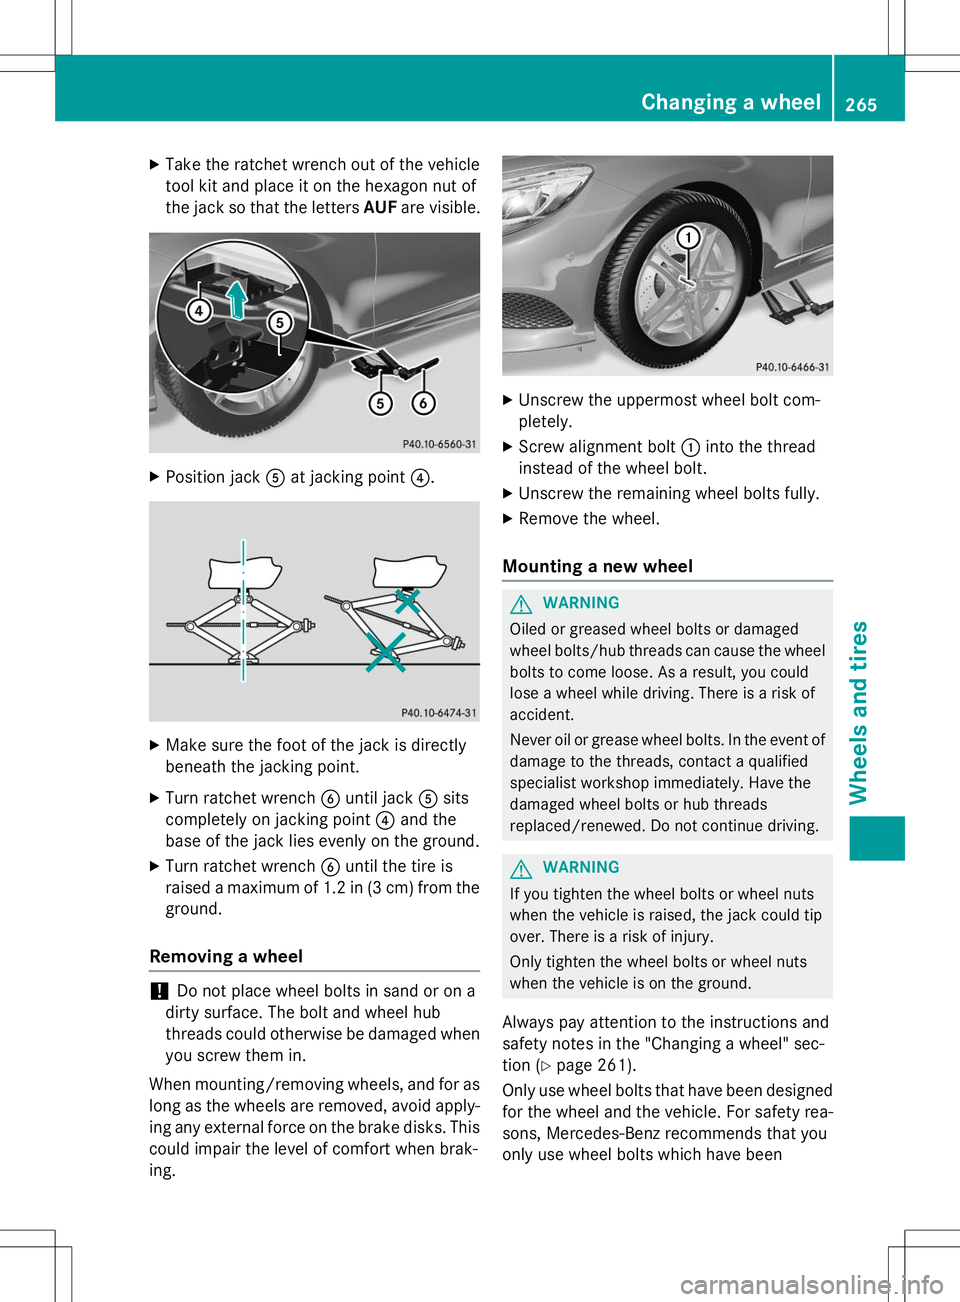
XTake the ratchet wrench out of the vehicle
tool kit and place it on the hexagon nut of
the jack so that the letters AUFare visible.
X
Position jack Aat jacking point ?.
X
Make sure the foot of the jack is directly
beneath the jacking point.
X Turn ratchet wrench Buntil jack Asits
completely on jacking point ?and the
base of the jack lies evenly on the ground.
X Turn ratchet wrench Buntil the tire is
raised a maximum of 1.2 in (3 cm) from the ground.
Removing a wheel
!Do not place wheel bolts in sand or on a
dirty surface. The bolt and wheel hub
threads could otherwise be damaged when you screw them in.
When mounting/removing wheels, and for as
long as the wheels are removed, avoid apply- ing any external force on the brake disks. This could impair the level of comfort when brak-ing.
X Unscrew the uppermost wheel bolt com- pletely.
X Screw alignment bolt :into the thread
instead of the wheel bolt.
X Unscrew the remaining wheel bolts fully.
X Remove the wheel.
Mounting a new wheel
GWARNING
Oiled or greased wheel bolts or damaged
wheel bolts/hub threads can cause the wheel
bolts to come loose. As a result, you could
lose a wheel while driving. There is a risk of
accident.
Never oil or grease wheel bolts. In the event ofdamage to the threads, contact a qualified
specialist workshop immediately. Have the
damaged wheel bolts or hub threads
replaced/renewed. Do not continue driving.
GWARNING
If you tighten the wheel bolts or wheel nuts
when the vehicle is raised, the jack could tip
over. There is a risk of injury.
Only tighten the wheel bolts or wheel nuts
when the vehicle is on the ground.
Always pay attention to the instructions and
safety notes in the "Changing a wheel" sec-
tion ( Ypage 261).
Only use wheel bolts that have been designed for the wheel and the vehicle. For safety rea-
sons, Mercedes-Benz recommends that you
only use wheel bolts which have been
Changing a wheel265
Wheels and tires
Z
Page 277 of 286
Vehicle identification plate with vehi-
cle identification number (VIN)
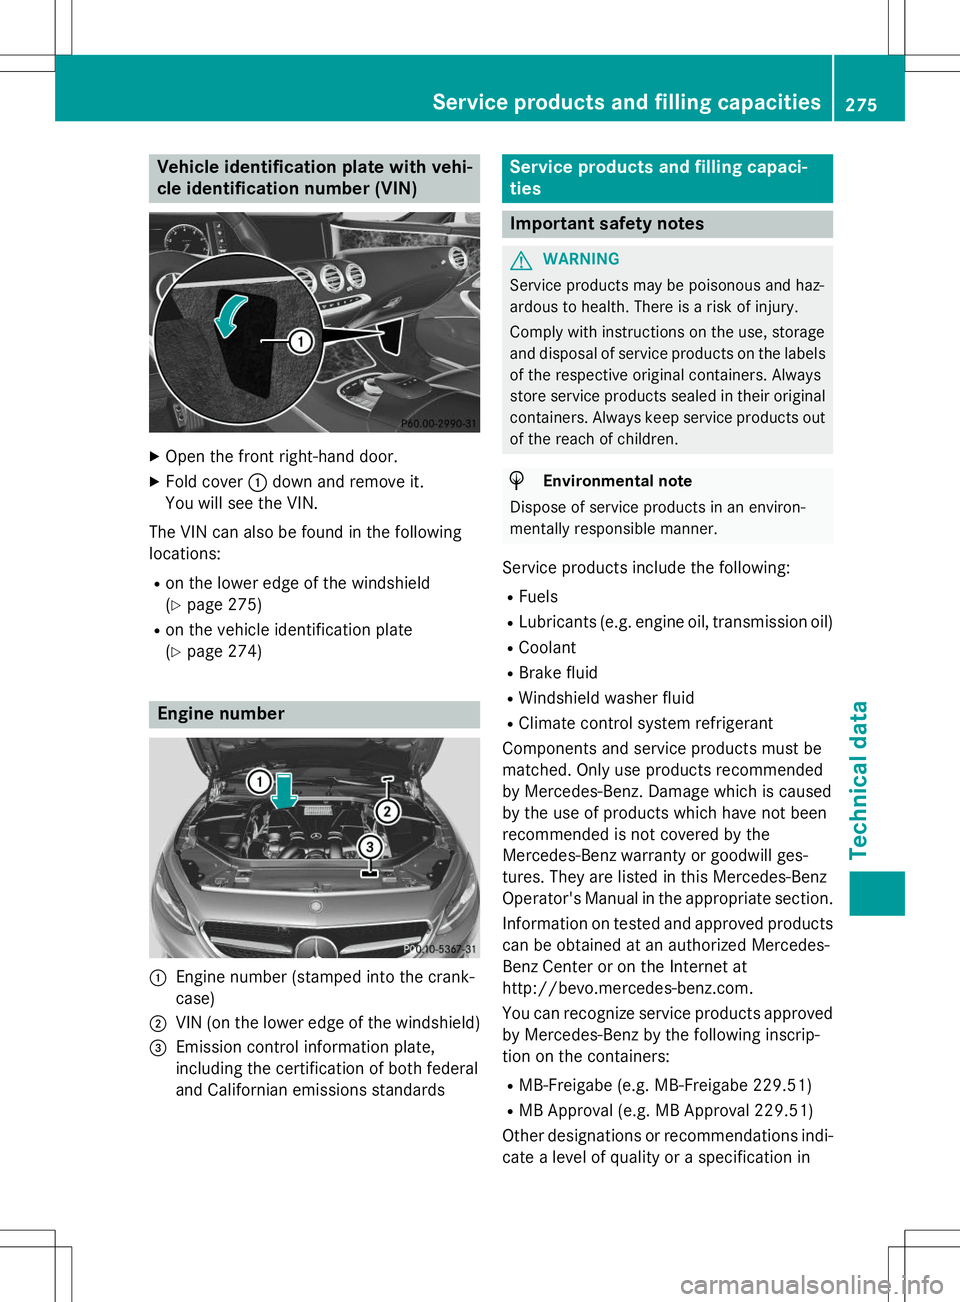
XOpen the front right-hand door.
X Fold cover :down and remove it.
You will see the VIN.
The VIN can also be found in the following
locations:
R on the lower edge of the windshield(Y page 275)
R on the vehicle identification plate(Y page 274)
Engine number
:Engine number (stamped into the crank-
case)
;VIN (on the lower edge of the windshield)
=Emission control information plate,
including the certification of both federal
and Californian emissions standards
Service products and filling capaci-
ties
Important safety notes
GWARNING
Service products may be poisonous and haz-
ardous to health. There is a risk of injury.
Comply with instructions on the use, storage
and disposal of service products on the labels of the respective original containers. Always
store service products sealed in their original containers. Always keep service products out
of the reach of children.
HEnvironmental note
Dispose of service products in an environ-
mentally responsible manner.
Service products include the following:
R Fuels
R Lubricants (e.g. engine oil, transmission oil)
R Coolant
R Brake fluid
R Windshield washer fluid
R Climate control system refrigerant
Components and service products must be
matched. Only use products recommended
by Mercedes-Benz. Damage which is caused
by the use of products which have not been
recommended is not covered by the
Mercedes-Benz warranty or goodwill ges-
tures. They are listed in this Mercedes-Benz
Operator's Manual in the appropriate section.
Information on tested and approved products can be obtained at an authorized Mercedes-
Benz Center or on the Internet at
http://bevo.mercedes-benz.com.
You can recognize service products approved
by Mercedes-Benz by the following inscrip-
tion on the containers:
R MB-Freigabe (e.g. MB-Freigabe 229.51)
R MB Approval (e.g. MB Approval 229.51)
Other designations or recommendations indi- cate a level of quality or a specification in
Service products and filling capacities275
Technical data
Z