2015 MERCEDES-BENZ S-Class steering wheel light
[x] Cancel search: steering wheel lightPage 144 of 502

R
the exterior mirrors fold in automatically as
soon as you lock the vehicle from the out-
side.
R the exterior mirrors fold out automatically
again as soon as you unlock the vehicle.
i If the exterior mirrors have been folded in
manually, they do not fold out.
Exterior mirror pushed out of position This function is only available in vehicles for
Canada.
If an exterior mirror has been pushed out of
position, proceed as follows:
X Press and hold button :until you hear a
click and the mirror engages audibly into
position (Y page 141).
The mirror housing is engaged again and
you can adjust the exterior mirrors as usual
(Y page 141). Automatic anti-glare mirrors
G
WARNING
Electrolyte may escape if the glass in an auto- matic anti-glare mirror breaks. The electrolyte
is harmful and causes irritation. It must not
come into contact with your skin, eyes, res-
piratory organs or clothing or be swallowed.
There is a risk of injury.
If you come into contact with the electrolyte,
observe the following:
R Rinse off the electrolyte from your skin
immediately with water.
R Immediately rinse the electrolyte out of
your eyes thoroughly with clean water.
R If the electrolyte is swallowed, immediately
rinse your mouth out thoroughly. Do not
induce vomiting.
R If electrolyte comes into contact with your
skin or hair or is swallowed, seek medical
attention immediately. R
Immediately change out of clothing which
has come into contact with electrolyte.
R If an allergic reaction occurs, seek medical
attention immediately.
The rear-view mirror and the exterior mirror
on the driver's side automatically go into anti- glare mode if the following conditions are met simultaneously:
R the ignition is switched on
R incident light from headlamps strikes the
sensor in the rear-view mirror.
The mirrors do not go into anti-glare mode if
reverse gear is engaged or if the interior light-
ing is switched on. Parking position for the exterior mir-
ror on the front-passenger side
Setting and storing the parking position Using reverse gear
:
Memory button M
; Adjustment button
= Button for the front-passenger side exte-
rior mirror
? Button for the driver's side exterior mirror
You can position the front-passenger side
exterior mirror in such a way that you can see
the rear wheel on that side as soon as you
engage reverse gear. You can store this posi-
tion. 142
MirrorsSeats, steering
wheel and mirrors
Page 147 of 502

G
WARNING
Children could become trapped if they acti-
vate the memory function, particularly when
unattended. There is a risk of injury.
When leaving the vehicle, always take the
SmartKey with you and lock the vehicle. Never leave children unsupervised in the vehicle. General notes
The settings for the rear seat and the front-
passenger seat can be stored using the rear-
compartment memory function.
R If the indicator lamp in the vbutton is
not lit, store the rear seat settings.
R If the indicator lamp in the vbutton
lights up, store the front-passenger seat
and rear seat settings. Both the front-
passenger and rear seat are taken into
account with this setting. Depending on the equipment in the vehicle, two or three
memory positions can be stored for the
front-passenger and rear seats. Storing settings
General notes With the memory function in the rear, you can
store up to three different settings, e.g. for
three different people.
The following settings are stored as a single
memory preset:
R position of the seat, backrest and head
restraint
R multicontour seat: the seat cushions of the
backrest as well as the contour of the back- rest in the lumbar and shoulder regions
R seat heating: distribution of the heated sec-
tions of the seat cushion and backrest if the
indicator lamp in the vbutton is not lit. The following settings are stored to a memory
position, if the indicator lamp in the v
button lights up:
R position of the footrest for the front-
passenger seat, if available
R position of the screen, if available
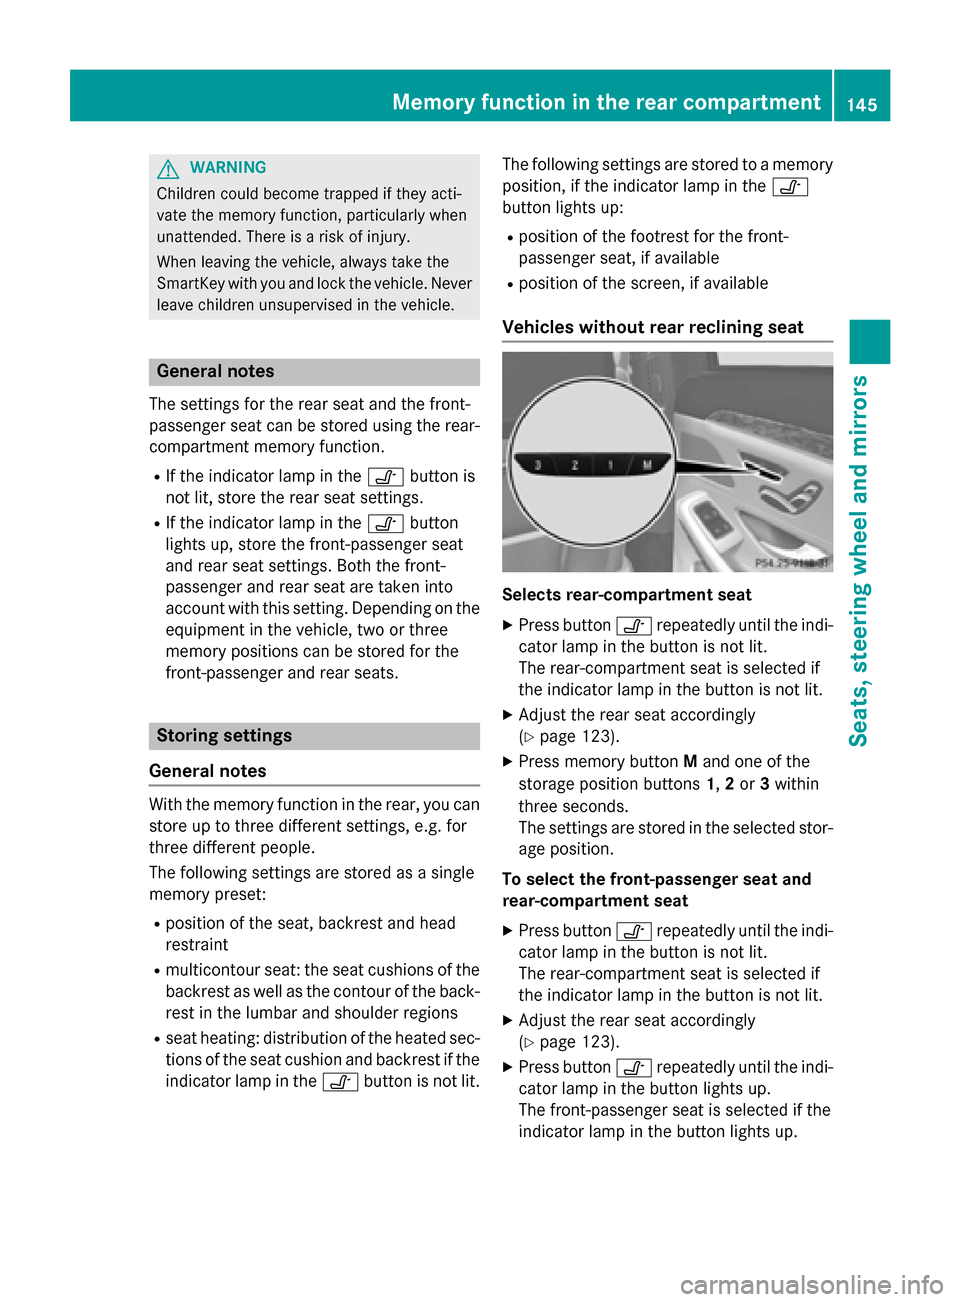
Vehicles without rear reclining seat Selects rear-compartment seat
X Press button vrepeatedly until the indi-
cator lamp in the button is not lit.
The rear-compartment seat is selected if
the indicator lamp in the button is not lit.
X Adjust the rear seat accordingly
(Y page 123).
X Press memory button Mand one of the
storage position buttons 1,2or 3within
three seconds.
The settings are stored in the selected stor- age position.
To select the front-passenger seat and
rear-compartment seat
X Press button vrepeatedly until the indi-
cator lamp in the button is not lit.
The rear-compartment seat is selected if
the indicator lamp in the button is not lit.
X Adjust the rear seat accordingly
(Y page 123).
X Press button vrepeatedly until the indi-
cator lamp in the button lights up.
The front-passenger seat is selected if the
indicator lamp in the button lights up. Memory function in the rear compartment
145Seats, steering wheel and mirrors Z
Page 148 of 502

X
Adjust the front-passenger seat accord-
ingly (Y page 124).
X Press memory button Mand one of the
storage position buttons 1,2or 3within
three seconds.
The settings are stored in the selected stor- age position.
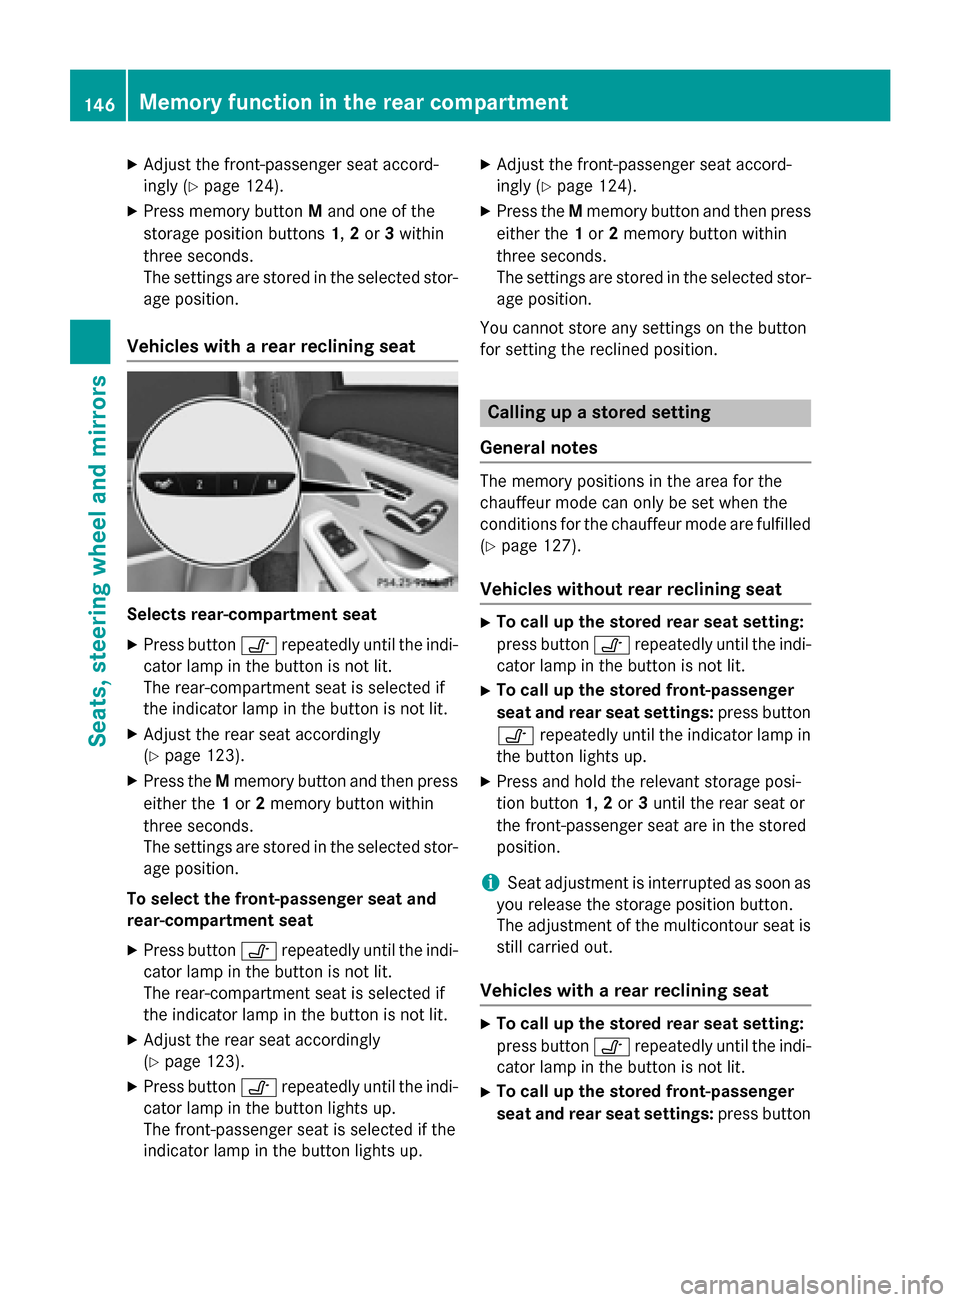
Vehicles with a rear reclining seat Selects rear-compartment seat
X Press button vrepeatedly until the indi-
cator lamp in the button is not lit.
The rear-compartment seat is selected if
the indicator lamp in the button is not lit.
X Adjust the rear seat accordingly
(Y page 123).
X Press the Mmemory button and then press
either the 1or 2memory button within
three seconds.
The settings are stored in the selected stor- age position.
To select the front-passenger seat and
rear-compartment seat
X Press button vrepeatedly until the indi-
cator lamp in the button is not lit.
The rear-compartment seat is selected if
the indicator lamp in the button is not lit.
X Adjust the rear seat accordingly
(Y page 123).
X Press button vrepeatedly until the indi-
cator lamp in the button lights up.
The front-passenger seat is selected if the
indicator lamp in the button lights up. X
Adjust the front-passenger seat accord-
ingly (Y page 124).
X Press the Mmemory button and then press
either the 1or 2memory button within
three seconds.
The settings are stored in the selected stor- age position.
You cannot store any settings on the button
for setting the reclined position. Calling up a stored setting
General notes The memory positions in the area for the
chauffeur mode can only be set when the
conditions for the chauffeur mode are fulfilled
(Y page 127).
Vehicles without rear reclining seat X
To call up the stored rear seat setting:
press button vrepeatedly until the indi-
cator lamp in the button is not lit.
X To call up the stored front-passenger
seat and rear seat settings: press button
v repeatedly until the indicator lamp in
the button lights up.
X Press and hold the relevant storage posi-
tion button 1,2or 3until the rear seat or
the front-passenger seat are in the stored
position.
i Seat adjustment is interrupted as soon as
you release the storage position button.
The adjustment of the multicontour seat is still carried out.
Vehicles with a rear reclining seat X
To call up the stored rear seat setting:
press button vrepeatedly until the indi-
cator lamp in the button is not lit.
X To call up the stored front-passenger
seat and rear seat settings: press button146
Memory function in the rear compartmentSeats, steering
wheel and mirrors
Page 149 of 502

v
repeatedly until the indicator lamp in
the button lights up.
X Press and hold the relevant storage posi-
tion button 1or 2until the rear seat or the
front-passenger seat is in the stored posi-
tion.
i Seat adjustment is interrupted as soon as
you release the storage position button.
The adjustment of the multicontour seat is still carried out. Memory function in the rear compartment
147Seats, steering wheel and mirrors Z
Page 155 of 502

The hazard warning lamps automatically
switch on if:
R an air bag is deployed or
R the vehicle decelerates rapidly from a
speed of above 45 mph (70 km/h) and
comes to a standstill
The hazard warning lamps switch off auto-
matically if the vehicle reaches a speed of
above 6 mph (10 km/h) again after a full
brake application.
The hazard warning lamps still operate if the
ignition is switched off. Cornering light function
The cornering light function improves the illu-
mination of the road over a wide angle in the direction you are turning, enabling better vis-
ibility in tight bends, for example. It can only
be activated when the low-beam headlamps
are switched on.
Active:
R if you are driving at speeds below 25 mph
(40 km/h) and switch on the turn signal or
turn the steering wheel
R if you are driving at speeds between
25 mph (40 km/ h)and 45 mph (70 km/h)
and turn the steering wheel
The cornering lamp may remain lit for a short
time, but is automatically switched off after
no more than three minutes. Adaptive Highbeam Assist Plus
General notes With Adaptive Highbeam Assist Plus, you can
automatically switch between low-beam, par-
tial high-beam and high-beam headlamps.
Partial high-beam is a form of illumination
whereby the high-beam is directed past other
road users. Other road users are kept out of
the high-beam. This prevents glare. When
there is a vehicle in front, for example, the
high-beam headlamps illuminate the areas to
its right and left, and the vehicle in front is
illuminated by the low-beam headlamps.
The system automatically adapts the low-
beam headlamp range depending on the dis-
tance to the other vehicle. Once the system
no longer detects any other vehicles, it reac-
tivates the high-beam headlamps.
If the high-beam or partial high-beam are
causing too much reflection from traffic
signs, the lights are automatically dimmed
and glare for the driver caused by the reflec-
tions is thus avoided.
The system's optical sensor is located behind the windshield near the overhead control
panel. Exterior lighting
153Lights and windshield wipers Z
Page 243 of 502

The support provided by the system can be
impaired if:
R there is poor visibility, e.g. due to insuffi-
cient illumination of the road, or due to
snow, rain, fog or spray
R there is glare, e.g. from oncoming traffic,
the sun or reflections (e.g. when the road
surface is wet)
R the windshield is dirty, fogged up, damaged
or covered, for instance by a sticker, in the
vicinity of the camera
R there are no, several or unclear lane mark-
ings for a lane, e.g. in areas with road con-
struction work
R the lane markings are worn away, dark or
covered up, e.g. by dirt or snow
R the distance to the vehicle in front is too
small and the lane markings thus cannot be
detected
R the lane markings change quickly, e.g.
lanes branch off, cross one another or
merge
R the road is narrow and winding
R there are strong shadows cast on the road
The system is switched to passive and no lon-
ger assists you by performing steering inter-
ventions if:
R you actively change lane
R you switch on the turn signal
R take your hands off the steering wheel or do
not steer for a prolonged period of time
i Steering Assist and Stop&Go Pilot are
activated again automatically after a lane
change is completed.
Steering Assist and Stop&Go Pilot do not pro- vide any support:
R on very sharp corners
R when a loss of tire pressure or a defective
tire has been detected and displayed
Pay attention also to the important safety
notes for DISTRONIC PLUS (Y page 232).
The steering interventions are carried out
with a limited steering moment. The system requires the driver to keep his hands on the
steering wheel and to steer himself.
If you do not steer yourself or if you take your
hands off the steering wheel for a prolonged
period of time, the system will first alert you
with a visual warning. A steering wheel sym-
bol appears in the multifunction display. If you have still not started to steer and have not
taken hold of the steering wheel after five
seconds at the latest, a warning tone also
sounds to remind you to take control of the
vehicle. Steering Assist and Stop&Go Pilot are
switched to passive. DISTRONIC PLUS
remains active.
Activating Steering Assist and Stop&Go
Pilot X
Press button ;.
Indicator lamp :lights up. The DTR+: DTR+:
Steering Assist. On
Steering Assist. On message appears
in the multifunction display. Steering Assist and Stop&Go Pilot are activated.
Information in the multifunction display If Steering Assist and Stop&Go Pilot are acti-
vated but not ready for a steering interven-
tion, steering wheel symbol :appears in
gray. If the system provides you with support Driving systems
241Driving and parking Z
Page 246 of 502

Make sure no one is underneath the vehicle or
in the immediate vicinity of the wheel arches
when the vehicle is being lowered.
! The vehicle is lowered when the engine is
switched off. When parking, position your
vehicle so that it does not make contact
with the curb as the vehicle is lowered. Your vehicle could otherwise be damaged.
Crosswind Assist The crosswind stabilization operates by
changing wheel loads through adjusting the
ABC spring struts. It reduces impairments in
handling when driving in a straight line and
assists during countersteering.
Crosswind Assist is active at vehicle speeds
above 50 mph (80 km/h) when driving
straight ahead or cornering gently.
Active Body Control ABC Vehicle level
All vehicles except AMG vehicles:
depend-
ing on the vehicle level that has been set, the
vehicle automatically adjusts its height
dependent on the current speed. The vehicle is lowered by up to 0.6 in (15 mm) as the
speed increases. As the speed is reduced, the
vehicle is raised up to the set vehicle height.
AMG vehicles: depending on the vehicle
level that has been selected, the vehicle auto- matically adjusts its height dependent on the
current speed. The vehicle is lowered by up to 0.4 in (10 mm) below the normal level as the
speed increases. As the speed is reduced, the vehicle is raised up to the set vehicle height.
Select the "Normal" setting for normal road
conditions and "Raised" for driving with snow chains or in particularly poor road conditions.
Your selection remains stored even if you
remove the SmartKey from the ignition lock. Setting the raised vehicle level
X Start the engine.
X If indicator lamp ; ;is not lit: press but-
ton :.
Indicator lamp ;lights up. The vehicle
height is adjusted to raised level. Setting the normal vehicle level
X Start the engine.
X If indicator lamp ;
;is lit: press but-
ton :.
Indicator lamp ;goes out. The vehicle is
adjusted to normal level.
Suspension tuning
The electronically controlled ABC suspension
system works continuously. This improves
driving safety and comfort. The system
detects the vehicle level and the vehicle load and adjusts the setting accordingly. You can
also choose between a particularly sporty or a
comfortable tuning. 244
Driving systemsDriving and parking
Page 247 of 502

The ABC suspension system is tuned individ-
ually to each wheel and depends on:
R your driving style, e.g. sporty
R the road surface condition, e.g. bumps
R your individual selection, i.e. sports or com-
fort
R the vehicle load
R the force of the side wind
Your selection remains stored even if you
remove the SmartKey from the ignition lock. The firmer suspension setting in SPORT mode
ensures even better contact with the road.
The steering response behavior is sporty.
Select this mode when employing a sporty
driving style on flat roads, e.g. on highways.
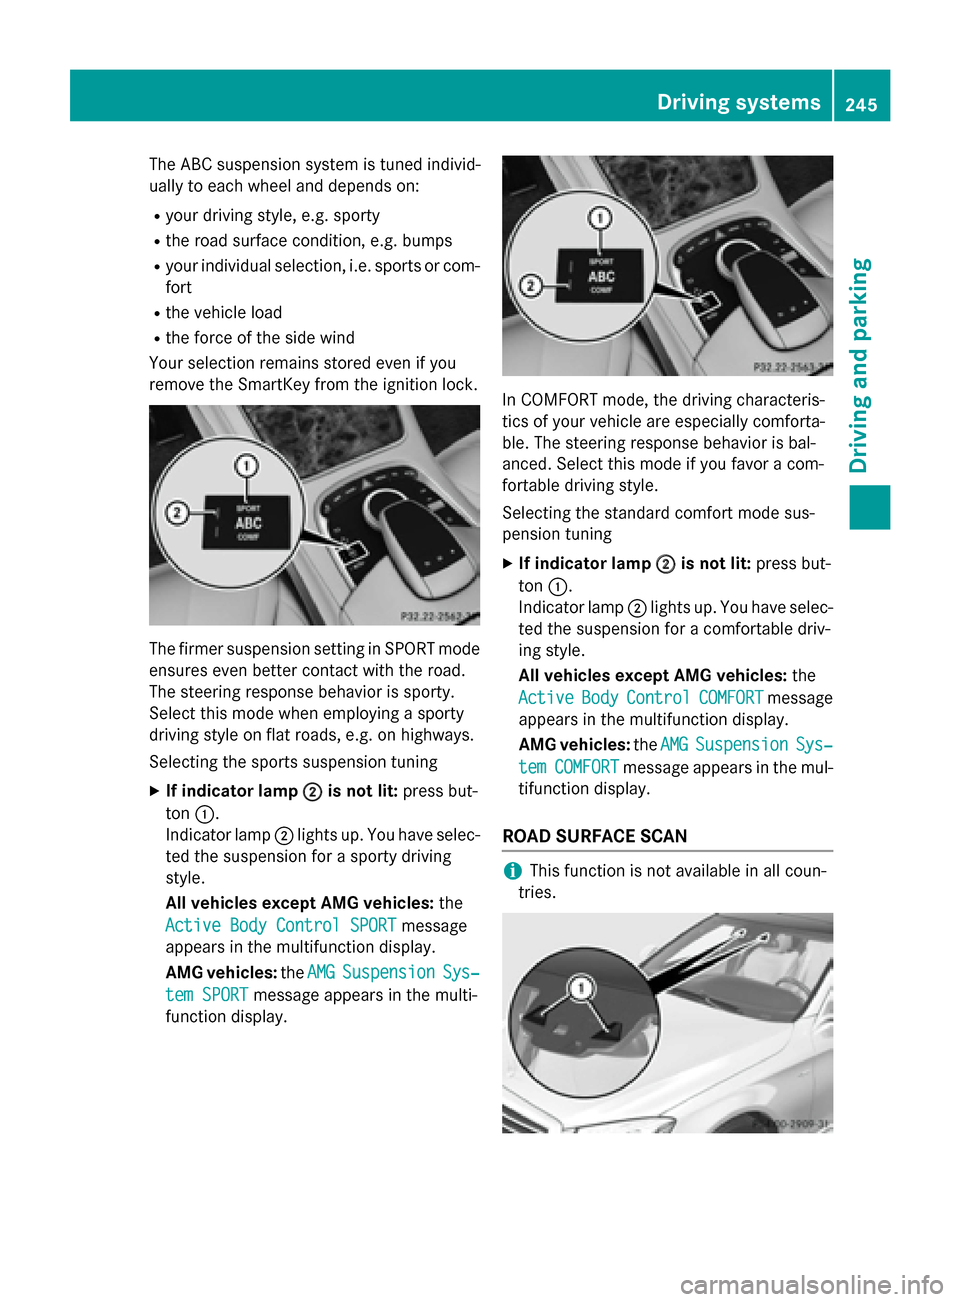
Selecting the sports suspension tuning
X If indicator lamp ; ;is not lit: press but-
ton :.
Indicator lamp ;lights up. You have selec-
ted the suspension for a sporty driving
style.
All vehicles except AMG vehicles: the
Active Body Control SPORT
Active Body Control SPORT message
appears in the multifunction display.
AMG vehicles: theAMG
AMG Suspension Suspension Sys‐
Sys‐
tem SPORT
tem SPORT message appears in the multi-
function display. In COMFORT mode, the driving characteris-
tics of your vehicle are especially comforta-
ble. The steering response behavior is bal-
anced. Select this mode if you favor a com-
fortable driving style.
Selecting the standard comfort mode sus-
pension tuning
X If indicator lamp ;
; is not lit: press but-
ton :.
Indicator lamp ;lights up. You have selec-
ted the suspension for a comfortable driv-
ing style.
All vehicles except AMG vehicles: the
Active Active Body
BodyControl
Control COMFORT
COMFORTmessage
appears in the multifunction display.
AMG vehicles: theAMG
AMG Suspension
Suspension Sys‐
Sys‐
tem
tem COMFORT
COMFORT message appears in the mul-
tifunction display.
ROAD SURFACE SCAN i
This function is not available in all coun-
tries. Driving systems
245Driving and parking Z