2015 MERCEDES-BENZ S-CLASS COUPE ad blue
[x] Cancel search: ad bluePage 118 of 417
Problems with the seat heating
Problem
Possible causes/consequences and
M
MSolutions The seat heating has
switched off prema-
turely or cannot be
switched on. The on-board voltage is too low because too many electrical con-
sumers are switched on.
X Switch off electrical consumers that you do not need, such as
the rear window heating or interior lighting.
Once the battery is sufficiently charged, the seat heating can be
switched back on manually. Switching the seat ventilation on/off
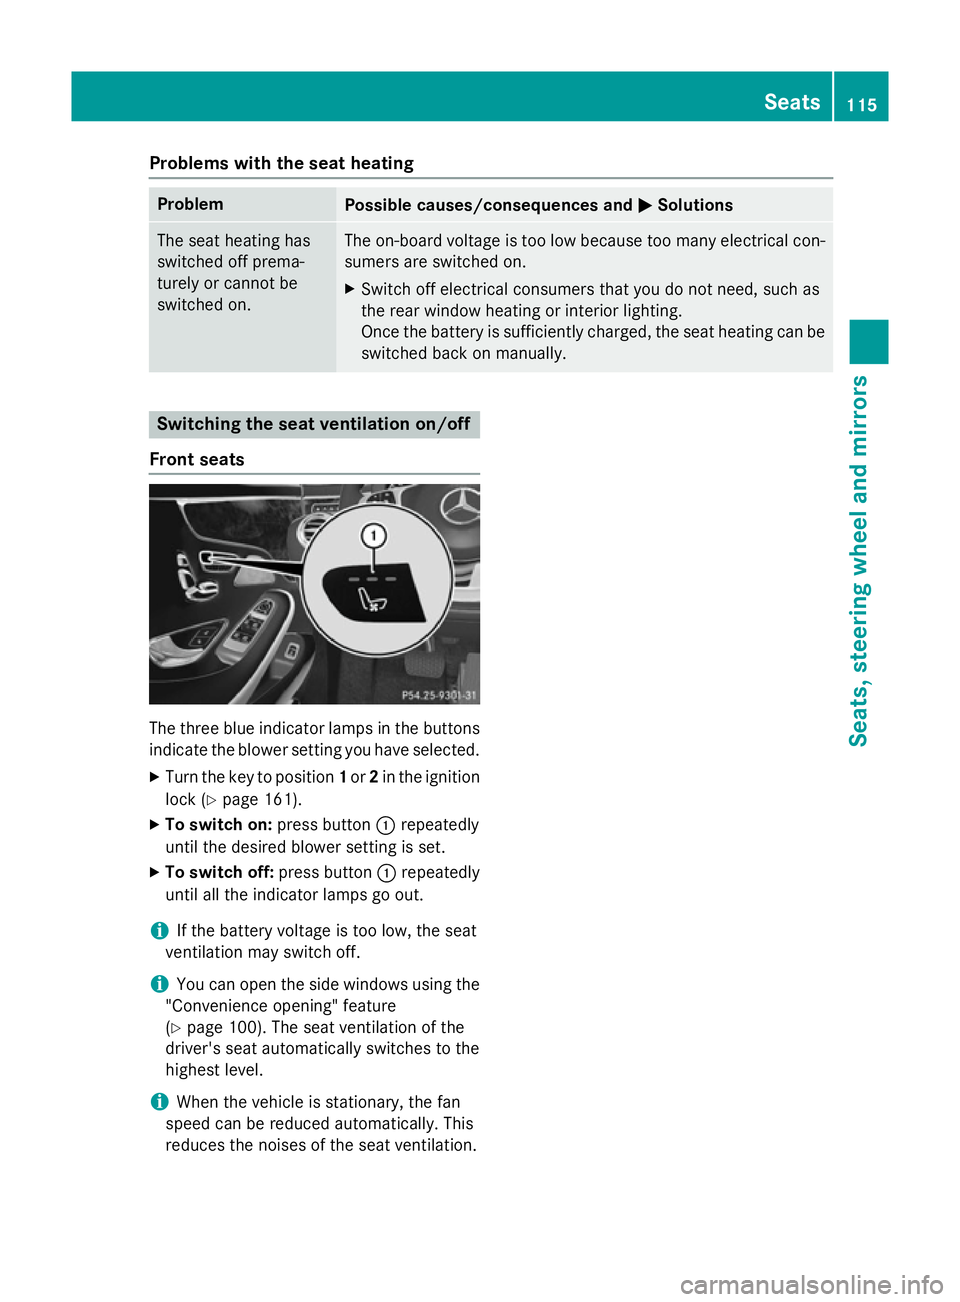
Front seats The three blue indicator lamps in the buttons
indicate the blower setting you have selected.
X Turn the key to position 1or 2in the ignition
lock (Y page 161).
X To switch on: press button:repeatedly
until the desired blower setting is set.
X To switch off: press button:repeatedly
until all the indicator lamps go out.
i If the battery voltage is too low, the seat
ventilation may switch off.
i You can open the side windows using the
"Convenience opening" feature
(Y page 100). The seat ventilation of the
driver's seat automatically switches to the
highest level.
i When the vehicle is stationary, the fan
speed can be reduced automatically. This
reduces the noises of the seat ventilation. Seats
115Seats, steering wheel and mirrors Z
Page 131 of 417
Parking lamps
Switching on the parking lamps ensures that
the corresponding side of the vehicle is illu-
minated.
X To switch on the parking lamps: the key
is not in the ignition lock or it is in posi-
tion 0.
X Turn the light switch to W(left-hand side
of the vehicle) or X(right-hand side of
the vehicle). Combination switch
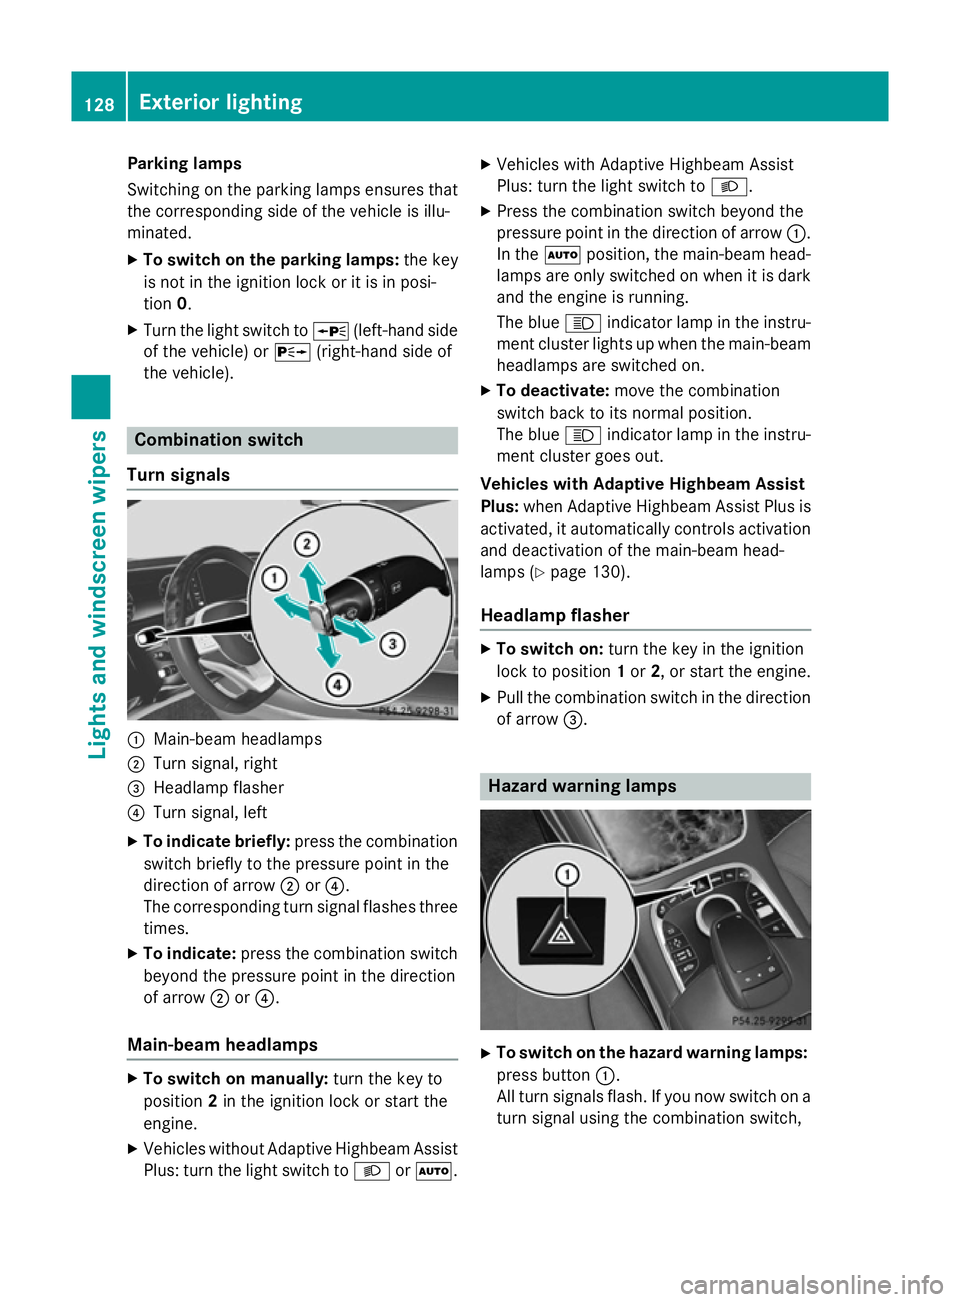
Turn signals :
Main-beam headlamps
; Turn signal, right
= Headlamp flasher
? Turn signal, left
X To indicate briefly: press the combination
switch briefly to the pressure point in the
direction of arrow ;or?.
The corresponding turn signal flashes three
times.
X To indicate: press the combination switch
beyond the pressure point in the direction
of arrow ;or?.
Main-beam headlamps X
To switch on manually: turn the key to
position 2in the ignition lock or start the
engine.
X Vehicles without Adaptive Highbeam Assist
Plus: turn the light switch to LorÃ. X
Vehicles with Adaptive Highbeam Assist
Plus: turn the light switch to L.
X Press the combination switch beyond the
pressure point in the direction of arrow :.
In the Ãposition, the main-beam head-
lamps are only switched on when it is dark
and the engine is running.
The blue Kindicator lamp in the instru-
ment cluster lights up when the main-beam
headlamps are switched on.
X To deactivate: move the combination
switch back to its normal position.
The blue Kindicator lamp in the instru-
ment cluster goes out.
Vehicles with Adaptive Highbeam Assist
Plus: when Adaptive Highbeam Assist Plus is
activated, it automatically controls activation and deactivation of the main-beam head-
lamps (Y page 130).
Headlamp flasher X
To switch on: turn the key in the ignition
lock to position 1or 2, or start the engine.
X Pull the combination switch in the direction
of arrow =. Hazard warning lamps
X
To switch on the hazard warning lamps:
press button :.
All turn signals flash. If you now switch on a turn signal using the combination switch, 128
Exterior lightingLights and windscreen wipers
Page 154 of 417
The colours of the indicator lamps in the
rocker switch have the following meanings:
R blue: cooling activated
R red: heating activated
R yellow: departure time is preselected
X To switch on auxiliary heating or auxili-
ary ventilation: press rocker switch :up
or down.
The red or the blue indicator lamp in rocker
switch :lights up.
X To set the temperature: switch on auxili-
ary heating or auxiliary ventilation.
COMAND Online is activated for approx-
imately one minute.
X Set the desired temperature using
COMAND Online (see the separate operat-
ing instructions).
In addition you can adjust the temperature at
any time using COMAND Online if the auxili-
ary heating/ventilation is switched on. To do so, call up COMAND Online using the qbut-
ton on the centre console.
X To switch off auxiliary heating or auxil-
iary ventilation: press rocker switch :up
or down.
The red or the blue indicator lamp in rocker
switch :goes out.
Switching the auxiliary heating/venti-
lation on or off using the remote control General notes
Your vehicle comes with one remote control.
You may use two additional remote controls
for your vehicle. For more information, please
contact a qualified specialist workshop.
Store the remote control for the auxiliary
heating so that the auxiliary heating cannot
be switched on unintentionally. In particular,
ensure that the remote control for the auxili-
ary heating is kept out of the reach of chil-
dren. The remote control has a range of approx-
imately 300 metres. This range is reduced by:
R sources of radio interference
R solid objects between the remote control
and the vehicle
R the remote control being in an unfavoura-
ble position in relation to the vehicle
R transmitting from an enclosed space
If the remote control battery is low, the bat-
tery symbol on the left of the display is shown as empty. Replace the remote control battery and observe the important safety notes when
doing so (Y page 153).
Activating/deactivating the auxiliary
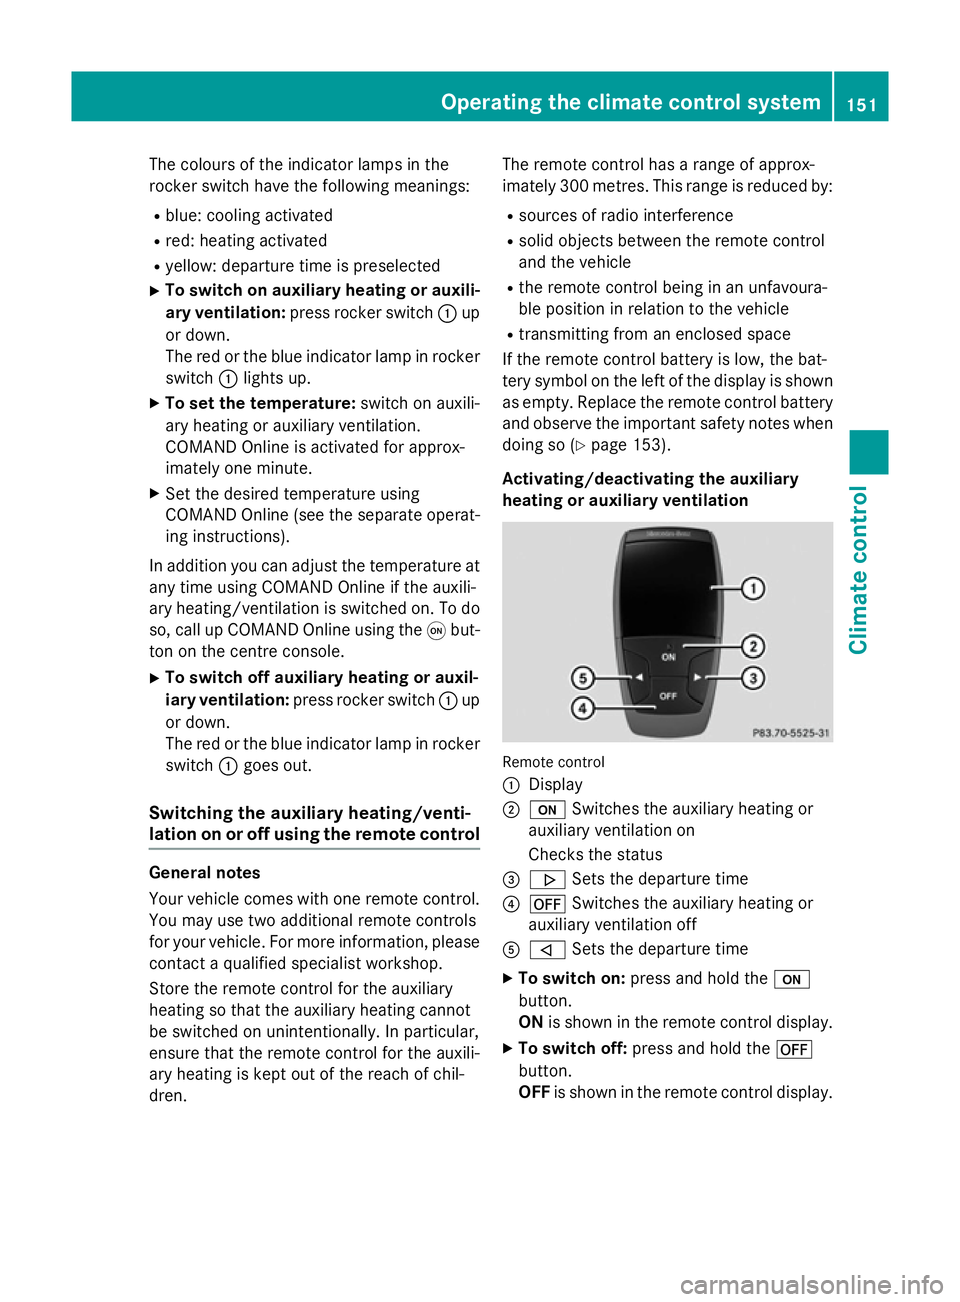
heating or auxiliary ventilation Remote control
:
Display
; u Switches the auxiliary heating or
auxiliary ventilation on
Checks the status
= . Sets the departure time
? ^ Switches the auxiliary heating or
auxiliary ventilation off
A , Sets the departure time
X To switch on: press and hold the u
button.
ON is shown in the remote control display.
X To switch off: press and hold the ^
button.
OFF is shown in the remote control display. Operating the climate control system
151Climate control Z
Page 257 of 417
X
Press :or9 to select the frequency
range or station memory.
X Press ato confirm the selection.
i Store the station in COMAND Online (see
the separate operating instructions).
i DAB radio mode (Digital
AudioBroadcast-
ing) is an optimised digital transmission
standard designed for the mobile reception of radio transmissions. Media menu
Changing the media source You can change the media source and play-
back mode (audio, video or TV) at any time in
the Media
Media menu.
X Switch on COMAND Online; see the sepa-
rate operating instructions.
X Press òon the steering wheel to open
the menu list.
X Press :or9 on the steering wheel
to select the Media
Mediamenu.
X Confirm by pressing aon the steering
wheel.
X To open/close the media sources list:
press abriefly.
The list shows the following media sources,
for example:
R Disc (CD/DVD)
R SD memory card
R Media register R
USB storage device
R Bluetooth ®
capable audio device
Please observe further information on media
support and media operation on COMAND
Online (see the separate operating instruc-
tions).
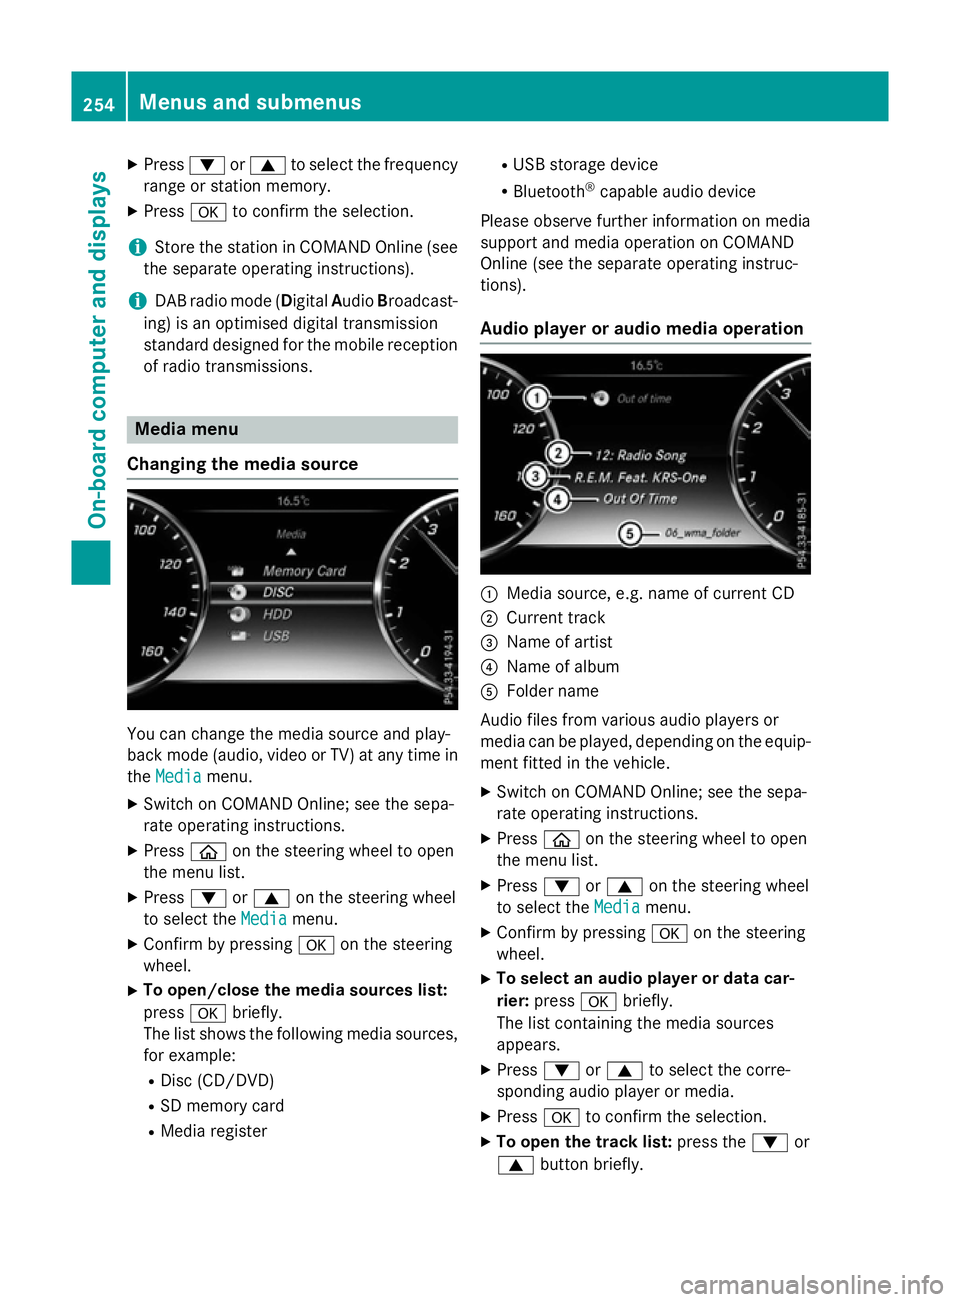
Audio player or audio media operation :
Media source, e.g. name of current CD
; Current track
= Name of artist
? Name of album
A Folder name
Audio files from various audio players or
media can be played, depending on the equip-
ment fitted in the vehicle.
X Switch on COMAND Online; see the sepa-
rate operating instructions.
X Press òon the steering wheel to open
the menu list.
X Press :or9 on the steering wheel
to select the Media Mediamenu.
X Confirm by pressing aon the steering
wheel.
X To select an audio player or data car-
rier: press abriefly.
The list containing the media sources
appears.
X Press :or9 to select the corre-
sponding audio player or media.
X Press ato confirm the selection.
X To open the track list: press the:or
9 button briefly. 254
Menus and submenusOn-board computer and displays
Page 259 of 417
X
To select TV: pressabriefly.
The list containing the media sources
appears.
X Press :or9 to select TV.
X Press ato confirm your selection.
X To open the channel list: press the:
or 9 button briefly.
X To select a channel in the channel list:
press the :or9 button briefly.
X To select a channel in the channel list
using rapid scroll: press and hold
the : or9 button.
X Press ato confirm the selection.
You can store TV channels in COMAND
Online; see the separate operating instruc-
tions. Telephone menu
Introduction G
WARNING
Operating the integrated information systems and communications equipment in the vehicle
while driving will distract you from traffic con-
ditions. You could then lose control of the
vehicle. There is a risk of an accident.
Only operate these devices if road traffic con-
ditions permit. If you are unsure about the
surrounding conditions, pull over to a safe
location and make entries only while the vehi-
cle is stationary.
When telephoning, you must observe the
legal requirements for the country in which
you are currently driving. X Switch on the mobile phone (see the man-
ufacturer's operating instructions).
X Switch on COMAND Online, see the sepa-
rate operating instructions. X
Insert the mobile phone into the bracket
(Y page 328).
or
X Establish a Bluetooth ®
connection to
COMAND Online, see the separate operat-
ing instructions.
X Press the òbutton on the steering
wheel to open the menu list.
X Press :or9 on the steering wheel
to select the Telephone Telephonemenu.
X Confirm by pressing aon the steering
wheel.
You will see one of the following display mes- sages in the multifunction display:
R Telephone ready
Telephone ready or the name of the net-
work provider: the mobile phone has found a network and is ready to receive.
R Telephone No service Telephone No service: there is no net-
work available or the mobile phone is
searching for a network.
i You can obtain further information about
suitable mobile phones and connecting
mobile phones via Bluetooth ®
:
R from any Mercedes-Benz Service Centre
R on the Internet at http://
www.mercedes-benz.com/connect
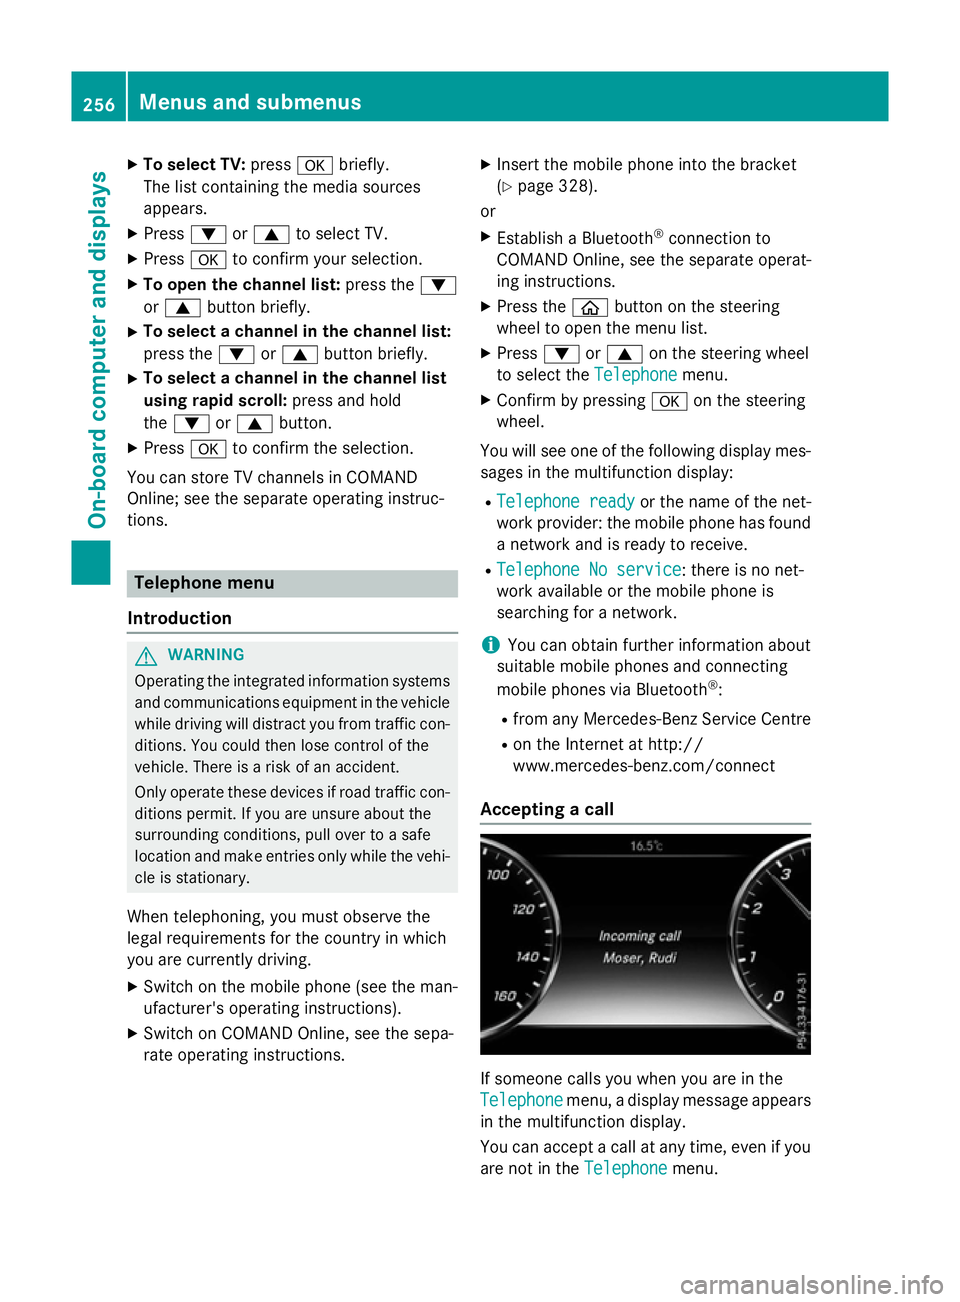
Accepting a call If someone calls you when you are in the
Telephone Telephone menu, a display message appears
in the multifunction display.
You can accept a call at any time, even if you
are not in the Telephone Telephonemenu.256
Menus and submenusOn-board computer and displays
Page 268 of 417
permanent SPEEDTRONIC function can only
be set in the Vehicle
Vehiclesubmenu. AMG menu (Mercedes-AMG vehicles)
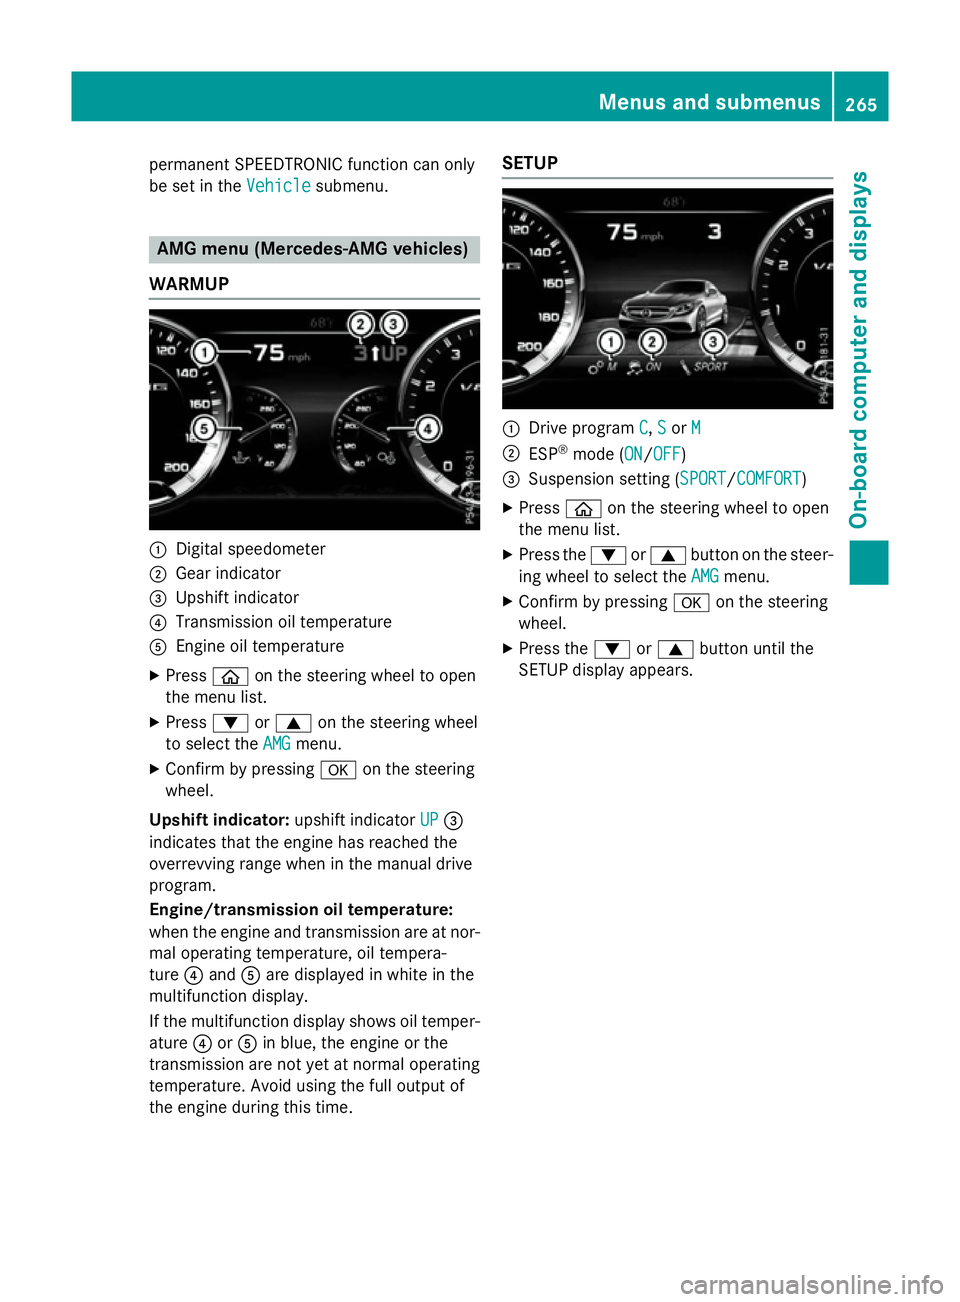
WARMUP :
Digital speedometer
; Gear indicator
= Upshift indicator
? Transmission oil temperature
A Engine oil temperature
X Press òon the steering wheel to open
the menu list.
X Press :or9 on the steering wheel
to select the AMG
AMG menu.
X Confirm by pressing aon the steering
wheel.
Upshift indicator: upshift indicatorUP
UP=
indicates that the engine has reached the
overrevving range when in the manual drive
program.
Engine/transmission oil temperature:
when the engine and transmission are at nor-
mal operating temperature, oil tempera-
ture ?and Aare displayed in white in the
multifunction display.
If the multifunction display shows oil temper-
ature ?orA in blue, the engine or the
transmission are not yet at normal operating
temperature. Avoid using the full output of
the engine during this time. SETUP
:
Drive program C C,S
Sor M
M
; ESP ®
mode (ON ON/OFFOFF)
= Suspension setting ( SPORT
SPORT/COMFORT
COMFORT)
X Press òon the steering wheel to open
the menu list.
X Press the :or9 button on the steer-
ing wheel to select the AMG
AMG menu.
X Confirm by pressing aon the steering
wheel.
X Press the :or9 button until the
SETUP display appears. Menus and submenus
265On-board computer and displays Z
Page 332 of 417

sion surrounding the possible health risk
posed by electromagnetic fields.
Mercedes-Benz recommends the use of an
approved exterior aerial. This ensures:
R optimal mobile phone reception quality in
the vehicle
R that mutual interference between the vehi-
cle electronics and mobile phones is mini-
mised
An exterior aerial has the following advan-
tages:
R it conducts the electromagnetic fields gen-
erated by a wireless device to the exterior
R the field strength in the vehicle interior is
lower than in a vehicle that does not have
an exterior aerial
Information on retrofitting two-way radios
and mobile phones (RF transmitters)
(Y page 402).
General notes Depending on the vehicle equipment, there
are various mobile phone brackets that may
be fitted in your vehicle; in some cases, these
are country-specific.
More information on suitable mobile phones,
mobile phone brackets and on connecting
Bluetooth ®
-capable mobile phones with
COMAND Online can be obtained:
R at your Mercedes-Benz Service Centre
R on the Internet at http://www.mercedes-
benz.com/connect
The functions and services available when
you use the phone depend on your mobile
phone model and service provider.
Using a mobile phone To connect a mobile phone to the exterior
aerial and charge it, insert it into the mobile
phone bracket. X
Open the telephone compartment
(Y page 318).
X Place the mobile phone bracket into the
pre-installed fitting; see the separate instal-
lation instructions for the mobile phone fit-
ting.
X Insert the mobile phone into the mobile
phone bracket; see the separate installa-
tion instructions for the mobile phone fit-
ting.
i The mobile phone can also be operated
without being in the bracket. However, the charging function and aerial function are
not available.
In order to use Bluetooth ®
(SAP profile) on
your telephone module, you must first insert
the telephone module into the pre-installed
fitting. This connects it to the exterior aerial.
If you wish to charge the mobile phone, then
you must connect it to a USB port.
Further information on the telephone module
with Bluetooth ®
(SAP profile) can be found in
the Digital Owner's Manual.
Operating the mobile phone You can operate the telephone using the
6 and~ buttons on the multifunction
steering wheel. You can operate other mobile
phone functions via the on-board computer
(Y page 256).
When you remove the key from the ignition
lock, the mobile phone is disconnected from
the vehicle. You can then no longer make calls using the hands-free system.
If a call is active and you remove the key from the ignition lock, the conversation is trans-
ferred over to the mobile phone. It is then
possible to continue the conversation on the
mobile phone. Features
329Stowing and features Z