2015 MERCEDES-BENZ S-CLASS COUPE transmission
[x] Cancel search: transmissionPage 227 of 417
Object detection
The reversing camera can detect moving and
stationary objects. If, for example, a pedes-
trian or another vehicle is detected, these
objects are marked with bars. The system is
only able to detect and mark stationary
objects when your vehicle is moving. When
the vehicle is stationary, moving objects can
be detected and marked.
To ensure that you can use the function, it
must be switched on in COMAND Online (see
the separate operating instructions). 360° camera (surround view)
General notes The 360° camera is a camera system that
consists of four cameras.
The system evaluates images from the fol-
lowing cameras:
R reversing camera
R front camera
R two side cameras in the exterior mirrors
The cameras cover the immediate surround-
ings of the vehicle. The 360° camera assists
you, for instance when parking or at exits with reduced visibility.
You can show pictures from the 360° camera
in full-screen mode or in six different split-
screen views on the COMAND display. A split- screen view also includes a top view of the
vehicle. This view is calculated from the data supplied by the installed cameras (virtual
camera).
The six split-screen views are:
R top view and image from the reversing cam-
era (130° viewing angle)
R top view and image from the front camera
(130° viewing angle without displaying the
maximum steering wheel angle)
R top view and enlarged rear view
R top view and enlarged front view R
top view and images from the rear-facing
side cameras (rear wheel view)
R top view and images from the forward-
facing side cameras (front wheel view)
When the function is active and you shift the
transmission from Dor Rto N, the guidelines
in the COMAND display are hidden.
When you change between transmission
positions Dand R, you see the previously
selected front or rear view.
Distances measured by PARKTRONIC will
also be optically displayed:
R as red or yellow brackets around the vehi-
cle symbol in top view in split-screen mode
or
R at the bottom right as red or yellow brack-
ets around the vehicle symbol in full-screen
mode
The line thickness and colour of the brackets show how far the vehicle is from an object.
R yellow brackets with thin lines:
PARKTRONIC is active
R yellow brackets with normal lines: an
object is present in close range of the vehi-
cle
R red line: an object is present in the imme-
diate close range of the vehicle
Important safety notes The 360° camera is only an aid and may show
a distorted view of obstacles, show them
incorrectly or not at all. The 360° camera is
not a substitute for attentive driving.
The responsibility for safe manoeuvring and
parking remains with you. Make sure that
there are no persons, animals or objects in
range while manoeuvring and parking.
You are always responsible for safety, and
must always pay attention to your surround-
ings when parking and manoeuvring. This
applies to the areas behind, in front of and
beside the vehicle. You could otherwise
endanger yourself and others. 224
Driving systemsDriving and parking
Page 228 of 417
The 360° camera will not function or will
function only in a limited manner:
R if the doors are open
R if the exterior mirrors are folded in
R if the boot lid is open
R in heavy rain, snow or fog
R at night or in very dark places
R if the cameras are exposed to very bright
light
R if the area is lit by fluorescent bulbs or LED
lighting (the display may flicker)
R if the camera lenses mist up, e.g. when
driving into a heated garage in winter, caus-
ing a rapid change in temperature
R if the camera lenses are dirty or covered.
Observe the notes on cleaning
(Y page 350)
R if the vehicle components in which the
cameras are fitted are damaged. In this
event, have the camera position and setting
checked at a qualified specialist workshop.
Do not use the 360° under such circumstan-
ces. You could otherwise injure others or
damage objects when parking the vehicle.
The guide lines in the COMAND display show
the distances to your vehicle. The distances
only apply to road level.
i The camera in the rear area is protected
from raindrops and dust by means of a flap.
This flap opens when the 360° camera is
activated.
The flap closes again when:
R you have finished the manoeuvring proc-
ess
R you switch off the engine
R you open the boot
See the notes on cleaning (Y page 350).
For technical reasons, the flap may remain
open briefly after the 360° camera has
been deactivated. On vehicles with height-adjustable chassis,
depending on technical conditions, leaving
the standard height can result in:
R inaccuracies in the guide lines
R inaccuracies in the display of generated
images (top view)
Activation conditions The 360° camera image can be displayed if:
R COMAND Online is switched on (see the
separate operating instructions)
R the 360° camera 360° camera function is switched on
i If the 360° camera is activated at speeds
above approximately 30 km/h, a warning
message appears.
The warning message disappears if:
R the vehicle's speed falls below approx-
imately 30 km/h. The 360° camera is
then activated.
R the message is confirmed with the %
button.
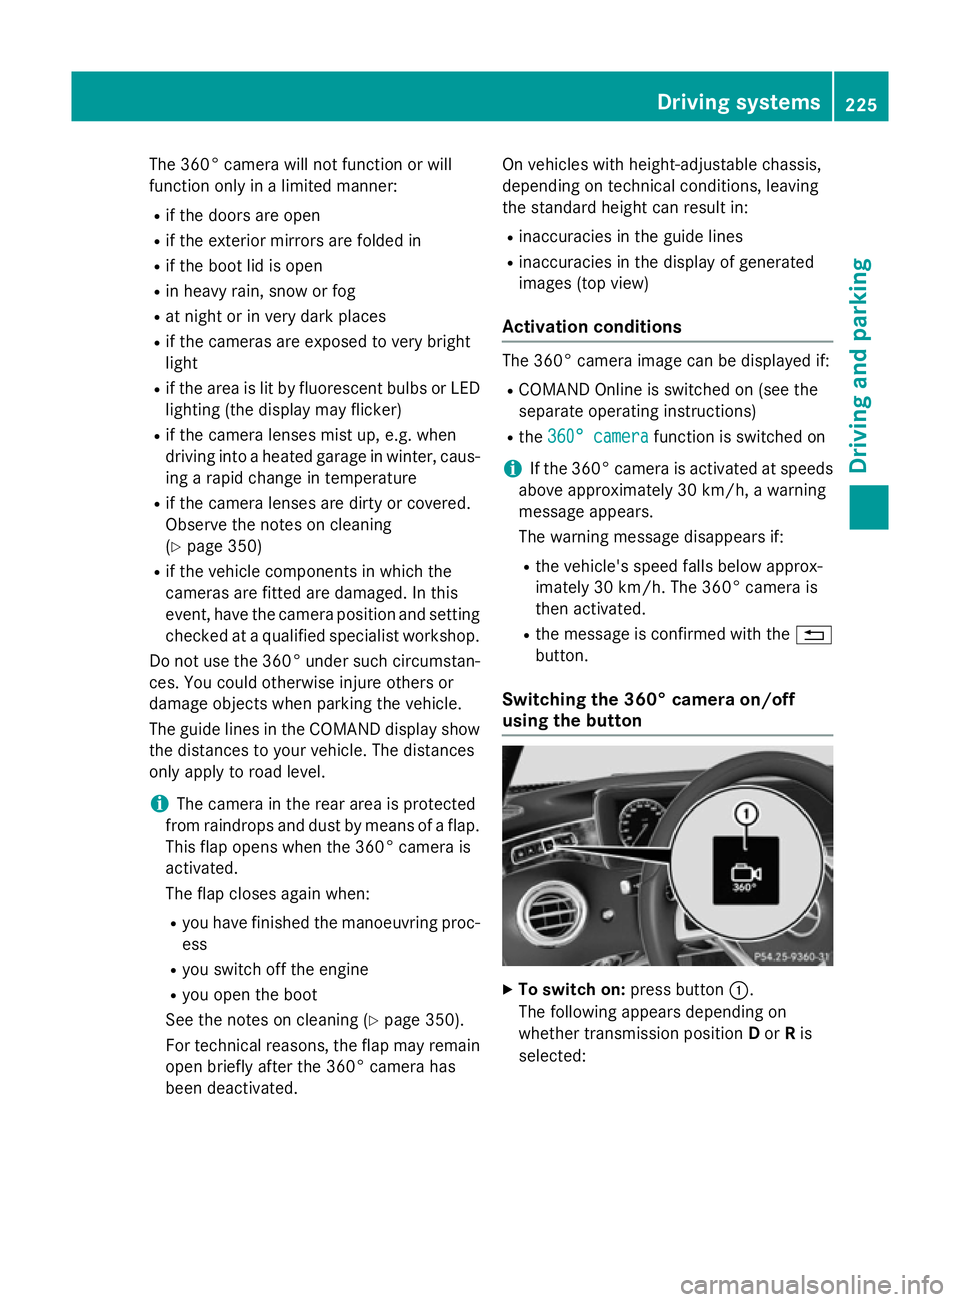
Switching the 360° camera on/off
using the button X
To switch on: press button:.
The following appears depending on
whether transmission position Dor Ris
selected: Driving systems
225Driving and parking Z
Page 229 of 417
R
full-screen view with image from the
front camera
R full-screen view with image from the
reversing camera.
X To switch off: press button:again.
Activating the 360° camera using
COMAND Online X
Press the Øbutton in the centre con-
sole.
The vehicle menu appears.
X To select the 360° camera: turn and press
the controller.
The following appears depending on
whether transmission position Dor Ris
selected:
R a split-screen with top view and the
image from the front camera or
R a split-screen with top view and the
image from the reversing camera.
Further information on the COMAND control-
ler can be found in the separate operating
instructions.
Activating the 360° camera using
reverse gear You can show images from the 360° camera
automatically by engaging reverse gear.
X Make sure that the key is in position 2in the
ignition lock.
X Make sure that the Activation by R Activation by R
gear
gear function is selected in COMAND
Online (see separate operating instruc-
tions).
X To show the 360° camera image: engage
reverse gear.
The area behind the vehicle is shown in the
COMAND display in split-screen mode. You see the top view of the vehicle and the
image from the reversing camera. Selecting the split-screen and full
screen displays Switching between split screen views:
X To switch to the line with the vehicle icons:
slide ZVthe controller.
X To select a vehicle icon: turn the controller.
Switching to full screen mode:
X Select 180° view
180° view by turning and pressing
the controller.
i The 180° option is only available in the
following views:
R Top view with image from the reversing
camera
R Top view with image from the front cam-
era
Displays in the COMAND display Important safety notes
The camera system may show a distorted
view of obstacles or show them incorrectly or
not at all. Obstacles are not shown by the
system in the following locations:
R under the front and rear bumpers
R very close to the front and rear bumpers
R in the area immediately above the handle
on the boot lid
R very close to the exterior mirrors
R in the transitional areas between the vari-
ous cameras in the virtual top view
! Objects not at ground level may appear to
be further away than they actually are, e.g.:
R the bumper of a parked vehicle
R the drawbar of a trailer
R the ball coupling of a trailer tow hitch
R the rear section of an HGV
R a slanted post
Use the guidelines only for orientation.
Approach objects no further than the bot-
tom-most guideline. 226
Driving systemsDriving an
d parking
Page 231 of 417
This view assists you in estimating the dis-
tance to the vehicle behind you.
i This setting can also be selected as an
enlarged front view.
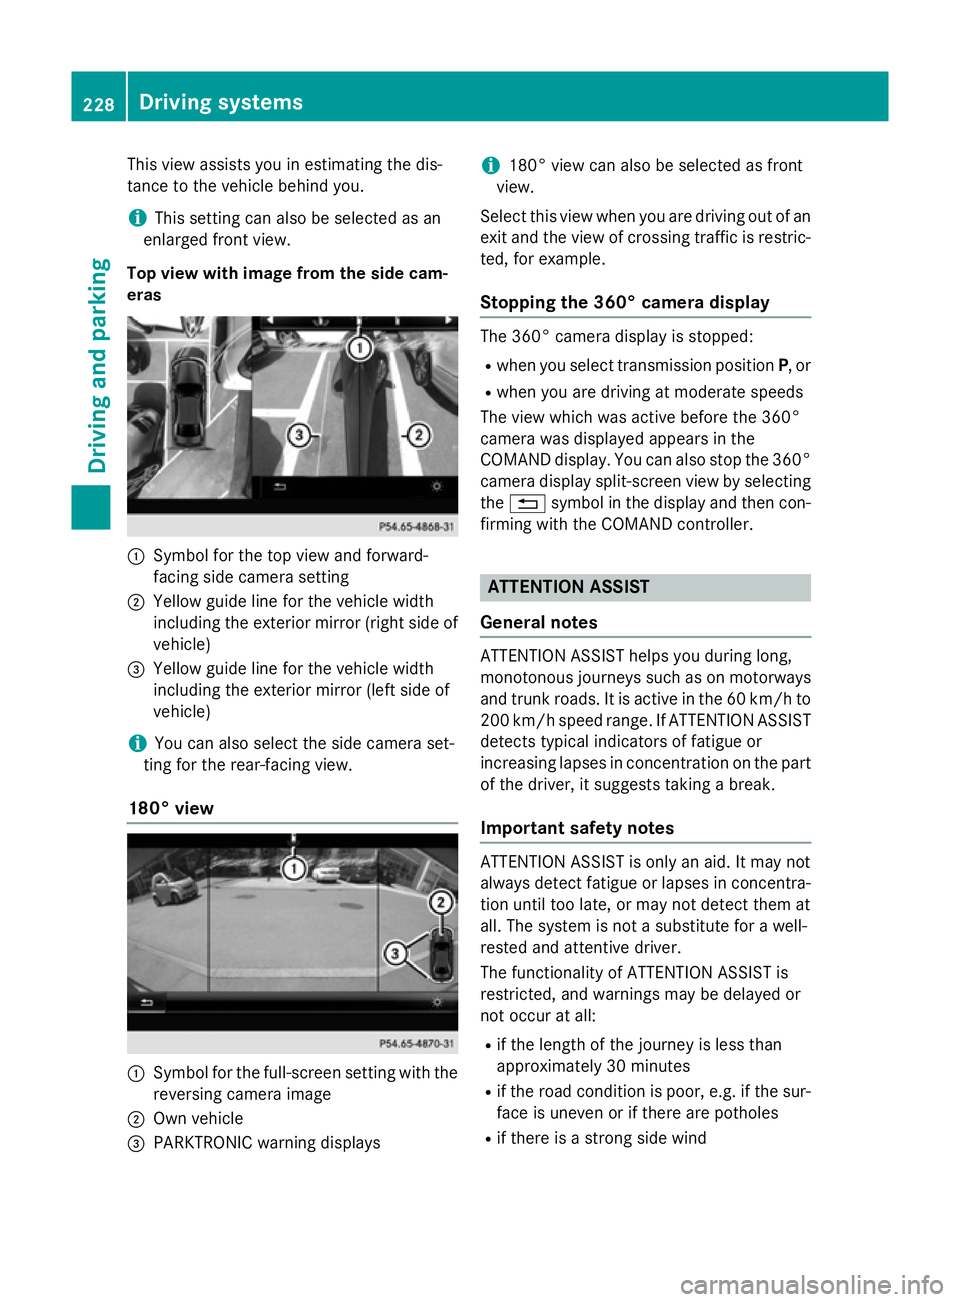
Top view with image from the side cam-
eras :
Symbol for the top view and forward-
facing side camera setting
; Yellow guide line for the vehicle width
including the exterior mirror (right side of vehicle)
= Yellow guide line for the vehicle width
including the exterior mirror (left side of
vehicle)
i You can also select the side camera set-
ting for the rear-facing view.
180° view :
Symbol for the full-screen setting with the
reversing camera image
; Own vehicle
= PARKTRONIC warning displays i
180° view can also be selected as front
view.
Select this view when you are driving out of an
exit and the view of crossing traffic is restric- ted, for example.
Stopping the 360° camera display The 360° camera display is stopped:
R
when you select transmission position P, or
R when you are driving at moderate speeds
The view which was active before the 360°
camera was displayed appears in the
COMAND display. You can also stop the 360° camera display split-screen view by selecting
the % symbol in the display and then con-
firming with the COMAND controller. ATTENTION ASSIST
General notes ATTENTION ASSIST helps you during long,
monotonous journeys such as on motorways and trunk roads. It is active in the 60 km/hto
200 km/h speed range. If ATTENTION ASSIST
detects typical indicators of fatigue or
increasing lapses in concentration on the part of the driver, it suggests taking a break.
Important safety notes ATTENTION ASSIST is only an aid. It may not
always detect fatigue or lapses in concentra-
tion until too late, or may not detect them at
all. The system is not a substitute for a well-
rested and attentive driver.
The functionality of ATTENTION ASSIST is
restricted, and warnings may be delayed or
not occur at all:
R if the length of the journey is less than
approximately 30 minutes
R if the road condition is poor, e.g. if the sur-
face is uneven or if there are potholes
R if there is a strong side wind 228
Driving systemsDriving and parking
Page 244 of 417
there is sufficient distance to the side for
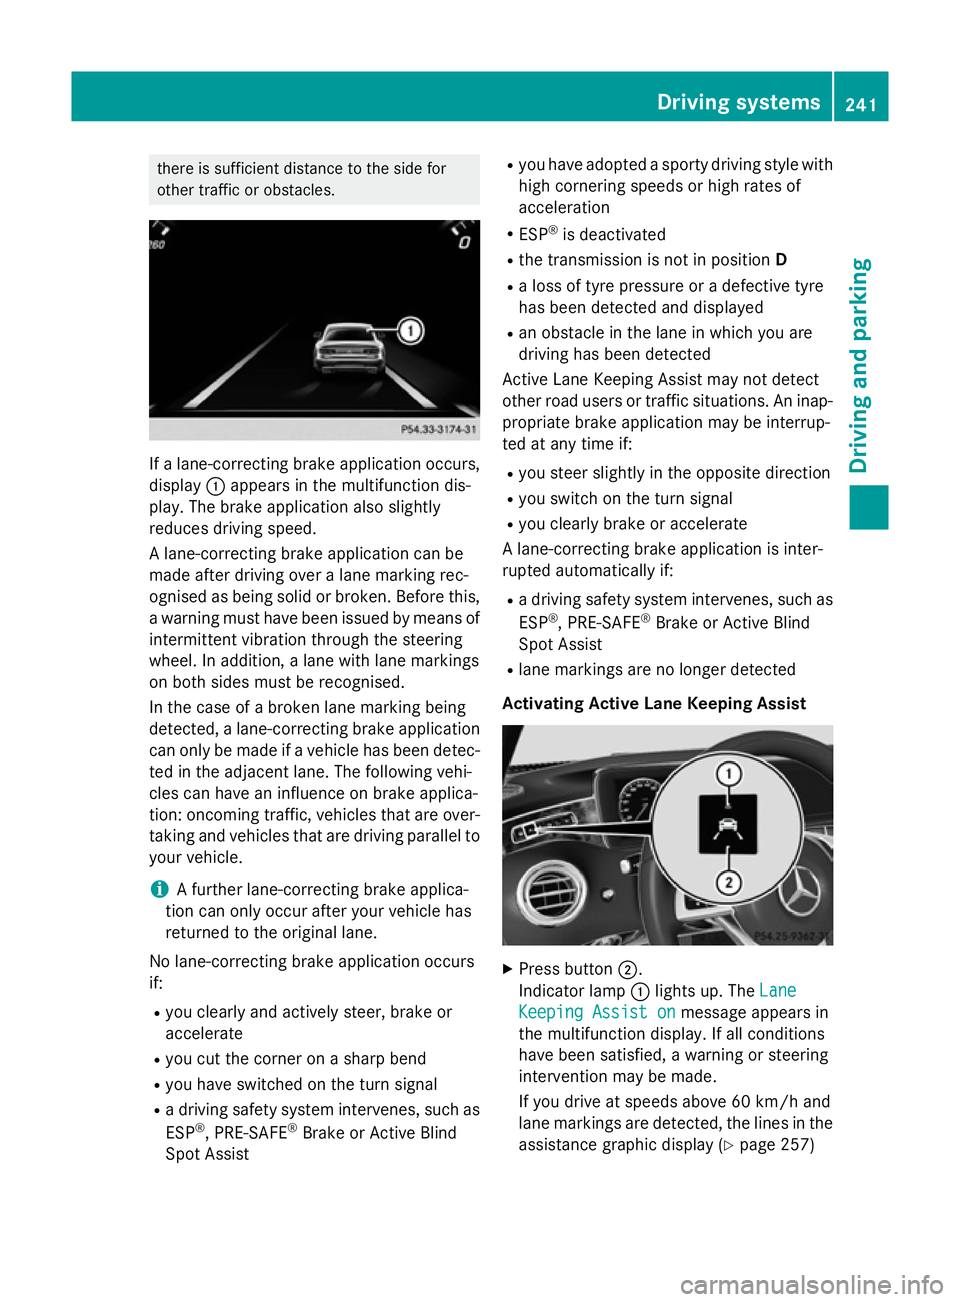
other traffic or obstacles. If a lane-correcting brake application occurs,
display :appears in the multifunction dis-
play. The brake application also slightly
reduces driving speed.
A lane-correcting brake application can be
made after driving over a lane marking rec-
ognised as being solid or broken. Before this,
a warning must have been issued by means of
intermittent vibration through the steering
wheel. In addition, a lane with lane markings
on both sides must be recognised.
In the case of a broken lane marking being
detected, a lane-correcting brake application can only be made if a vehicle has been detec-
ted in the adjacent lane. The following vehi-
cles can have an influence on brake applica-
tion: oncoming traffic, vehicles that are over-
taking and vehicles that are driving parallel to
your vehicle.
i A further lane-correcting brake applica-
tion can only occur after your vehicle has
returned to the original lane.
No lane-correcting brake application occurs
if:
R you clearly and actively steer, brake or
accelerate
R you cut the corner on a sharp bend
R you have switched on the turn signal
R a driving safety system intervenes, such as
ESP ®
, PRE-SAFE ®
Brake or Active Blind
Spot Assist R
you have adopted a sporty driving style with
high cornering speeds or high rates of
acceleration
R ESP ®
is deactivated
R the transmission is not in position D
R a loss of tyre pressure or a defective tyre
has been detected and displayed
R an obstacle in the lane in which you are
driving has been detected
Active Lane Keeping Assist may not detect
other road users or traffic situations. An inap- propriate brake application may be interrup-
ted at any time if:
R you steer slightly in the opposite direction
R you switch on the turn signal
R you clearly brake or accelerate
A lane-correcting brake application is inter-
rupted automatically if:
R a driving safety system intervenes, such as
ESP ®
, PRE-SAFE ®
Brake or Active Blind
Spot Assist
R lane markings are no longer detected
Activating Active Lane Keeping Assist X
Press button ;.
Indicator lamp :lights up. The Lane Lane
Keeping Assist on
Keeping Assist on message appears in
the multifunction display. If all conditions
have been satisfied, a warning or steering
intervention may be made.
If you drive at speeds above 60 km/h and
lane markings are detected, the lines in the assistance graphic display (Y page 257) Driving systems
241Driving and parking Z
Page 257 of 417
X
Press :or9 to select the frequency
range or station memory.
X Press ato confirm the selection.
i Store the station in COMAND Online (see
the separate operating instructions).
i DAB radio mode (Digital
AudioBroadcast-
ing) is an optimised digital transmission
standard designed for the mobile reception of radio transmissions. Media menu
Changing the media source You can change the media source and play-
back mode (audio, video or TV) at any time in
the Media
Media menu.
X Switch on COMAND Online; see the sepa-
rate operating instructions.
X Press òon the steering wheel to open
the menu list.
X Press :or9 on the steering wheel
to select the Media
Mediamenu.
X Confirm by pressing aon the steering
wheel.
X To open/close the media sources list:
press abriefly.
The list shows the following media sources,
for example:
R Disc (CD/DVD)
R SD memory card
R Media register R
USB storage device
R Bluetooth ®
capable audio device
Please observe further information on media
support and media operation on COMAND
Online (see the separate operating instruc-
tions).
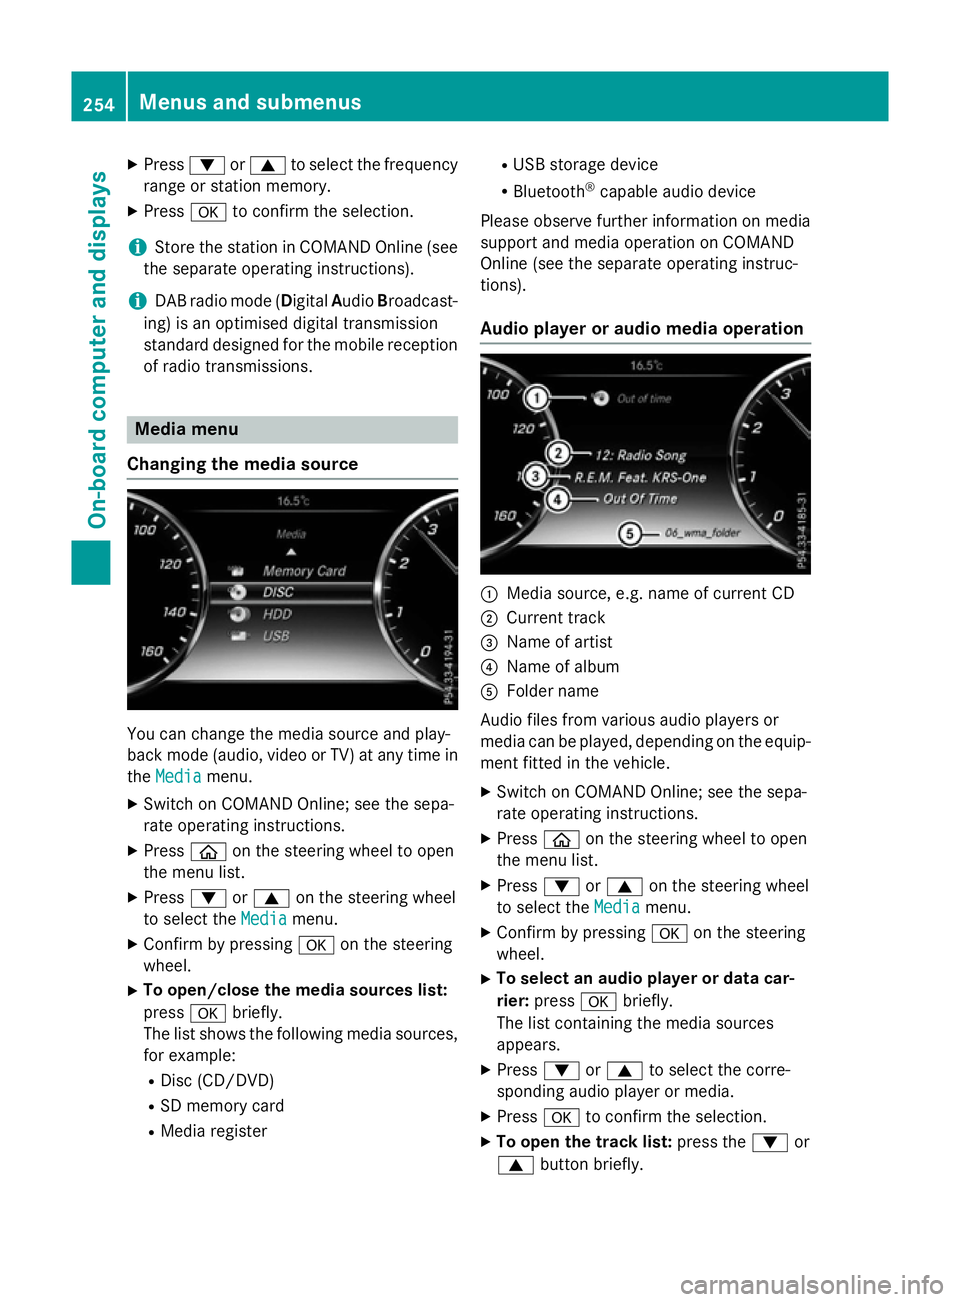
Audio player or audio media operation :
Media source, e.g. name of current CD
; Current track
= Name of artist
? Name of album
A Folder name
Audio files from various audio players or
media can be played, depending on the equip-
ment fitted in the vehicle.
X Switch on COMAND Online; see the sepa-
rate operating instructions.
X Press òon the steering wheel to open
the menu list.
X Press :or9 on the steering wheel
to select the Media Mediamenu.
X Confirm by pressing aon the steering
wheel.
X To select an audio player or data car-
rier: press abriefly.
The list containing the media sources
appears.
X Press :or9 to select the corre-
sponding audio player or media.
X Press ato confirm the selection.
X To open the track list: press the:or
9 button briefly. 254
Menus and submenusOn-board computer and displays
Page 268 of 417
permanent SPEEDTRONIC function can only
be set in the Vehicle
Vehiclesubmenu. AMG menu (Mercedes-AMG vehicles)
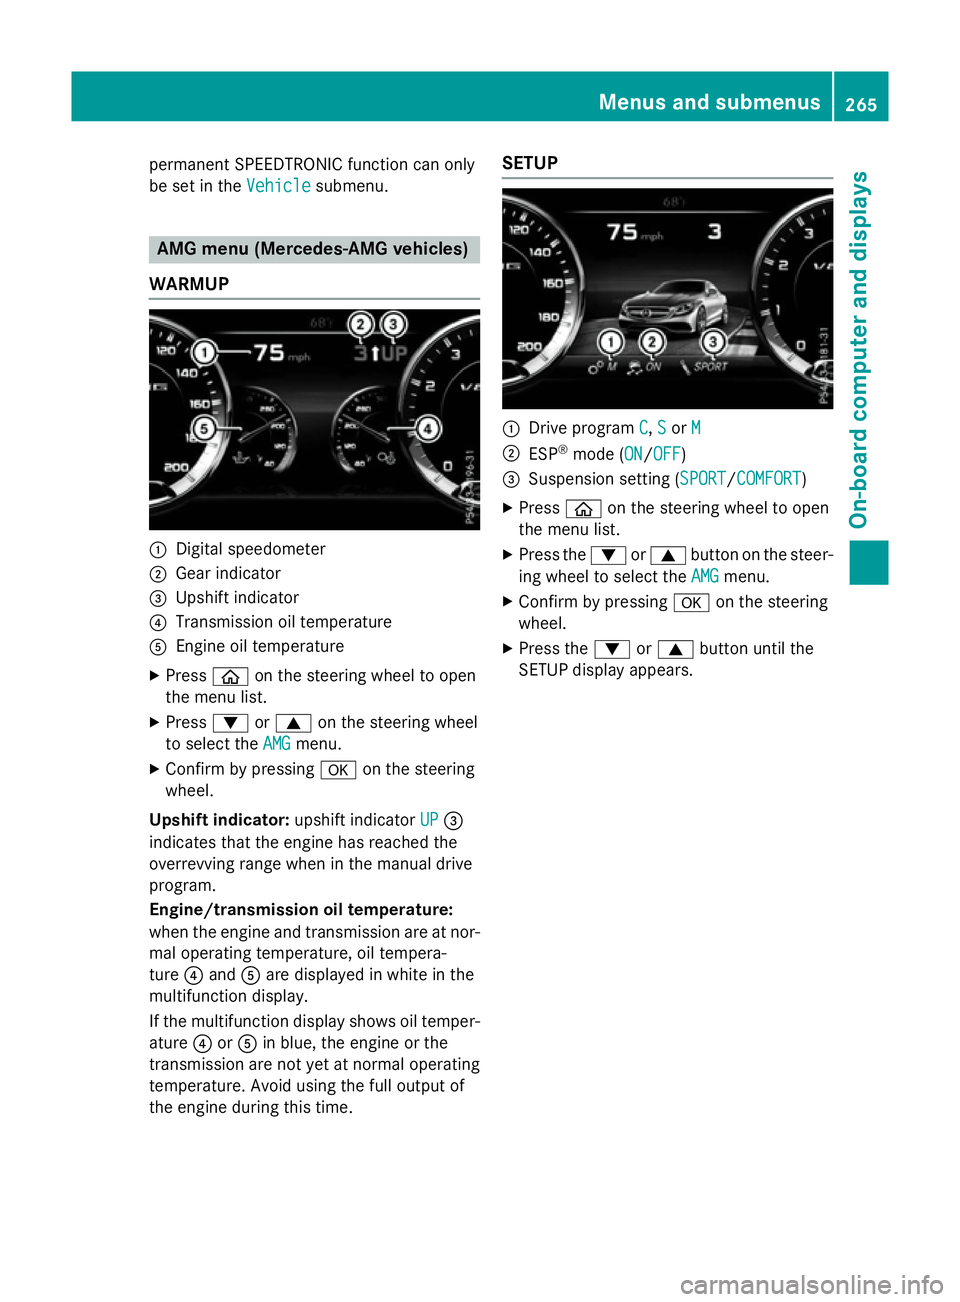
WARMUP :
Digital speedometer
; Gear indicator
= Upshift indicator
? Transmission oil temperature
A Engine oil temperature
X Press òon the steering wheel to open
the menu list.
X Press :or9 on the steering wheel
to select the AMG
AMG menu.
X Confirm by pressing aon the steering
wheel.
Upshift indicator: upshift indicatorUP
UP=
indicates that the engine has reached the
overrevving range when in the manual drive
program.
Engine/transmission oil temperature:
when the engine and transmission are at nor-
mal operating temperature, oil tempera-
ture ?and Aare displayed in white in the
multifunction display.
If the multifunction display shows oil temper-
ature ?orA in blue, the engine or the
transmission are not yet at normal operating
temperature. Avoid using the full output of
the engine during this time. SETUP
:
Drive program C C,S
Sor M
M
; ESP ®
mode (ON ON/OFFOFF)
= Suspension setting ( SPORT
SPORT/COMFORT
COMFORT)
X Press òon the steering wheel to open
the menu list.
X Press the :or9 button on the steer-
ing wheel to select the AMG
AMG menu.
X Confirm by pressing aon the steering
wheel.
X Press the :or9 button until the
SETUP display appears. Menus and submenus
265On-board computer and displays Z
Page 300 of 417

Display messages
Possible causes/consequences and
M
MSolutions Tyre press. moni‐
Tyre press. moni‐
tor currently tor currently
unavailable unavailable No signals can be received from the tyre pressure sensors due to
strong RF interference. The tyre pressure monitor is temporarily
malfunctioning.
X Drive on.
The tyre pressure monitor restarts automatically as soon as the
cause has been rectified. Wheel sensor(s) Wheel sensor(s)
missing missing There is no signal from the tyre pressure sensor of one or several
wheels. The pressure of the affected tyre is not displayed in the
multifunction display.
X Have the faulty tyre pressure sensor replaced at a qualified spe-
cialist workshop. Tyre press. moni‐ Tyre press. moni‐
tor tor
inoperative
inoperative No
No
wheel sensors
wheel sensors The wheels fitted do not have suitable tyre pressure sensors. The
tyre pressure monitor is deactivated.
X Fit wheels with suitable tyre pressure sensors.
The tyre pressure monitor is activated automatically after driv-
ing for a few minutes. Tyre press. moni‐ Tyre press. moni‐
tor inoperative tor inoperative The tyre pressure monitor is faulty.
X Consult a qualified specialist workshop. Vehicle
Display messages
Possible causes/consequences and
M
MSolutions To start engine,
To start engine,
shift to either P shift to either P
or N or N You have attempted to start the engine with the transmission in
position
Ror D.
X Shift the selector lever to position Por N. Apply brake to Apply brake to
deselect Park (P) deselect Park (P)
position position You have attempted to shift the selector lever to position
D,Ror N
without depressing the brake pedal.
X Depress the brake pedal. To shift out of P
To shift out of P
or N, depress or N, depress
brake and start brake and start
engine engine With the engine switched off, you have attempted to shift the
selector lever out of position
Por Ninto another transmission
position.
X Depress the brake pedal.
X Start the engine. Display
messages
297On-board computer and displays Z