2015 MERCEDES-BENZ GLK-CLASS SUV tow
[x] Cancel search: towPage 339 of 386
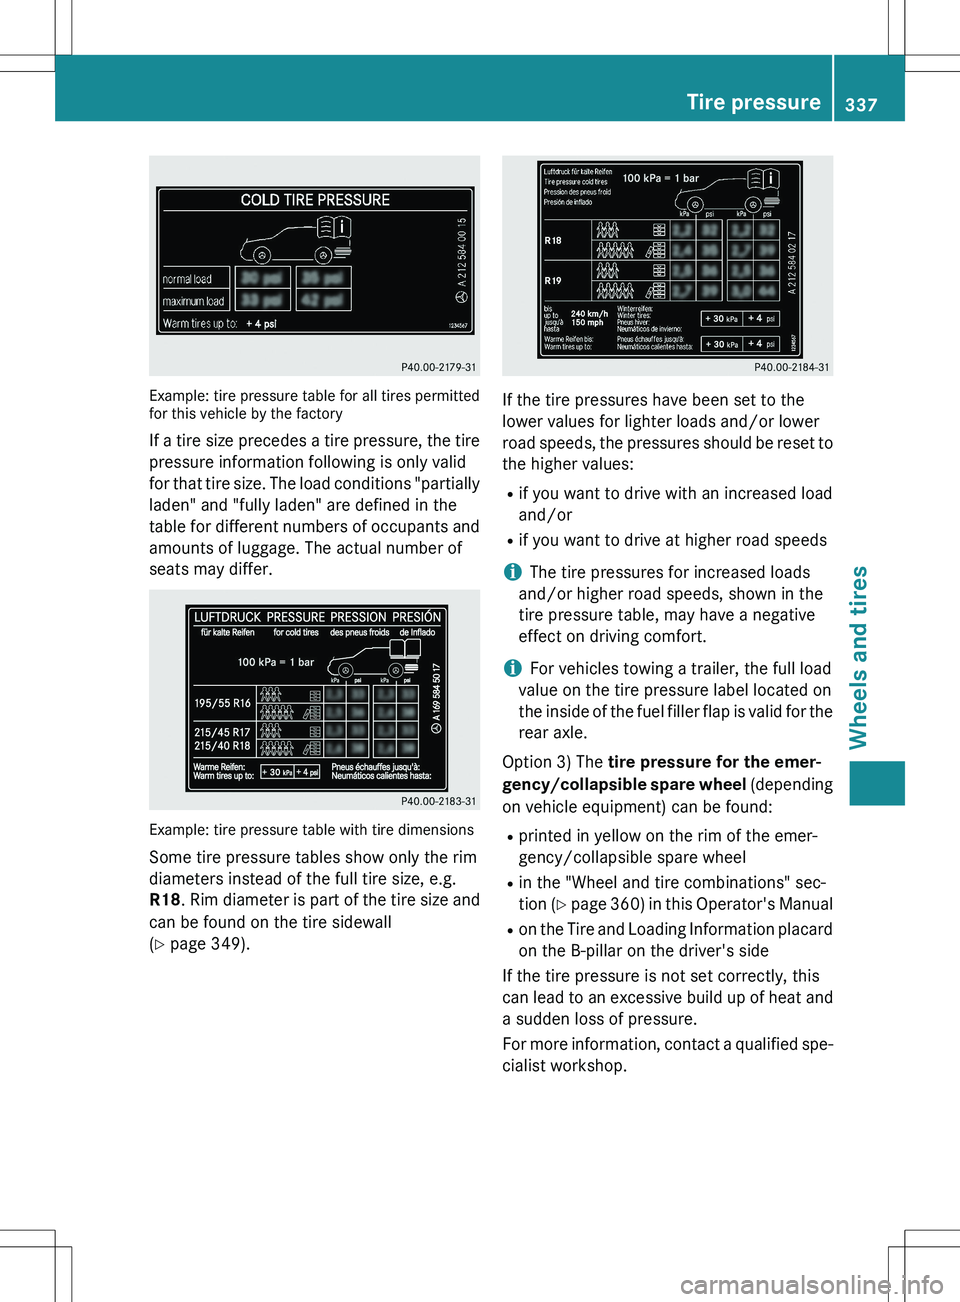
Example: tire pressure table for all tires permitted
for this vehicle by the factory
If a tire size precedes a tire pressure, the tirepressure information following is only valid
for that tire size. The load conditions "partially
laden" and "fully laden" are defined in the
table for different numbers of occupants and amounts of luggage. The actual number of
seats may differ.
Example: tire pressure table with tire dimensions
Some tire pressure tables show only the rim
diameters instead of the full tire size, e.g.
R18 . Rim diameter is part of the tire size and
can be found on the tire sidewall
( Y page 349).
If the tire pressures have been set to the
lower values for lighter loads and/or lower
road speeds, the pressures should be reset to
the higher values:
R if you want to drive with an increased load
and/or
R if you want to drive at higher road speeds
iThe tire pressures for increased loads
and/or higher road speeds, shown in the
tire pressure table, may have a negative
effect on driving comfort.
iFor vehicles towing a trailer, the full load
value on the tire pressure label located on
the inside of the fuel filler flap is valid for the rear axle.
Option 3) The tire pressure for the emer-
gency/collapsible spare wheel (depending
on vehicle equipment) can be found:
R printed in yellow on the rim of the emer-
gency/collapsible spare wheel
R in the "Wheel and tire combinations" sec-
tion ( Y page 360) in this Operator's Manual
R on the Tire and Loading Information placard
on the B-pillar on the driver's side
If the tire pressure is not set correctly, this
can lead to an excessive build up of heat and
a sudden loss of pressure.
For more information, contact a qualified spe- cialist workshop.
Tire pressure337
Wheels and tires
Z
Page 346 of 386
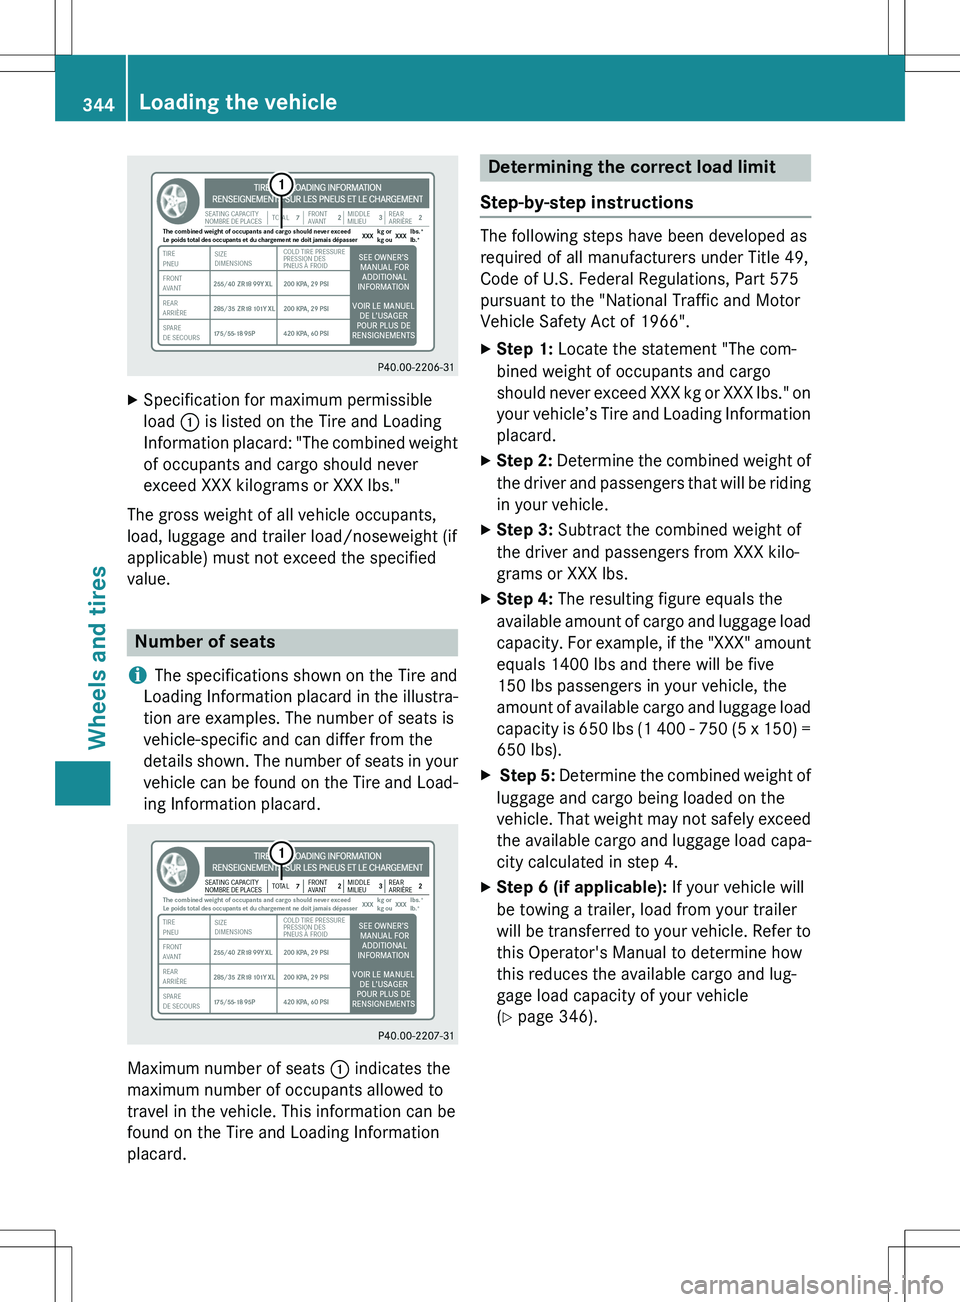
XSpecification for maximum permissible
load : is listed on the Tire and Loading
Information placard: "The combined weight of occupants and cargo should never
exceed XXX kilograms or XXX lbs."
The gross weight of all vehicle occupants,
load, luggage and trailer load/noseweight (if
applicable) must not exceed the specified
value.
Number of seats
iThe specifications shown on the Tire and
Loading Information placard in the illustra-
tion are examples. The number of seats is
vehicle-specific and can differ from the
details shown. The number of seats in your vehicle can be found on the Tire and Load-
ing Information placard.
Maximum number of seats : indicates the
maximum number of occupants allowed to
travel in the vehicle. This information can be
found on the Tire and Loading Information
placard.
Determining the correct load limit
Step-by-step instructions
The following steps have been developed as
required of all manufacturers under Title 49,
Code of U.S. Federal Regulations, Part 575
pursuant to the "National Traffic and Motor
Vehicle Safety Act of 1966". X Step 1: Locate the statement "The com-
bined weight of occupants and cargo
should never exceed XXX kg or XXX lbs." on your vehicle’s Tire and Loading Information
placard.
X Step 2: Determine the combined weight of
the driver and passengers that will be riding
in your vehicle.
X Step 3: Subtract the combined weight of
the driver and passengers from XXX kilo-
grams or XXX lbs.
X Step 4: The resulting figure equals the
available amount of cargo and luggage load
capacity. For example, if the "XXX" amount
equals 1400 lbs and there will be five
150 lbs passengers in your vehicle, the
amount of available cargo and luggage load
capacity is 650 lbs (1 400 - 750 (5 x 150) = 650 lbs).
X Step 5: Determine the combined weight of
luggage and cargo being loaded on the
vehicle. That weight may not safely exceed the available cargo and luggage load capa-
city calculated in step 4.
X Step 6 (if applicable): If your vehicle will
be towing a trailer, load from your trailer
will be transferred to your vehicle. Refer to
this Operator's Manual to determine how
this reduces the available cargo and lug-
gage load capacity of your vehicle
( Y page 346).
344Loading the vehicle
Wheels and tires
Page 348 of 386
Example 1Example 2Example 3
Step 3Permissible load and
trailer load/nose-
weight (maximum
permissible load rat-
ing from the Tire and Loading Information
placard minus the
gross weight of all
occupants)1500 lbs
(680 kg) -
750 lbs (340 kg) = 750 lbs
(340 kg)1500 lbs
(680 kg) –
540 lbs (245 kg)= 960 lbs
(435 kg)1500 lbs
(680 kg) -
150 lbs (68 kg) =1350 lbs
(612 kg)
The greater the combined weight of the occupants, the lower the maxim um luggage load.
Further information can be found under "Towing a trailer" ( Y page 346).
Vehicle identification plate
Even if you have calculated the total cargo
carefully, you should still make sure that the
gross vehicle weight rating and the gross axle
weight rating are not exceeded. Details can
be found on the vehicle identification plate on the B-pillar on the driver's side of the vehicle
( Y page 343).
Permissible Gross Vehicle Weight Rating
(GVWR): the gross weight of the vehicle, all
passengers, load and trailer load/noseweight (if applicable) must not exceed the permissi-
ble gross vehicle weight.
Gross Axle Weight Rating (GAWR): the
maximum permissible weight that can be car- ried by one axle (front or rear axle).
To ensure that your vehicle does not exceed
the maximum permissible values (gross vehi-
cle weight and maximum gross axle weight
rating), have your loaded vehicle (including
driver, occupants, cargo, and full trailer load if applicable) weighed on a suitable vehicle
weighbridge.
Trailer load/noseweight
The trailer load/noseweight affects the gross
weight of the vehicle. If a trailer is attached,
the trailer load/noseweight is included in the
load along with occupants and luggage. The trailer load/noseweight is usually approx-
imately 8% of the gross weight of the trailer
and its cargo.
Maximum load rating
Do not overload the tires by exceeding the
specified load limit. The maximum permissi-
ble load can be found on the vehicle's Tire and
Loading Information placard on the B-pillar on
the driver's side ( Y page 343).
iThe actual values for tires are vehicle-
specific and may deviate from the values in
the illustration.
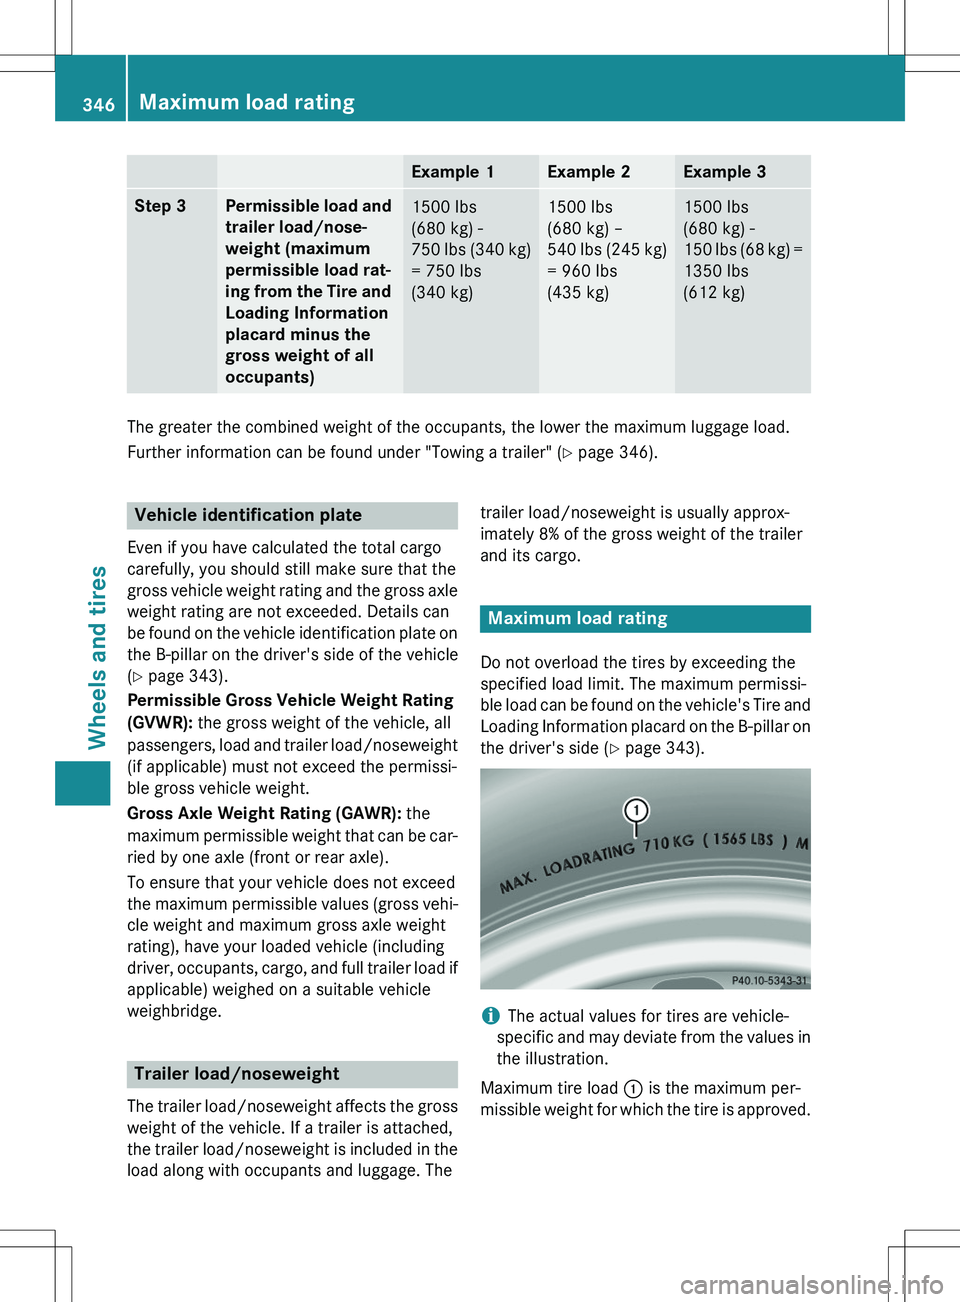
Maximum tire load : is the maximum per-
missible weight for which the tire is approved.
346Maximum load rating
Wheels and tires
Page 356 of 386
Maximum load on one tire
Maximum load on one tire. This is calculated
by dividing the maximum axle load of one axleby two.
PSI (pounds per square inch)
A standard unit of measure for tire pressure.
Aspect ratio
Relationship between tire height and tire
width in percent.
Tire pressure
This is pressure inside the tire applying an
outward force to each square inch of the tire's surface. The tire pressure is specified in
pounds per square inch (psi), in kilopascal
(kPa) or in bar. The tire pressure should only
be corrected when the tires are cold.
Tire pressure of cold tires
The tires are cold:
R if the vehicle has been parked without
direct sunlight on the tires for at least three
hours and
R if the vehicle has not been driven further
than 1 mile (1.6 km)
Tread
The part of the tire that comes into contact
with the road.
Bead
The tire bead ensures that the tire sits
securely on the wheel. There are several steel
wires in the bead to prevent the tire from
coming loose from the wheel rim.
Sidewall
The part of the tire between the tread and the
bead.
Weight of optional extras
The combined weight of those optional extras that weigh more than the replaced standard
parts and more than 2.3 kg (5 lbs). These
optional extras, such as high-performance
brakes, level control, a roof rack or a high-
performance battery, are not included in the
curb weight and the weight of the accesso-
ries.
TIN (Tire Identification Number)
This is a unique identifier which can be used
by a tire manufacturer to identify tires, for
example for a product recall, and thus identifythe purchasers. The TIN is made up of the
manufacturer's identity code, tire size, tire
type code and the manufacturing date.
Load bearing index
The load bearing index (also load index) is a
code that contains the maximum load bearing
capacity of a tire.
Traction
Traction is the result of friction between the
tires and the road surface.
TWR (Tongue Weight Rating)
The TWR specifies the maximum permissible
weight that the ball coupling of the trailer tow
hitch can support.
354Definition of terms for tires and loading
Wheels and tires
Page 361 of 386

! Always use wheel bolts ; to mount the
collapsible spare wheel. Using other wheel
bolts to mount the collapsible spare wheel could damage the brake system.
Be sure to use the original-length wheel bolts
when re-mounting the original wheel after it
has been repaired.
! To prevent damage to the paintwork, hold
the wheel securely against the wheel hub
while screwing in the first wheel bolt.
X Clean the wheel and wheel hub contact
surfaces.
X Place the new wheel on the wheel hub and
push it on.
X Tighten the wheel bolts until they are fin-
ger-tight.
X Inflate the collapsible spare wheel
(Y page 367).
Only then lower the vehicle.
Lowering the vehicle
GWARNING
The wheels could work loose if the wheel nuts and bolts are not tightened to the specified
tightening torque. There is a risk of accident.
Have the tightening torque immediately
checked at a qualified specialist workshop
after a wheel is changed.
! Inflate the collapsible spare wheel using
the tire inflation compressor before lower-
ing the vehicle. The wheel rim could other-
wise be damaged.
X Place the ratchet wrench onto the hexagon
nut of the jack so that the letters AB are
visible.
X Turn the ratchet wrench until the vehicle is
once again standing firmly on the ground.
X Place the jack to one side.
X Tighten the wheel bolts evenly in a cross-
wise pattern in the sequence indicated ( :
to A ). The tightening torque must be
110 lb-ft (150 Nm) .
X Turn the jack back to its initial position and
store it together with the rest of the tire-
change tool kit in the cargo compartment.
X Transport the faulty wheel in the cargo
compartment.
X Check the tire pressure of the newly moun-
ted wheel and adjust it if necessary.
Observe the recommended tire pressure
( Y page 336).
For further information on stowing the col-
lapsible spare wheel, see ( Y page 367).
iWhen you are driving with the emergency
spare wheel mounted, the tire pressure
monitor cannot function reliably. Only
restart the tire pressure monitor when the
defective wheel has been replaced with a
new wheel. All wheels mounted must be
equipped with functioning sensors.
Mounting a wheel359
Wheels and tires
Z
Page 368 of 386

Emergency spare wheel
Important safety notes
GWARNING
The wheel or tire size as well as the tire type ofthe spare wheel or emergency spare wheel
and the wheel to be replaced may differ.
Mounting an emergency spare wheel may
severely impair the driving characteristics.
There is a risk of an accident.
To avoid hazardous situations:
R adapt your driving style accordingly and
drive carefully.
R never mount more than one spare wheel or
emergency spare wheel that differs in size.
R only use a spare wheel or emergency spare
wheel of a different size briefly.
R do not switch ESP ®
off.
R have a spare wheel or emergency spare
wheel of a different size replaced at the
nearest qualified specialist workshop.
Observe that the wheel and tire dimensions
as well as the tire type must be correct.
When using an emergency spare wheel or
spare wheel of a different size, you must not
exceed the maximum speed of 50 mph
(80 km/h).
Snow chains must not be mounted on emer-
gency spare wheels.
General notes
You should regularly check the pressure of
the emergency spare wheel, particularly prior
to long trips, and correct the pressure as nec-
essary ( Y page 336). The applicable value can
be found on the wheel or under "Technical
data" ( Y page 360).
iWhen you are driving with the emergency
spare wheel mounted, the tire pressure
monitor cannot function reliably. Only
restart the tire pressure monitor when the
defective wheel has been replaced with a
new wheel. If an emergency spare wheel is mounted,
the system may continue to show the tire
pressure of the wheel that has been
removed for a few minutes. The value dis-
played for the mounted emergency spare
wheel is not the same as the current tire
pressure of the emergency spare wheel.
An emergency spare wheel may also be
mounted against the direction of rotation.
Observe the time restriction on use as well as
the speed limitation specified on the emer-
gency spare wheel.
Replace the tires after six years at the latest, regardless of wear. This also applies to the
emergency spare wheel.
Collapsible spare wheel
Removing the collapsible spare wheel
The collapsible spare wheel can be found in
the stowage well under the cargo compart-
ment floor.
X Lift the cargo compartment floor upwards
(Y page 281).
X
Remove stowage compartment :.
X Turn retaining screw ; counter-clockwise
and remove it.
X Remove collapsible spare wheel =.
X Take the wheel bolts for the collapsible
spare wheel from the vehicle tool kit.
For further information on changing a wheel
and mounting the spare wheel, see
( Y page 314).
366Emergency spare wheel
Wheels and tires
Page 369 of 386
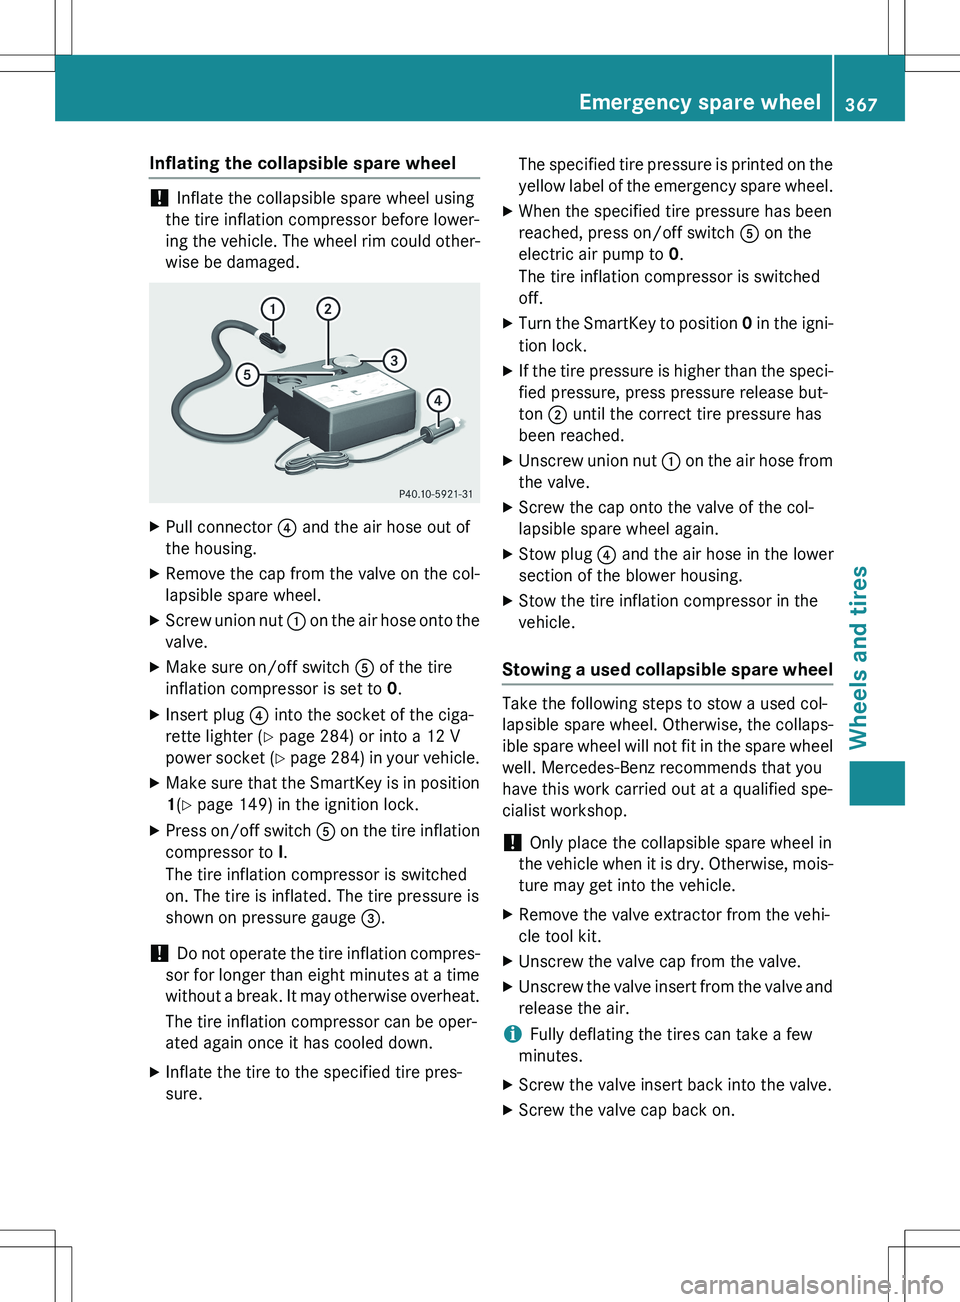
Inflating the collapsible spare wheel
! Inflate the collapsible spare wheel using
the tire inflation compressor before lower-
ing the vehicle. The wheel rim could other-
wise be damaged.
X Pull connector ? and the air hose out of
the housing.
X Remove the cap from the valve on the col-
lapsible spare wheel.
X Screw union nut : on the air hose onto the
valve.
X Make sure on/off switch A of the tire
inflation compressor is set to 0.
X Insert plug ? into the socket of the ciga-
rette lighter ( Y page 284) or into a 12 V
power socket ( Y page 284) in your vehicle.
X Make sure that the SmartKey is in position
1 (Y page 149) in the ignition lock.
X Press on/off switch A on the tire inflation
compressor to I.
The tire inflation compressor is switched
on. The tire is inflated. The tire pressure is
shown on pressure gauge =.
! Do not operate the tire inflation compres-
sor for longer than eight minutes at a time
without a break. It may otherwise overheat.
The tire inflation compressor can be oper-
ated again once it has cooled down.
X Inflate the tire to the specified tire pres-
sure. The specified tire pressure is printed on the
yellow label of the emergency spare wheel.
X When the specified tire pressure has been
reached, press on/off switch A on the
electric air pump to 0.
The tire inflation compressor is switched
off.
X Turn the SmartKey to position 0 in the igni-
tion lock.
X If the tire pressure is higher than the speci-
fied pressure, press pressure release but-
ton ; until the correct tire pressure has
been reached.
X Unscrew union nut : on the air hose from
the valve.
X Screw the cap onto the valve of the col-
lapsible spare wheel again.
X Stow plug ? and the air hose in the lower
section of the blower housing.
X Stow the tire inflation compressor in the
vehicle.
Stowing a used collapsible spare wheel
Take the following steps to stow a used col-
lapsible spare wheel. Otherwise, the collaps-
ible spare wheel will not fit in the spare wheel
well. Mercedes-Benz recommends that you
have this work carried out at a qualified spe-
cialist workshop.
! Only place the collapsible spare wheel in
the vehicle when it is dry. Otherwise, mois-
ture may get into the vehicle.
X Remove the valve extractor from the vehi-
cle tool kit.
X Unscrew the valve cap from the valve.
X Unscrew the valve insert from the valve and
release the air.
iFully deflating the tires can take a few
minutes.
X Screw the valve insert back into the valve.
X Screw the valve cap back on.
Emergency spare wheel367
Wheels and tires
Z
Page 370 of 386
XPlace the valve extractor back into the vehi-
cle tool kit.
X Stow the collapsible spare wheel in the
emergency spare wheel well under the
cargo compartment and fasten in place.
368Emergency spare wheel
Wheels and tires