2015 MERCEDES-BENZ C-Class bluetooth
[x] Cancel search: bluetoothPage 124 of 214

Saving or editing the contact data on
COMAND does not change the contacts on
the mobile phone. If automatic download-
ing of phone contacts is activated,
COMAND displays the copy ¥with the
changed data. To add additional data, such
as additional phone numbers or e-mail
addresses, select this contact. In this way,
you avoid creating additional copies of the
mobile phone entry. Deleting the contact
X Call up the address book (Y page 117).
X Search for a contact (Y page 117).
X To select G: slide 9the controller.
X To select Delete Entry
Delete Entry: turn and press
the controller.
X To select Yes Yes: turn and press the controller.
The contact is deleted.
or
X To select No
No: turn and press the controller.
The process is canceled. Importing contacts
Information and requirements Contacts can be imported as vCards (vcf
files). A vCard is an electronic business card.
A memory card, USB device or a Bluetooth ®
connection can be used for importing.
i Up to 2000 entries can be imported into
the address book. A message notifies you
when the maximum number is reached. In
order to be able to then import new con-
tacts, you have to delete existing contacts
(Y page 122). Source Prerequisites
Memory card The SD memory card is
inserted. It contains
importable contact details. USB device The USB device is inserted
into the USB port. It con-
tains importable contact
details.
Bluetooth
®
connection If the sending of vCards is
supported via Bluetooth
®
,
vCards can be received on
mobile phones or net-
books, for example.
Bluetooth ®
must be acti-
vated in COMAND and on
the respective device (see
the manufacturer's operat-
ing instructions). Importing from the memory card or USB
device
Contacts imported from the memory card or
from a USB device can be recognized by the
00BB
symbol.
The following conditions must be fulfilled in
order to import vCards:
R vCards (vcf files) may be located in the main
directory or in folders. COMAND allows you
to select the relevant folders directly.
R vCards must have the file extension ".vcf".
i COMAND supports vCards in versions 2.1
and 3.0. X
To switch to the menu bar in the telephone
menu or the address book: slide 6the
controller.
X To select Options Options: turn and press the con-
troller. 122
Address bookTelephone
Page 125 of 214

X
To select Download Contacts
Download Contacts: turn and
press the controller.
X To select From
From Memory
Memory Card
CardorFrom
From USB
USB
device
device: turn and press the controller.
Receiving vCards via Bluetooth ®COMAND
X
To switch to the menu bar in the telephone
menu or the address book: slide 6the
controller.
X To select Options
Options: turn and press the con-
troller.
X To select Download Contacts
Download Contacts: turn and
press the controller.
X To select From Bluetooth Device
From Bluetooth Device: turn
and press the controller.
If COMAND is connected to a mobile
phone, the connection is terminated.
vCards can now be received by a device
(PC, mobile phone) via Bluetooth ®
.
External device
X Start the data transfer (see the operating
instructions for the device).
The number of vCards received is displayed
in COMAND.
COMAND
X To end reception: press the controller or
the 0038 button.
If a mobile phone was connected, the con-
nection to the mobile phone is established
again.
Received vCards are identified by the 00BA
symbol in the address book. i
If you switch to another main function,
e.g. navigation, while receiving vCards, the
reception of vCards will be terminated. Deleting imported contacts
X To change to the menu bar when in the
address book or the telephone menu: slide
6 the controller.
X To select Options Options: turn and press the con-
troller.
X To select Delete Contacts Delete Contacts: turn and
press the controller.
X Select one of the following options:
R
Internal Contacts Internal Contacts
R Imported from Storage Device
Imported from Storage Device
R Imported from Bluetooth Devices
Imported from Bluetooth Devices
R Downloaded from Phone
Downloaded from Phone
Turn and press the controller.
X To select Yes
Yes: turn and press the controller.
The contacts are deleted.
or
X To select No No: turn and press the controller.
The process is canceled.
i If automatic calling up of the contacts is
deactivated (Y page 121), the Down‐
Down‐
loaded from Phone
loaded from Phone option is available. Closing the address book
X Press the 002Bbutton one or more times. Call lists
Introduction
If your mobile phone supports the PBAP Blue-
tooth ®
profile, the call lists from the mobile
phone are displayed in COMAND. When con-
necting the mobile phone, you may have to
confirm the connection for the PBAP Blue-
tooth ®
profile.
If your mobile phone does not support the
PBAP Bluetooth ®
profile, COMAND generates Call lists
123Telephone Z
Page 128 of 214

Preventing overwriting an entry
X
To select No No: turn and press the controller.
The process is canceled. Deleting call lists
Call lists which are generated and managed
by COMAND can be deleted on COMAND.
You cannot delete call lists from COMAND
which are displayed on a mobile phone that
supports the PBAP Bluetooth ®
profile.
X To call up the telephone menu: press the
002B button.
X To switch to the menu bar: slide 6the
controller.
X To select Call Lists Call Lists: turn and press the
controller.
X Select Delete Call Lists
Delete Call Lists.
A prompt appears asking whether you wish
to delete all call lists.
X To select Yes Yes: turn and press the controller.
The call lists are deleted.
or
X To select No
No: turn and press the controller.
The process is canceled.
i If you delete these call lists from the
mobile phone (see the separate mobile
phone operating instructions), COMAND
updates the call list display the next time it
connects. Speed dial lists
Setting up
X To call up the telephone menu: press the
002B button.
X To call up the menu bar: slide 6the con-
troller.
X To select Call Lists
Call Lists: turn and press the
controller.
X Select Speed Dial Preset List
Speed Dial Preset List.
The speed dial list is displayed. X
To highlight a memory position for the
speed dial: turn the controller.
If you highlight an entry that already exists
in the speed dial list, this is overwritten with
the new entry.
X To select G: slide 9the controller.
X Select Assign Speed Dial Preset Assign Speed Dial Preset.
The phone book is displayed.
X Search for a contact (Y page 114).
X To select a contact: turn and press the con-
troller.
The phone number has been saved as a
speed dial. Deleting
Deleting a speed dial preset X
To call up the telephone menu: press the
002B button.
X To call up the menu bar: slide 6the con-
troller.
X To select Call Lists Call Lists: turn and press the
controller.
X Select Speed Dial Preset List
Speed Dial Preset List.
The speed dial list is displayed.
X To highlight the memory position you want
to delete: turn the controller.
X To select G: slide 9the controller.
X To select Delete Speed Dial Preset Delete Speed Dial Preset:
turn and press the controller.
X To select Yes
Yes: turn and press the controller.
The speed dial preset has been deleted.
or
X To select No No: turn and press the controller.
The process is canceled.
Deleting all speed dial presets X
To call up the telephone menu: press the
002B button.
X To call up the menu bar: slide 6the con-
troller. 126
Speed dial listsTelephone
Page 129 of 214

X
To select Call Lists
Call Lists: turn and press the
controller.
X Select Speed Dial Preset List
Speed Dial Preset List.
The speed dial list is displayed.
X To highlight the desired memory position:
turn the controller.
X To select G: slide 9the controller.
X To select Delete All Speed Dial Pre‐
Delete All Speed Dial Pre‐
sets sets: turn and press the controller.
X To select Yes
Yes: turn and press the controller.
All speed dials are deleted.
or
X To select No
No: turn and press the controller.
The process is canceled. Messages (text messages and e-
mails) General notes
New messages are identified by the 008F
symbol in the COMAND display and an audi-
ble signal. Once you have read all the mes-
sages, the symbol is no longer displayed.
COMAND displays the 100 newest text mes-
sages and e-mails.
The ú symbol is displayed when the
mobile phone's message memory is full. The
symbol is no longer displayed if you delete
messages on the mobile phone. Prerequisites
To use the message functions, the connected
mobile phone must support the Bluetooth ®
MAP profile. The prompt for the MAP Blue-
tooth ®
profile may have to be confirmed on
the mobile phone.
With some mobile phones, some settings still
have to be made after connecting to
COMAND (see the manufacturer's operating
instructions). The messages are displayed the
next time you connect to COMAND. An e-mail account must be set up on the
mobile phone for the e-mail function (see the
manufacturer’s operating instructions).
To read and write e-mails in COMAND, the e-
mail account first needs to be configured
(Y page 128).
Some mobile phones with the MAP Blue-
tooth ®
profile:
R only show new text messages.
R do not support the deleting or editing of
text messages.
R do not support the drafts folder for text
messages.
R do not support the sending of text mes-
sages.
R do not support the e-mail function.
R do not send messages in a locked status.
Not all mobile phones available on the market
are equally suitable. You can obtain further
information about settings and supported
functions of Bluetooth ®
-capable mobile
phones on the Internet at
http://www.mbusa-mobile.com. Or call
the Mercedes-Benz Customer Assistance
Center at 1-800-FOR-MERCedes
(1-800-367-6372)( for the USA) or Customer
Relations at 1-800-387-0100 (for Canada). Settings
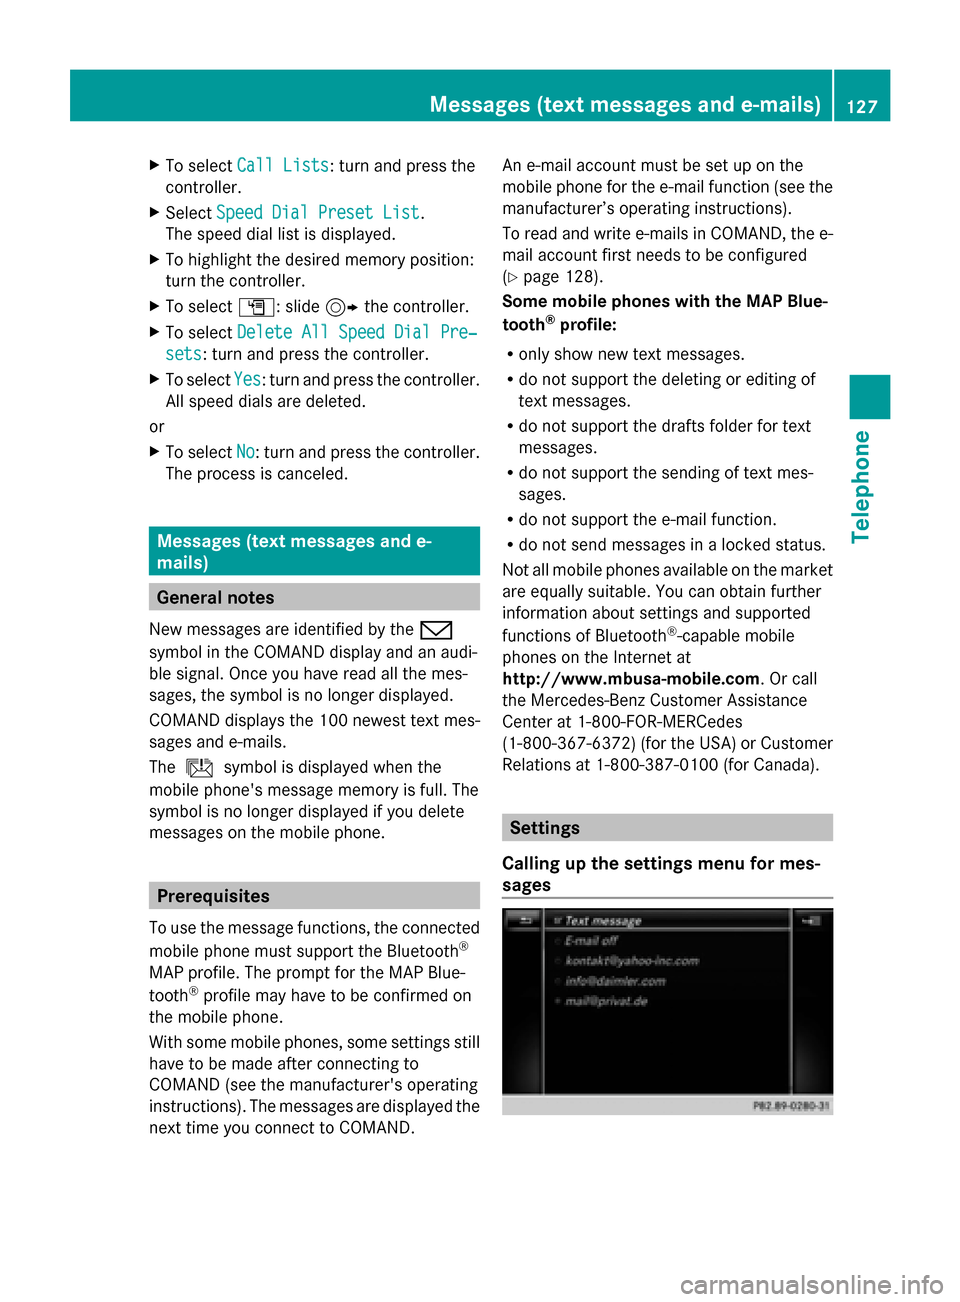
Calling up the settings menu for mes-
sages Messages (text messages and e-mails)
127Telephone Z
Page 165 of 214

Your COMAND equipment
................164
Activating media mode ....................164
Audio/video mode ............................165
Media search ..................................... 173
MEDIA REGISTER ............................... 176
Bluetooth ®
audio mode .................... 180
Operation with the Media Inter-
face .................................................... 186
Audio AUX mode ............................... 189
Video AUX mode ............................... 190
Video DVD mode ............................... 191
Picture viewer ................................... 196 163Media
Page 166 of 214

Your COMAND equipment
These operating instructions describe all
standard and optional equipment available
for your COMAND system at the time of pur-
chase. Country-specific differences are pos-
sible. Please note that your COMAND system
may not be equipped with all the features
described. This also applies to safety-relevant
systems and functions. Therefore, the equip-
ment on your COMAND system may differ
from that in the descriptions and illustrations.
Should you have any questions concerning
equipment and operation, please consult an
authorized Mercedes-Benz Center. Activating media mode
General notes
There are several ways to activate media
sources using COMAND.
The relevant sections of the Operator's Man-
ual describe the simplest way to activate a
media source.
This section describes all options for activat-
ing media sources. Using the MEDIA button
X Press the 00FDbutton.
The menu for the last accessed media
source appears.
X To select the media source: keep pressing
the 00FD button until the required media
source has been set.
The media sources appear in the following
order:
R CD/DVD
R Memory card
R Media Register
R Vehicles without Media Interface: USB 1
and USB 2
R Vehicles with Media Interface: Media
Interface 1 and Media Interface 2 R
BT audio
R TV (if your vehicle is equipped with a TV)
R AUX
If playable music files are found, they will
be played by COMAND.
X To display the function bars: slide 00520064the
controller. Switching on automatically
After an external media source has been con-
nected, COMAND will only activate the cor-
responding media mode automatically in the
case of CDs and SD cards. When using USB
devices, depending on the vehicle's equip-
ment, the relevant Media Interface 1, 2 or
USB 1, 2 basic display must already be acti-
vated.
External media sources:
R Apple devices (e.g. iPhone ®
)
R USB devices (e.g. USB stick, MP3 player)
R CD
R DVD
R SD cards
R via AUX cable (automatic activation
depends on the device connected)
R via devices connected by Bluetooth ®
If playable music files are found, they will be
played by COMAND.
i If a media function is already switched on
in COMAND, this will be interrupted and the
basic display of the newly connected
device will appear.
If another function, such as navigation, is
operating, the basic display will not change.
Only the music from the newly connected
media source will play 164
Activa
ting media modeMedia
Page 178 of 214

X
Select a track.
The basic display appears and playback
starts. MEDIA REGISTER
General notes
i Keep your original music files, photos and
video files in a secure location. An error in
COMAND may result in the loss of music
files stored in the MEDIA REGISTER.
Mercedes-Benz is not liable for any loss of
data.
You can store music files, photos or video files
in the MEDIA REGISTER. The memory has a
capacity of 10 GB. Switching on the MEDIA REGISTER
X Press the 00FDbutton repeatedly until the
MEDIA REGISTER is switched on.
Pressing the button repeatedly changes
the operating mode in the following order:
R Disc
Disc;
R Memory Card Memory Card;
R Media Register
Media Register;
R USB 1
USB 1 (vehicles without Media Interface)
R Media Interface 1
Media Interface 1 (vehicles without
Media Interface)
R USB 2
USB 2 (vehicles without Media Interface)
R Media Interface 2
Media Interface 2 (vehicles with
Media Interface) R
Bluetooth Audio Bluetooth Audio;
R Aux Aux .
Playback begins at the point last listened to.
If there are no files, you will see a message to
this effect.
Further options for switching on:
R Using the number keypad: (Y page 165)
R Using the main function bar: (Y page 165)
R Using the device list: (Y page 165)
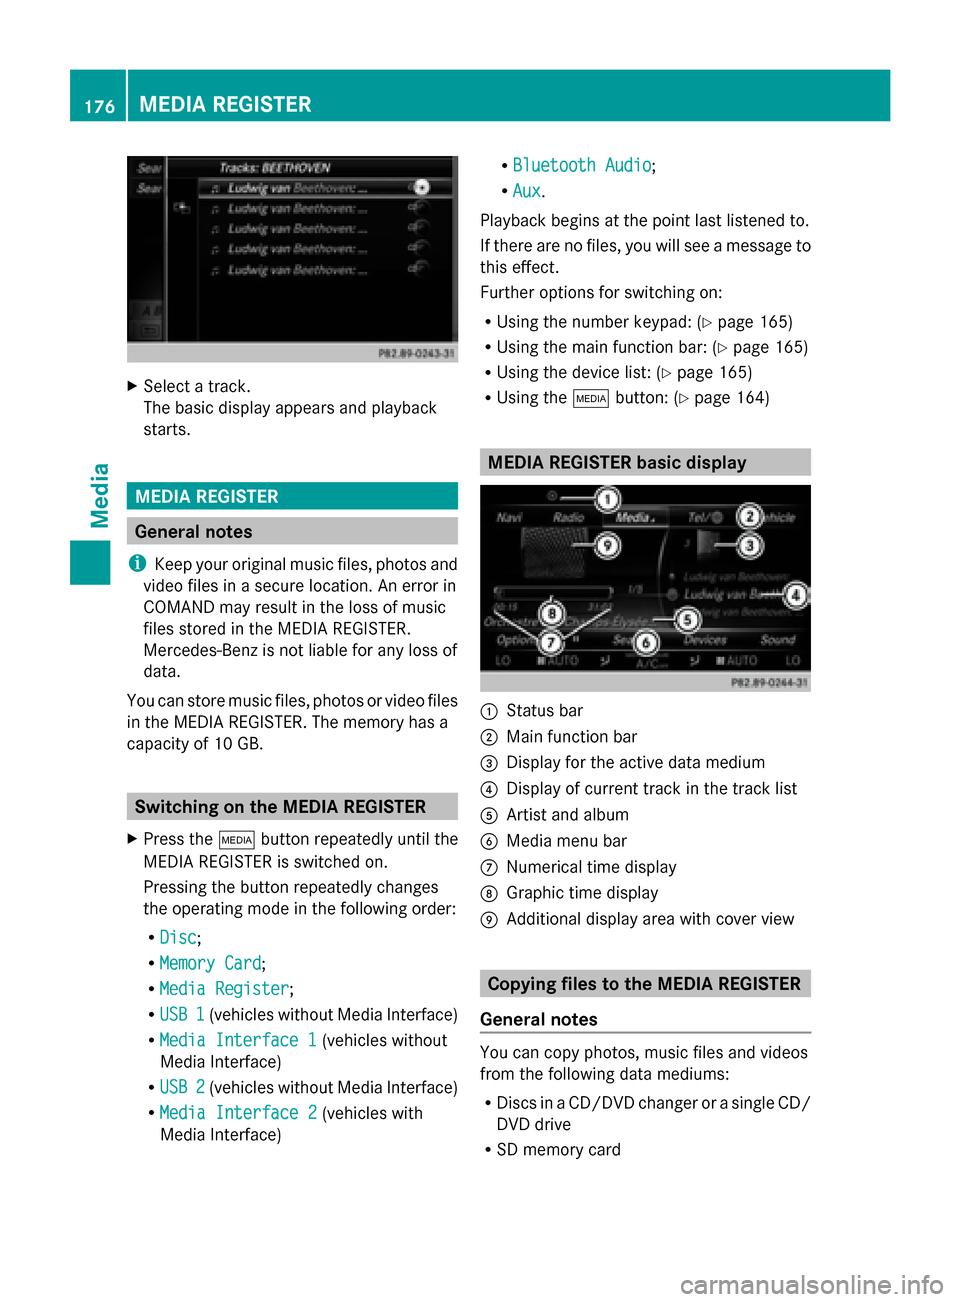
R Using the 00FDbutton: (Y page 164) MEDIA REGISTER basic display
0043
Status bar
0044 Main function bar
0087 Display for the active data medium
0085 Display of current track in the track list
0083 Artist and album
0084 Media menu bar
006B Numerical time display
006C Graphic time display
006D Additional display area with cover view Copying files to the MEDIA REGISTER
General notes You can copy photos, music files and videos
from the following data mediums:
R
Discs in a CD/DVD changer or a single CD/
DVD drive
R SD memory card 176
MEDIA REGISTERMedia
Page 182 of 214

Selecting a playback mode
X To switch MEDIA REGISTER on: press the
00FD button repeatedly until the MEDIA
REGISTER is switched on.
X Slide 00520064the controller.
The media menu bar appears.
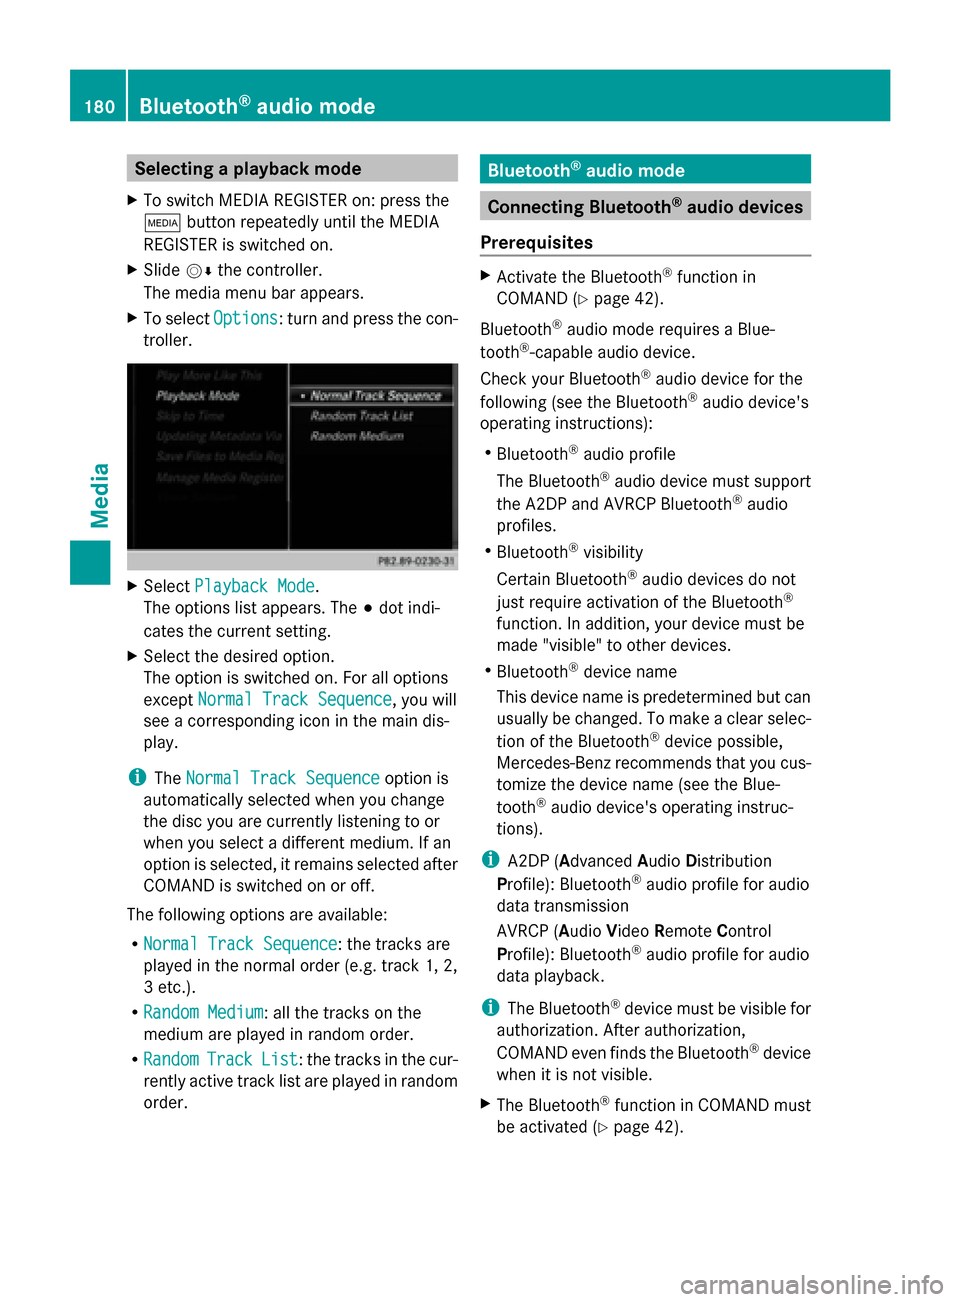
X To select Options
Options: turn and press the con-
troller. X
Select Playback Mode
Playback Mode.
The options list appears. The 003Bdot indi-
cates the current setting.
X Select the desired option.
The option is switched on. For all options
except Normal Track Sequence
Normal Track Sequence, you will
see a corresponding icon in the main dis-
play.
i The Normal Track Sequence Normal Track Sequence option is
automatically selected when you change
the disc you are currently listening to or
when you select a different medium. If an
option is selected, it remains selected after
COMAND is switched on or off.
The following options are available:
R Normal Track Sequence Normal Track Sequence: the tracks are
played in the normal order (e.g. track 1, 2,
3 etc.).
R Random Medium Random Medium: all the tracks on the
medium are played in random order.
R Random Random Track
TrackList
List: the tracks in the cur-
rently active track list are played in random
order. Bluetooth
®
audio mode Connecting Bluetooth
®
audio devices
Prerequisites X
Activate the Bluetooth ®
function in
COMAND (Y page 42).
Bluetooth ®
audio mode requires a Blue-
tooth ®
-capable audio device.
Check your Bluetooth ®
audio device for the
following (see the Bluetooth ®
audio device's
operating instructions):
R Bluetooth ®
audio profile
The Bluetooth ®
audio device must support
the A2DP and AVRCP Bluetooth ®
audio
profiles.
R Bluetooth ®
visibility
Certain Bluetooth ®
audio devices do not
just require activation of the Bluetooth ®
function. In addition, your device must be
made "visible" to other devices.
R Bluetooth ®
device name
This device name is predetermined but can
usually be changed. To make a clear selec-
tion of the Bluetooth ®
device possible,
Mercedes-Benz recommends that you cus-
tomize the device name (see the Blue-
tooth ®
audio device's operating instruc-
tions).
i A2DP (Advanced AudioDistribution
Profile): Bluetooth ®
audio profile for audio
data transmission
AVRCP (Audio VideoRemote Control
Profile): Bluetooth ®
audio profile for audio
data playback.
i The Bluetooth ®
device must be visible for
authorization. After authorization,
COMAND even finds the Bluetooth ®
device
when it is not visible.
X The Bluetooth ®
function in COMAND must
be activated (Y page 42).180
Bluetooth ®
audio modeMedia