2015 MERCEDES-BENZ C-Class change time
[x] Cancel search: change timePage 68 of 214

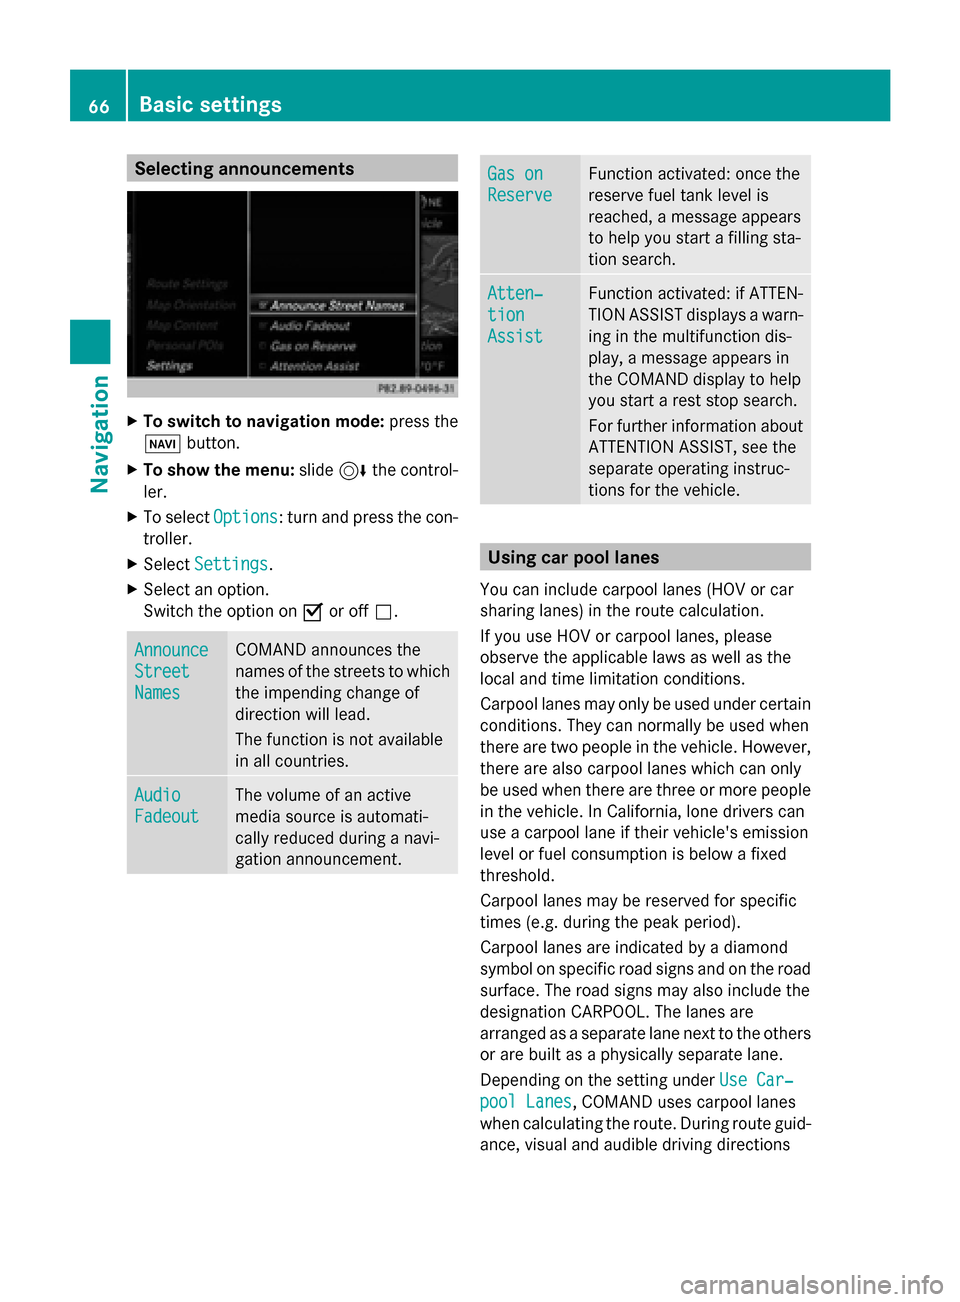
Selecting announcements
X
To switch to navigation mode: press the
00BE button.
X To show the menu: slide6the control-
ler.
X To select Options
Options: turn and press the con-
troller.
X Select Settings
Settings.
X Select an option.
Switch the option on 0073or off 0053. Announce Announce
Street Street
Names Names COMAND announces the
names of the streets to which
the impending change of
direction will lead.
The function is not available
in all countries.
Audio Audio
Fadeout Fadeout The volume of an active
media source is automati-
cally reduced during a navi-
gation announcement. Gas on Gas on
Reserve Reserve Function activated: once the
reserve fuel tank level is
reached, a message appears
to help you start a filling sta-
tion search. Atten‐ Atten‐
tion tion
Assist Assist Function activated: if ATTEN-
TION ASSIST displays a warn-
ing in the multifunction dis-
play, a message appears in
the COMAND display to help
you start a rest stop search.
For further information about
ATTENTION ASSIST, see the
separate operating instruc-
tions for the vehicle. Using car pool lanes
You can include carpool lanes (HOV or car
sharing lanes) in the route calculation.
If you use HOV or carpool lanes, please
observe the applicable laws as well as the
local and time limitation conditions.
Carpool lanes may only be used under certain
conditions. They can normally be used when
there are two people in the vehicle. However,
there are also carpool lanes which can only
be used when there are three or more people
in the vehicle. In California, lone drivers can
use a carpool lane if their vehicle's emission
level or fuel consumption is below a fixed
threshold.
Carpool lanes may be reserved for specific
times (e.g. during the peak period).
Carpool lanes are indicated by a diamond
symbol on specific road signs and on the road
surface. The road signs may also include the
designation CARPOOL. The lanes are
arranged as a separate lane next to the others
or are built as a physically separate lane.
Depending on the setting under Use Car‐ Use Car‐
pool Lanes
pool Lanes, COMAND uses carpool lanes
when calculating the route. During route guid-
ance, visual and audible driving directions 66
Basic settingsNavigation
Page 78 of 214

X
To select a destination: press the con-
troller.
The list contains the Menu
Menu menu item. If
there are multiple destinations around the
crosshair, a selection list will also appear.
X To show the menu: press the controller.
X To select a destination from the selection
list: turn and press the controller.
If the digital map provides navigable
address data, you will see the destination
address in the address entry menu. If not,
the Destination from Map, Date_1,
Destination from Map, Date_1,
Time_1
Time_1 entry is shown.
X To start route calculation: selectStart Start. Entering way points
Introduction You can also map the route to the destination
yourself by entering up to four way points. The
sequence of the way points can be changed
at any time.
COMAND provides a selection of predefined
destinations in eight categories for this pur-
pose, e.g. GAS STATION
GAS STATION orRESTAURANT RESTAURANT. You
can also use the destination entry options to
enter way points. Creating way points X
To switch to navigation mode: press the
00BE button.
X To show the menu: slide6the control-
ler.
X To select Destination Destination: turn and press the
controller.
X Select Way Points
Way Points .
The destination is entered into the way
points menu. The way points are not yet
entered.
X To select Add New: Add New: : press the controller. X
To select a category or Other
Other: turn and
press the controller.
After selecting a category, the POIs which
are available along the route and in the
vicinity are displayed.
COMAND first searches for destinations
along the route. The search for destinations
is then initiated in the area around the vehi-
cle position.
X After selecting Other Other, select one of the
destination entry options from the list. 76
Destination inputNavigation
Page 81 of 214

Using geo-coordinates
X To switch to navigation mode: press the
00CB button.
X To show the menu: slide6the control-
ler.
X To select Destination
Destination: turn and press the
controller.
X Select Using Geo-Coordinates
Using Geo-Coordinates.
Geo-coordinates are entered in degrees,
minutes and seconds.
Entering the latitude and longitude coor-
dinates
X To change the value: turn the controller.
X To move the selection within the line: slide
1 the controller.
X To move the selection between lines: slide
4 the controller.
X To confirm the value: press the controller.
Saving a destination
X To select Save
Save: turn and press the control-
ler.
The destination can be saved as:
R a navigable contact in the address book
R My Address
Starting route calculation
X To select Start Route Guidance
Start Route Guidance: turn
and press the controller. Route guidance
Important notes
For this reason, you must always observe
road and traffic rules and regulations during
your journey. Road and traffic rules and reg-
ulations always have priority over system
driving recommendations.
COMAND calculates the route to the destina-
tion without taking account of the following,
for example:
R traffic lights
R stop and yield signs R
merging lanes
R parking or stopping in a no parking/no
stopping zone
R other road and traffic rules and regulations
R narrow bridges
COMAND may give differing navigation com-
mands if the actual street/traffic situation
does not correspond with the digital map's
data. For example, if the road layout or the
direction of a one-way street has been
changed.
For this reason, you must always observe
road and traffic rules and regulations during
your journey. Road and traffic rules and reg-
ulations always have priority over the sys-
tem's driving recommendations.
Route guidance begins once a route has been
calculated (Y page 69).
COMAND guides you to your destination by
means of navigation announcements in the
form of audible navigation announcements
and route guidance displays.
The route guidance displays can be seen if the
display is switched to navigation mode.
If you do not follow the navigation announce-
ments or if you leave the calculated route,
COMAND automatically calculates a new
route to the destination.
If the digital map contains the corresponding
information, the following applies:
R during route guidance, COMAND tries to
avoid roads with restricted access. Those
roads, for example, that are closed to
through-traffic.
R roads that have time restrictions (e.g.
closed on Sundays and public holidays) are
considered for route guidance on days
when they are open. For this purpose, the
relevant times must be correctly stored in
the database. Route guidance
79Navigation Z
Page 82 of 214

Displays during route guidance
Change of direction Changes of direction have three phases:
R preparation phase
R announcement phase
R change-of-direction phase
Changes in direction are also shown in the
multifunction display of the instrument clus-
ter (see the vehicle Operator's Manual).
Preparation phase: COMAND prepares you
for the upcoming change of direction. Based
on the example display below, the change of
direction is announced by the "Prepare to turn
right message", for instance. You see the full-
screen map.
Announcement phase: COMAND announ-
ces the imminent change of direction. The
change of direction is announced ahead of
time, such as with the announcement "Turn
right in 200 meters".
The display is now split into two sectors. The
map is shown on the left side of the display,
and a detailed image of the intersection or a
3D image of the imminent change of direction
is shown on the right side of the display. 0043
Next road
0044 Point at which the change of direction
takes place (white dot)
0087 Change of direction (turn right here)
0085 Distance to the next change of direction
Change-of-direction phase: COMAND
announces the immediate change of direc-
tion. The change of direction is announced ahead of time, e.g. with the announcement
"Now turn right".
The display is split in two like in the announce-
ment phase.
The change of direction is performed when
the light-color bar on the right drops down to
0 ft and the current vehicle position symbol
has reached the white change-of-direction
point.
When the change of direction is completed,
the map will appear in full screen mode again. The image shows an example of route guid-
ance at a highway intersection when driving
on a highway.80
Route guidanceNavigation
Page 85 of 214

Canceling/continuing route guidance
Canceling route guidance X
Slide 6the controller.
The menu is shown.
X To select Destination
Destination: turn and press the
controller.
X Select Cancel Active Route Guidance
Cancel Active Route Guidance .
The blue route line is no longer shown on
the map.
Continue route guidance X
Slide 6the controller.
The menu is shown.
X To select Destination
Destination: turn and press the
controller.
X Select Continue Route Guidance
Continue Route Guidance.
COMAND calculates the route. Route information
Destination information X
To switch to navigation mode: press the
00BE button.
X To show the menu: slide6the control-
ler.
X To select Route
Route: turn and press the con-
troller.
X Select Destination Information
Destination Information.
The destination and existing way points are
displayed with distances, travel time and
arrival time.
X To select a destination/way point: turn
and press the controller.
The address appears.
X Select Save
Save.
The destination/way point can be saved as:
R a navigable contact in the address book
R My Address
X To call up the map: select Map Map.
X Move the map, change the map scale and
select the destination/way point
(Y page 75).
X To call a destination/way point: select
Call
Call.
If a phone is connected and a phone num-
ber is available, COMAND switches to the
telephone function.
Alternative route If the
Calculate Calculate Alternative
Alternative Routes
Routesset-
ting is activated 0073, different routes will be
offered each time a route is calculated
(Y page 64).
You can also view these for the current route
any time from COMAND. Route guidance
83Navigation Z
Page 106 of 214

Symbol
0044shows the current signal strength
of the mobile phone network. If all bars are
filled, you have optimum reception.
If the bars are not filled, you have very poor
reception or no reception at all.
i Receiver icon shows whether a call is
active/being connected 0075or not 0071.
X To call up the telephone menu: press the
002B button.
X To show the menu bar: slide6the con-
troller.
If the mobile phone connected supports the
MAP Bluetooth ®
profile (Message Access
Profile), the 0083menu item is available. Fur-
ther information on text messages and e-mail
(Y page 127).
If you have an unread text message or e-mail,
the 0082 mail symbol is displayed at the top
in the status bar. The symbol disappears once
you have read the text message or e-mail. The
ú symbol is displayed as soon as the mes-
sage memory on the mobile phone or SIM
card is full. The symbol disappears once you
delete at least one message. Connecting/disconnecting a mobile
phone Prerequisites
For telephony via the Bluetooth ®
interface,
you require a Bluetooth ®
-capable mobile
phone. The mobile phone must support
Hands-Free Profile 1.0 or above.
On COMAND
X Activate Bluetooth ®
(Y page 42).
On the mobile phone
X Switch on the mobile phone and enter the
PIN when prompted to do so (see the man-
ufacturer's operating instructions).
X Activate Bluetooth ®
and, if necessary,
Bluetooth ®
visibility for other devices (see
the manufacturer's operating instructions). This visibility is for restricted periods of
time on some mobile phones (see the man-
ufacturer's operating instructions).
X Set the Bluetooth ®
device name for the
mobile phone if necessary.
The Bluetooth ®
device names for all of one
manufacturer's products might be identical.
To make it possible to clearly identify your
mobile phone, change the device name (see
the manufacturer's operating instructions).
The name can be freely selected.
If the mobile phone supports the PBAP
(Phone BookAccess Profile) and MAP
(Message AccessProfile) Bluetooth ®
pro-
files, the following information will be trans-
mitted after you connect:
R Phone book
R Call lists
R Messages
The battery of the mobile phone should
always be kept sufficiently charged in order
to prevent malfunctions.
i Not all mobile phones available on the
market are equally suitable. You can obtain
more detailed information about suitable
mobile phones and about the connection
between the mobile phone and COMAND
on the Internet at
http://www.mbusa-mobile.com.
You can also obtain more information by
calling.
In the USA, you can get in touch with the
Mercedes-Benz Customer Assistance
Center on 1-800-FOR-MERCedes
(1-800-367-6372).
In Canada, you can get in touch with the
Customer Relations Center on
1-800-387-0100.
i Some displays (e.g. the signal strength)
depend on the supported version of the
Hands-Free Profile. 104
Connecting/disconnecting a mobile phoneTelephone
Page 111 of 214

X
To call up the telephone menu: press the
002B button.
X To switch to the menu bar: slide 6the
controller.
X To select Connect Device
Connect Device: turn the con-
troller and press to confirm.
The device list appears.
X To highlight the desired mobile phone in the
device list: turn the controller.
X To select G: slide 9the controller.
X To select Reception Volume
Reception Volume orTrans‐ Trans‐
mission Volume
mission Volume: turn and press the con-
troller.
X To select a volume setting: turn the con-
troller.
X To accept changes: press the controller.
i Incorrect settings may have an impact on
the quality of calls. Using the telephone
Accepting a call
X To select Accept Accept: press the controller.
or
X Press 0061on the multifunction steering
wheel.
The call is accepted.
Additional functions available during a call
(Y page 110).
Adjusting the call volume (Y page 108).
Further information about ending a call
(Y page 113).
i You can also accept the call by voice com-
mand using the Voice Control System (see
the separate operating instructions).
i If the phone number of the caller is trans-
ferred, it appears in the display. If the
phone number is saved in the phone book,
the contact's name is also displayed. If the
phone number is not transferred,
Unknown Unknown is shown in the display. Rejecting a call
X To select Reject
Reject: turn the controller and
press to confirm.
or
X Press 0076on the multifunction steering
wheel. Making a call
Using the telephone menu X
To call up the telephone menu: press the
002B button.
X To select all numbers one after the other in
the telephone menu: turn and press the
controller each time.
X To select 0097in the telephone menu: turn
and press the controller.
The call is made.
Further information about ending a call
(Y page 113).
Redial X
To call up the telephone menu: press the
002B button.
X To select 0097in the telephone menu: turn
and press the controller.
The list of outgoing calls is displayed. The
most recently dialed number is at the top.
X To select an entry and make a call: turn and
press the controller.
Further information about ending a call
(Y page 113).
Using call lists X
To call up the telephone menu: press the
002B button.
X To switch to the menu bar: slide 6the
controller.
X To select Call Lists
Call Lists: turn and press the
controller. Using the telephone
109Telephone Z
Page 116 of 214

Sym-
bol Explanation
00BB
Contact imported from the SD
memory card or USB device.
00BA
Contact imported via the Blue-
tooth ®
interface. Searching for a contact
With the character bar You determine the first letter of the contact
you are looking for with the first character you
enter.
X
To select characters: turn the controller
and press to confirm.
The first contact with the selected first
character is highlighted in the phone book.
If there are similar contacts, the next dif-
ferent character is shown. For example,
with contacts such as Jana JanaandJohn
John, the
beginnings of the names are identical. The
next different character A Aand O
Oare offered
for selection.
X Select the characters of the contact you are
searching for one by one, pressing and con-
firming with the controller each time.
X To select 0054: turn and press the control-
ler.
The contacts in the phone book are dis-
played.
X To select a contact: turn and press the con-
troller. The
0043symbol indicates that a contact con-
tains more than one phone number.
X To select a contact with the 0043symbol:
turn the controller and press to confirm.
The phone numbers are displayed. The 0043
symbol changes to 0045.
Back to the character bar:
X Press the 0038button repeatedly until the
character bar is displayed.
Information about character entry
(Y page 28)
Using the touchpad You determine the first letter of the contact
you are looking for with the first character you
enter.
X Draw the letter on the touchpad surface.
The first contact with the selected first
character is highlighted in the phone book.
Further information on handwriting recog-
nition on the touchpad (Y page 23).
X Draw additional letters on the touchpad
surface one after another.
X To complete the search and return to the
phone book: press the touchpad.
X To select and call the contact: glide up or
down and press. Displaying the details of a contact114
Phone bookTelephone