2015 MERCEDES-BENZ B-Class ELECTRIC steering
[x] Cancel search: steeringPage 194 of 338
X
Switch on COMAND and select video DVD
(see the separate operating instructions).
X Press the =or; button on the steer-
ing wheel to select the Audio
Audio menu.
X To select the next or previous scene:
briefly press the 9or: button.
X To select a scene from the scene list
(rapid scrolling): press and hold the 9
or : button until desired scene :has
been reached. Telephone menu
Introduction G
WARNING
If you operate information systems and com-
munication equipment integrated in the vehi- cle while driving, you will be distracted from
traffic conditions. You could also lose control of the vehicle. There is a risk of an accident.
Only operate the equipment when the traffic
situation permits. If you are not sure that this
is possible, park the vehicle paying attention
to traffic conditions and operate the equip-
ment when the vehicle is stationary.
When telephoning, you must observe the
legal requirements for the country in which
you are currently driving.
X Switch on the mobile phone (see the man-
ufacturer’s operating instructions).
X Switch on Audio 20 or COMAND, see the
separate operating instructions.
X Establish a Bluetooth ®
connection to Audio
20 or COMAND, see the separate operating
instructions.
X Press the =or; button on the steer-
ing wheel to select the Tel
Tel menu. You will see one of the following display mes-
sages in the multifunction display:
R Phone READY Phone READY or the name of the network
provider: the mobile phone has found a
network and is ready to receive.
R Phone No Service Phone No Service: there is no network
available or the mobile phone is searching
for a network.
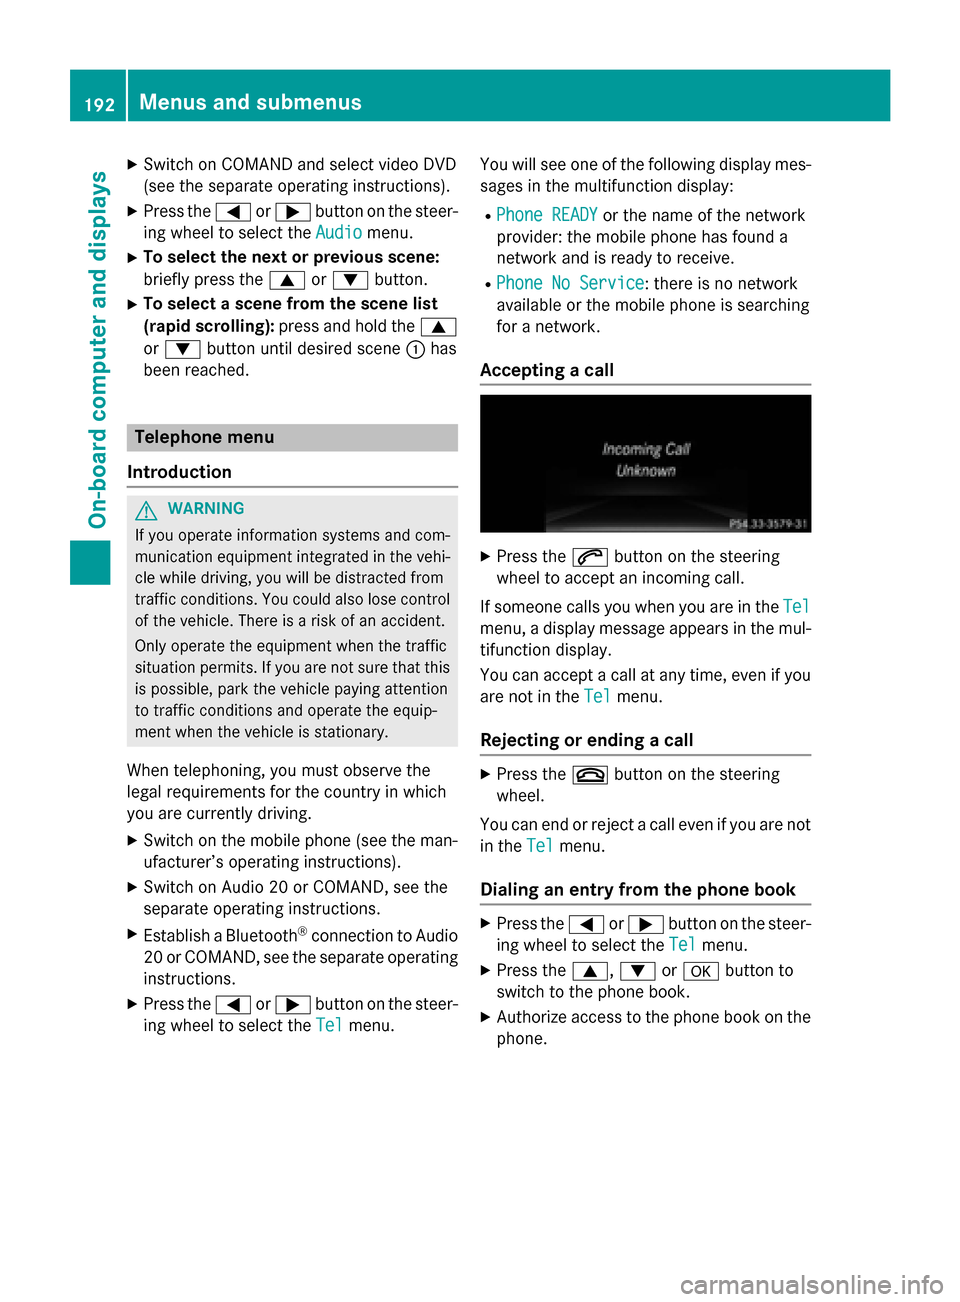
Accepting a call X
Press the 6button on the steering
wheel to accept an incoming call.
If someone calls you when you are in the Tel Tel
menu, a display message appears in the mul- tifunction display.
You can accept a call at any time, even if you
are not in the Tel
Tel menu.
Rejecting or ending a call X
Press the ~button on the steering
wheel.
You can end or reject a call even if you are not
in the Tel
Tel menu.
Dialing an entry from the phone book X
Press the =or; button on the steer-
ing wheel to select the Tel
Tel menu.
X Press the 9,:ora button to
switch to the phone book.
X Authorize access to the phone book on the
phone. 192
Menus and submenusOn-board computer and displays
Page 197 of 338
Activating/deactivating Blind Spot
Assist X
Press the =or; button on the steer-
ing wheel to select the DriveAssist
DriveAssist menu.
X Press the 9or: button to select
Blind Spot Assist
Blind Spot Assist .
X Press the abutton.
The current selection is displayed.
X To activate/deactivate: press thea
button again.
For further information about Blind Spot
Assist, see (Y page 177). Service menu
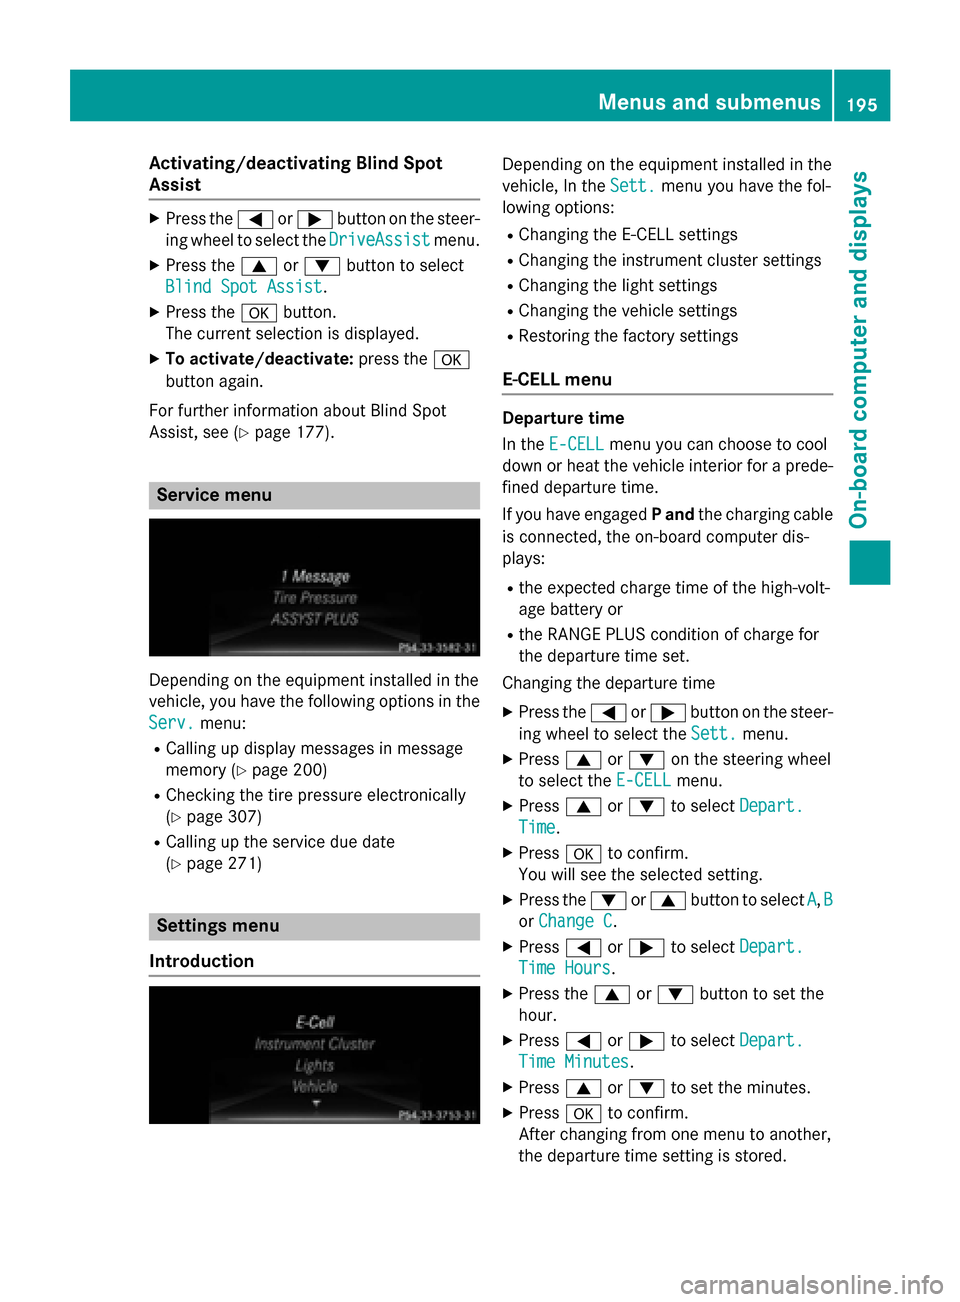
Depending on the equipment installed in the
vehicle, you have the following options in the
Serv. Serv. menu:
R Calling up display messages in message
memory (Y page 200)
R Checking the tire pressure electronically
(Y page 307)
R Calling up the service due date
(Y page 271) Settings menu
Introduction Depending on the equipment installed in the
vehicle, In the
Sett. Sett.menu you have the fol-
lowing options:
R Changing the E-CELL settings
R Changing the instrument cluster settings
R Changing the light settings
R Changing the vehicle settings
R Restoring the factory settings
E ‑CELL menu Departure time
In the
E-CELL E-CELL menu you can choose to cool
down or heat the vehicle interior for a prede- fined departure time.
If you have engaged Pand the charging cable
is connected, the on-board computer dis-
plays:
R the expected charge time of the high-volt-
age battery or
R the RANGE PLUS condition of charge for
the departure time set.
Changing the departure time
X Press the =or; button on the steer-
ing wheel to select the Sett.
Sett. menu.
X Press 9or: on the steering wheel
to select the E‑CELL E‑CELLmenu.
X Press 9or: to select Depart.
Depart.
Time
Time.
X Press ato confirm.
You will see the selected setting.
X Press the :or9 button to select A
A, B
B
or Change C
Change C.
X Press =or; to select Depart.
Depart.
Time Hours
Time Hours.
X Press the 9or: button to set the
hour.
X Press =or; to select Depart.
Depart.
Time Minutes
Time Minutes.
X Press 9or: to set the minutes.
X Press ato confirm.
After changing from one menu to another,
the departure time setting is stored. Menus and submenus
195On-board computer and displays Z
Page 198 of 338
Selecting the departure time
X Press the =or; button on the steer-
ing wheel to select the Sett.
Sett.menu.
X Press 9or: on the steering wheel
to select the E‑CELL
E‑CELL menu.
X Press 9or: to select Depart.
Depart.
Time
Time.
X Press ato confirm.
X Press the :or9 button to select
one of the three departure times or Timer
Timer
Off
Off (no timer active).
X Press ato confirm.
Charging with RANGE PLUS
If you have engaged Pand the charging cable
is connected, the on-board computer dis-
plays:
R the expected charge time of the high-volt-
age battery or
R the RANGE PLUS condition of charge for
the departure time set
RANGE PLUS charges when:
R you have activated RANGE PLUS via the
center console prior to charging and
R the high-voltage battery is fully charged
If charging is not complete by departure time,
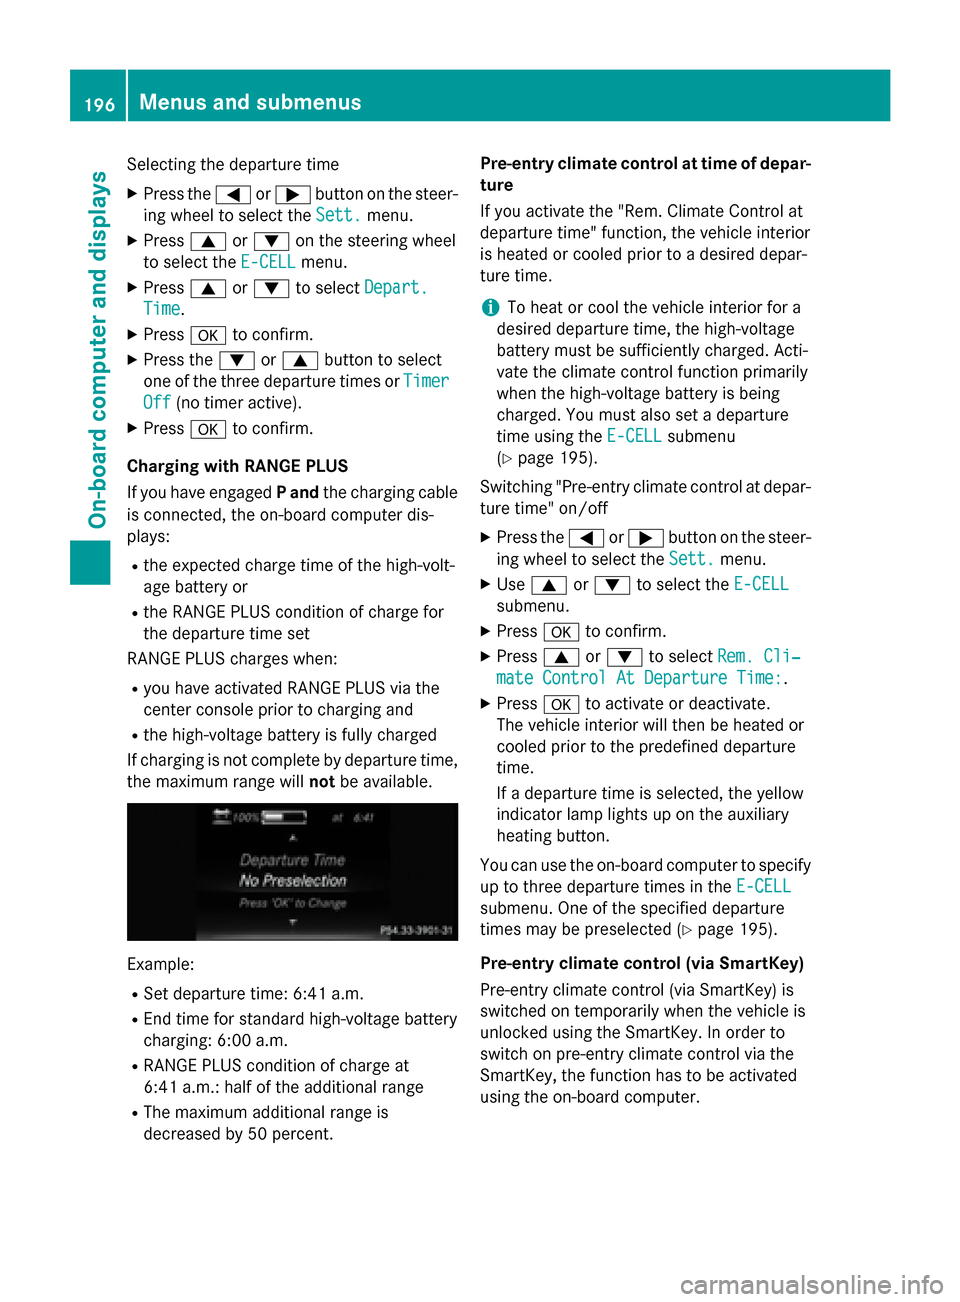
the maximum range will notbe available. Example:
R Set departure time: 6:41 a.m.
R End time for standard high-voltage battery
charging: 6:00 a.m.
R RANGE PLUS condition of charge at
6:41 a.m.: half of the additional range
R The maximum additional range is
decreased by 50 percent. Pre-entry climate control at time of depar-
ture
If you activate the "Rem. Climate Control at
departure time" function, the vehicle interior
is heated or cooled prior to a desired depar-
ture time.
i To heat or cool the vehicle interior for a
desired departure time, the high-voltage
battery must be sufficiently charged. Acti-
vate the climate control function primarily
when the high-voltage battery is being
charged. You must also set a departure
time using the E-CELL
E-CELL submenu
(Y page 195).
Switching "Pre-entry climate control at depar-
ture time" on/off
X Press the =or; button on the steer-
ing wheel to select the Sett. Sett.menu.
X Use 9 or: to select the E-CELL
E-CELL
submenu.
X Press ato confirm.
X Press 9or: to select Rem. Cli‐
Rem. Cli‐
mate Control At Departure Time:
mate Control At Departure Time:.
X Press ato activate or deactivate.
The vehicle interior will then be heated or
cooled prior to the predefined departure
time.
If a departure time is selected, the yellow
indicator lamp lights up on the auxiliary
heating button.
You can use the on-board computer to specify up to three departure times in the E-CELL E-CELL
submenu. One of the specified departure
times may be preselected (Y page 195).
Pre-entry climate control (via SmartKey)
Pre-entry climate control (via SmartKey) is
switched on temporarily when the vehicle is
unlocked using the SmartKey. In order to
switch on pre-entry climate control via the
SmartKey, the function has to be activated
using the on-board computer. 196
Menus and submenusOn-board computer and displays
Page 199 of 338
Activating/deactivating pre-entry climate
control (via SmartKey)
X Press the =or; button on the steer-
ing wheel to select the Sett.
Sett. menu.
X Use 9 or: to select the E-CELL
E-CELL
submenu.
X Press ato confirm.
X Press 9or: to select Pre-Entry
Pre-Entry
Climate Cont. (Via Key):
Climate Cont. (Via Key):.
X Press ato activate or deactivate.
If pre-entry climate control (via SmartKey)
is activated, pre-entry climate control (via
SmartKey) is switched on temporarily when
you unlock the vehicle.
Setting the maximum charge current
Before charging the high-voltage battery,
check the maximum permissible charge cur-
rent for the relevant power socket.
You can set a maximum charge current in the
E-CELL E-CELL menu.
It is only necessary to select the maximum
charge current if there are no charge current
settings on the charging cable.
i The maximum charge current values in
the on-board computer may deviate from
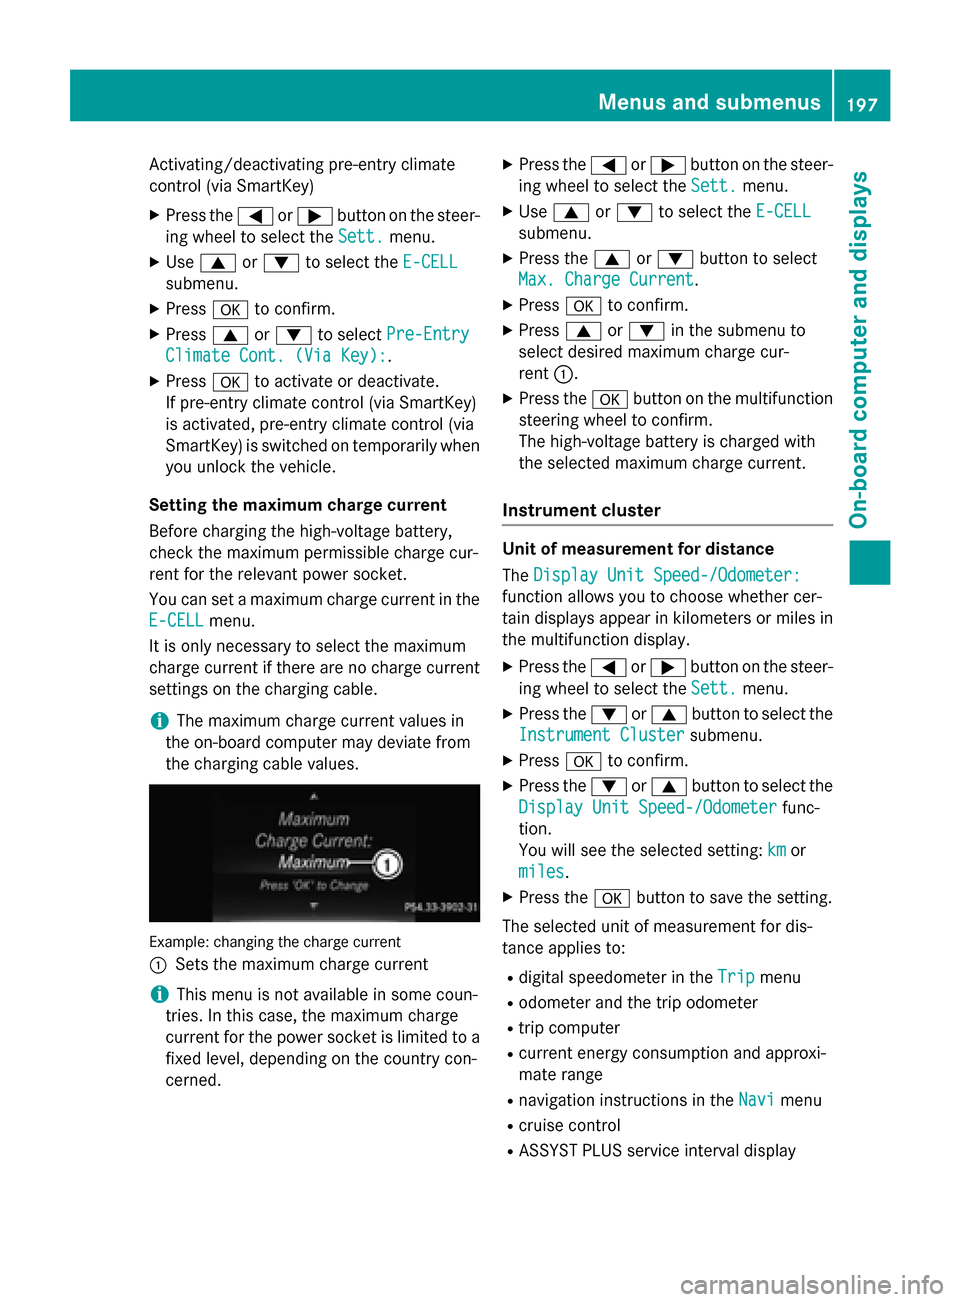
the charging cable values. Example: changing the charge current
:
Sets the maximum charge current
i This menu is not available in some coun-
tries. In this case, the maximum charge
current for the power socket is limited to a fixed level, depending on the country con-
cerned. X
Press the =or; button on the steer-
ing wheel to select the Sett.
Sett. menu.
X Use 9 or: to select the E-CELL E-CELL
submenu.
X Press the 9or: button to select
Max. Charge Current
Max. Charge Current.
X Press ato confirm.
X Press 9or: in the submenu to
select desired maximum charge cur-
rent :.
X Press the abutton on the multifunction
steering wheel to confirm.
The high-voltage battery is charged with
the selected maximum charge current.
Instrument cluster Unit of measurement for distance
The
Display Unit Speed-/Odometer: Display Unit Speed-/Odometer:
function allows you to choose whether cer-
tain displays appear in kilometers or miles in the multifunction display.
X Press the =or; button on the steer-
ing wheel to select the Sett. Sett.menu.
X Press the :or9 button to select the
Instrument Cluster
Instrument Cluster submenu.
X Press ato confirm.
X Press the :or9 button to select the
Display Unit Speed-/Odometer
Display Unit Speed-/Odometer func-
tion.
You will see the selected setting: km kmor
miles
miles.
X Press the abutton to save the setting.
The selected unit of measurement for dis-
tance applies to:
R digital speedometer in the Trip
Trip menu
R odometer and the trip odometer
R trip computer
R current energy consumption and approxi-
mate range
R navigation instructions in the Navi
Navi menu
R cruise control
R ASSYST PLUS service interval display Menus and submenus
197On-board computer and displays Z
Page 202 of 338
Display messages
Introduction
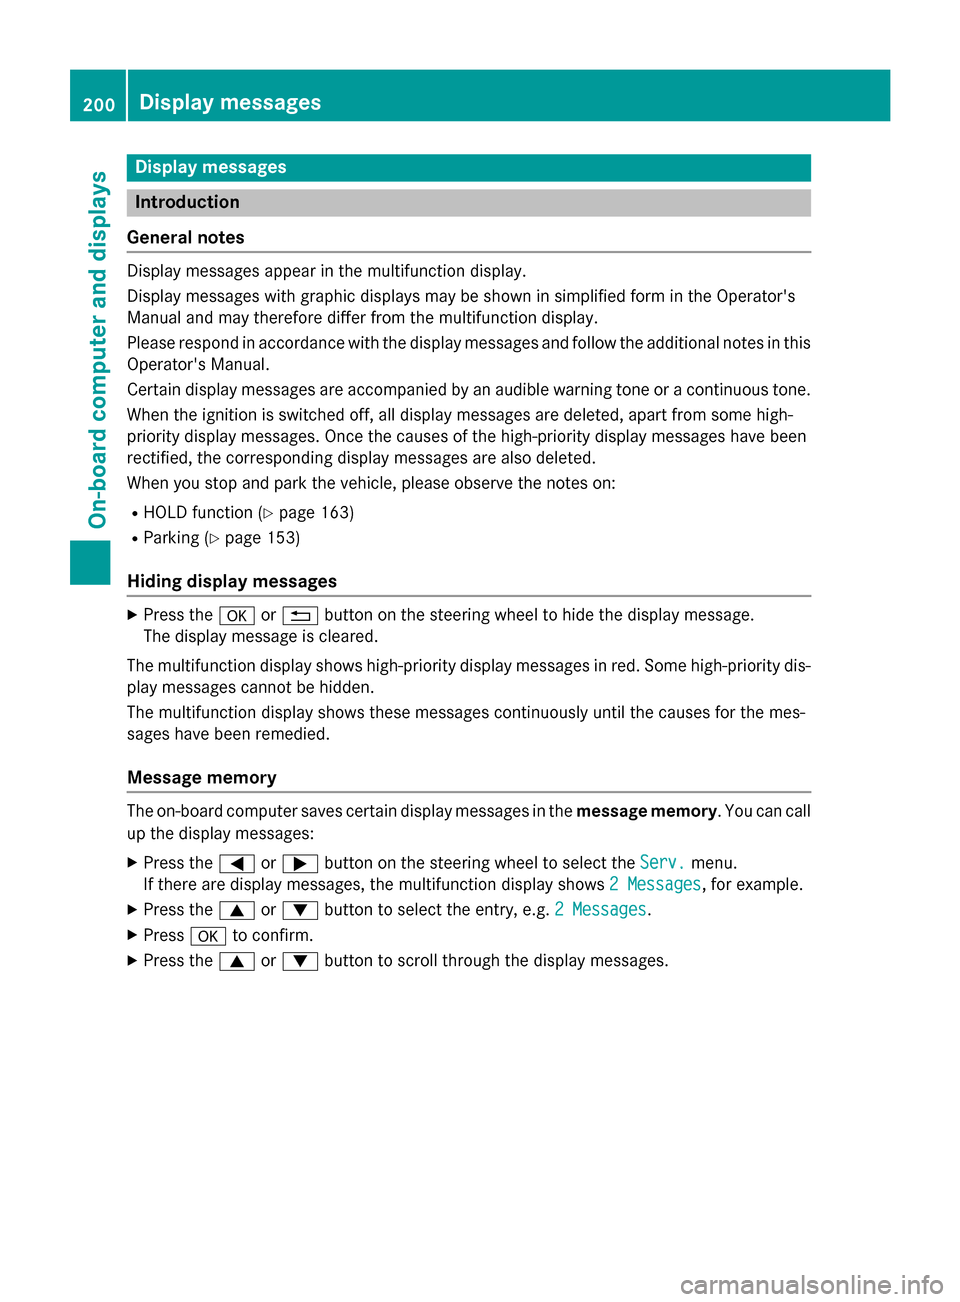
General notes Display messages appear in the multifunction display.
Display messages with graphic displays may be shown in simplified form in the Operator's
Manual and may therefore differ from the multifunction display.
Please respond in accordance with the display messages and follow the additional notes in this Operator's Manual.
Certain display messages are accompanied by an audible warning tone or a continuous tone.
When the ignition is switched off, all display messages are deleted, apart from some high-
priority display messages. Once the causes of the high-priority display messages have been
rectified, the corresponding display messages are also deleted.
When you stop and park the vehicle, please observe the notes on:
R HOLD function (Y page 163)
R Parking (Y page 153)
Hiding display messages X
Press the aor% button on the steering wheel to hide the display message.
The display message is cleared.
The multifunction display shows high-priority display messages in red. Some high-priority dis- play messages cannot be hidden.
The multifunction display shows these messages continuously until the causes for the mes-
sages have been remedied.
Message memory The on-board computer saves certain display messages in the
message memory. You can call
up the display messages:
X Press the =or; button on the steering wheel to select the Serv.
Serv. menu.
If there are display messages, the multifunction display shows 2 Messages
2 Messages, for example.
X Press the 9or: button to select the entry, e.g. 2 Messages
2 Messages.
X Press ato confirm.
X Press the 9or: button to scroll through the display messages. 200
Display
messagesOn-board computer and displays
Page 203 of 338
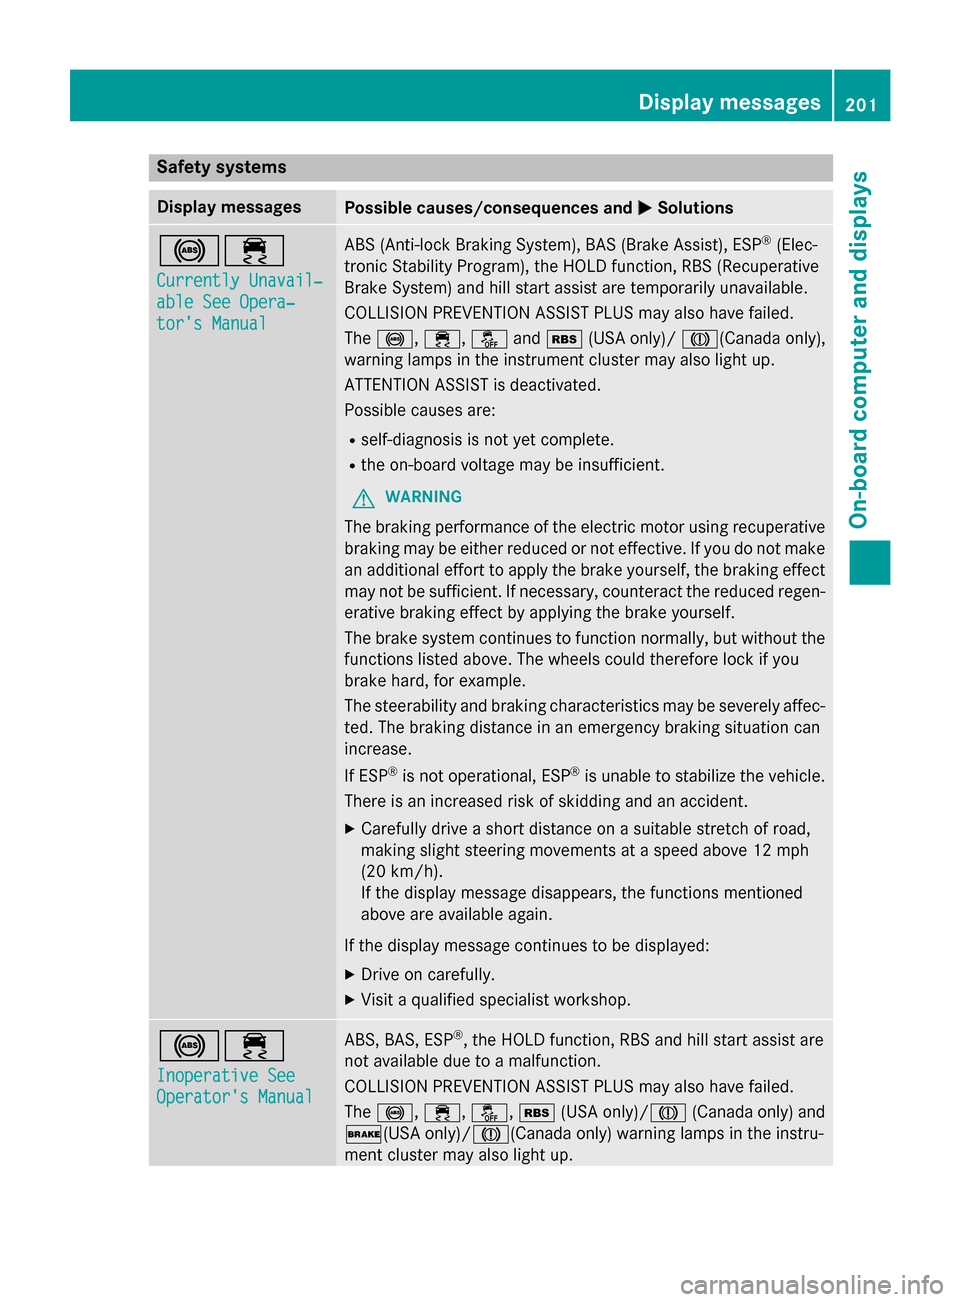
Safety systems
Display messages
Possible causes/consequences and
M
MSolutions !÷
Currently Unavail‐ Currently Unavail‐
able See Opera‐ able See Opera‐
tor's Manual tor's Manual ABS (Anti-lock Braking System), BAS (Brake Assist), ESP
®
(Elec-
tronic Stability Program), the HOLD function, RBS (Recuperative
Brake System) and hill start assist are temporarily unavailable.
COLLISION PREVENTION ASSIST PLUS may also have failed.
The !, ÷, åandé (USA only)/ J(Canada only),
warning lamps in the instrument cluster may also light up.
ATTENTION ASSIST is deactivated.
Possible causes are:
R self-diagnosis is not yet complete.
R the on-board voltage may be insufficient.
G WARNING
The braking performance of the electric motor using recuperative braking may be either reduced or not effective. If you do not make
an additional effort to apply the brake yourself, the braking effect may not be sufficient. If necessary, counteract the reduced regen-erative braking effect by applying the brake yourself.
The brake system continues to function normally, but without the functions listed above. The wheels could therefore lock if you
brake hard, for example.
The steerability and braking characteristics may be severely affec-
ted. The braking distance in an emergency braking situation can
increase.
If ESP ®
is not operational, ESP ®
is unable to stabilize the vehicle.
There is an increased risk of skidding and an accident.
X Carefully drive a short distance on a suitable stretch of road,
making slight steering movements at a speed above 12 mph
(20 km/h).
If the display message disappears, the functions mentioned
above are available again.
If the display message continues to be displayed: X Drive on carefully.
X Visit a qualified specialist workshop. !÷
Inoperative See Inoperative See
Operator's Manual Operator's Manual ABS, BAS, ESP
®
, the HOLD function, RBS and hill start assist are
not available due to a malfunction.
COLLISION PREVENTION ASSIST PLUS may also have failed.
The !, ÷, å,é(USA only)/ J(Canada only) and
$(USA only)/J(Canada only) warning lamps in the instru-
ment cluster may also light up. Display messages
201On-board computer and displays Z
Page 205 of 338
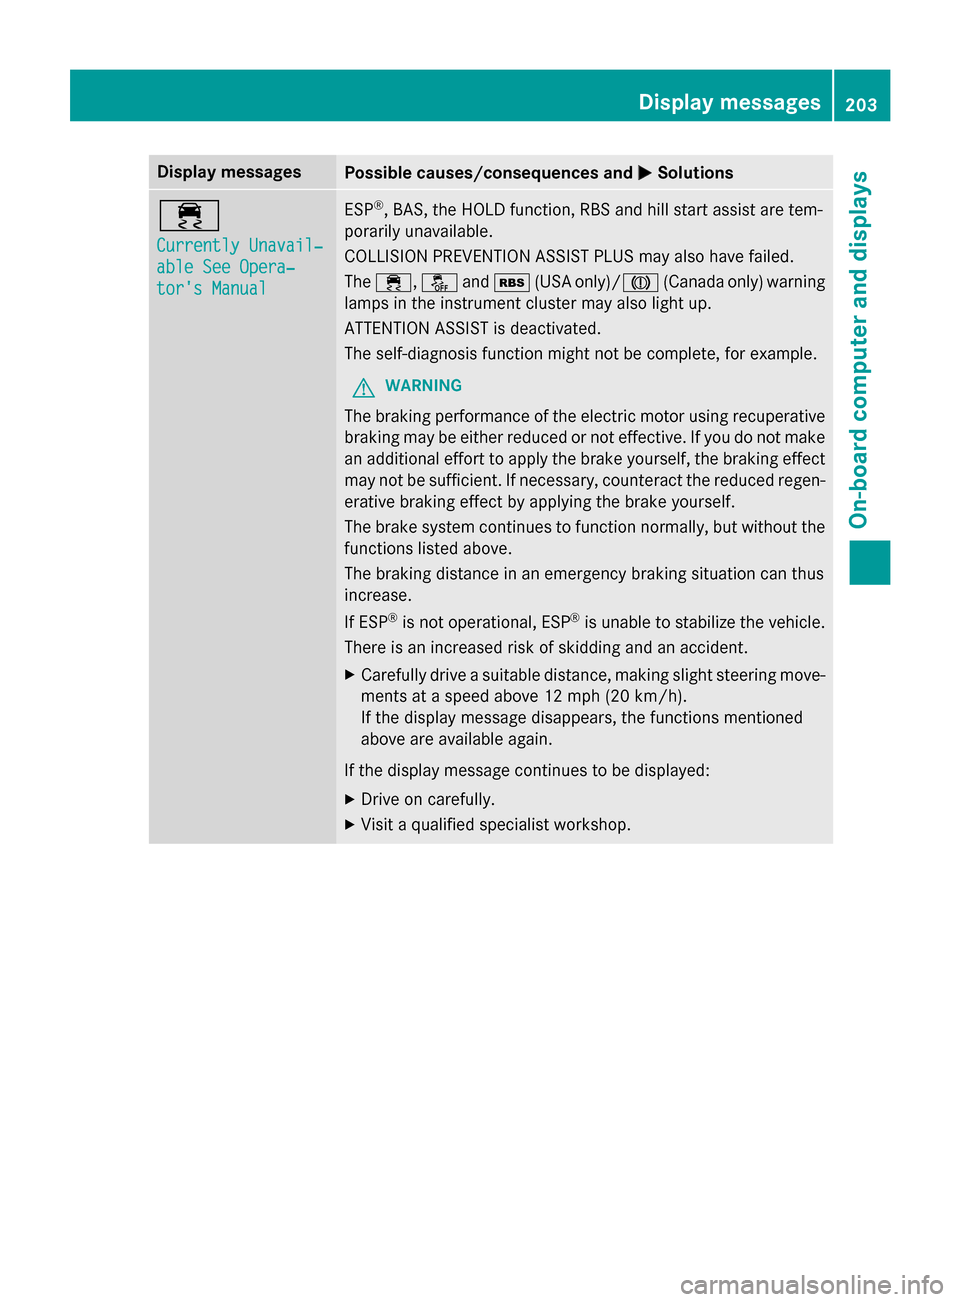
Display messages
Possible causes/consequences and
M
MSolutions ÷
Currently Unavail‐ Currently Unavail‐
able See Opera‐ able See Opera‐
tor's Manual tor's Manual ESP
®
, BAS, the HOLD function, RBS and hill start assist are tem-
porarily unavailable.
COLLISION PREVENTION ASSIST PLUS may also have failed.
The ÷, åandé (USA only)/ J(Canada only) warning
lamps in the instrument cluster may also light up.
ATTENTION ASSIST is deactivated.
The self-diagnosis function might not be complete, for example.
G WARNING
The braking performance of the electric motor using recuperative braking may be either reduced or not effective. If you do not make
an additional effort to apply the brake yourself, the braking effect may not be sufficient. If necessary, counteract the reduced regen-erative braking effect by applying the brake yourself.
The brake system continues to function normally, but without the functions listed above.
The braking distance in an emergency braking situation can thus
increase.
If ESP ®
is not operational, ESP ®
is unable to stabilize the vehicle.
There is an increased risk of skidding and an accident.
X Carefully drive a suitable distance, making slight steering move-
ments at a speed above 12 mph (20 km/h).
If the display message disappears, the functions mentioned
above are available again.
If the display message continues to be displayed: X Drive on carefully.
X Visit a qualified specialist workshop. Display
messages
203On-board computer and displays Z
Page 222 of 338
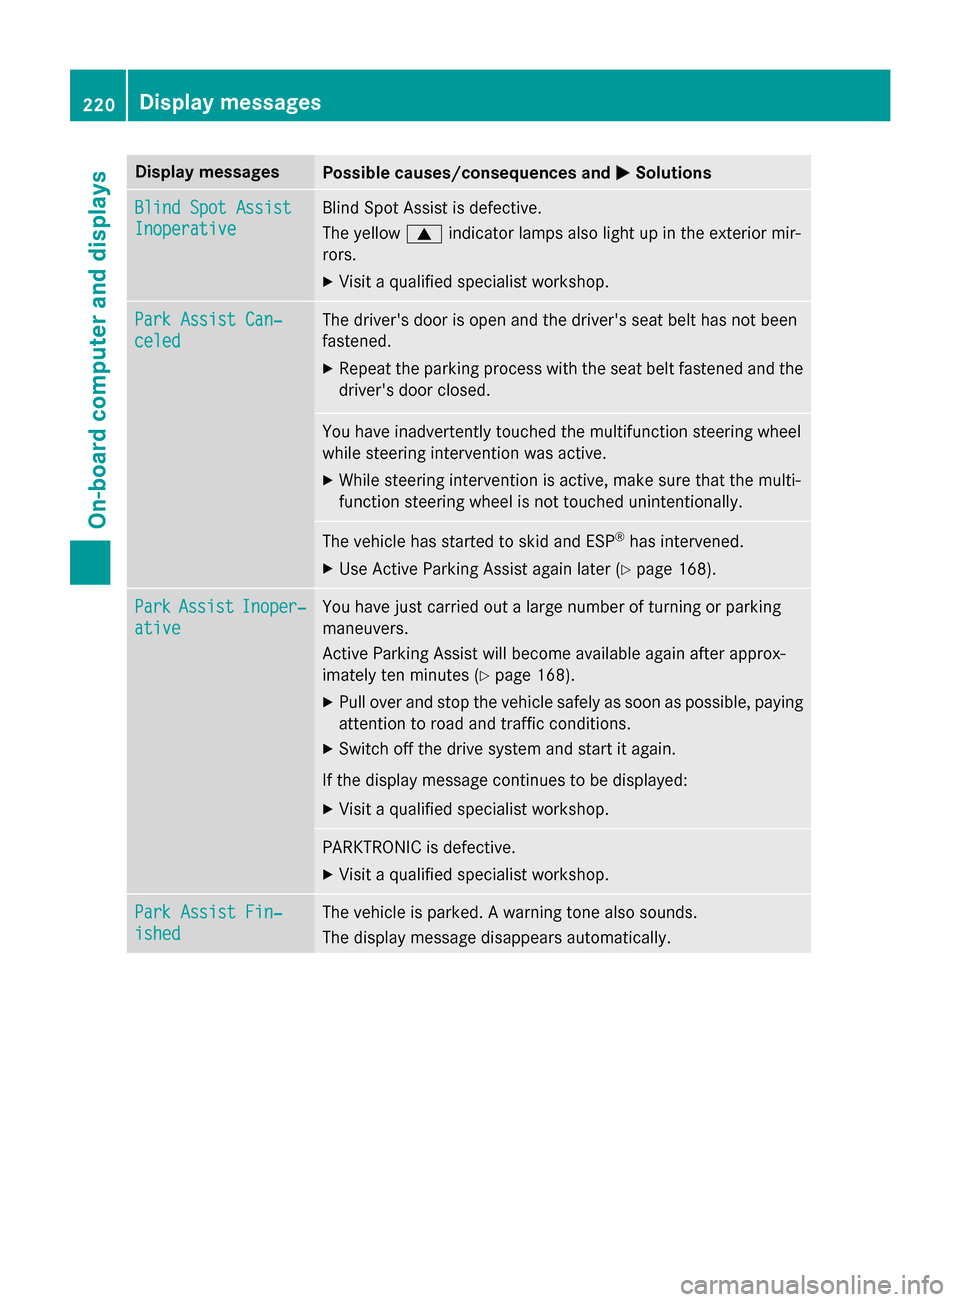
Display messages
Possible causes/consequences and
M
MSolutions Blind Spot Assist
Blind Spot Assist
Inoperative Inoperative Blind Spot Assist is defective.
The yellow
9indicator lamps also light up in the exterior mir-
rors.
X Visit a qualified specialist workshop. Park Assist Can‐ Park Assist Can‐
celed celed The driver's door is open and the driver's seat belt has not been
fastened.
X Repeat the parking process with the seat belt fastened and the
driver's door closed. You have inadvertently touched the multifunction steering wheel
while steering intervention was active.
X While steering intervention is active, make sure that the multi-
function steering wheel is not touched unintentionally. The vehicle has started to skid and ESP
®
has intervened.
X Use Active Parking Assist again later (Y page 168).Park Park
Assist
Assist Inoper‐
Inoper‐
ative
ative You have just carried out a large number of turning or parking
maneuvers.
Active Parking Assist will become available again after approx-
imately ten minutes (Y
page 168).
X Pull over and stop the vehicle safely as soon as possible, paying
attention to road and traffic conditions.
X Switch off the drive system and start it again.
If the display message continues to be displayed: X Visit a qualified specialist workshop. PARKTRONIC is defective.
X Visit a qualified specialist workshop. Park Assist Fin‐ Park Assist Fin‐
ished ished The vehicle is parked. A warning tone also sounds.
The display message disappears automatically.220
Display
messagesOn-board computer and displays