2015 MERCEDES-BENZ B-Class ELECTRIC warning lights
[x] Cancel search: warning lightsPage 143 of 338
To avoid hazardous situations, observe the
following:
R Only connect the charging cable to mains
sockets that:
- are installed correctly and
- have been approved by an electrical spe-
cialist.
R For safety reasons, only use the charging
cables supplied with the vehicle, or charg-
ing cables which have been approved for
use with this vehicle.
R Never use a damaged charging cable.
R Do not use:
- Extension cables
- Cable drums
- Multiple sockets
R Do not use a socket adapter to connect the
charging cable to the mains socket. The
only exception is if the adapter has been
tested and approved by the manufacturer
for charging the high-voltage battery in an
electric vehicle.
R Always observe the safety notes in the
socket adapter's operating instructions.
The vehicle's high voltage electrical system is under high voltage.
R Do not handle high-voltage components or
the orange cables of the vehicle's high-volt-age electrical system.
R Do not touch high-voltage components or
the orange cables of the high-voltage elec-
trical system when a vehicle has been
involved in a crash.
R Do not touch any damaged components or
damaged orange cables of the vehicle's
high-voltage electrical system.
R Do not remove the covers of the high-volt-
age electrical system components that are
marked with a warning sticker. General notes
Method of operation The vehicle is equipped with a high-voltage
battery for driving. The high-voltage battery
stores the energy needed to operate the elec-
tric motor and releases it again.
The electric motor uses energy that has been stored in the high-voltage battery when pull-
ing away, accelerating and during the jour-
ney.
In overrun mode (except D+), kinetic energy
is converted by means of energy recuperation
into electrical energy and stored in the high-
voltage battery.
The high-voltage battery can be charged as
follows:
R through energy recuperation while the
vehicle is in motion
R with the charging cable at a mains socket
while the vehicle is stationary
R with the charging cable at a charging sta-
tion while the vehicle is stationary
The high-voltage battery can be charged in a
voltage range from 110 V to 240 V.
If the condition of charge drops to less than
13%, the high-voltage battery reserve indica-
tor lamp lights up in the instrument cluster.
Charge the high-voltage battery as soon as
possible.
Below a condition of charge of 5%, the per-
formance of the vehicle is reduced. The vehi-
cle's high-voltage electrical system switches
off at a condition of charge of 0%.
Use of the pre-entry climate control function
may mean that the high-voltage battery is not fully charged.
Discharged battery The vehicle's high-voltage electrical system
switches off if the high-voltage battery is com-
pletely discharged. 30 seconds prior to this,
you are informed of the switch-off by the
Battery level too low. Stop and Battery level too low. Stop and High-voltage battery
141Driving and parking Z
Page 149 of 338
Display
:
: Lights up
green The external power supply
connection is working prop-
erly. The high-voltage bat-
tery can be charged. Flashes red A malfunction has been
detected in the external
power supply. The high-volt-
age battery is recharged as
soon as the electricity signal
registers normal values. Lights up red There is a malfunction. The
charging cable must be
removed from the electrical
outlet and then re-inserted.
Display
; ; Lights up
green There are no malfunctions.
The high-voltage battery
can be charged.
Lights up red There is a malfunction. The
high-voltage battery cannot
be charged. For information on problems relating to the
charging process, see (Y
page 151).
Setting the maximum charge current G
WARNING
If the charge current draw via a mains socket is too high during the charging process, the
external electrical system may overheat.
There is a risk of fire.
Before beginning the charging process, check the maximum permissible charge current
locally. Consult a qualified expert to do so
where necessary.
If necessary, adjust your vehicle's settings.
! An excessive charge current can blow a
fuse or lead to overheating of the external
power supply. Check whether the external
power supply is compatible with the set charge current. If necessary, lower the set
charge current or use another power
socket.
You can set a limit for the values of the charge current used in charging the high-voltage bat-
tery. This acts as a means of preventing the
power supply from overloading. You can set
this limit by using the controls on the charging
cable or in the on-board computer's menu.
Only set the maximum charge current in the
on-board computer menu if there are no
charge current settings on the charging
cable.
The default standard value is the minimum
charge current setting. This corresponds to
the minimum available charge current from
the power supply.
i The value of the maximum setting and the
relevant adjustment values may vary
depending on the country.
Before charging the high-voltage battery,
have the maximum permissible charge cur-
rent for the relevant power socket checked by
an electrician.
X To adjust the setting: press button?
repeatedly until the desired setting is selec- ted in display =.
R Two LEDs are flashing: minimum setting
R All LEDs are flashing: maximum setting
Information about the charging time
(Y page 334)
If, after the charging process, the charging
cable is:
R left connected to the power socket, the
currently selected values will be used for
the next charging process.
R removed from the power socket, the values
will be reset to the minimum setting for the next charging process. You may then need
to reset the values of the maximum charge current.
If the charge current values that have been
set on the charging cable and the on-board High-voltage batte
ry
147Driving an d parking Z
Page 157 of 338
With the Start/Stop button:
X Remove the Start/Stop button from the
ignition lock.
X Insert the SmartKey into the ignition lock.
X Switch on the ignition.
X Depress the brake pedal and keep it
depressed.
X Shift to neutral N.
X Release the brake pedal.
X Release the electric parking brake.
X Switch off the ignition and leave the Smart-
Key in the ignition lock.
If you try to switch off the drive system when the transmission is not in position P:
R a message appears in the multifunction dis-
play
R a warning signal sounds Electric parking brake
General notes G
WARNING
If you leave children unsupervised in the vehi- cle, they could set it in motion by, for example:
R release the parking brake.
R shift the transmission out of park position
P.
R start the vehicle's drive system.
They could also operate the vehicle's equip-
ment. There is a risk of an accident and injury.
When leaving the vehicle, always take the
SmartKey with you and lock the vehicle. Never leave children unsupervised in the vehicle. The function of the electric parking brake and
the parking lock is dependent on the on-board voltage. If the on-board voltage is low or if
there is a malfunction in the system, it may
not be possible to apply the released parking
brake or to shift the transmission to the P
position.
X If this is the case, only park the vehicle on
level ground and secure it to prevent it roll-
ing away.
X Shift the transmission to position P.
It may not be possible to release an applied
parking brake if the on-board voltage is low or
there is a malfunction in the system. Contact a qualified specialist workshop.
The electric parking brake carries out a func-
tion check at regular intervals when the drive
system is switched off. The sounds that can
be heard while this is occurring are normal.
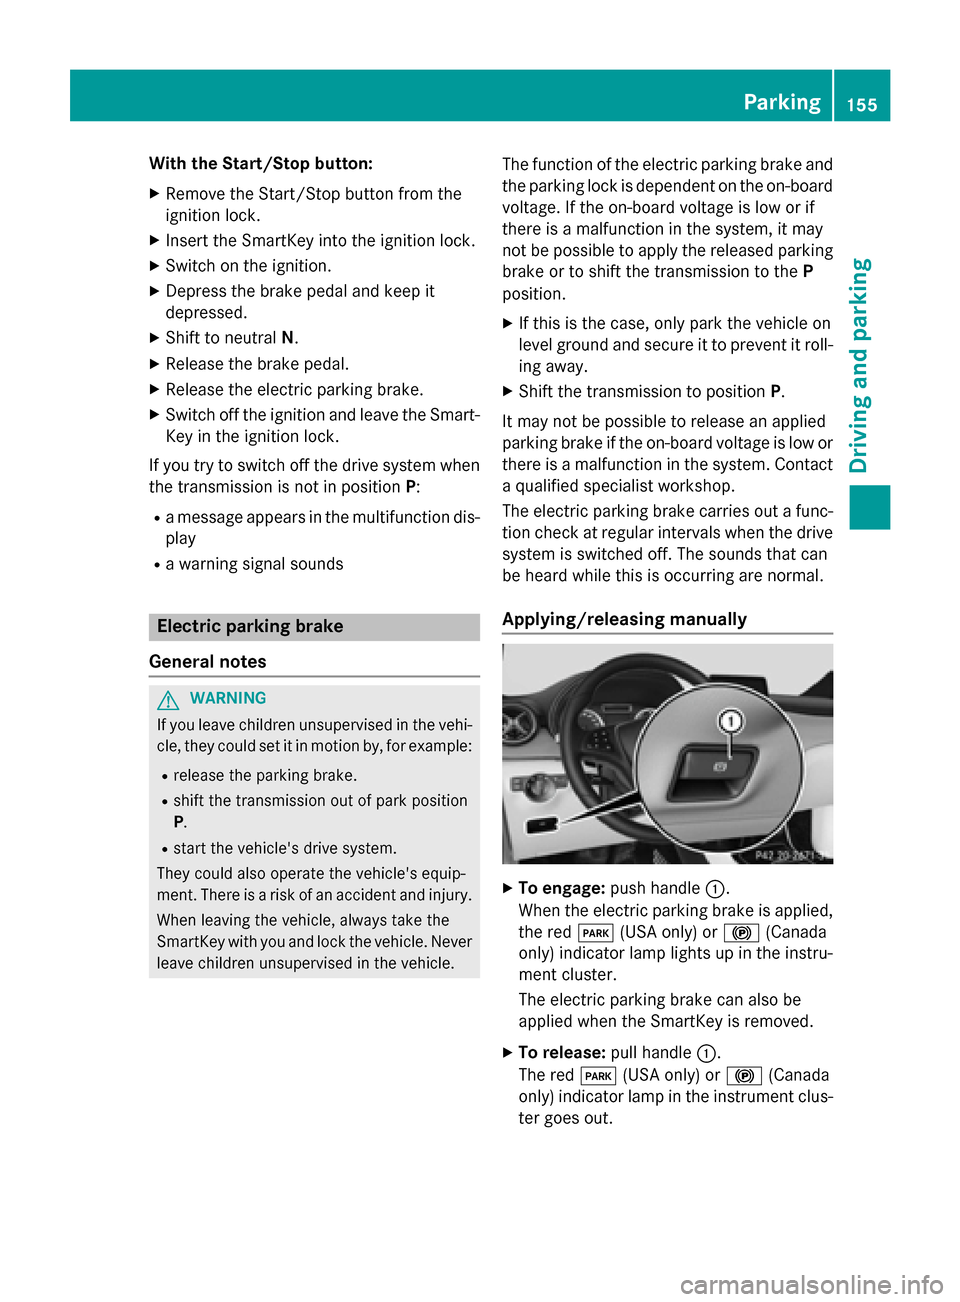
Applying/releasing manually X
To engage: push handle :.
When the electric parking brake is applied, the red F(USA only) or !(Canada
only) indicator lamp lights up in the instru-
ment cluster.
The electric parking brake can also be
applied when the SmartKey is removed.
X To release: pull handle:.
The red F(USA only) or !(Canada
only) indicator lamp in the instrument clus- ter goes out. Parking
155Driving and parking Z
Page 158 of 338
The electric parking brake can only be
released:
R when the SmartKey is in position 1or 2in
the ignition lock (Y page 131) or
R if the ignition was switched on using the
Start/Stop button
Applying automatically When the vehicle's HOLD function is holding
the vehicle at a standstill, the electric parking brake is engaged automatically.
In addition, at least one of the following con-
ditions must be fulfilled:
R the drive system is switched off.
R the driver's door is open and the seat belt is
not fastened.
R there is a system malfunction.
R the power supply is insufficient.
R the vehicle is stationary for a lengthy
period.
The red F(USA only) or !(Canada
only) indicator lamp in the instrument cluster
lights up.
Releasing automatically Your vehicle's electric parking brake is auto-
matically released if all of the following con-
ditions are met:
R the vehicle has been started.
R the transmission is in position Dor R.
R the seat belt has been fastened.
R you depress the accelerator pedal.
If the transmission is in position R, the tailgate
must be closed.
If your seat belt is not fastened, the following conditions must be fulfilled to automatically
release the electric parking brake:
R the driver's door is closed.
R you have shifted out of transmission posi-
tion Por you have previously driven faster
than 2 mph (3 km/h). Ensure that you do not depress the acceler-
ator pedal unintentionally. Otherwise the
parking brake will be released and the vehicle
will start to move.
Emergency braking The vehicle can also be braked during an
emergency by using the electric parking
brake.
X While driving, push handle :of the electric
parking brake (Y page 155).
The vehicle is braked as long as you keep
handle :of the electric parking brake
pressed. The longer the electric parking
brake handle :is depressed, the greater
the braking force.
During braking:
R a warning tone sounds
R the Please Release Parking Brake Please Release Parking Brake
message appears
R the red F(USA only) or !(Canada
only) indicator lamp in the instrument clus-
ter flashes
When the vehicle has been braked to a stand-
still, the electric parking brake is applied. Parking the vehicle for a long period
If you leave the vehicle parked for longer than
four weeks, the battery may be damaged by
exhaustive discharging.
If you leave the vehicle parked for longer than six weeks, the vehicle may suffer damage as a
result of lack of use.
X Visit a qualified specialist workshop and
seek advice.
i You can obtain information about trickle
chargers from a qualified specialist work-
shop. 156
ParkingDriving and parking
Page 161 of 338
Do not depress the brake pedal continuously
while the vehicle is in motion, e.g. causing the
brakes to rub by constantly applying light
pressure to the pedal. This results in exces-
sive and premature wear to the brake pads.
Heavy and light loads G
WARNING
If you rest your foot on the brake pedal while
driving, the braking system can overheat. This increases the stopping distance and can even
cause the braking system to fail. There is a
risk of an accident.
Never use the brake pedal as a footrest. Never
depress the brake pedal and the accelerator
pedal at the same time.
! Depressing the brake pedal constantly
results in excessive and premature wear to
the brake pads.
If the brakes have been subjected to a heavy load, do not stop the vehicle immediately.
Drive on for a short while. This allows the air-
flow to cool the brakes more quickly.
Wet roads If you have driven for a long time in heavy rain
without braking, there may be a delayed reac- tion from the brakes when braking for the firsttime. This may also occur after the vehicle has
been washed or driven through deep water.
You have to depress the brake pedal more
firmly. Maintain a greater distance from the
vehicle in front.
After driving on a wet road or having the vehi-
cle washed, brake firmly while paying atten-
tion to the traffic conditions. This will warm up
the brake discs, thereby drying them more
quickly and protecting them against corro-
sion.
Limited braking performance on salt-
treated roads If you drive on salted roads, a layer of salt
residue may form on the brake discs and brake pads. This can result in a significantly
longer braking distance.
R In order to prevent any salt build-up, apply
the brakes occasionally while paying atten- tion to the traffic conditions.
R Carefully depress the brake pedal and the
beginning and end of a journey.
R Maintain a greater distance to the vehicle
ahead.
Servicing the brakes !
If the red brake warning lamp lights up in
the instrument cluster and you hear a warn- ing tone while the engine is running, the
brake fluid level may be too low. Observe
additional warning messages in the multi-
function display.
The brake fluid level may be too low due to brake pad wear or leaking brake lines.
Have the brake system checked immedi-
ately. This work should be carried out at a
qualified specialist workshop.
! A function or performance test should
only be carried out on a 2-axle dynamom-
eter. If you are planning to have the vehicle tested on such a dynamometer, contact an
authorized Mercedes-Benz Center to
obtain further information first. Otherwise,
you could damage the drive train or the
brake system.
! As the ESP ®
system operates automati-
cally, the engine and the ignition must be
switched off (the SmartKey must be in posi-
tion 0or 1in the ignition lock) if:
R the electric parking brake is tested on a
brake dynamometer (for a maximum of
ten second s)
R the vehicle is towed with the front axle
raised.
Braking triggered automatically by ESP ®
may seriously damage the brake system.
All checks and maintenance work on the
brake system must be carried out at a quali- Driving
tips
159Driving an d parking Z
Page 169 of 338
From the:
R sixth segment onwards, you will hear an
intermittent warning tone for approx-
imately two seconds.
R seventh segment onwards, you will hear a
warning tone for approximately two sec-
onds. This indicates that you have now
reached the minimum distance.
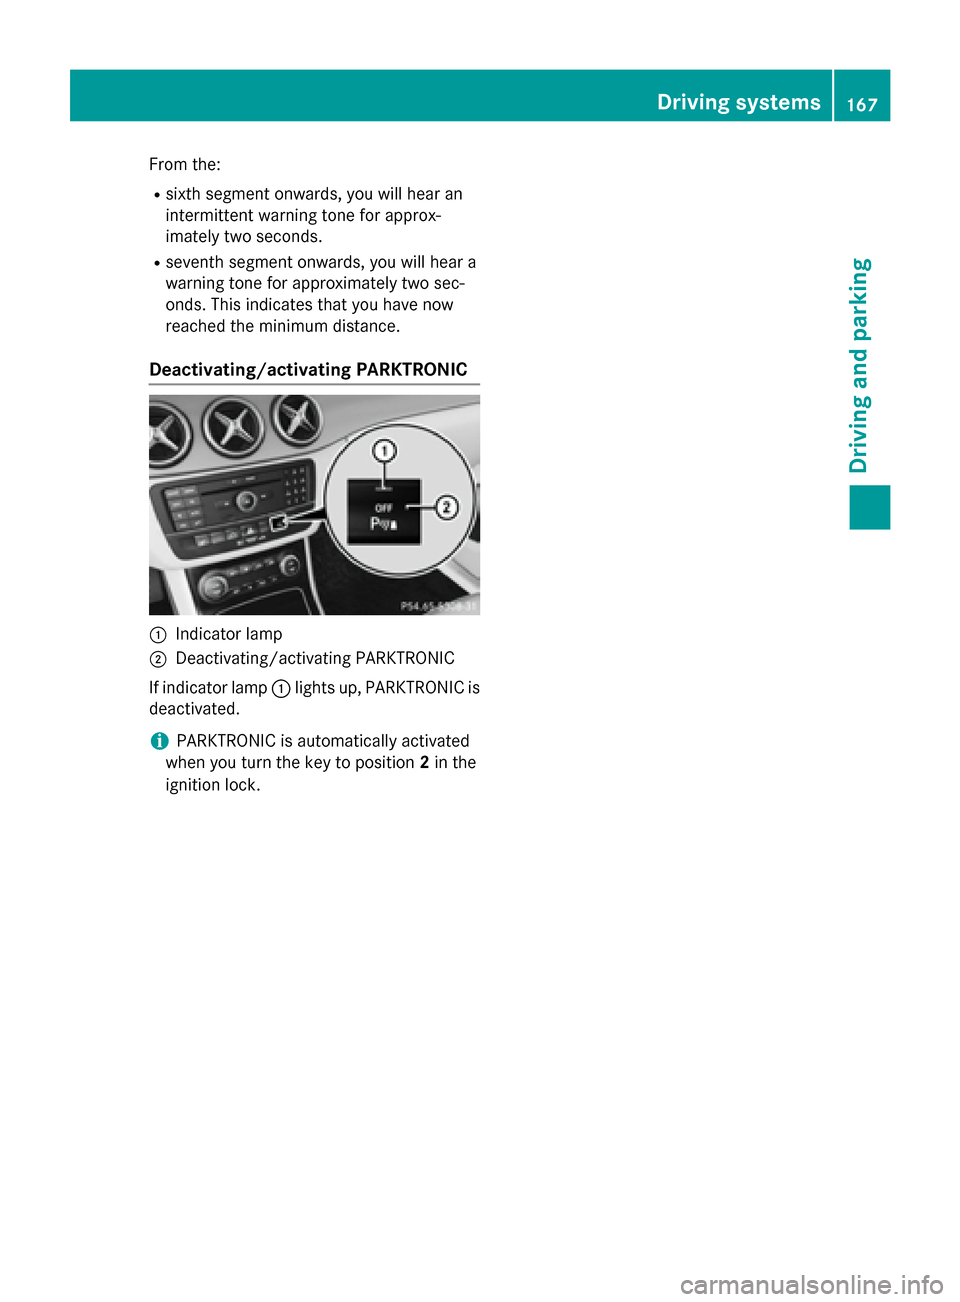
Deactivating/activating PARKTRONIC :
Indicator lamp
; Deactivating/activating PARKTRONIC
If indicator lamp :lights up, PARKTRONIC is
deactivated.
i PARKTRONIC is automatically activated
when you turn the key to position 2in the
ignition lock. Driving systems
167Driving and parking Z
Page 170 of 338
Problems with PARKTRONIC
Problem
Possible causes/consequences and
M
MSolutions Only the red segments
in the PARKTRONIC
warning displays are lit.
You also hear a warning
tone for approximately
two seconds.
PARKTRONIC is then
deactivated and the
indicator lamp on the
PARKTRONIC button
lights up. PARKTRONIC has malfunctioned and has switched off.
X If problems persist, have PARKTRONIC checked at a qualified
specialist workshop. Only the red segments
in the PARKTRONIC
warning displays are lit.
PARKTRONIC is then
deactivated. The PARKTRONIC sensors are dirty or there is interference.
X Clean the PARKTRONIC sensors (Y page 275).
X Switch the ignition back on. The problem may be caused by an external source of radio or
ultrasound waves.
X See if PARKTRONIC functions in a different location. Active Parking Assist
General notes Active Parking Assist is an electronic parking
aid with ultrasound. It measures the road on
both sides of the vehicle. A parking symbol
indicates a suitable parking space. Active
steering intervention can assist you during
maneuvering and parking. You may also use
PARKTRONIC (Y page 165).
Important safety notes Active Parking Assist is merely an aid. It is not
a replacement for your attention to your
immediate surroundings. You are always
responsible for safe maneuvering, parking
and exiting a parking space. Make sure that
no persons, animals or objects are in the
maneuvering range.
When PARKTRONIC is switched off, Active
Parking Assist is also unavailable. G
WARNING
While parking or pulling out of a parking
space, the vehicle swings out and can drive
onto areas of the oncoming lane. This could
result in a collision with another road user.
There is a risk of an accident.
Pay attention to other road users. Stop the
vehicle if necessary or cancel the Active Park- ing Assist parking procedure.
! If unavoidable, you should drive over
obstacles such as curbs slowly and not at a sharp angle. Otherwise, you may damage
the wheels or tires.
Active Parking Assist may possibly indicate
parking spaces which are not suitable for
parking, for example:
R where parking or stopping is prohibited
R in front of driveways or entrances and exits
R on unsuitable surfaces 168
Driving systemsDriving and parking
Page 174 of 338
X
Drive forwards and back up as prompted by
the PARKTRONIC warning displays, several
times if necessary.
X Stop when PARKTRONIC sounds the con-
tinuous warning tone, if not before.
Once you have exited the parking space com-
pletely, the steering wheel is moved to the
straight-ahead position. You hear a tone and
the Park Assist Finished
Park Assist Finished message
appears in the multifunction display. You will
then have to steer and merge into traffic on
your own. PARKTRONIC is still available. You
can take over the steering, before the vehicle has exited the parking space completely. Thisis useful, for example when you recognize
that it is already possible to pull out of the
parking space.
Canceling Active Parking Assist X
Stop the movement of the multifunction
steering wheel or steer yourself.
Active Parking Assist will be canceled at
once. The Park Assist Canceled Park Assist Canceled mes-
sage appears in the multifunction display.
or
X Press the PARKTRONIC button
(Y page 167).
PARKTRONIC is switched off and Active
Parking Assist is immediately canceled.
The Park Assist Canceled
Park Assist Canceled message
appears in the multifunction display.
Active Parking Assist is canceled automati-
cally if:
R the electric parking brake is engaged
R transmission position Pis selected
R parking using Active Parking Assist is no
longer possible
R you are driving faster than 6 mph (10 km/h)
R a wheel spins, ESP ®
intervenes or fails. The
÷ warning lamp lights up in the instru-
ment cluster
A warning tone sounds. The parking symbol
disappears and the multifunction display shows the
Park Assist Canceled
Park Assist Canceled mes-
sage.
When Active Parking Assist is canceled, you
must steer and brake again yourself.
If a system malfunction occurs, the vehicle is braked to a standstill. To drive on, depress the
accelerator again. Rear view camera
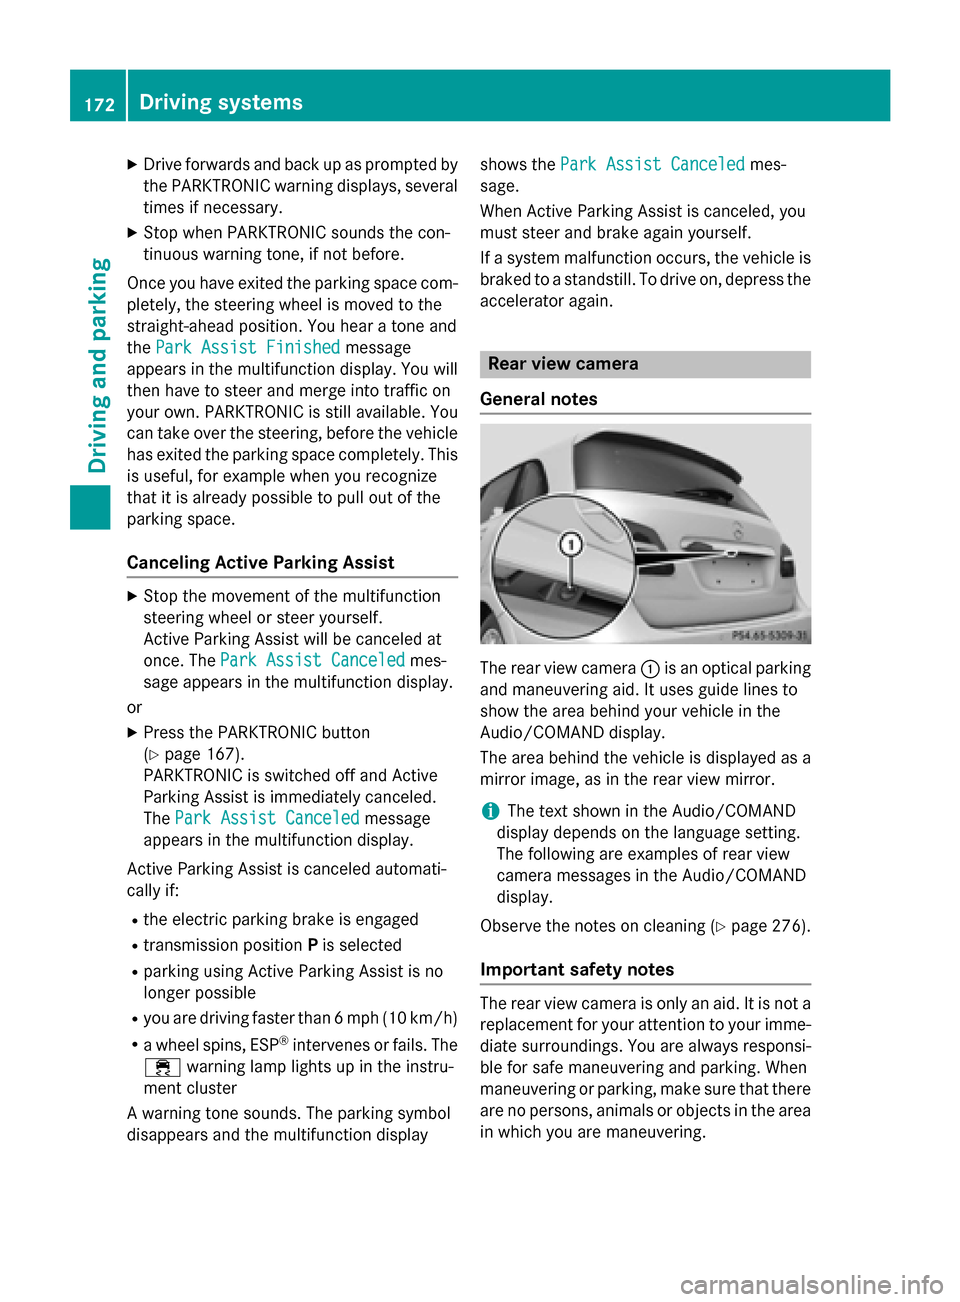
General notes The rear view camera
:is an optical parking
and maneuvering aid. It uses guide lines to
show the area behind your vehicle in the
Audio/COMAND display.
The area behind the vehicle is displayed as a
mirror image, as in the rear view mirror.
i The text shown in the Audio/COMAND
display depends on the language setting.
The following are examples of rear view
camera messages in the Audio/COMAND
display.
Observe the notes on cleaning (Y page 276).
Important safety notes The rear view camera is only an aid. It is not a
replacement for your attention to your imme-
diate surroundings. You are always responsi-
ble for safe maneuvering and parking. When
maneuvering or parking, make sure that there are no persons, animals or objects in the area in which you are maneuvering. 172
Driving systemsDriving an
d parking