2015 MERCEDES-BENZ B-Class ELECTRIC glove box
[x] Cancel search: glove boxPage 11 of 338

ESP
®
(Electronic Stability Pro-
gram)
Activating/deactivating (on-
board computer) ............................ 194
Characteristics ................................ .67
Deactivating/activating (notes )....... 67
Display message ............................ 201
ETS .................................................. 66
Function/note s................................ 66
General notes .................................. 66
Important safety information ........... 66
Warning lamp ................................. 233
ETS (Electronic Traction System) ....... 66
Exhaustive discharging (high-volt-
age battery) ....................................... 288
Exterior lighting
Cleaning ......................................... 275
see Lights
Exterior mirrors
Adjusting ......................................... 94
Dipping (automatic) ......................... 95
Out of position (troubleshooting) ..... 94
Storing settings (memory func-
tion) ................................................. 97
Storing the parking position ............. 95
Eyeglasses compartment ................. 241F
Flat tire MOExtended tire s.......................... 281
Preparing the vehicle ..................... 280
TIREFIT kit ...................................... 282
Floormats ........................................... 265
Folding table ...................................... 242
Front-passenger seat
Folding the backrest forward/
back ............................................... 243
Fuses
Allocation chart ............................. 297
Before changing ............................. 296
Fuse box in the engine compart-
ment .............................................. 296
Fuse box in the front-passenger
footwell .......................................... 297
Important safety notes .................. 296 G
Garage door opener Clearing the memory ..................... 264
General notes ................................ 261
Important safety notes .................. 261
Opening/closing the garage doo r..2 64
Programming (button in the rear-
view mirror) ................................... 262
Synchronizing the rolling code ....... 262
Generated electrical energy (Audio
20) ...................................................... 142
Genuine parts ...................................... 19
Glove box .......................................... .241 H
Hazard warning lamps Display message ............................ 226
Switching on/off ........................... 102
Head restraints
Adjusting ......................................... 90
Adjusting (manually) ........................ 91
Adjusting (rear) ................................ 91
Headlamps
Fogging up ..................................... 104
see Automatic headlamp mode
Heating
see Climate control
High beam flasher ............................. 102
High voltage
see Safety notes
High-beam headlamps
Adaptive Highbeam Assist ............. 103
Changing bulb s.............................. 108
Display message ............................ 215
Switching on/of f........................... 102
High-voltage battery
Battery care ................................... 145
Charging (charging station) ............ 149
Charging (mains socket) ................ 146
Charging cable warming ................ 145
Cruise range .................................. 142
Discharged battery ........................ 141
Display message ............................ 218
Displaying energy consumption
(on-board computer) ...................... 188 Index
9
Page 17 of 338

Problem (malfunction) ..................... 77
SmartKey positions (ignition lock) .. 131
Snow chains ...................................... 303
Sockets
Center console .............................. 252
General notes ................................ 252
Luggage compartment ...................2 53
Rear compartment ......................... 253
Special seat belt retractor .................. 57
Specialist workshop ............................ 25
Speed, controlling
see Cruise control
Speedometer
Activating/deactivating the addi-
tional speedometer ........................ 198
Digital ............................................ 189
In the Instrument cluster ................. 31
Selecting the unit of measure-
ment .............................................. 197
Standing lamps
Changing bulbs .............................. 108
Display message ............................ 216
Switching on/off ........................... 101
Start/Stop button
Removing ....................................... 132
Starting the drive system .............. .133
Starting (vehicle) ............................... 132
STEER CONTROL .................................. 68
Steering (display message) .............. 225
Steering assistant STEER CON-
TROL
see STEER CONTROL
Steering wheel
Adjusting (manually) ........................ 93
Button overview ............................... 33
Buttons (on-board computer) ......... 184
Cleaning ......................................... 277
Important safety notes .................... 93
Paddle shifters ............................... 138
Steering wheel paddle shifters ........ 138
Stowage compartments
Armrest (front) ............................... 241
Armrest (under) ............................. 242
Center console .............................. 241
Center console (rear) ..................... 242
Cup holders ................................... 249
Eyeglasses compartment ............... 241 Glove box ....................................... 241
Important safety information ......... 240
Map pockets .................................. 243
Stowage net ................................... 243
Under driver's seat/front-
passenger sea
t.............................. 242
Stowage net ....................................... 243
Summer tires ..................................... 302
Sun visor ............................................ 251
Switching air-recirculation mode
on/off ................................................. 123 T
Tail lamps see Lights
Tailgate
Display message ............................ 224
Emergency unlocking ....................... 82
Important safety notes .................... 81
Opening dimensions ...................... 334
Opening/closing (from outside) ....... 82
Technical data
Capacities ...................................... 331
Information .................................... 330
Tires/wheels ................................. 325
Vehicle data ................................... 334
Telephone
Accepting a call (multifunction
steering wheel) .............................. 192
Display message ............................ 225
Introduction ................................... 192
Menu (on-board computer) ............ 192
Number from the phone book ........ 192
Redialing ........................................ 193
Rejecting/ending a call ................. 192
Temperature
Outside temperature ...................... 183
Setting (climate control )................ 120
Through-loading feature ................... 243
Tire pressure
Calling up (on-board computer) ..... 307
Checking manually ........................ 307
Display message ............................ 221
Important safety notes .................. 307
Maximum ....................................... 306
Not reached (TIREFIT) .................... 284
Note s............................................. 305 Index
15
Page 49 of 338

R
Only secure a child in a rearward-facing
child restraint system on the front-
passenger seat when the front-passenger
front air bag is deactivated. If the
PASSENGER AIR BAG OFF indicator lamp is permanently lit, the front-passenger front
air bag is deactivated (Y page 41).
R Always observe the instructions and safety
notes on the "Occupant Classification Sys- tem (OCS)" (Y page 49) and on "Children
in the vehicle" (Y page 56) in addition to
the child restraint system manufacturer's
installation instructions.
Objects in the vehicle interior may pre-
vent an air bag from functioning correctly.
Before starting your journey and to avoid risks
resulting from the speed of the air bag as it
deploys, make sure that:
R there are no people, animals or objects
between the vehicle occupants and an air
bag.
R there are no objects between the seat, door
and B-pillar.
R no hard objects, e.g. coat hangers, hang on
the grab handles or coat hooks.
R no accessories, such as cup holders, are
attached to the vehicle within the deploy-
ment area of an air bag, e.g. to doors, side
windows, rear side trim or side walls.
R no heavy, sharp-edged or fragile objects
are in the pockets of your clothing. Store
such objects in a suitable place. G
WARNING
If you modify the air bag cover or affix objects
such as stickers to it, the air bag can no longer function correctly. There is an increased risk
of injury.
Never modify an air bag cover or affix objectsto it. G
WARNING
Sensors to control the air bags are located in the doors. Modifications or work not per-
formed correctly to the doors or door panel-
ing, as well as damaged doors, can lead to the function of the sensors being impaired. The air
bags might therefore not function properly
any more. Consequently, the air bags cannot
protect vehicle occupants as they are
designed to do. There is an increased risk of
injury.
Never modify the doors or parts of the doors.
Always have work on the doors or door pan-
eling carried out at a qualified specialist work- shop.
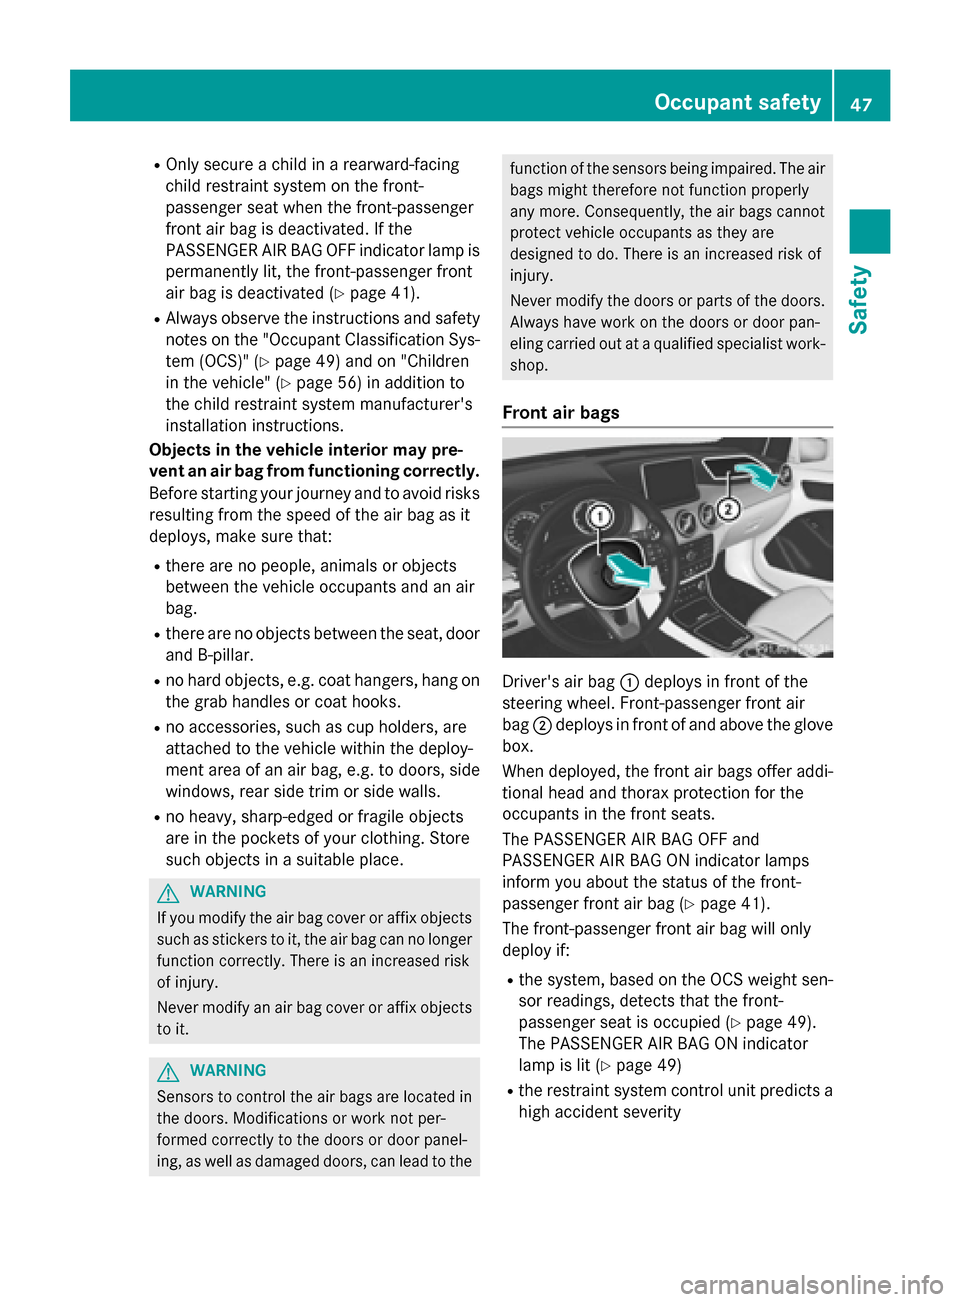
Front air bags Driver's air bag
:deploys in front of the
steering wheel. Front-passenger front air
bag ;deploys in front of and above the glove
box.
When deployed, the front air bags offer addi- tional head and thorax protection for the
occupants in the front seats.
The PASSENGER AIR BAG OFF and
PASSENGER AIR BAG ON indicator lamps
inform you about the status of the front-
passenger front air bag (Y page 41).
The front-passenger front air bag will only
deploy if:
R the system, based on the OCS weight sen-
sor readings, detects that the front-
passenger seat is occupied (Y page 49).
The PASSENGER AIR BAG ON indicator
lamp is lit (Y page 49)
R the restraint system control unit predicts a
high accident severity Occupant safety
47Safety Z
Page 162 of 338

fied specialist workshop. Consult a qualified
specialist workshop to arrange this.
Have brake pads installed and brake fluid
replaced at a qualified specialist workshop.
If the brake system has only been subject to
moderate loads, you should test the function- ality of your brakes at regular intervals.
You can find a description of Brake Assist
(BAS) on (Y page 63).
Mercedes-Benz recommends that you only
have brake pads/linings installed on your
vehicle which have been approved for
Mercedes-Benz vehicles or which correspond to an equivalent quality standard. Brake
pads/linings which have not been approved
for Mercedes-Benz vehicles or which are not
of an equivalent quality could affect your vehi-
cle's operating safety.
Mercedes-Benz recommends that you only
use brake fluid that has been specially
approved for your vehicle by Mercedes-Benz,
or which corresponds to an equivalent quality standard. Brake fluid which has not been
approved for Mercedes-Benz vehicles or
which is not of an equivalent quality could
affect your vehicle's operating safety.
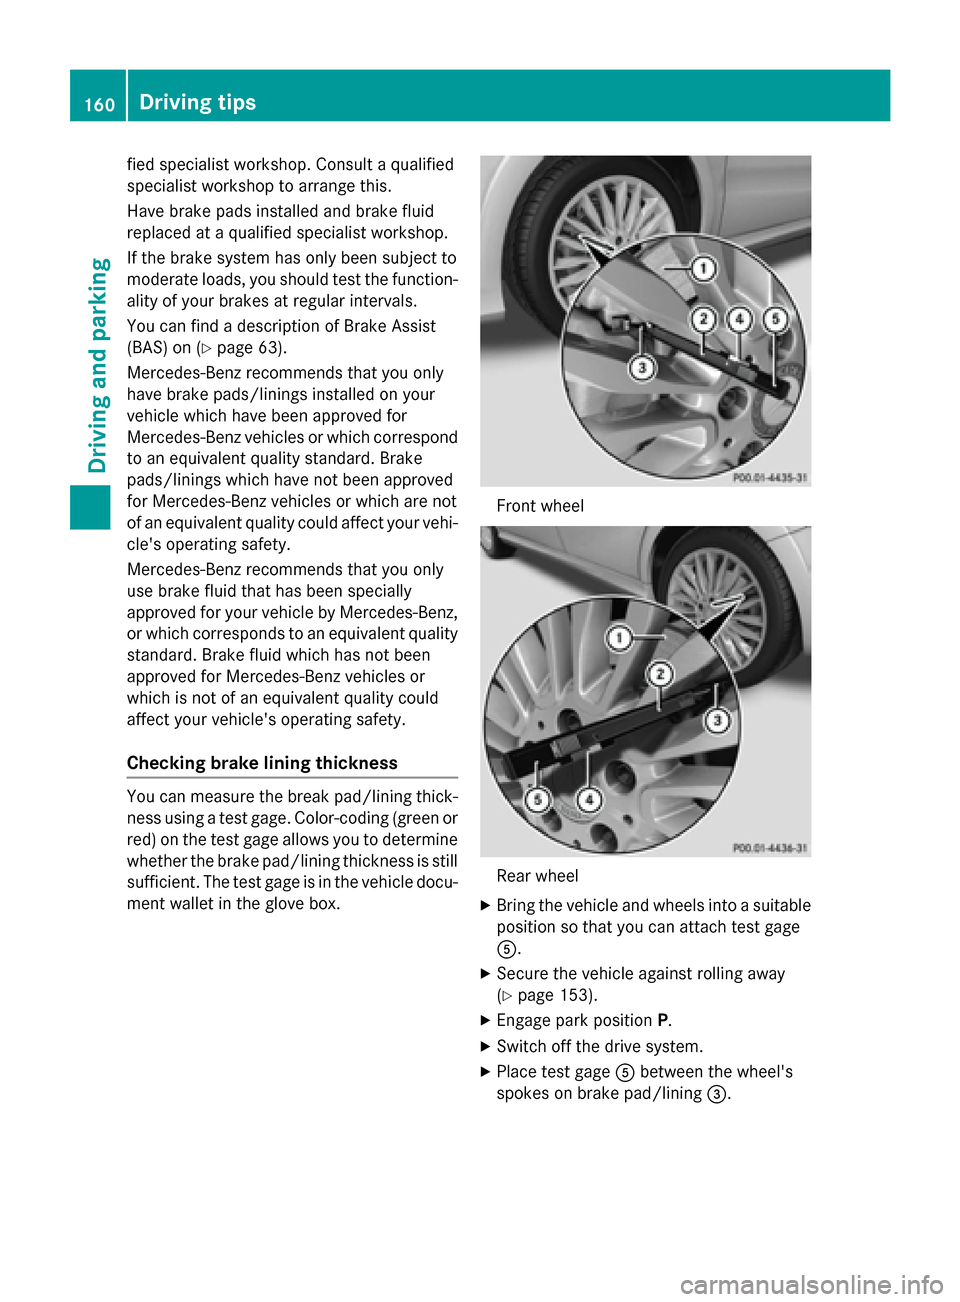
Checking brake lining thickness You can measure the break pad/lining thick-
ness using a test gage. Color-coding (green or
red) on the test gage allows you to determine whether the brake pad/lining thickness is still
sufficient. The test gage is in the vehicle docu-
ment wallet in the glove box. Front wheel
Rear wheel
X Bring the vehicle and wheels into a suitable
position so that you can attach test gage
A.
X Secure the vehicle against rolling away
(Y page 153).
X Engage park position P.
X Switch off the drive system.
X Place test gage Abetween the wheel's
spokes on brake pad/lining =.160
Driving tipsDriving and parking
Page 243 of 338

R
Always stow objects so that they cannot be
thrown around in such situations.
R Always make sure that objects do not pro-
trude from stowage spaces, parcel nets or
stowage nets.
R Close the lockable stowage spaces while
driving.
R Stow and secure objects that are heavy,
hard, pointy, sharp-edged, fragile or too
large in the cargo compartment.
Observe the loading guidelines (Y page 240).
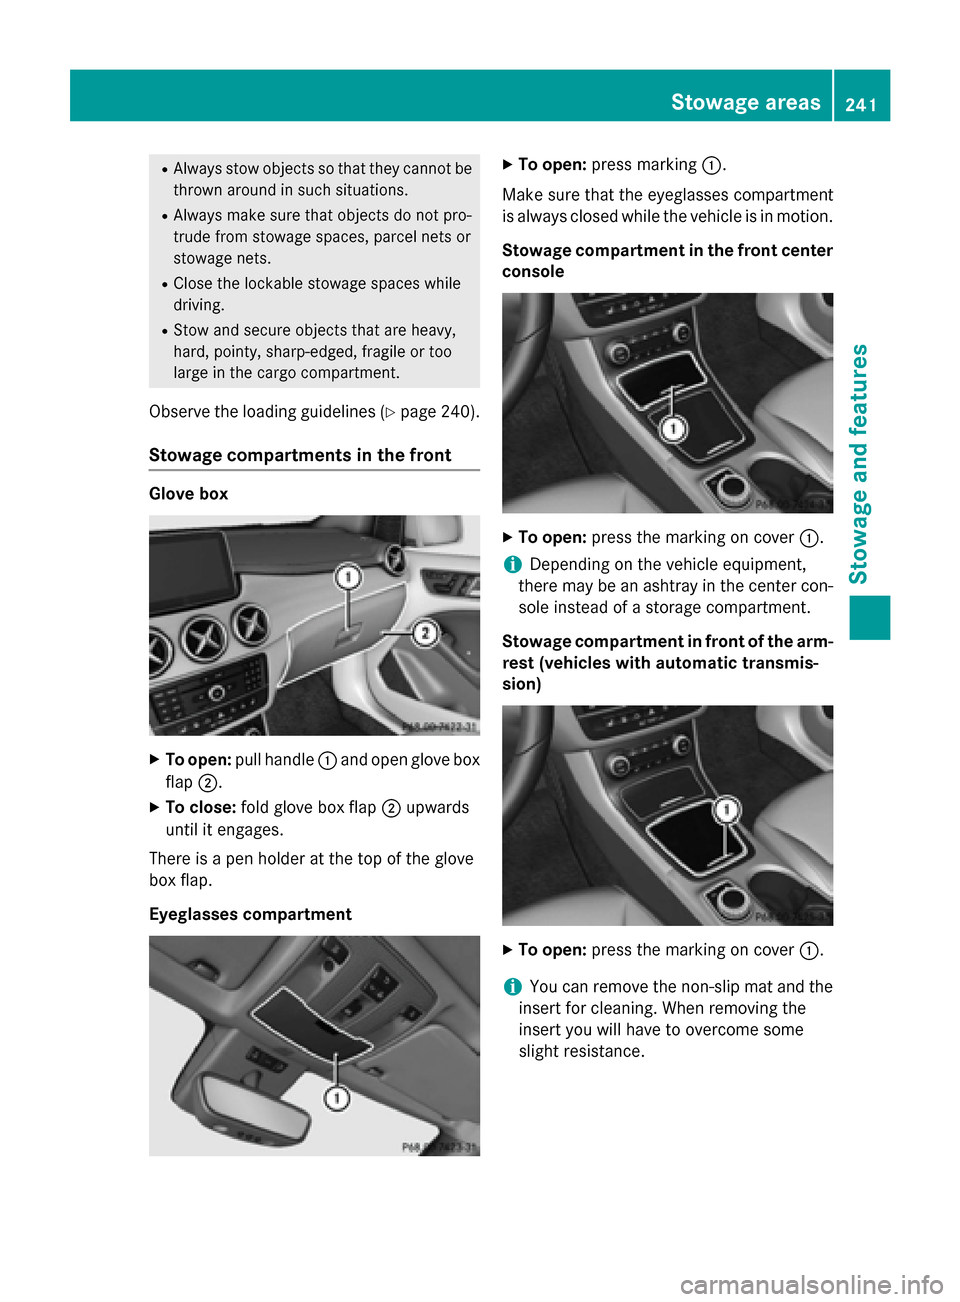
Stowage compartments in the front Glove box
X
To open: pull handle :and open glove box
flap ;.
X To close: fold glove box flap ;upwards
until it engages.
There is a pen holder at the top of the glove
box flap.
Eyeglasses compartment X
To open: press marking :.
Make sure that the eyeglasses compartment
is always closed while the vehicle is in motion.
Stowage compartment in the front centerconsole X
To open: press the marking on cover :.
i Depending on the vehicle equipment,
there may be an ashtray in the center con-
sole instead of a storage compartment.
Stowage compartment in front of the arm-
rest (vehicles with automatic transmis-
sion) X
To open: press the marking on cover :.
i You can remove the non-slip mat and the
insert for cleaning. When removing the
insert you will have to overcome some
slight resistance. Stowage areas
241Stowage an d features Z