2015 MERCEDES-BENZ B-Class ELECTRIC interior lights
[x] Cancel search: interior lightsPage 7 of 338

B
Backup lamp Changing bulb s.............................. 109
Display message ............................ 216
Bag hook ............................................ 245
BAS (Brake Assist System) ................. 63
Battery (SmartKey)
Checking .......................................... 75
Important safety notes .................... 75
Replacing ......................................... 75
Battery (vehicle)
Charging ........................................ 287
Display message ............................ 217
Important safety notes .................. 285
Jump starting ................................. 290
Blind Spot Assist
Activating/deactivating (on-
board computer) ............................ 195
Display message ............................ 219
Notes/function .............................. 177
Brake fluid
Display message ............................ 208
Notes ............................................. 332
Brake force distribution
see EBD (electronic brake force
distribution)
Brake lamps
Display message ............................ 215
Brake system
Driving safety systems ..................... 68
Brakes
ABS .................................................. 63
Adaptive Brake Assist ...................... 65
BAS .................................................. 63
Brake fluid (notes) ......................... 332
Display message ............................ 201
EBD .................................................. 68
Hill start assist ............................... 134
HOLD function ............................... 163
Important safety notes .................. 158
Maintenance .................................. 159
Parking brake ................................ 155
Riding tips ...................................... 158
Warning lamp ................................. 229
Breakdown
Towing away .................................. 292
see Flat tire Brightness control (instrument
cluster lighting)
................................... 31
Buttons on the steering wheel ......... 184 C
California Important notice for retail cus-
tomers and lessees .......................... 21
Calling up a malfunction
see Display messages
Care
Car wash ........................................ 272
Carpets .......................................... 278
Display ........................................... 276
Exterior lights ................................ 275
Gear or selector lever .................... 277
Interior ........................................... 276
Matte finish ................................... 274
Note s............................................. 272
Paint .............................................. 273
Plastic trim .................................... 276
Power washer ................................ 273
Rear view camera .......................... 276
Roof lining ...................................... 278
Seat belt ........................................ 278
Seat cove r..................................... 277
Sensors ......................................... 275
Steering wheel ............................... 277
Trim pieces .................................... 277
Washing by hand ........................... 273
Wheels ........................................... 274
Windows ........................................ 274
Wiper blades .................................. 275
Wooden trim .................................. 277
Cargo compartment cover
Important safety notes .................. 246
Installing/removing ....................... 246
Notes/how to use ......................... 246
Cargo compartment enlargement ... 244
Cargo compartment floor
Height adjustment ......................... 248
Important safety notes .................. 247
Opening/closing ............................ 248
Stowage well (under )..................... 247
Cargo net
Attaching ....................................... 247
Important safety information ......... 246 Index
5
Page 12 of 338
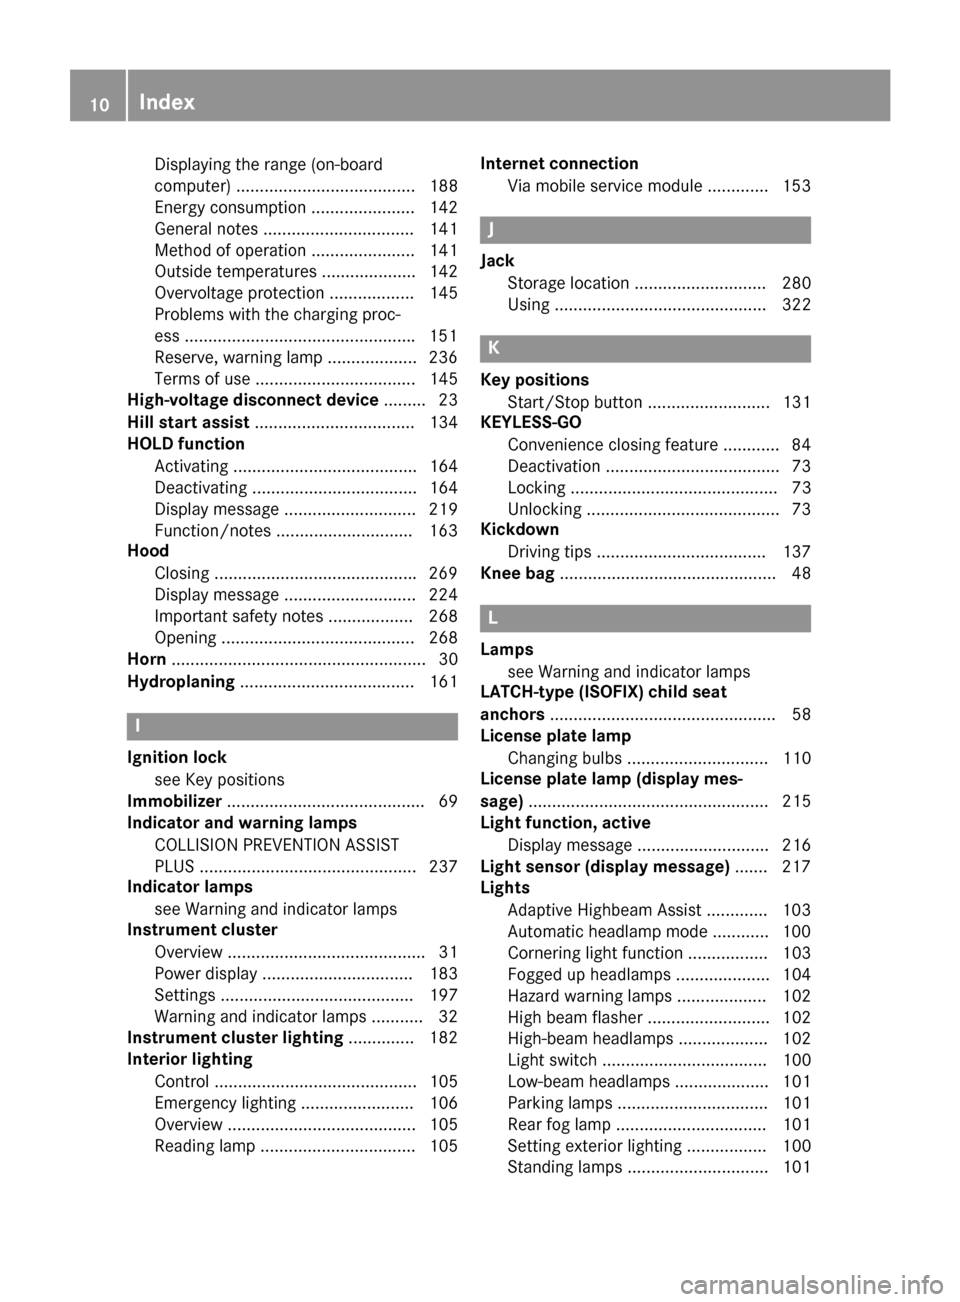
Displaying the range (on-board
computer) ...................................... 188
Energy consumption ...................... 142
General notes ................................ 141
Method of operation ...................... 141
Outside temperatures .................... 142
Overvoltage protection .................. 145
Problems with the charging proc-
ess ................................................ .151
Reserve, warning lamp ................... 236
Terms of use .................................. 145
High-voltage disconnect device ......... 23
Hill start assist .................................. 134
HOLD function
Activating ....................................... 164
Deactivating ................................... 164
Display message ............................ 219
Function/notes ............................ .163
Hood
Closing .......................................... .269
Display message ............................ 224
Important safety notes .................. 268
Opening ......................................... 268
Horn ...................................................... 30
Hydroplaning ..................................... 161 I
Ignition lock see Key positions
Immobilizer .......................................... 69
Indicator and warning lamps
COLLISION PREVENTION ASSIST
PLUS .............................................. 237
Indicator lamps
see Warning and indicator lamps
Instrument cluster
Overview .......................................... 31
Power displa y................................ 183
Setting s......................................... 197
Warning and indicator lamps ........... 32
Instrument cluster lighting .............. 182
Interior lighting
Control ........................................... 105
Emergency lighting ........................ 106
Overview ........................................ 105
Reading lamp ................................. 105 Internet connection
Via mobile service modul e............. 153 J
Jack Storage location ............................ 280
Using ............................................. 322 K
Key positions Start/Stop button .......................... 131
KEYLESS-GO
Convenience closing feature ............ 84
Deactivation ..................................... 73
Locking ............................................ 73
Unlocking ......................................... 73
Kickdown
Driving tip s.................................... 137
Knee bag .............................................. 48 L
Lamps see Warning and indicator lamps
LATCH-type (ISOFIX) child seat
anchors ................................................ 58
License plate lamp
Changing bulbs .............................. 110
License plate lamp (display mes-
sage) ................................................... 215
Light function, active
Display message ............................ 216
Light sensor (display message) ....... 217
Lights
Adaptive Highbeam Assist ............. 103
Automatic headlamp mode ............ 100
Cornering light function ................. 103
Fogged up headlamp s.................... 104
Hazard warning lamps ................... 102
High beam flasher .......................... 102
High-beam headlamp s................... 102
Light switch ................................... 100
Low-beam headlamp s.................... 101
Parking lamps ................................ 101
Rear fog lamp ................................ 101
Setting exterior lighting ................. 100
Standing lamps .............................. 101 10
Index
Page 44 of 338
The indicator lamps display the status of the
front-passenger front air bag.
R PASSENGER AIR BAG ON lights up: the
front-passenger front air bag is enabled. If,
in the event of an accident, all deployment
criteria are met, the front-passenger front
air bag is deployed.
R PASSENGER AIR BAG OFF lights up: the
front-passenger front air bag is deactiva-
ted. It will then not be deployed in the event of an accident.
Depending on the person in the front-
passenger seat, the front-passenger front air
bag must either be deactivated or enabled;
see the following points. You must make sure
of this both before and during a journey.
R Children in a child restraint system:
whether the front-passenger front air bag is
enabled or deactivated depends on the
installed child restraint system, and the age and size of the child. Therefore, be sure to
observe the notes on the "Occupant Clas-
sification System (OCS)" (Y page 49) and
on "Children in the vehicle" (Y page 56).
There you will also find instructions on rear-
ward and forward-facing child restraint sys- tems on the front-passenger seat.
R All other persons: depending on the clas-
sification of the person in the front-
passenger seat, the front-passenger front
air bag is enabled or deactivated
(Y page 49). Be sure to observe the notes
on "Seat belts“ (Y page 42) and "Air bags"
(Y page 46). There you can also find infor-
mation on the correct seat position. Seat belts
Introduction Seat belts are the most effective means of
restricting the movement of vehicle occu-
pants in the event of an accident or the vehi-
cle rolling over. This reduces the risk of vehi- cle occupants coming into contact with parts
of the vehicle interior or being ejected from the vehicle. Furthermore, the seat belt helps
to keep the vehicle occupant in the best posi-
tion in relation to the air bag.
The seat belt system comprises:
R Seat belts
R Emergency Tensioning Devices for the
front seat belts and the outer seat belts in
the rear
R Seat belt force limiters for the front seat
belts and the outer seat belts in the rear
If the seat belt is pulled out of the belt outlet quickly or with a jerky movement, the belt
retractor locks. The belt strap cannot be
extracted any further.
The Emergency Tensioning Device tightens
the seat belt in an accident, pulling the belt
close against the body. However it does not
pull the vehicle occupant back in the direction
of the backrest.
The Emergency Tensioning Device does not
correct an incorrect seat position or the rout- ing of an incorrectly fastened seat belt.
When triggered, a seat belt force limiter helps
to reduce the force exerted by the seat belt on
the vehicle occupant.
The seat belt force limiters for the front seats
are synchronized with the front air bags,
which absorb part of the deceleration force.
This can reduce the force exerted on the vehi- cle occupants during an accident.
! If the front-passenger seat is unoccupied,
do not insert the belt tongue into the buckle of the front-passenger seat. This may oth-
erwise lead to the triggering of the Emer-
gency Tensioning Device in the event of anaccident, which will then need to be
replaced.
Important safety notes The use of seat belts and child restraint sys-
tems is required by law in:
R all 50 states
R the U.S. territories 42
Occupant safetySafety
Page 52 of 338
The indicator lamps display the status of the
front-passenger front air bag.
R PASSENGER AIR BAG OFF lights up: the
front-passenger front air bag is deactiva-
ted. It will then not be deployed in the event of an accident.
R PASSENGER AIR BAG ON lights up: the
front-passenger front air bag is enabled. If,
in the event of an accident, all deployment
criteria are met, the front-passenger front
air bag is deployed.
If the status of the front-passenger front air
bag changes while the vehicle is in motion, an
air bag display message appears in the instru-
ment cluster (Y page 213). When the front-
passenger seat is occupied, always pay atten-
tion to the PASSENGER AIR BAG ON and
PASSENGER AIR BAG OFF indicator lamps. Be aware of the status of the front-passenger
front air bag both before and during the jour-ney. G
WARNING
If the PASSENGER AIR BAG OFF indicator
lamp is lit, the front-passenger front air bag is disabled. It will not be deployed in the event of
an accident and cannot perform its intended
protective function. A person in the front-
passenger seat could then, for example, come
into contact with the vehicle's interior, espe-
cially if the person is sitting too close to the
dashboard. This poses an increased risk of
injury or even fatal injury.
When the front-passenger seat is occupied,
always ensure that:
R the classification of the person in the front-
passenger seat is correct and the front-
passenger front air bag is enabled or disa-
bled in accordance with the person in the
front-passenger seat
R the front-passenger seat has been moved
back as far back as possible.
R the person is seated correctly.
Make sure, both before and during the jour-
ney, that the status of the front-passenger
front air bag is correct. G
WARNING
If you secure a child in a rearward-facing child
restraint system on the front-passenger seat
and the PASSENGER AIR BAG ON indicator
lamp is lit up, the front-passenger front air bag may deploy in an accident. The child could be
struck by the air bag. This poses an increased risk of injury or even fatal injury.
Make sure that the front-passenger front air
bag has been disabled. The PASSENGER AIR
BAG OFF indicator lamp must be lit.
If the PASSENGER AIR BAG OFF indicator
lamp remains off and/or the PASSENGER AIR BAG ON indicator lamp lights up, do not install
a rearward-facing child restraint system on
the front-passenger seat. You can find more
information on OCS under "Problems with the Occupant Classification System"
(Y page 53). G
WARNING
If you secure a child in a forward-facing child
restraint system on the front-passenger seat
and you position the front-passenger seat too close to the dashboard, in the event of an
accident, the child could:
R come into contact with the vehicle's inte-
rior if the PASSENGER AIR BAG OFF indi-
cator lamp is lit, for example
R be struck by the air bag if the PASSENGER
AIR BAG ON is lit up
This poses an increased risk of injury or even fatal injury.
Move the front-passenger seat as far back as
possible. Always make sure that the shoulder belt strap is correctly routed from the vehicle
belt outlet to the shoulder belt guide on the
child restraint system. The shoulder belt strap
must be routed forwards and downwards
from the vehicle belt outlet. If necessary,
adjust the vehicle belt outlet and the front-
passenger seat accordingly. Always observe
the child restraint system manufacturer's
installation instructions. 50
Occupant safetySafety
Page 101 of 338
Useful information
............................100
Exterior lighting ................................ 100
Interior lighting ................................. 105
Replacing bulbs ................................. 106
Windshield wipers ............................111 99Lights and windshield wipers
Page 107 of 338
Interior lighting
Overview of interior lighting
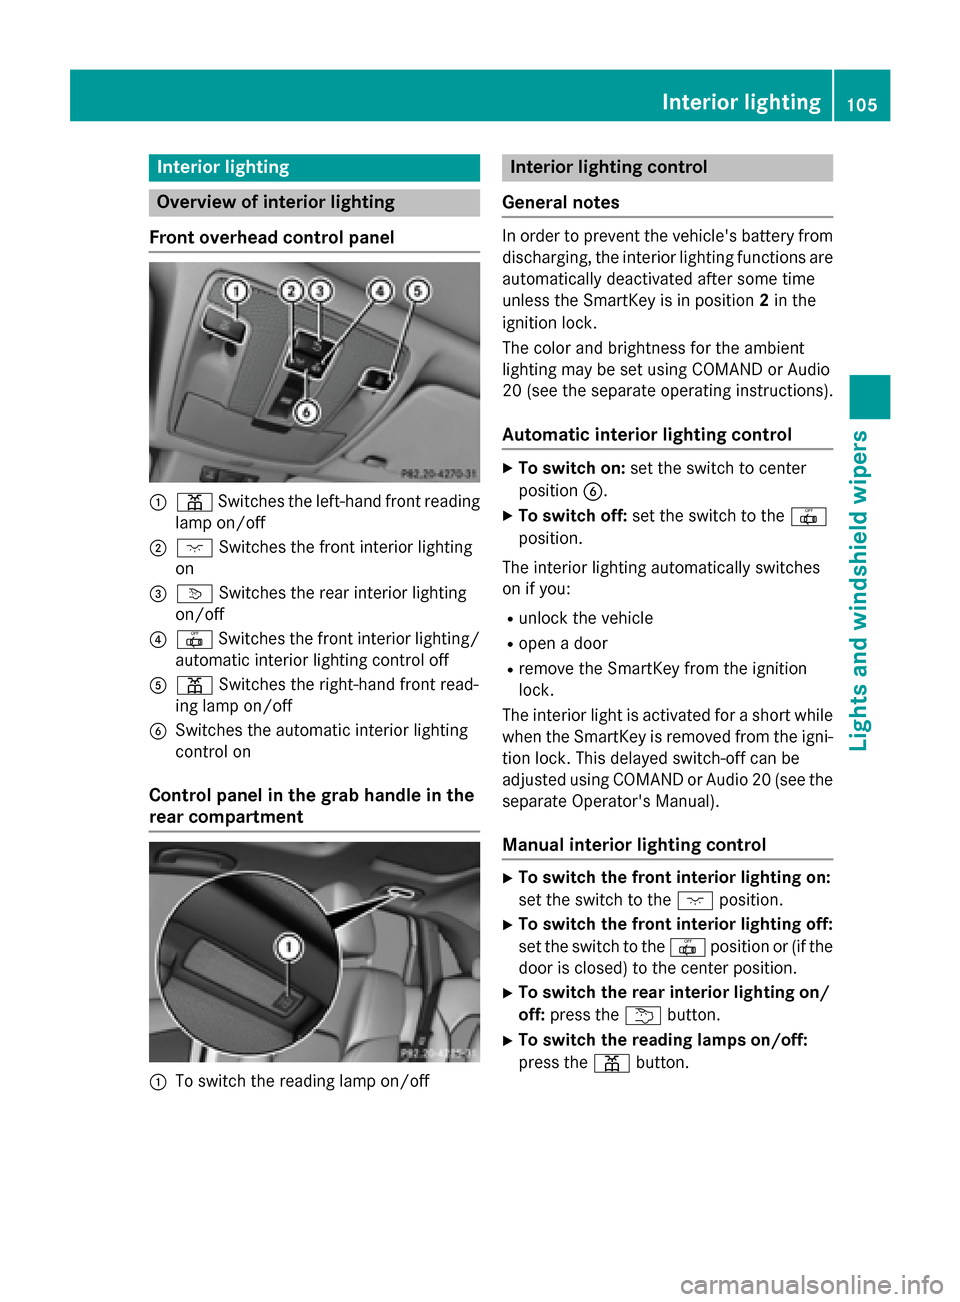
Front overhead control panel :
p Switches the left-hand front reading
lamp on/off
; c Switches the front interior lighting
on
= v Switches the rear interior lighting
on/off
? | Switches the front interior lighting/
automatic interior lighting control off
A p Switches the right-hand front read-
ing lamp on/off
B Switches the automatic interior lighting
control on
Control panel in the grab handle in the
rear compartment :
To switch the reading lamp on/off Interior lighting control
General notes In order to prevent the vehicle's battery from
discharging, the interior lighting functions are
automatically deactivated after some time
unless the SmartKey is in position 2in the
ignition lock.
The color and brightness for the ambient
lighting may be set using COMAND or Audio
20 (see the separate operating instructions).
Automatic interior lighting control X
To switch on: set the switch to center
position B.
X To switch off: set the switch to the |
position.
The interior lighting automatically switches
on if you:
R unlock the vehicle
R open a door
R remove the SmartKey from the ignition
lock.
The interior light is activated for a short while when the SmartKey is removed from the igni-
tion lock. This delayed switch-off can be
adjusted using COMAND or Audio 20 (see the separate Operator's Manual).
Manual interior lighting control X
To switch the front interior lighting on:
set the switch to the cposition.
X To switch the front interior lighting off:
set the switch to the |position or (if the
door is closed) to the center position.
X To switch the rear interior lighting on/
off: press the ubutton.
X To switch the reading lamps on/off:
press the pbutton. Interior lighting
105Lights and windshield wipers Z
Page 108 of 338
Crash-responsive emergency lighting
The interior lighting is activated automatically
if the vehicle is involved in an accident.
X To switch off the crash-responsive
emergency lighting: press the hazard
warning lamp button.
or X Lock and then unlock the vehicle using the
SmartKey. Replacing bulbs
Important safety notes
Xenon bulbs G
DANGER
Xenon bulbs carry a high voltage. You can get an electric shock if you remove the cover of
the Xenon bulb and touch the electrical con-
tacts. There is a risk of fatal injury.
Never touch the parts or the electrical con-
tacts of the Xenon bulb. Always have work on
the Xenon bulbs carried out at a qualified spe-
cialist workshop.
If your vehicle is equipped with Xenon bulbs,
you can recognize this by the following: the
cone of light from the Xenon bulbs moves
from the top to the bottom and back again
when you start the drive system. For this to be
observed, the lights must be switched on
before the drive system is started.
Bulbs and lamps are an important aspect of
vehicle safety. You must therefore make sure that these function correctly at all times.
Have the headlamp setting checked regularly.
Other bulbs G
WARNING
Bulbs, lamps and connectors can get very hot when operating. If you change a bulb, you
could burn yourself on these components.
There is a risk of injury.
Allow these components to cool down before changing a bulb. Do not use a bulb that has been dropped or if
its glass tube has been scratched.
The bulb may explode if:
R you touch it
R it is hot
R you drop it
R you scratch it
Only operate bulbs in enclosed lamps
designed for that purpose. Only install spare
bulbs of the same type and the specified volt- age.
Marks on the glass tube reduce the service
life of the bulbs. Do not touch the glass tube
with your bare hands. If necessary, clean the
glass tube when cold with alcohol or spirit and
rub it off with a lint-free cloth.
Protect bulbs from moisture during opera-
tion. Do not allow bulbs to come into contact
with liquids.
There are bulbs other than the Xenon bulbs
that you cannot replace. Replace only the
bulbs listed (Y page 106). Have the bulbs that
you cannot replace yourself changed at a
qualified specialist workshop.
If you require assistance changing bulbs, con- sult a qualified specialist workshop.
If the new bulb still does not light up, consult
a qualified specialist workshop.
Bulbs and lamps are an important aspect of
vehicle safety. You must therefore make sure that these function correctly at all times.
Have the headlamp setting checked regularly. Overview: changing bulbs/bulb types
You can change the following bulbs. The bulb type can be found in the legend. 106
Replacing bulbsLights and windshield wipers
Page 125 of 338
Problems with the rear window defroster
Problem
Possible causes/consequences and
M
MSolutions The rear window
defroster has deactiva-
ted prematurely or can-
not be activated. The battery has not been sufficiently charged.
X Switch off any consumers that are not required, e.g. reading
lamps, interior lighting or the seat heating.
When the battery is sufficiently charged, the rear window
defroster can be activated again. Activating/deactivating air-recircula-
tion mode
General notes You can deactivate the flow of fresh air if
unpleasant odors are entering the vehicle
from outside. The air already inside the vehi-
cle will then be recirculated.
If you switch on air-recirculation mode, the
windows can fog up more quickly, in particu-
lar at low temperatures. Only use air-recircu-
lation mode briefly to prevent the windows
from fogging up.
Switching on/off X
Turn the SmartKey to position 2in the igni-
tion lock (Y page 131).
X To activate: press theebutton.
The indicator lamp in the ebutton lights
up.
Air-recirculation mode switches on automat-
ically:
R at high outside temperatures
R at high levels of pollution
When air-recirculation mode is activated
automatically, the indicator lamp in the e
button is not lit. Outside air is added after
about 30 minutes.
X To deactivate: press theebutton.
The indicator lamp in the ebutton goes
out. i
Air-recirculation mode deactivates auto-
matically:
R after approximately five minutes at out-
side temperatures below approximately
45 ‡ (7 †)
R after approximately five minutes if the
"Cooling with air dehumidification" func-
tion is deactivated
R after approximately 30 minutes at out-
side temperatures above approximately
45 ‡ (7 †) if the cooling with air dehu-
midification function is activated Convenience opening/closing using
the air-recirculation button
G
WARNING
When using the convenience closing feature,
parts of the body could be trapped in the clos- ing area when a side window is being closed. There is a risk of injury.
Observe the complete closing procedure
when the convenience closing feature is oper-
ating. Make sure that no body parts are in
close proximity during the closing procedure. G
WARNING
During convenience opening parts of the body could be drawn in or become trapped
between the side window and window frame.
There is a risk of injury.
Make sure that nobody touches the side win-
dow during the opening procedure. If some-
one becomes trapped, press the Wswitch Operating the climate control systems
123Climate control
Z