2015 MERCEDES-BENZ B-Class ELECTRIC service
[x] Cancel search: servicePage 146 of 338
e-Navigator App (COMAND)
:
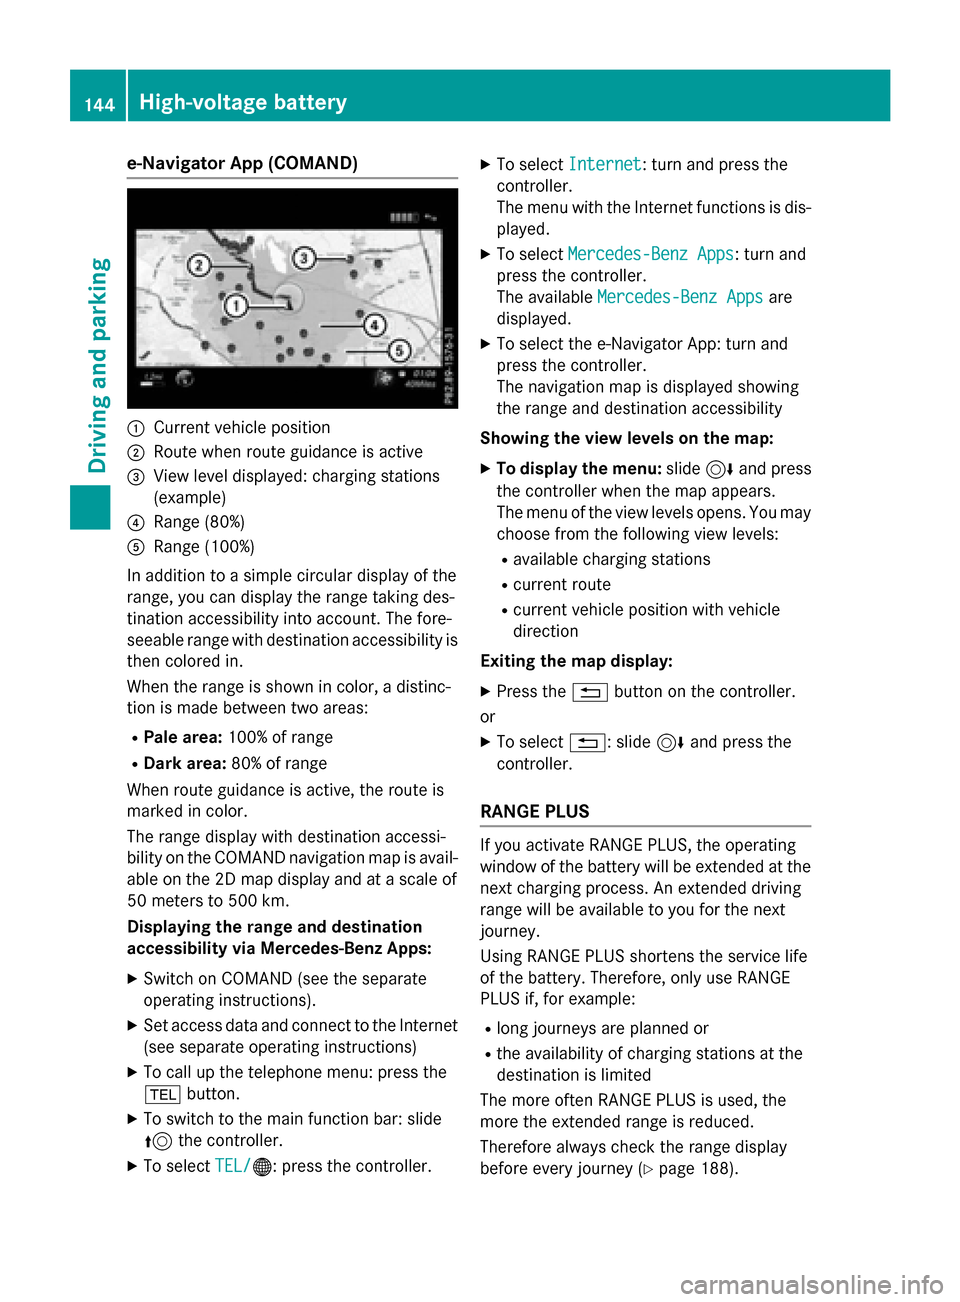
Current vehicle position
; Route when route guidance is active
= View level displayed: charging stations
(example)
? Range (80%)
A Range (100%)
In addition to a simple circular display of the
range, you can display the range taking des-
tination accessibility into account. The fore-
seeable range with destination accessibility is
then colored in.
When the range is shown in color, a distinc-
tion is made between two areas:
R Pale area: 100% of range
R Dark area: 80% of range
When route guidance is active, the route is
marked in color.
The range display with destination accessi-
bility on the COMAND navigation map is avail-
able on the 2D map display and at a scale of
50 meters to 500 km.
Displaying the range and destination
accessibility via Mercedes-Benz Apps:
X Switch on COMAND (see the separate
operating instructions).
X Set access data and connect to the Internet
(see separate operating instructions)
X To call up the telephone menu: press the
% button.
X To switch to the main function bar: slide
5 the controller.
X To select TEL/ TEL/®: press the controller. X
To select Internet Internet: turn and press the
controller.
The menu with the Internet functions is dis-
played.
X To select Mercedes-Benz Apps Mercedes-Benz Apps: turn and
press the controller.
The available Mercedes-Benz Apps Mercedes-Benz Apps are
displayed.
X To select the e-Navigator App: turn and
press the controller.
The navigation map is displayed showing
the range and destination accessibility
Showing the view levels on the map: X To display the menu: slide6and press
the controller when the map appears.
The menu of the view levels opens. You may
choose from the following view levels:
R available charging stations
R current route
R current vehicle position with vehicle
direction
Exiting the map display: X Press the %button on the controller.
or
X To select %: slide 6and press the
controller.
RANGE PLUS If you activate RANGE PLUS, the operating
window of the battery will be extended at the
next charging process. An extended driving
range will be available to you for the next
journey.
Using RANGE PLUS shortens the service life
of the battery. Therefore, only use RANGE
PLUS if, for example:
R long journeys are planned or
R the availability of charging stations at the
destination is limited
The more often RANGE PLUS is used, the
more the extended range is reduced.
Therefore always check the range display
before every journey (Y page 188).144
High-voltage batteryDriving an
d parking
Page 166 of 338
The vehicle is kept stationary without the
driver having to depress the brake pedal.
The braking effect is canceled and the HOLD
function deactivated when you depress the
accelerator pedal to pull away.
Important safety notes G
WARNING
When leaving the vehicle, it can still roll away despite being braked by the HOLD function if:
R there is a malfunction in the system or in
the voltage supply.
R the HOLD function has been deactivated by
pressing the accelerator pedal or the brake
pedal, e.g. by a vehicle occupant.
R the electrical system in the engine com-
partment, the battery or the fuses have
been tampered with.
R the battery is disconnected
There is a risk of an accident.
If you wish to exit the vehicle, always turn off the HOLD function and secure the vehicle
against rolling away.
! If the HOLD function is activated, the vehi-
cle brakes automatically in certain situa-
tions.
To prevent damage to the vehicle, deacti-
vate the HOLD function in the following or
other similar situations:
R when towing the vehicle
R in the car wash
Deactivating the HOLD function
(Y page 164).
Activation conditions You can activate the HOLD function if:
R the vehicle is stationary
R the engine is running or if it has been auto-
matically switched off by the ECO start/
stop function
R the driver's door is closed or your seat belt
is fastened R
the electric parking brake is released
R the transmission is in position D,Ror N
Activating the HOLD function X
Make sure that the activation conditions
are met.
X Depress the brake pedal.
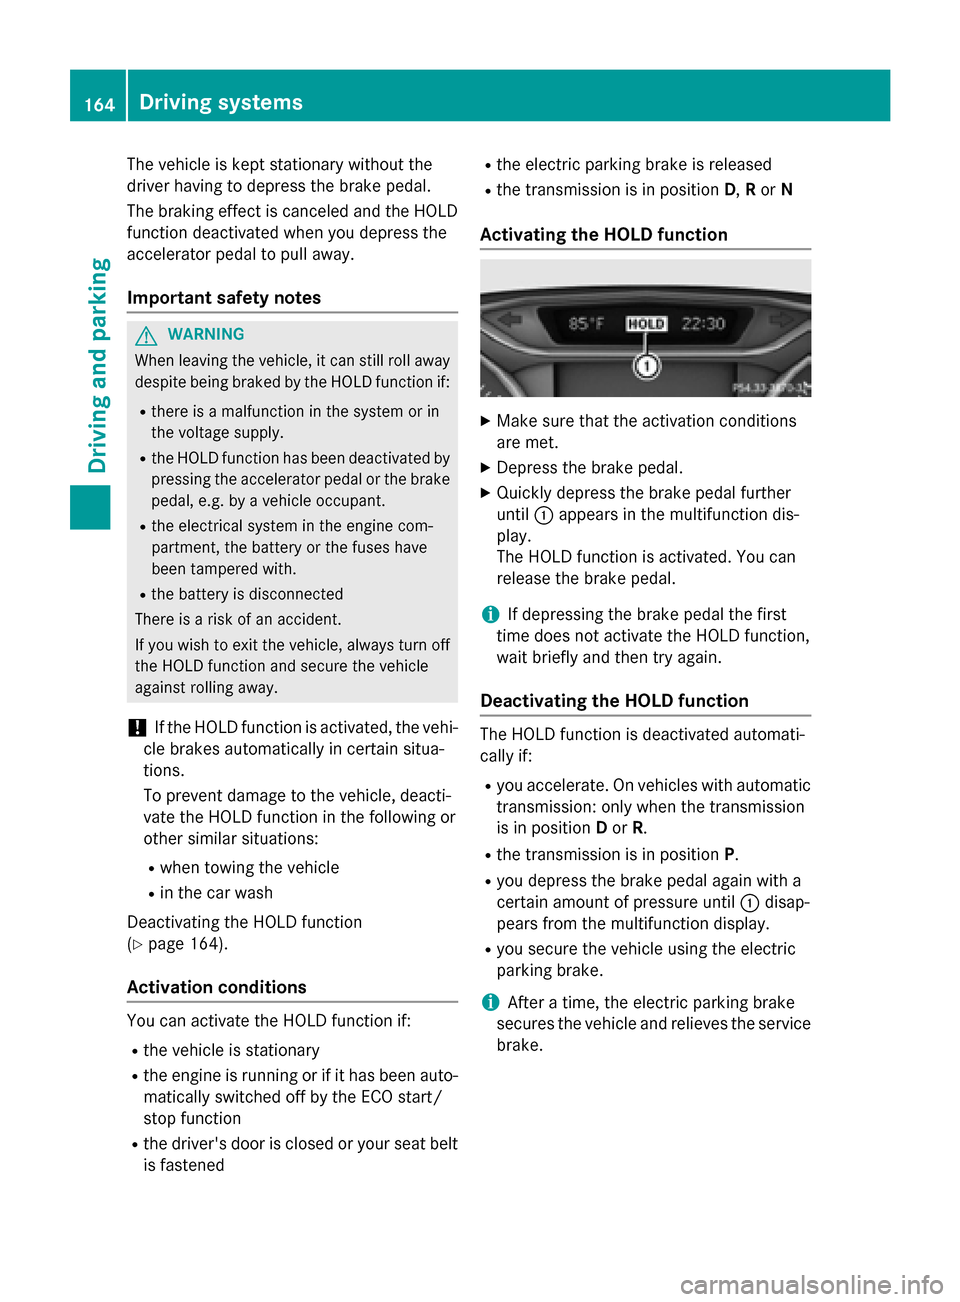
X Quickly depress the brake pedal further
until :appears in the multifunction dis-
play.
The HOLD function is activated. You can
release the brake pedal.
i If depressing the brake pedal the first
time does not activate the HOLD function,
wait briefly and then try again.
Deactivating the HOLD function The HOLD function is deactivated automati-
cally if:
R you accelerate. On vehicles with automatic
transmission: only when the transmission
is in position Dor R.
R the transmission is in position P.
R you depress the brake pedal again with a
certain amount of pressure until :disap-
pears from the multifunction display.
R you secure the vehicle using the electric
parking brake.
i After a time, the electric parking brake
secures the vehicle and relieves the service
brake. 164
Driving systemsDriving and parking
Page 179 of 338

The following information is displayed:
R length of the journey since the last break.
R the attention level determined by ATTEN-
TION ASSIST ( Attention Level
Attention Level), dis-
played in a bar display in five levels from
high to low
R If ATTENTION ASSIST is unable to calculate
the attention level and cannot issue a warn-
ing, the System Suspended System Suspended message
appears. The bar display then changes the
display, e.g. if you are driving at a speed
below 37 mph (60 km/h) or above 124 mph
(200 km/h).
Activating ATTENTION ASSIST X
Activate ATTENTION ASSIST using the on-
board computer (Y page 194).
The system determines the attention level
of the driver depending on the setting
selected:
Selection Standard
Standard: the sensitivity with
which the system determines the attention
level is set to normal.
Selection Sensitive Sensitive: the sensitivity is set
higher. The attention level detected by Atten- tion Assist is adapted accordingly and the
driver is warned earlier.
When ATTENTION ASSIST is deactivated, the é symbol appears in the multifunction
display in the assistance graphic display.
When ATTENTION ASSIST has been deactiva-
ted, it is automatically reactivated after the
engine has been stopped. The sensitivity
selected corresponds to the last selection
activated (standard/sensitive).
Warning in the multifunction display If fatigue or increasing lapses in concentra-
tion are detected, a warning appears in the
multifunction display:
ATTENTION ASSIST ATTENTION ASSIST
Take a Break! Take a Break!.
In addition to the message shown in the mul-
tifunction display, you will then hear a warn-
ing tone. X
If necessary, take a break.
X Confirm the message by pressing the a
button on the steering wheel.
On long journeys, take regular breaks in good
time to allow yourself to rest properly. If you
do not take a break and ATTENTION ASSIST
still detects increasing lapses in concentra-
tion, you will be warned again after
15 minutes at the earliest. This will only hap-
pen if ATTENTION ASSIST still detects typical indicators of fatigue or increasing lapses in
concentration.
If a warning is output in the multifunction dis-
play, a service station search is performed in
COMAND. You can select a service station
and navigation to this service station will then
begin. This function can be activated and
deactivated in COMAND. Blind Spot Assist
General notes Blind Spot Assist monitors the areas on either
side of the vehicle that are not visible to the
driver with two lateral, rear-facing radar sen-
sors. A warning display in the exterior mirrors draws your attention to vehicles detected in
the monitored area. If you then switch on thecorresponding turn signal to change lanes,
you will also receive a visual and audible col-
lision warning.
Blind Spot Assist supports you from a speed
of approximately 20 mph (30 km/h).
Important safety notes G
WARNING
Blind Spot Assist does not react to:
R vehicles overtaken too closely on the side,
placing them in the blind spot area
R vehicles which approach with a large speed
differential and overtake your vehicle
As a result, Blind Spot Assist may not give
warnings in such situations. There is a risk of an accident. Driving systems
177Driving and parking
Z
Page 194 of 338
X
Switch on COMAND and select video DVD
(see the separate operating instructions).
X Press the =or; button on the steer-
ing wheel to select the Audio
Audio menu.
X To select the next or previous scene:
briefly press the 9or: button.
X To select a scene from the scene list
(rapid scrolling): press and hold the 9
or : button until desired scene :has
been reached. Telephone menu
Introduction G
WARNING
If you operate information systems and com-
munication equipment integrated in the vehi- cle while driving, you will be distracted from
traffic conditions. You could also lose control of the vehicle. There is a risk of an accident.
Only operate the equipment when the traffic
situation permits. If you are not sure that this
is possible, park the vehicle paying attention
to traffic conditions and operate the equip-
ment when the vehicle is stationary.
When telephoning, you must observe the
legal requirements for the country in which
you are currently driving.
X Switch on the mobile phone (see the man-
ufacturer’s operating instructions).
X Switch on Audio 20 or COMAND, see the
separate operating instructions.
X Establish a Bluetooth ®
connection to Audio
20 or COMAND, see the separate operating
instructions.
X Press the =or; button on the steer-
ing wheel to select the Tel
Tel menu. You will see one of the following display mes-
sages in the multifunction display:
R Phone READY Phone READY or the name of the network
provider: the mobile phone has found a
network and is ready to receive.
R Phone No Service Phone No Service: there is no network
available or the mobile phone is searching
for a network.
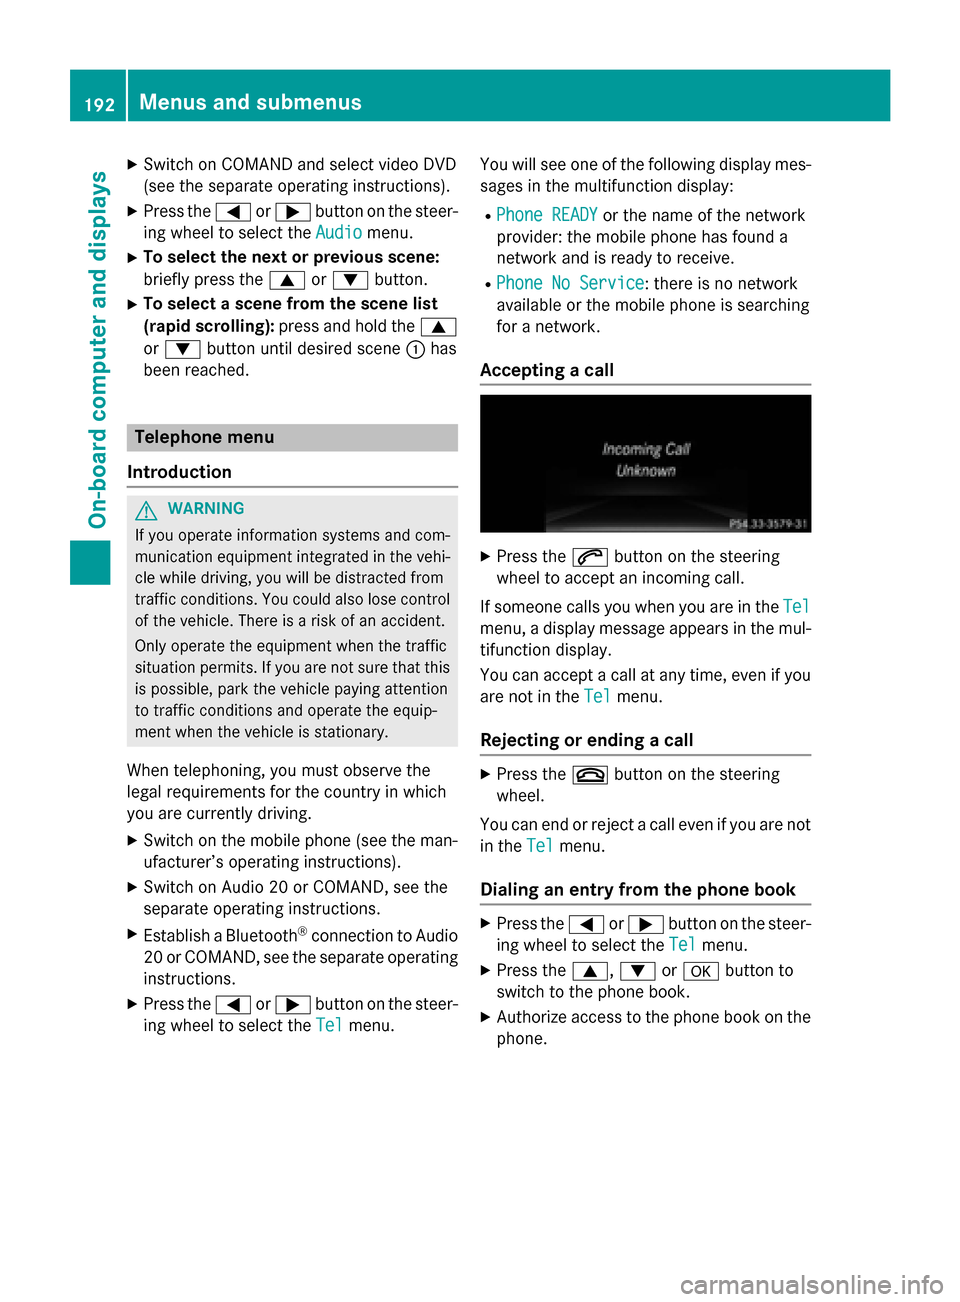
Accepting a call X
Press the 6button on the steering
wheel to accept an incoming call.
If someone calls you when you are in the Tel Tel
menu, a display message appears in the mul- tifunction display.
You can accept a call at any time, even if you
are not in the Tel
Tel menu.
Rejecting or ending a call X
Press the ~button on the steering
wheel.
You can end or reject a call even if you are not
in the Tel
Tel menu.
Dialing an entry from the phone book X
Press the =or; button on the steer-
ing wheel to select the Tel
Tel menu.
X Press the 9,:ora button to
switch to the phone book.
X Authorize access to the phone book on the
phone. 192
Menus and submenusOn-board computer and displays
Page 197 of 338
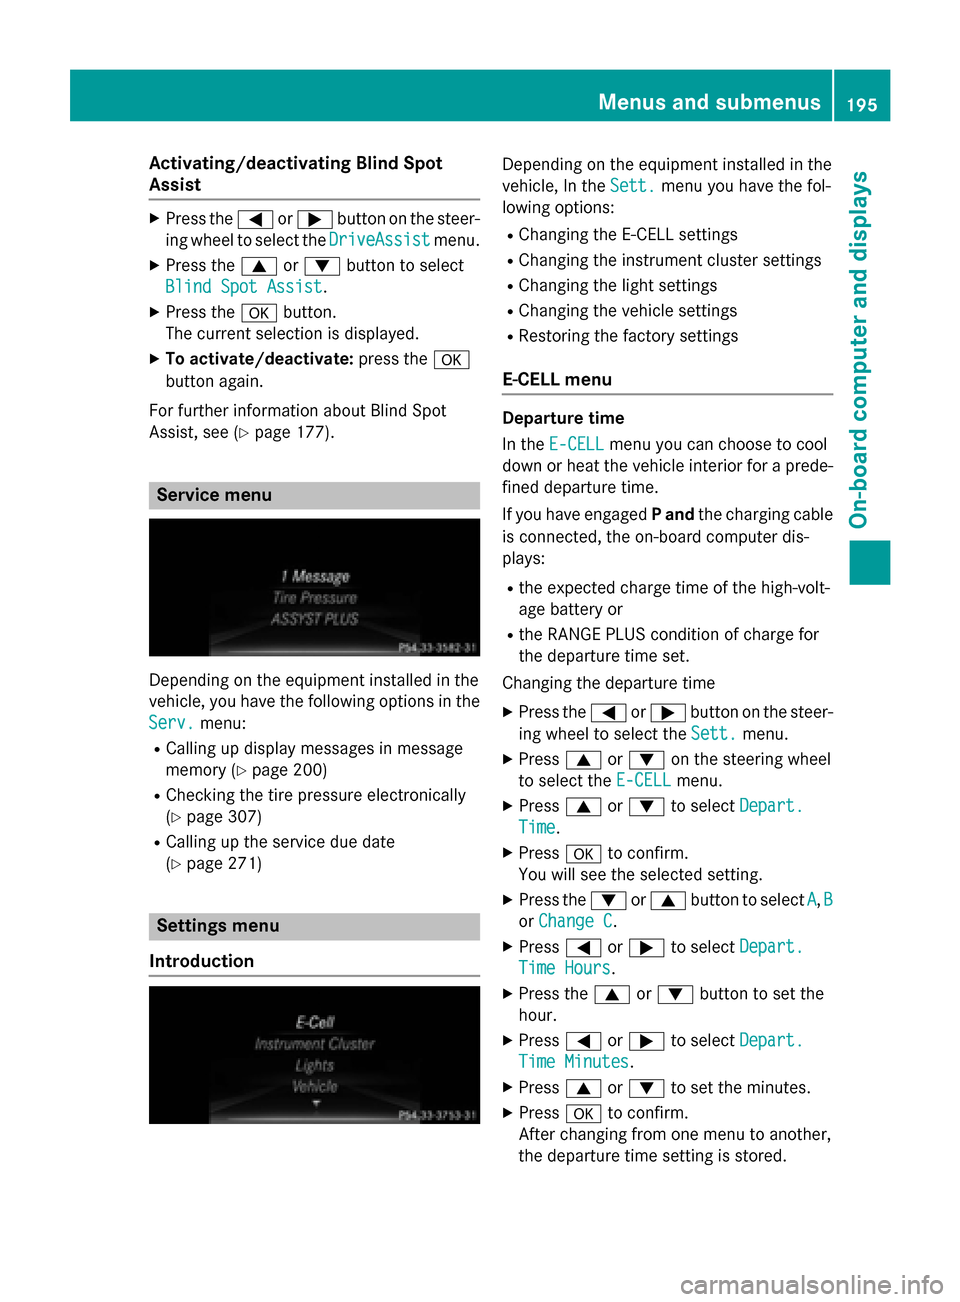
Activating/deactivating Blind Spot
Assist X
Press the =or; button on the steer-
ing wheel to select the DriveAssist
DriveAssist menu.
X Press the 9or: button to select
Blind Spot Assist
Blind Spot Assist .
X Press the abutton.
The current selection is displayed.
X To activate/deactivate: press thea
button again.
For further information about Blind Spot
Assist, see (Y page 177). Service menu
Depending on the equipment installed in the
vehicle, you have the following options in the
Serv. Serv. menu:
R Calling up display messages in message
memory (Y page 200)
R Checking the tire pressure electronically
(Y page 307)
R Calling up the service due date
(Y page 271) Settings menu
Introduction Depending on the equipment installed in the
vehicle, In the
Sett. Sett.menu you have the fol-
lowing options:
R Changing the E-CELL settings
R Changing the instrument cluster settings
R Changing the light settings
R Changing the vehicle settings
R Restoring the factory settings
E ‑CELL menu Departure time
In the
E-CELL E-CELL menu you can choose to cool
down or heat the vehicle interior for a prede- fined departure time.
If you have engaged Pand the charging cable
is connected, the on-board computer dis-
plays:
R the expected charge time of the high-volt-
age battery or
R the RANGE PLUS condition of charge for
the departure time set.
Changing the departure time
X Press the =or; button on the steer-
ing wheel to select the Sett.
Sett. menu.
X Press 9or: on the steering wheel
to select the E‑CELL E‑CELLmenu.
X Press 9or: to select Depart.
Depart.
Time
Time.
X Press ato confirm.
You will see the selected setting.
X Press the :or9 button to select A
A, B
B
or Change C
Change C.
X Press =or; to select Depart.
Depart.
Time Hours
Time Hours.
X Press the 9or: button to set the
hour.
X Press =or; to select Depart.
Depart.
Time Minutes
Time Minutes.
X Press 9or: to set the minutes.
X Press ato confirm.
After changing from one menu to another,
the departure time setting is stored. Menus and submenus
195On-board computer and displays Z
Page 199 of 338
Activating/deactivating pre-entry climate
control (via SmartKey)
X Press the =or; button on the steer-
ing wheel to select the Sett.
Sett. menu.
X Use 9 or: to select the E-CELL
E-CELL
submenu.
X Press ato confirm.
X Press 9or: to select Pre-Entry
Pre-Entry
Climate Cont. (Via Key):
Climate Cont. (Via Key):.
X Press ato activate or deactivate.
If pre-entry climate control (via SmartKey)
is activated, pre-entry climate control (via
SmartKey) is switched on temporarily when
you unlock the vehicle.
Setting the maximum charge current
Before charging the high-voltage battery,
check the maximum permissible charge cur-
rent for the relevant power socket.
You can set a maximum charge current in the
E-CELL E-CELL menu.
It is only necessary to select the maximum
charge current if there are no charge current
settings on the charging cable.
i The maximum charge current values in
the on-board computer may deviate from
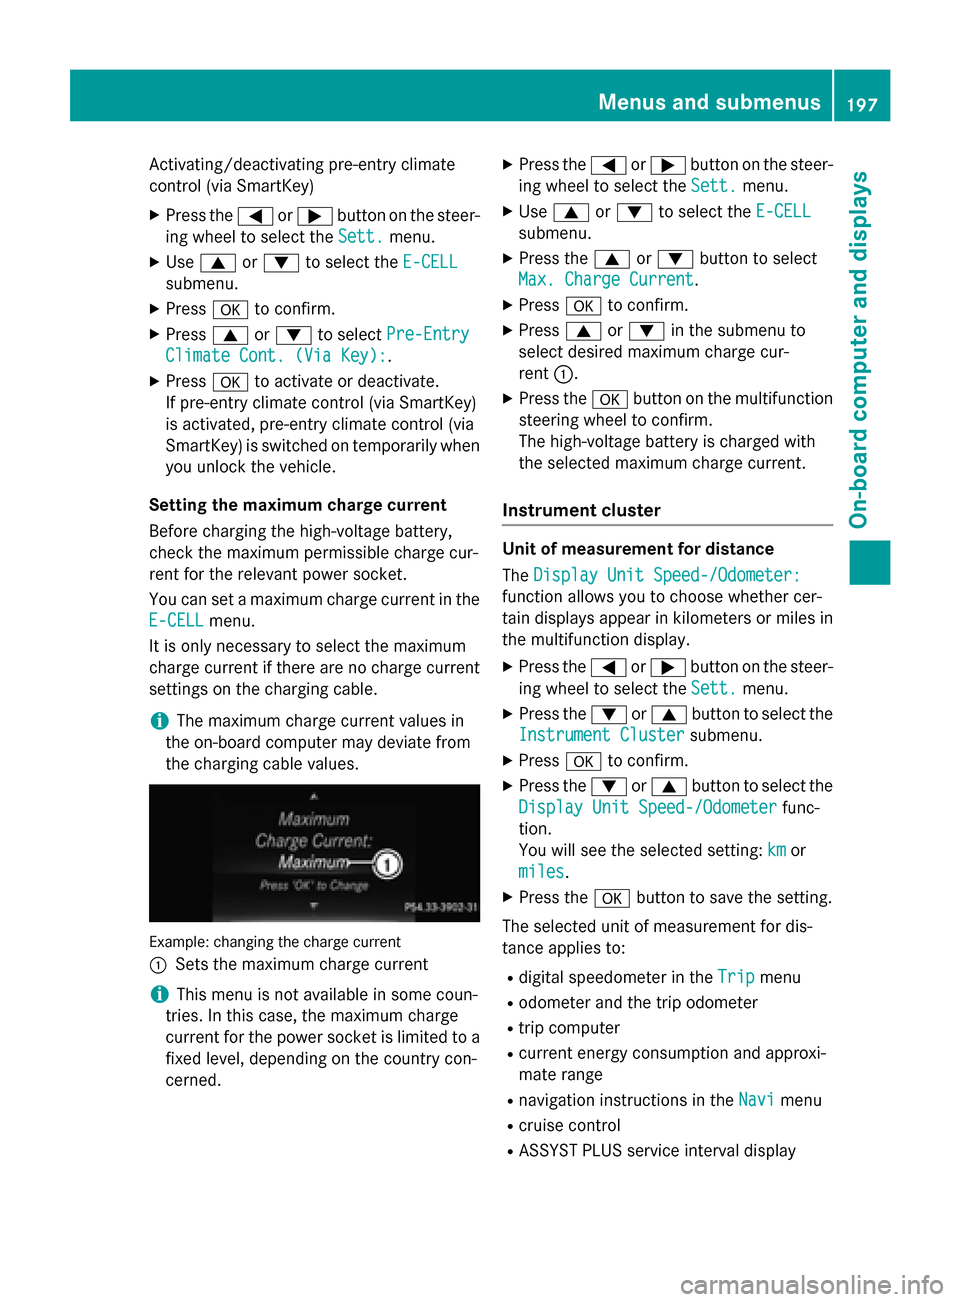
the charging cable values. Example: changing the charge current
:
Sets the maximum charge current
i This menu is not available in some coun-
tries. In this case, the maximum charge
current for the power socket is limited to a fixed level, depending on the country con-
cerned. X
Press the =or; button on the steer-
ing wheel to select the Sett.
Sett. menu.
X Use 9 or: to select the E-CELL E-CELL
submenu.
X Press the 9or: button to select
Max. Charge Current
Max. Charge Current.
X Press ato confirm.
X Press 9or: in the submenu to
select desired maximum charge cur-
rent :.
X Press the abutton on the multifunction
steering wheel to confirm.
The high-voltage battery is charged with
the selected maximum charge current.
Instrument cluster Unit of measurement for distance
The
Display Unit Speed-/Odometer: Display Unit Speed-/Odometer:
function allows you to choose whether cer-
tain displays appear in kilometers or miles in the multifunction display.
X Press the =or; button on the steer-
ing wheel to select the Sett. Sett.menu.
X Press the :or9 button to select the
Instrument Cluster
Instrument Cluster submenu.
X Press ato confirm.
X Press the :or9 button to select the
Display Unit Speed-/Odometer
Display Unit Speed-/Odometer func-
tion.
You will see the selected setting: km kmor
miles
miles.
X Press the abutton to save the setting.
The selected unit of measurement for dis-
tance applies to:
R digital speedometer in the Trip
Trip menu
R odometer and the trip odometer
R trip computer
R current energy consumption and approxi-
mate range
R navigation instructions in the Navi
Navi menu
R cruise control
R ASSYST PLUS service interval display Menus and submenus
197On-board computer and displays Z
Page 212 of 338
Display messages
Possible causes/consequences and
M
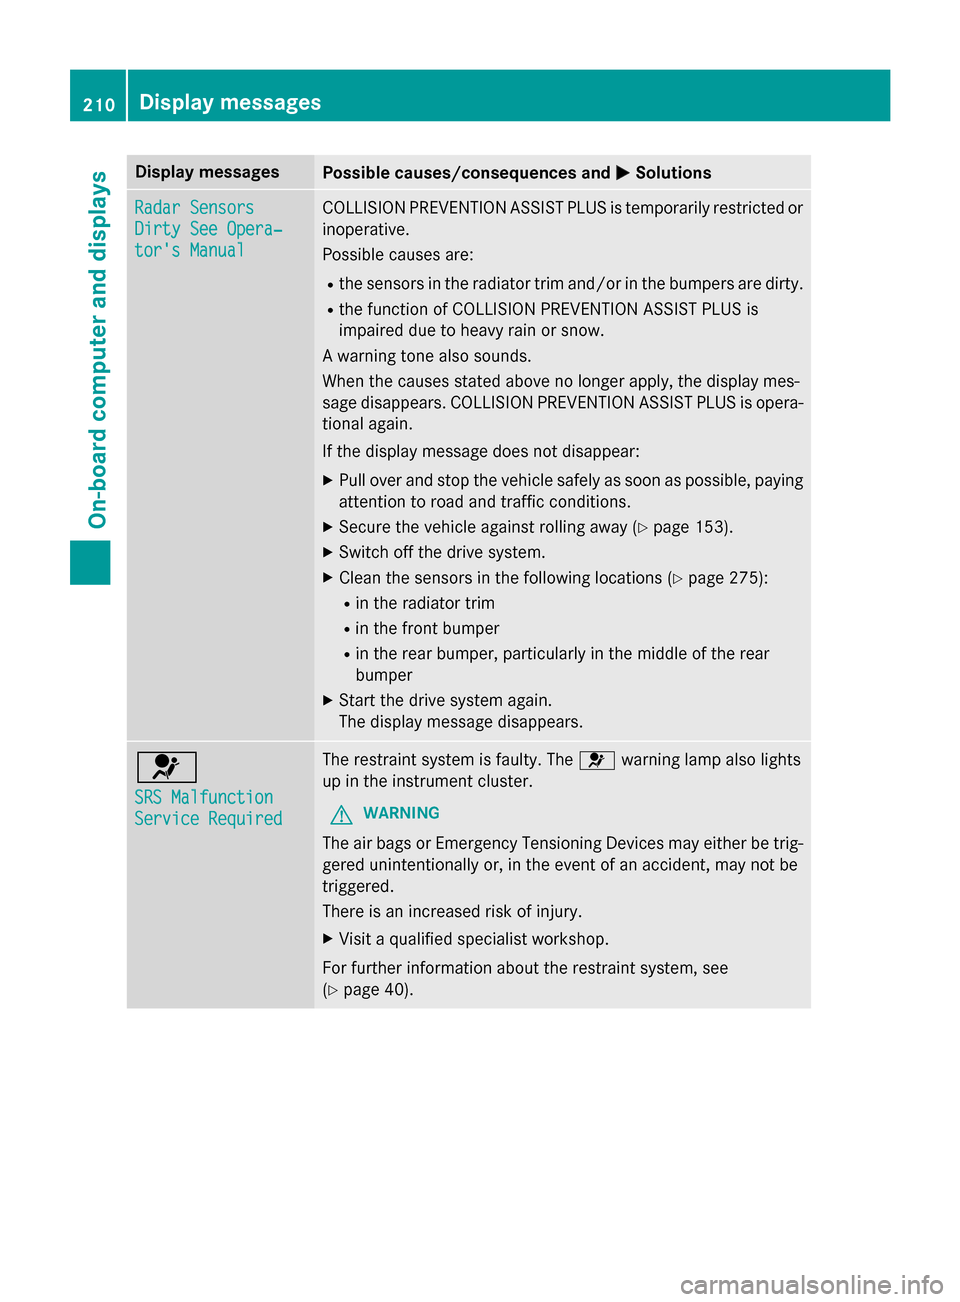
MSolutions Radar Sensors
Radar Sensors
Dirty See Opera‐ Dirty See Opera‐
tor's Manual tor's Manual COLLISION PREVENTION ASSIST PLUS is temporarily restricted or
inoperative.
Possible causes are:
R the sensors in the radiator trim and/or in the bumpers are dirty.
R the function of COLLISION PREVENTION ASSIST PLUS is
impaired due to heavy rain or snow.
A warning tone also sounds.
When the causes stated above no longer apply, the display mes-
sage disappears. COLLISION PREVENTION ASSIST PLUS is opera- tional again.
If the display message does not disappear:
X Pull over and stop the vehicle safely as soon as possible, paying
attention to road and traffic conditions.
X Secure the vehicle against rolling away (Y page 153).
X Switch off the drive system.
X Clean the sensors in the following locations (Y page 275):
R in the radiator trim
R in the front bumper
R in the rear bumper, particularly in the middle of the rear
bumper
X Start the drive system again.
The display message disappears. 6
SRS Malfunction SRS Malfunction
Service Required Service Required The restraint system is faulty. The
6warning lamp also lights
up in the instrument cluster.
G WARNING
The air bags or Emergency Tensioning Devices may either be trig- gered unintentionally or, in the event of an accident, may not be
triggered.
There is an increased risk of injury.
X Visit a qualified specialist workshop.
For further information about the restraint system, see
(Y page 40). 210
Display
messagesOn-board computer and displays
Page 213 of 338
Display messages
Possible causes/consequences and
M
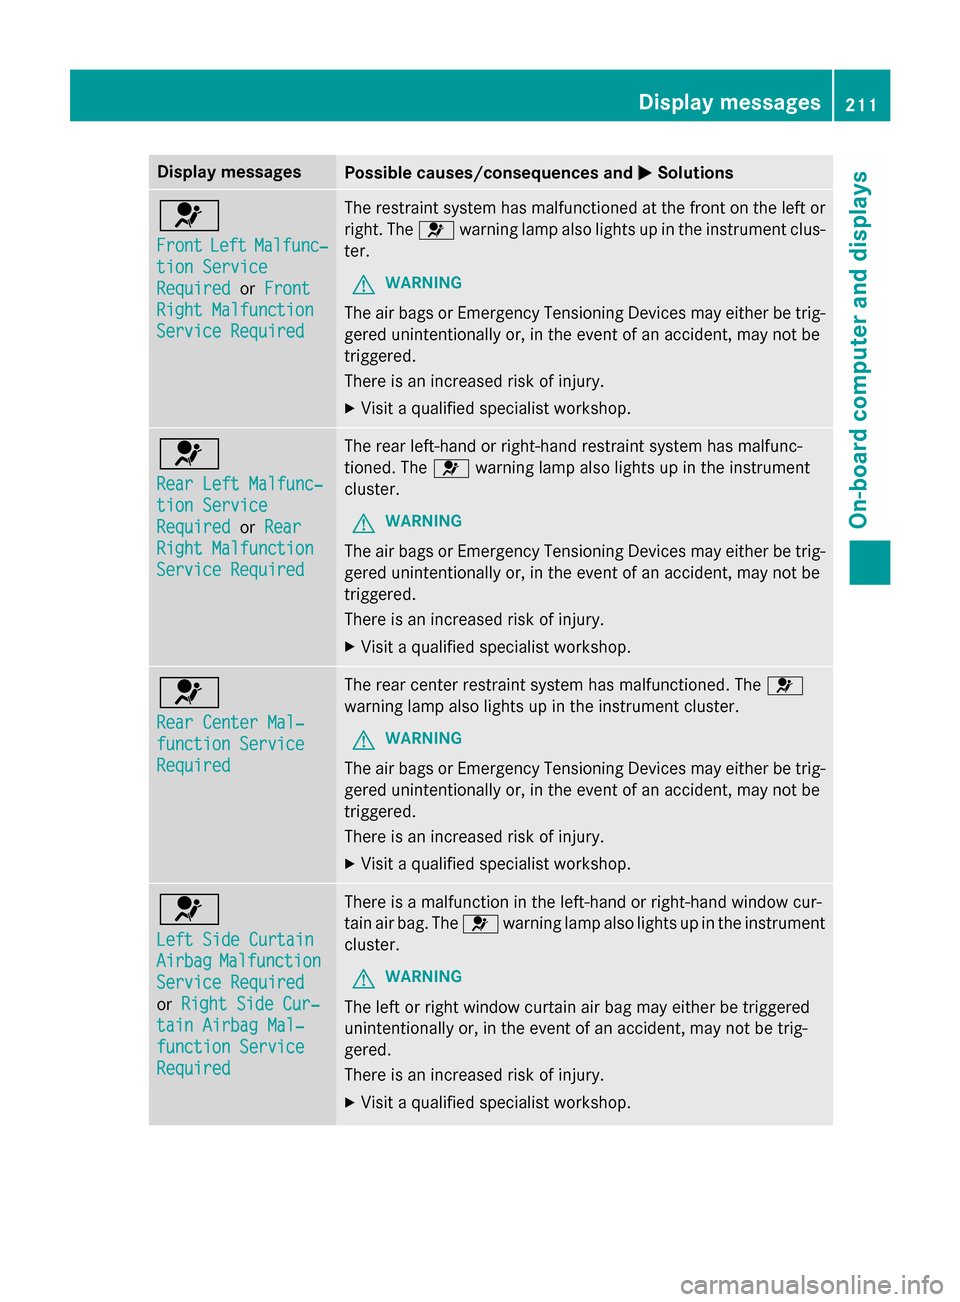
MSolutions 6
Front Front
Left
LeftMalfunc‐
Malfunc‐
tion Service
tion Service
Required Required orFront
Front
Right Malfunction
Right Malfunction
Service Required Service Required The restraint system has malfunctioned at the front on the left or
right. The 6warning lamp also lights up in the instrument clus-
ter.
G WARNING
The air bags or Emergency Tensioning Devices may either be trig- gered unintentionally or, in the event of an accident, may not be
triggered.
There is an increased risk of injury.
X Visit a qualified specialist workshop. 6
Rear Left Malfunc‐ Rear Left Malfunc‐
tion Service tion Service
Required Required
orRear
Rear
Right Malfunction
Right Malfunction
Service Required Service Required The rear left-hand or right-hand restraint system has malfunc-
tioned. The 6warning lamp also lights up in the instrument
cluster.
G WARNING
The air bags or Emergency Tensioning Devices may either be trig- gered unintentionally or, in the event of an accident, may not be
triggered.
There is an increased risk of injury.
X Visit a qualified specialist workshop. 6
Rear Center Mal‐ Rear Center Mal‐
function Service function Service
Required Required The rear center restraint system has malfunctioned. The
6
warning lamp also lights up in the instrument cluster.
G WARNING
The air bags or Emergency Tensioning Devices may either be trig- gered unintentionally or, in the event of an accident, may not be
triggered.
There is an increased risk of injury.
X Visit a qualified specialist workshop. 6
Left Side Curtain Left Side Curtain
Airbag Airbag
Malfunction
Malfunction
Service Required
Service Required
or Right Side Cur‐ Right Side Cur‐
tain Airbag Mal‐
tain Airbag Mal‐
function Service function Service
Required Required There is a malfunction in the left-hand or right-hand window cur-
tain air bag. The
6warning lamp also lights up in the instrument
cluster.
G WARNING
The left or right window curtain air bag may either be triggered
unintentionally or, in the event of an accident, may not be trig-
gered.
There is an increased risk of injury. X Visit a qualified specialist workshop. Display
messages
211On-board computer and displays Z