2015 MERCEDES-BENZ B-Class ELECTRIC lock
[x] Cancel search: lockPage 175 of 338
Under the following circumstances, the rear
view camera will not function, or will function
in a limited manner:
R if the trunk lid is open
R in heavy rain, snow or fog
R at night or in very dark places
R if the camera is exposed to very bright light
R if the area is lit by fluorescent bulbs or LED
lighting (the display may flicker)
R if there is a sudden change in temperature,
e.g. when driving into a heated garage in
winter
R if the camera lens is dirty or obstructed.
Observe the notes on cleaning
(Y page 276)
R if the rear of your vehicle is damaged. In this
event, have the camera position and setting checked at a qualified specialist workshop
The field of vision and other functions of the
rear view camera may be restricted due to
additional accessories on the rear of the vehi-
cle (e.g. license plate holder, bicycle rack).
Activating/deactivating the rear view
camera X
To activate: make sure that the key is in
position 2in the ignition lock.
X Make sure that the Activation by R Activation by R
gear
gear function is selected in Audio 20/
COMAND; see the Digital Operator's Man-
ual.
X Engage reverse gear.
The area behind the vehicle is shown with
guide lines in the Audio 20/COMAND dis-
play.
The image from the rear view camera is
available throughout the maneuvering
process.
To deactivate: the rear view camera deacti-
vates if you shift the transmission to Por after
driving forwards a short distance. Displays in the Audio 20/COMAND dis-
play The rear view camera may show a distorted
view of obstacles, show them incorrectly or
not at all. The rear view camera does not show
objects in the following positions:
R very close to the rear bumper
R under the rear bumper
R in the area immediately above the tailgate
handle
! Objects not at ground level may appear to
be further away than they actually are, e.g.:
R the bumper of a parked vehicle
R the drawbar of a trailer
R the ball coupling of a trailer tow hitch
R the rear section of an HGV
R a slanted post
Use the guidelines only for orientation.
Approach objects no further than the bot-
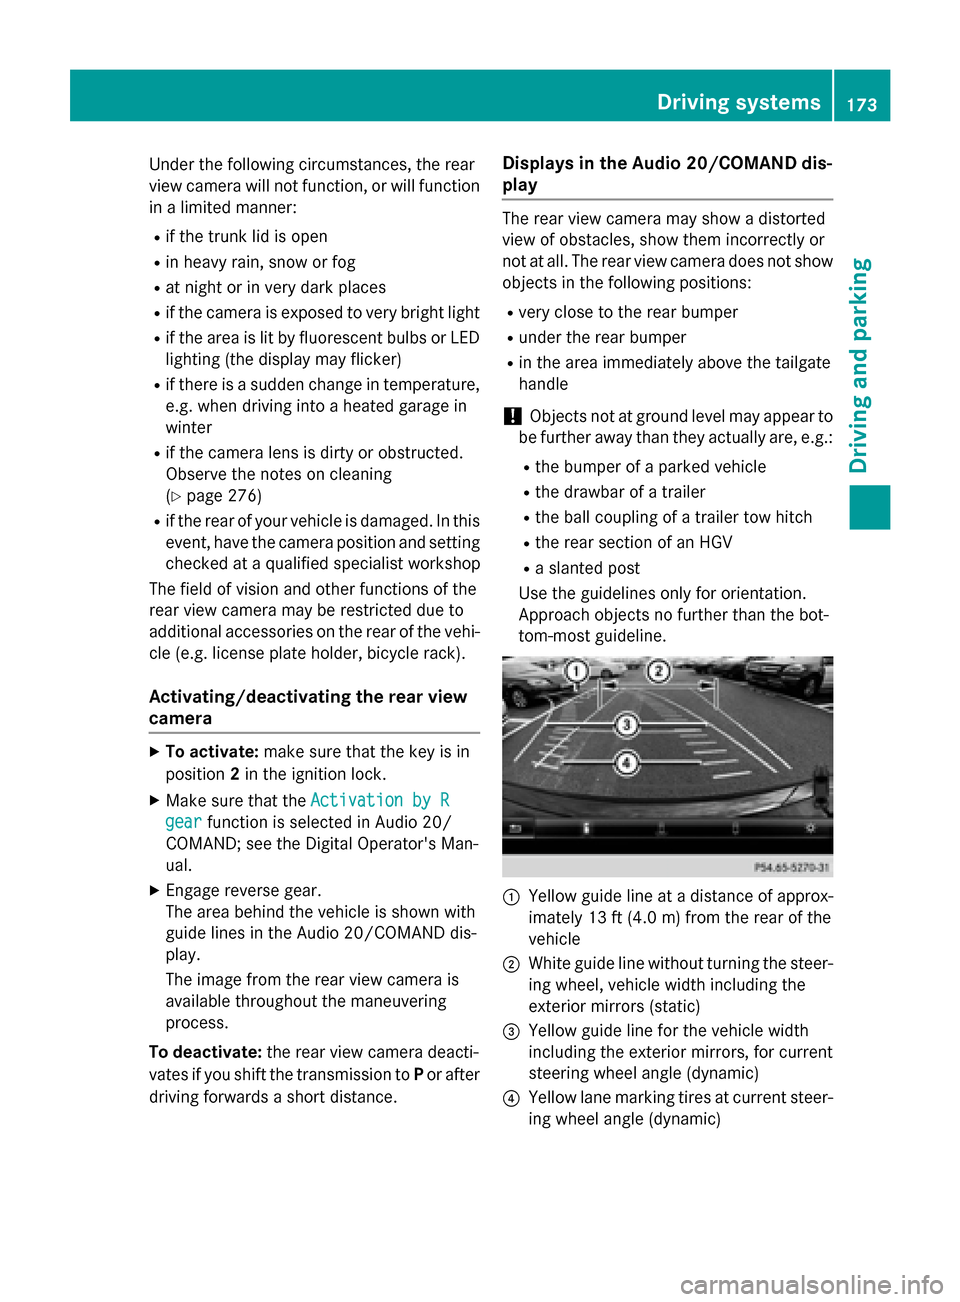
tom-most guideline. :
Yellow guide line at a distance of approx-
imately 13 ft (4.0 m) from the rear of the
vehicle
; White guide line without turning the steer-
ing wheel, vehicle width including the
exterior mirrors (static)
= Yellow guide line for the vehicle width
including the exterior mirrors, for current
steering wheel angle (dynamic)
? Yellow lane marking tires at current steer-
ing wheel angle (dynamic) Driving systems
173Driving and parking Z
Page 181 of 338
Warning display
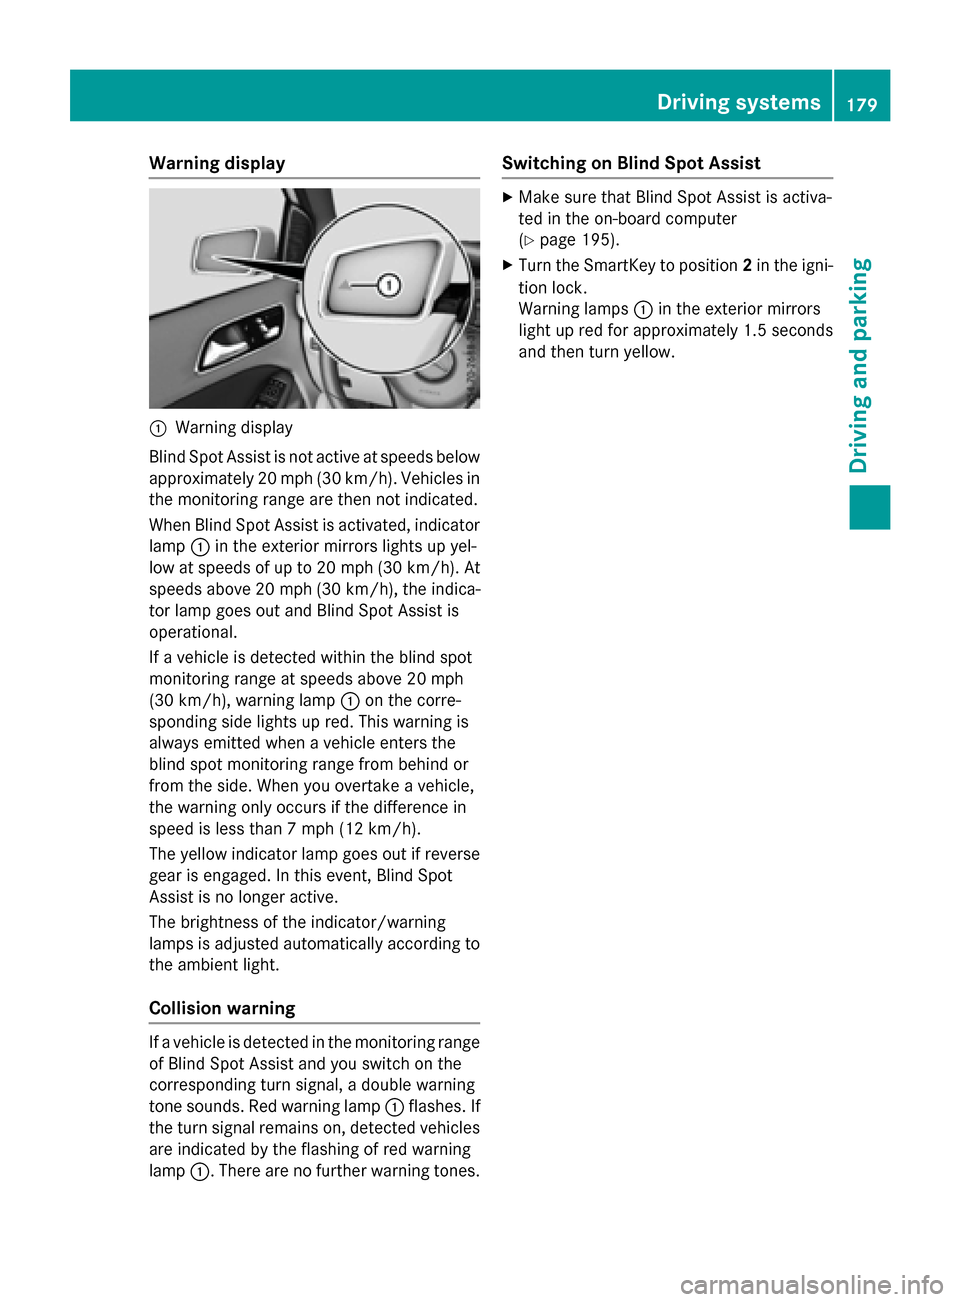
:
Warning display
Blind Spot Assist is not active at speeds below approximately 20 mph (30 km/h). Vehicles in the monitoring range are then not indicated.
When Blind Spot Assist is activated, indicator
lamp :in the exterior mirrors lights up yel-
low at speeds of up to 20 mph (30 km/h). At speeds above 20 mph (30 km/h), the indica-
tor lamp goes out and Blind Spot Assist is
operational.
If a vehicle is detected within the blind spot
monitoring range at speeds above 20 mph
(30 km/h), warning lamp :on the corre-
sponding side lights up red. This warning is
always emitted when a vehicle enters the
blind spot monitoring range from behind or
from the side. When you overtake a vehicle,
the warning only occurs if the difference in
speed is less than 7 mph (12 km/h).
The yellow indicator lamp goes out if reverse gear is engaged. In this event, Blind Spot
Assist is no longer active.
The brightness of the indicator/warning
lamps is adjusted automatically according to
the ambient light.
Collision warning If a vehicle is detected in the monitoring range
of Blind Spot Assist and you switch on the
corresponding turn signal, a double warning
tone sounds. Red warning lamp :flashes. If
the turn signal remains on, detected vehicles
are indicated by the flashing of red warning
lamp :. There are no further warning tones. Switching on Blind Spot Assist X
Make sure that Blind Spot Assist is activa-
ted in the on-board computer
(Y page 195).
X Turn the SmartKey to position 2in the igni-
tion lock.
Warning lamps :in the exterior mirrors
light up red for approximately 1.5 seconds
and then turn yellow. Driving systems
179Driving and parking Z
Page 184 of 338
Useful information
i This Operator's Manual describes all
models and all standard and optional equip- ment of your vehicle available at the time of
publication of the Operator's Manual.
Country-specific differences are possible.
Please note that your vehicle may not be
equipped with all features described. This
also applies to safety-related systems and
functions.
i Read the information on qualified special-
ist workshops (Y page 25). Important safety notes
G
WARNING
If you operate information systems and com-
munication equipment integrated in the vehi- cle while driving, you will be distracted from
traffic conditions. You could also lose control of the vehicle. There is a risk of an accident.
Only operate the equipment when the traffic
situation permits. If you are not sure that this
is possible, park the vehicle paying attention
to traffic conditions and operate the equip-
ment when the vehicle is stationary.
You must observe the legal requirements for
the country in which you are currently driving when operating the on-board computer. G
WARNING
If the instrument cluster has failed or mal-
functioned, you may not recognize function
restrictions in systems relevant to safety. The operating safety of your vehicle may be
impaired. There is a risk of an accident.
Drive on carefully. Have the vehicle checked
at a qualified specialist workshop immedi-
ately.
The on-board computer only shows messages
or warnings from certain systems in the mul- tifunction display. You should therefore make sure your vehicle is operating safely at all
times.
If the operating safety of your vehicle is
impaired, pull over as soon as it is safe to do
so. Contact a qualified specialist workshop.
For an overview, see the instrument panel
illustration (Y page 31). Displays and operation
Instrument cluster lighting
The light sensor in the instrument cluster
automatically controls the brightness of the
multifunction display. In daylight, the displays
in the instrument cluster are not illuminated.
The lighting in the instrument cluster, in the
displays and the controls in the vehicle inte-
rior can be adjusted using the brightness con- trol knob.
The brightness control knob is located on the
bottom left of the instrument cluster
(Y page 31).
X Turn the brightness control knob clockwise
or counter-clockwise.
If the light switch is set to Ã,Tor
L, the brightness is dependent upon
the brightness of the ambient light. READY indicator
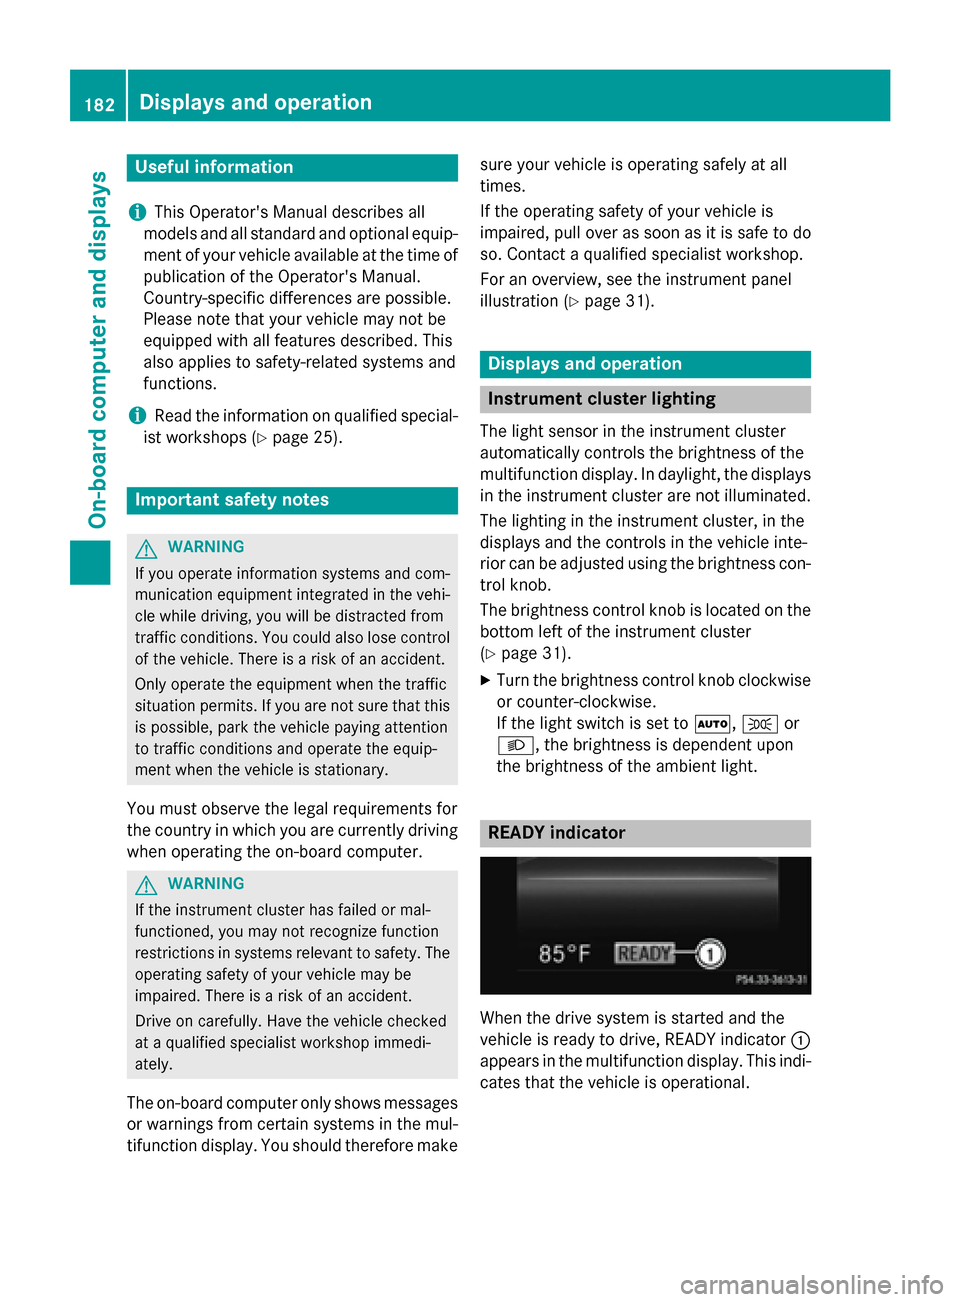
When the drive system is started and the
vehicle is ready to drive, READY indicator
:
appears in the multifunction display. This indi- cates that the vehicle is operational. 182
Displays and operationOn-board computer and displays
Page 187 of 338
X
To activate the on-board computer: turn
the SmartKey to position 1in the ignition
lock.
You can control the multifunction display and
the settings in the on-board computer using
the buttons on the multifunction steering
wheel.
Left control panel =
; R
Calls up the menu and menu bar 9
: Press briefly:
R Scrolls in lists
R Selects a submenu or function
R Vehicles with Audio 20: in the
Audio Audio menu, selects the previ-
ous/next stored station, when
the preset list or station list is
active, or an audio track
R Vehicles with COMAND: in the
Audio Audio menu, selects the previ-
ous/next station, when the pre-
set list or station list is active, or
an audio track or video scene
R In the Tel Tel(telephone) menu:
switches to the phone book and
selects a name or telephone
number 9
: Press and hold:
R Vehicles with Audio 20: in the
Audio Audio menu, selects the previ-
ous/next station, when the pre-
set list or station list is active, or
selects an audio track using
rapid scrolling
R Vehicles with COMAND: in the
Audio Audio menu, selects a preset list
or station list in the desired
waveband or an audio track or
video scene using rapid scrolling
R In the Tel Tel(Telephone) menu:
starts rapid scrolling if the phone book is open a R
Confirms a selection/display
message
R In the Tel Tel(Telephone) menu:
switches to the telephone book
and starts dialing the selected
number % Press briefly:
R Back
R Switches off the Voice Control
System (see the separate oper-
ating instructions)
R Hides display messages/calls
up the last Trip Tripmenu function
used
R Exits the telephone book/redial
memory % Press and hold:
R Calls up the standard display in
the Trip Trip menu Right control panel
ó R
Switches on the Voice Control
System (see the separate oper-
ating instructions) 8 R
Mute W
X R
Adjusts the volume ~ R
Rejects or ends a call
R Exits phone book/redial mem-
ory 6 R
Makes or accepts a call
R Switches to the redial memory Displays and operation
185On-board computer and displays Z
Page 198 of 338
Selecting the departure time
X Press the =or; button on the steer-
ing wheel to select the Sett.
Sett.menu.
X Press 9or: on the steering wheel
to select the E‑CELL
E‑CELL menu.
X Press 9or: to select Depart.
Depart.
Time
Time.
X Press ato confirm.
X Press the :or9 button to select
one of the three departure times or Timer
Timer
Off
Off (no timer active).
X Press ato confirm.
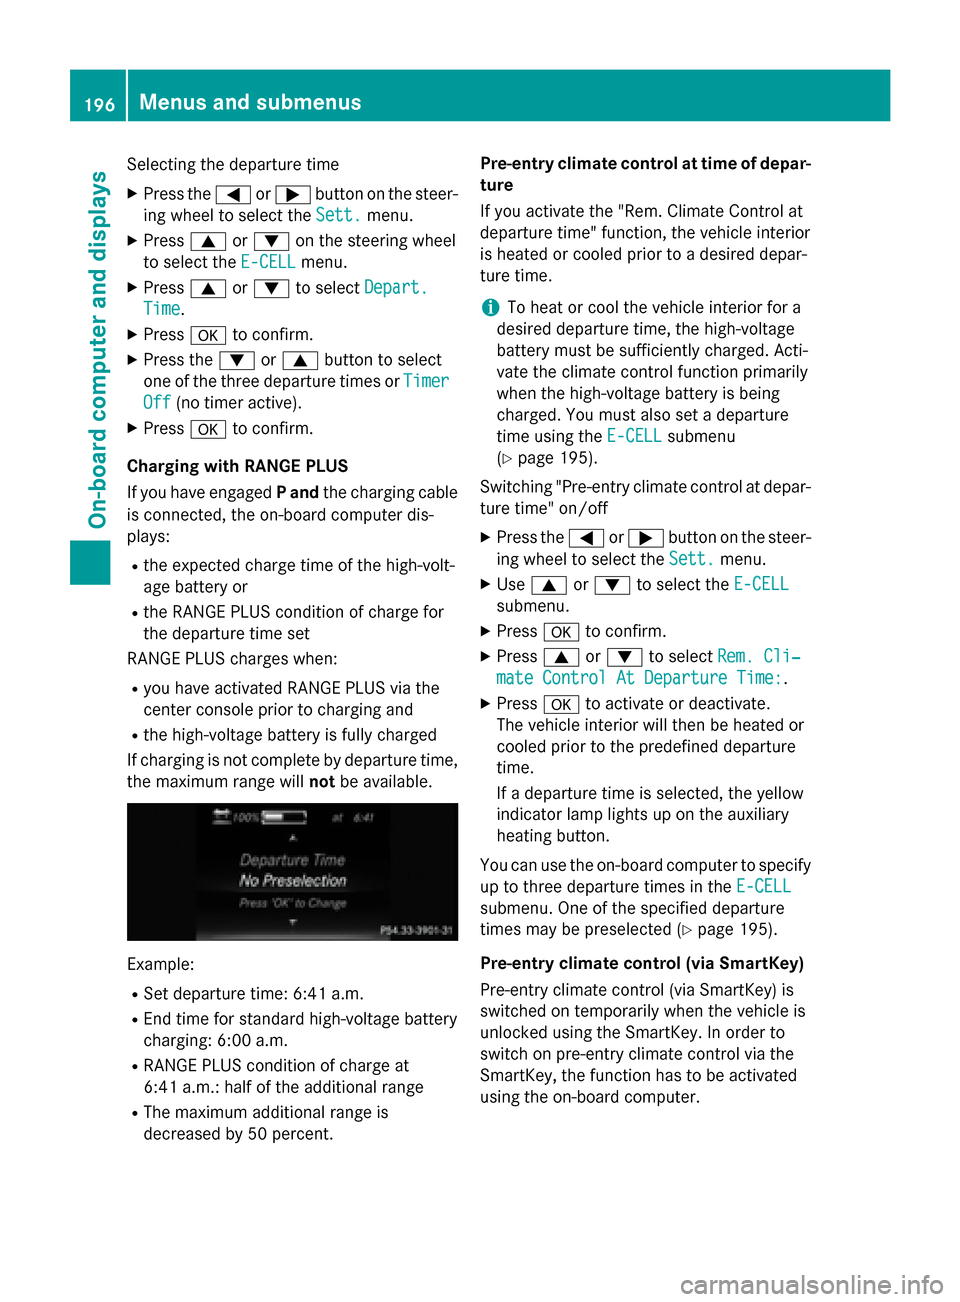
Charging with RANGE PLUS
If you have engaged Pand the charging cable
is connected, the on-board computer dis-
plays:
R the expected charge time of the high-volt-
age battery or
R the RANGE PLUS condition of charge for
the departure time set
RANGE PLUS charges when:
R you have activated RANGE PLUS via the
center console prior to charging and
R the high-voltage battery is fully charged
If charging is not complete by departure time,
the maximum range will notbe available. Example:
R Set departure time: 6:41 a.m.
R End time for standard high-voltage battery
charging: 6:00 a.m.
R RANGE PLUS condition of charge at
6:41 a.m.: half of the additional range
R The maximum additional range is
decreased by 50 percent. Pre-entry climate control at time of depar-
ture
If you activate the "Rem. Climate Control at
departure time" function, the vehicle interior
is heated or cooled prior to a desired depar-
ture time.
i To heat or cool the vehicle interior for a
desired departure time, the high-voltage
battery must be sufficiently charged. Acti-
vate the climate control function primarily
when the high-voltage battery is being
charged. You must also set a departure
time using the E-CELL
E-CELL submenu
(Y page 195).
Switching "Pre-entry climate control at depar-
ture time" on/off
X Press the =or; button on the steer-
ing wheel to select the Sett. Sett.menu.
X Use 9 or: to select the E-CELL
E-CELL
submenu.
X Press ato confirm.
X Press 9or: to select Rem. Cli‐
Rem. Cli‐
mate Control At Departure Time:
mate Control At Departure Time:.
X Press ato activate or deactivate.
The vehicle interior will then be heated or
cooled prior to the predefined departure
time.
If a departure time is selected, the yellow
indicator lamp lights up on the auxiliary
heating button.
You can use the on-board computer to specify up to three departure times in the E-CELL E-CELL
submenu. One of the specified departure
times may be preselected (Y page 195).
Pre-entry climate control (via SmartKey)
Pre-entry climate control (via SmartKey) is
switched on temporarily when the vehicle is
unlocked using the SmartKey. In order to
switch on pre-entry climate control via the
SmartKey, the function has to be activated
using the on-board computer. 196
Menus and submenusOn-board computer and displays
Page 199 of 338
Activating/deactivating pre-entry climate
control (via SmartKey)
X Press the =or; button on the steer-
ing wheel to select the Sett.
Sett. menu.
X Use 9 or: to select the E-CELL
E-CELL
submenu.
X Press ato confirm.
X Press 9or: to select Pre-Entry
Pre-Entry
Climate Cont. (Via Key):
Climate Cont. (Via Key):.
X Press ato activate or deactivate.
If pre-entry climate control (via SmartKey)
is activated, pre-entry climate control (via
SmartKey) is switched on temporarily when
you unlock the vehicle.
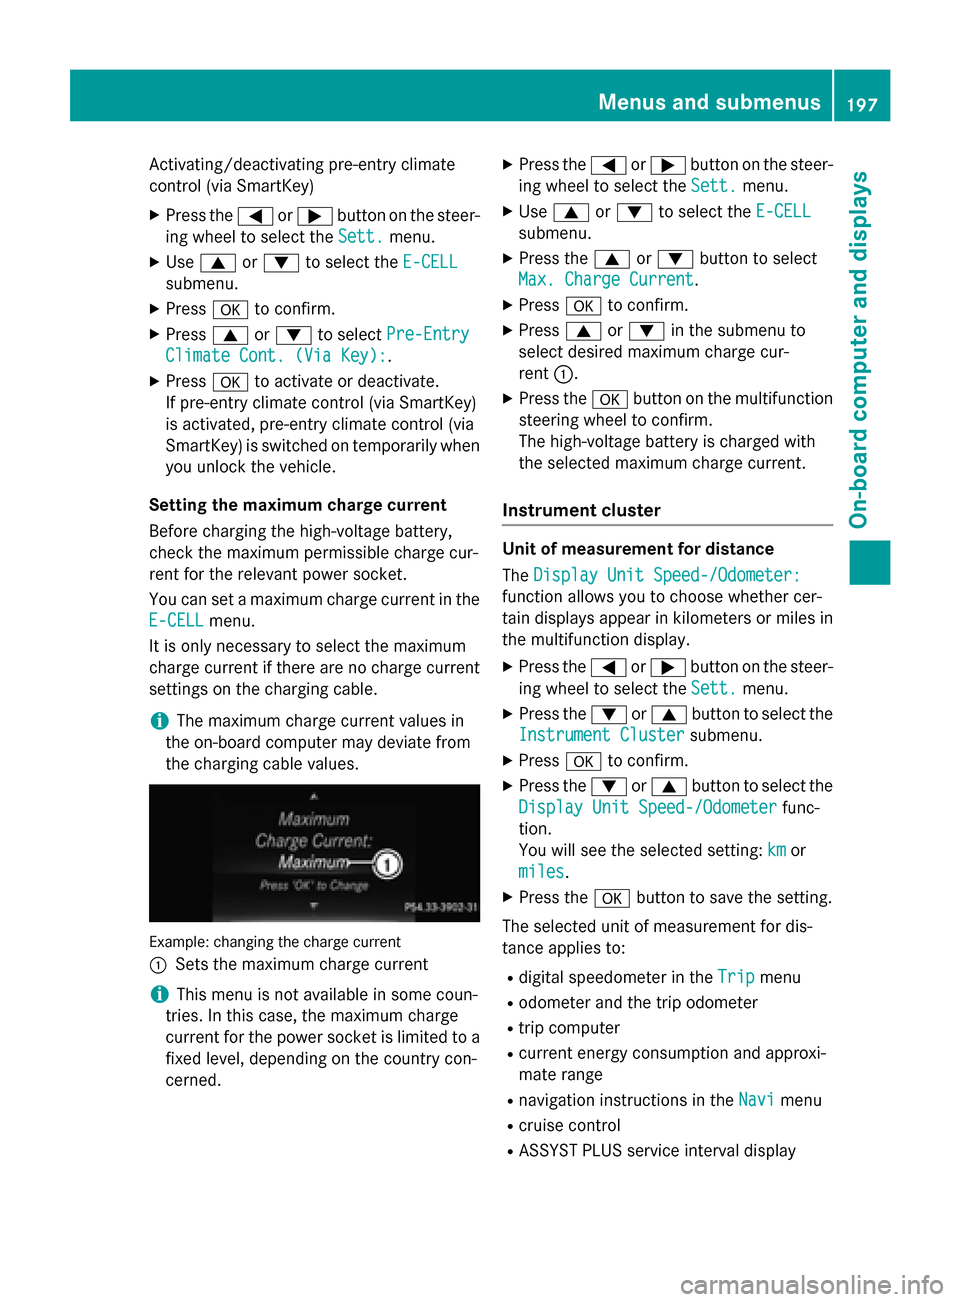
Setting the maximum charge current
Before charging the high-voltage battery,
check the maximum permissible charge cur-
rent for the relevant power socket.
You can set a maximum charge current in the
E-CELL E-CELL menu.
It is only necessary to select the maximum
charge current if there are no charge current
settings on the charging cable.
i The maximum charge current values in
the on-board computer may deviate from
the charging cable values. Example: changing the charge current
:
Sets the maximum charge current
i This menu is not available in some coun-
tries. In this case, the maximum charge
current for the power socket is limited to a fixed level, depending on the country con-
cerned. X
Press the =or; button on the steer-
ing wheel to select the Sett.
Sett. menu.
X Use 9 or: to select the E-CELL E-CELL
submenu.
X Press the 9or: button to select
Max. Charge Current
Max. Charge Current.
X Press ato confirm.
X Press 9or: in the submenu to
select desired maximum charge cur-
rent :.
X Press the abutton on the multifunction
steering wheel to confirm.
The high-voltage battery is charged with
the selected maximum charge current.
Instrument cluster Unit of measurement for distance
The
Display Unit Speed-/Odometer: Display Unit Speed-/Odometer:
function allows you to choose whether cer-
tain displays appear in kilometers or miles in the multifunction display.
X Press the =or; button on the steer-
ing wheel to select the Sett. Sett.menu.
X Press the :or9 button to select the
Instrument Cluster
Instrument Cluster submenu.
X Press ato confirm.
X Press the :or9 button to select the
Display Unit Speed-/Odometer
Display Unit Speed-/Odometer func-
tion.
You will see the selected setting: km kmor
miles
miles.
X Press the abutton to save the setting.
The selected unit of measurement for dis-
tance applies to:
R digital speedometer in the Trip
Trip menu
R odometer and the trip odometer
R trip computer
R current energy consumption and approxi-
mate range
R navigation instructions in the Navi
Navi menu
R cruise control
R ASSYST PLUS service interval display Menus and submenus
197On-board computer and displays Z
Page 200 of 338
![MERCEDES-BENZ B-Class ELECTRIC 2015 W246 Owners Manual Switching the additional speedometer
on/off
The
Speedometer [km/h] Speedometer [km/h] orSpeedometer
Speedometer
[mph]
[mph] function allows you to choose whether
the multifunction display in the statu MERCEDES-BENZ B-Class ELECTRIC 2015 W246 Owners Manual Switching the additional speedometer
on/off
The
Speedometer [km/h] Speedometer [km/h] orSpeedometer
Speedometer
[mph]
[mph] function allows you to choose whether
the multifunction display in the statu](/manual-img/4/3623/w960_3623-199.png)
Switching the additional speedometer
on/off
The
Speedometer [km/h] Speedometer [km/h] orSpeedometer
Speedometer
[mph]
[mph] function allows you to choose whether
the multifunction display in the status area
shows the speed in km/h km/hor inmph
mphinstead of
the outside temperature.
X Press the =or; button on the steer-
ing wheel to select the Sett.
Sett. menu.
X Press the :or9 button to select the
Instrument Cluster
Instrument Cluster submenu.
X Press ato confirm.
X Press the :or9 button to select the
Speedometer [km/h]
Speedometer [km/h] orSpeedometer
Speedometer
[mph]
[mph] function.
You will see the selected setting: On
OnorOff
Off.
X Press the abutton to save the setting.
Selecting the permanent display function You can determine whether the multifunction
display permanently shows the outside tem-
perature or your speed in km/h( USA) or mph
(Canada).
X Press the =or; button on the steer-
ing wheel to select the Sett. Sett.menu.
X Press the :or9 button to select the
Instrument Cluster
Instrument Cluster submenu.
X Press ato confirm.
X Press the :or9 button to select the
Permanent Display:
Permanent Display: function.
You will see the selected setting: Outside
Outside
Temperature Temperature orSpeedometer [km/h] Speedometer [km/h]/
Speedometer [mph]
Speedometer [mph].
X Press the abutton to save the setting.
i The speed is highlighted in km/h or in
mph conversely to your speedometer.
Lights Switching the daytime running lamps on/
off
X Press the =or; button on the steer-
ing wheel to select the Sett.
Sett.menu.
X Press the :or9 button to select the
Lights
Lights submenu. X
Press ato confirm.
X Press the :or9 button to select the
Daytime Running Lights
Daytime Running Lights function.
If the Daytime Running Lights
Daytime Running Lights function
has been switched on, the cone of light and
the W symbol in the multifunction dis-
play are shown in orange.
X Press the abutton to save the setting.
Further information on daytime running lights (Y page 100).
Vehicle Activating/deactivating the automatic
door locking mechanism
X Press the =or; button on the steer-
ing wheel to select the Sett. Sett.menu.
X Press the :or9 button to select the
Vehicle
Vehicle submenu.
X Press ato confirm.
X Press the :or9 button to select the
Automatic Door Lock
Automatic Door Lock function.
When the Automatic
Automatic Door
DoorLock
Lockfunction
is activated, the vehicle doors are displayed in orange in the multifunction display.
X Press the abutton to save the setting.
If you activate the Automatic Door Lock
Automatic Door Lock
function, the vehicle is centrally locked above
a speed of around 9 mph (15 km/h).
For further information on the automatic lock- ing feature, see (Y page 80).
Activating/deactivating the acoustic
locking verification signal
If you switch on the Acoustic AcousticLock Lockfunction,
an acoustic signal sounds when you lock the
vehicle.
X Press the =or; button on the steer-
ing wheel to select the Sett.
Sett.menu.
X Press the :or9 button to select the
Vehicle
Vehicle submenu.
X Press ato confirm. 198
Menus and submenusOn-board computer and displays
Page 201 of 338
X
Press the :or9 button to select the
Acoustic Lock
Acoustic Lock function.
If the Acoustic
Acoustic Lock
Lockfunction is activated,
the & symbol in the multifunction dis-
play lights up orange.
X Press the abutton to save the setting.
Restoring the factory settings X
Press the =or; button on the steer-
ing wheel to select the Sett.
Sett.menu.
X Press the :or9 button to select the
Factory Settings
Factory Settings submenu.
X Press ato confirm.
The Reset All Settings?
Reset All Settings? message
appears.
X Press the :or9 button to select No
No
or Yes
Yes.
X Press the abutton to confirm the selec-
tion.
If you have selected Yes
Yes, the multifunction
display shows a confirmation message.
For safety reasons, not all functions are reset. For safety reasons, the Daytime Running
Daytime Running
Lights Lights function in the Lights
Lightssubmenu is
only reset if the vehicle is stationary. Menus and submenus
199On-board computer and displays Z