Page 338 of 636

Clear Personal Data
After pressing the “Clear Personal Data Settings” button
on the touchscreen the following settings will be avail-
able:
•Clear Personal Data
When this feature is selected it will remove personal data
including Bluetooth® devices and presets. To remove
personal information, press the “Clear Personal Data”
button and a pop-up will appear asking�Are you sure
you want to clear all personal data?” select “OK” to
Clear, or “Cancel” to exit. Once the data has been cleared,
a pop up appears stating�Personal data cleared.”
System Information
After pressing the “System Information” button on the
touchscreen the following settings will be available:
•System Information
When System Information is selected, a System Informa-
tion screen will appear displaying the system software
version.
SRT Performance Pages
To access the SRT Performance Pages, press the “SRT &
Apps” button on the touchscreen then select the “SRT
Performance Pages” App from the list. Press the UP or
DOWN buttons on the touchscreen to cycle through the
list.
336 UNDERSTANDING YOUR INSTRUMENT PANEL
Page 359 of 636
Display Settings
When watching a video source (Blu-ray™ Disc or DVD
Video with the disc in Play mode, Aux Video, etc.),
pushing the remote control’s SETUP button activates theDisplay Settings menu. These settings control the appear-
ance of the video on the screen. The factory default
settings are already set for optimum viewing, so there is
no need to change these settings under normal circum-
stances.
To change the settings, push the remote control’s naviga-
tion buttons (�,�) to select an item, then push the
remote control’s navigation buttons (�,�) to change the
value for the currently selected item. To reset all values
back to the original settings, select the Default Settings
menu option and push the remote control’s ENTER/OK
button.
Disc Features control the remote Blu-ray™ Disc player’s
settings of DVD being watched in the remote player.
Video Screen Display Settings
4
UNDERSTANDING YOUR INSTRUMENT PANEL 357
Page 365 of 636

The right-hand control is a rocker-type switch with a
push-button in the center and controls the volume and
mode of the sound system. Pushing the top of the rocker
switch will increase the volume, and pushing the bottom
of the rocker switch will decrease the volume.
Pushing the center button will make the radio switch
between the various modes available (AM/FM/SXM/
CD/AUX/VES, etc.).
The left-hand control is a rocker-type switch with a
push-button in the center. The function of the left-hand
control is different depending on which mode you are in.
The following describes the left-hand control operation in
each mode.
Radio Operation
Pushing the top of the switch will “Seek” up for the next
listenable station and pushing the bottom of the switch
will “Seek” down for the next listenable station.The button located in the center of the left-hand control
will tune to the next preset station that you have pro-
grammed in the radio preset button.
CD Player
Pushing the top of the switch once will go to the next
track on the CD. Pushing the bottom of the switch once
will go to the beginning of the current track, or to the
beginning of the previous track if it is within one second
after the current track begins to play.
If you push the switch up or down twice, it plays the
second track; three times, it will play the third, etc.
CD/DVD DISC MAINTENANCE
To keep a CD/DVD in good condition, take the following
precautions:
1. Handle the disc by its edge; avoid touching the
surface.
4
UNDERSTANDING YOUR INSTRUMENT PANEL 363
Page 415 of 636
![JEEP GRAND CHEROKEE 2015 WK2 / 4.G SRT Owners Manual During extremely cold temperatures (-22°F [-30°C] or
below), transmission operation may be modified depend-
ing on engine and transmission temperature as well as
vehicle speed. Normal operation will JEEP GRAND CHEROKEE 2015 WK2 / 4.G SRT Owners Manual During extremely cold temperatures (-22°F [-30°C] or
below), transmission operation may be modified depend-
ing on engine and transmission temperature as well as
vehicle speed. Normal operation will](/manual-img/16/7110/w960_7110-414.png)
During extremely cold temperatures (-22°F [-30°C] or
below), transmission operation may be modified depend-
ing on engine and transmission temperature as well as
vehicle speed. Normal operation will resume once the
transmission temperature has risen to a suitable level.
SPORT (S)
The SPORT shift mode alters the transmission’s auto-
matic shift schedule for sportier driving. Upshift speeds
are increased to make full use of available engine power.
To switch between DRIVE and SPORT shift mode, tap the
shift lever rearward. SPORT shift mode is only accessible
from DRIVE.
Transmission Limp Home Mode
Transmission function is monitored electronically for
abnormal conditions. If a condition is detected that could
result in transmission damage, Transmission Limp Home
Mode is activated. In this mode, the transmission mayoperate only in certain gears, or may not shift at all.
Vehicle performance may be severely degraded and the
engine may stall. In some situations, the transmission
may not re-engage if the engine is turned off and
restarted. The Malfunction Indicator Light (MIL) may be
illuminated. A message in the instrument cluster will
inform the driver of the more serious conditions, and
indicate what actions may be necessary.
In the event of a momentary problem, the transmission
can be reset to regain all forward gears by performing the
following steps:
NOTE:In cases where the instrument cluster message
indicates the transmission may not re-engage after en-
gine shutdown, perform this procedure only in a desired
location (preferably, at your authorized dealer).
1. Stop the vehicle.
5
STARTING AND OPERATING 413
Page 416 of 636

2. Shift the transmission into PARK, if possible. If not,
shift the transmission to NEUTRAL.
3. Press and hold the ignition switch until the engine
turns OFF.
4. Wait approximately 30 seconds.
5. Restart the engine.
6. Shift into the desired gear range. If the problem is no
longer detected, the transmission will return to normal
operation.
NOTE:Even if the transmission can be reset, we recom-
mend that you visit your authorized dealer at your
earliest possible convenience. Your authorized dealer has
diagnostic equipment to determine if the problem could
recur.
If the transmission cannot be reset, authorized dealer
service is required.When To Use TOW Mode
When driving in hilly areas, towing a trailer, carrying a
heavy load, etc., and frequent transmission shifting oc-
curs, select TOW mode, using the rotary switch on the
center console. Selecting TOW mode will improve per-
formance and reduce the potential for transmission over-
heating or failure due to excessive shifting. Refer to
“Selec-Track™” in “Starting And Operating” for further
information.
PADDLE SHIFT MODE
Paddle Shift mode is a driver-interactive transmission
feature providing manual shift control, giving you more
control of the vehicle. Paddle Shift allows you to maxi-
mize engine braking, eliminate undesirable upshifts and
downshifts, and improve overall vehicle performance.
This system can also provide you with more control
414 STARTING AND OPERATING
Page 419 of 636

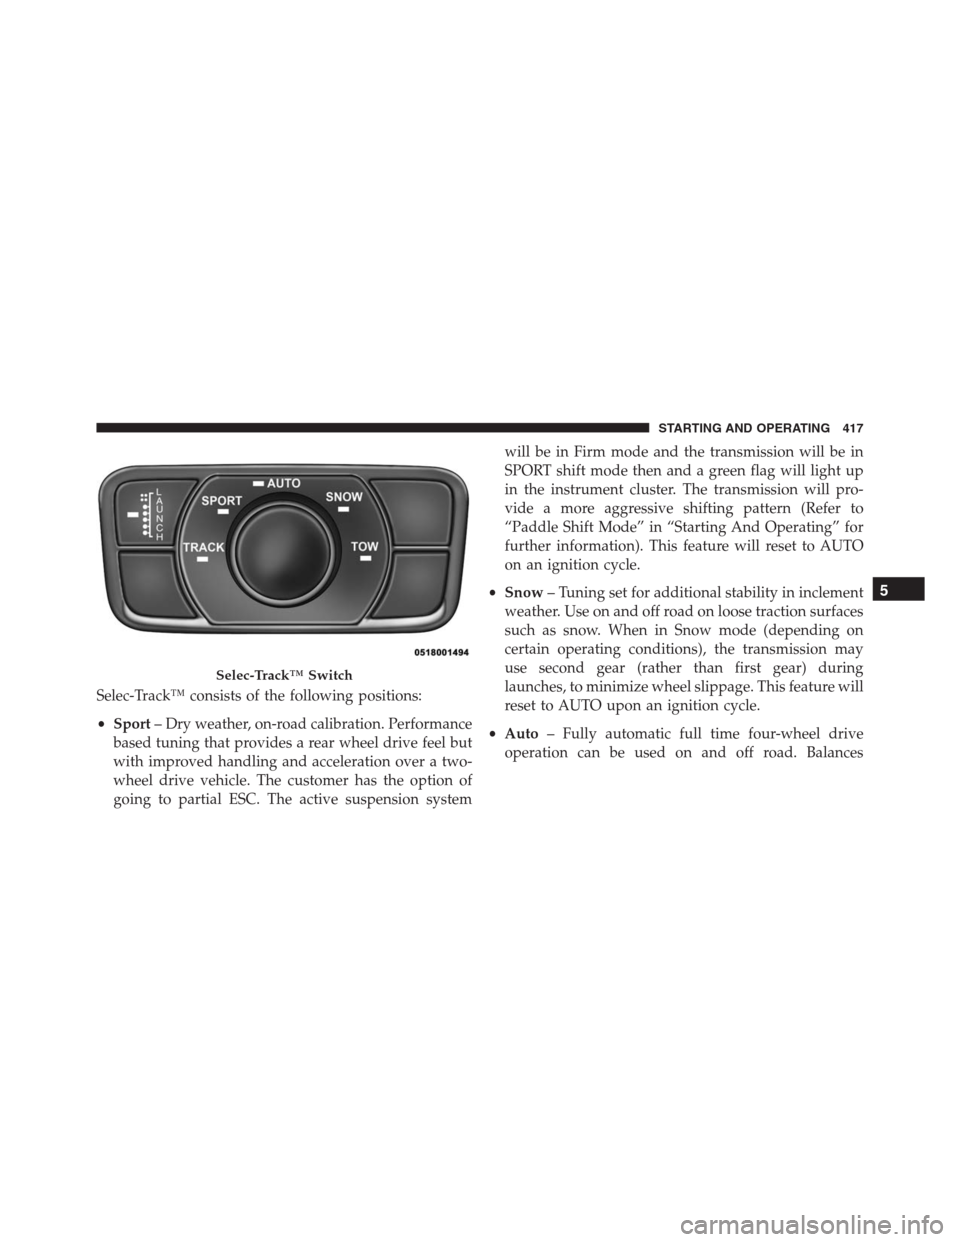
Selec-Track™ consists of the following positions:
•Sport– Dry weather, on-road calibration. Performance
based tuning that provides a rear wheel drive feel but
with improved handling and acceleration over a two-
wheel drive vehicle. The customer has the option of
going to partial ESC. The active suspension systemwill be in Firm mode and the transmission will be in
SPORT shift mode then and a green flag will light up
in the instrument cluster. The transmission will pro-
vide a more aggressive shifting pattern (Refer to
“Paddle Shift Mode” in “Starting And Operating” for
further information). This feature will reset to AUTO
on an ignition cycle.
•Snow– Tuning set for additional stability in inclement
weather. Use on and off road on loose traction surfaces
such as snow. When in Snow mode (depending on
certain operating conditions), the transmission may
use second gear (rather than first gear) during
launches, to minimize wheel slippage. This feature will
reset to AUTO upon an ignition cycle.
•Auto– Fully automatic full time four-wheel drive
operation can be used on and off road. Balances
Selec-Track™ Switch
5
STARTING AND OPERATING 417
Page 420 of 636

traction with seamless steering feel to provide im-
proved handling and acceleration over two-wheel
drive vehicles. The active suspension system will be in
Touring Mode.
•Track– Track road calibration for use on high traction
surfaces. Driveline is maximized for traction. Some
binding may be felt on less forgiving surfaces. The
electronic brake controls are set to Partial OFF to limit
traction control management of throttle and wheel
spin.
•The transmission will be in SPORT shift mode and
provide a more aggressive shifting pattern. Refer to
“Paddle Shift Mode” in “Starting And Operating”
for further information.
•The customer has the option of going to FULL OFF
with no interaction from the ESC System. The active
suspension system will be in Full Firm mode.
•This feature will reset to AUTO on an ignition cycle.•To w– Use this mode for towing. Vehicle suspension
will go to Firm mode. Trailer sway control is enabled
in the ESC system. The terrain switch will remain in
this position through an ignition cycle until the cus-
tomer cycles into another position. This feature will
reset to AUTO upon an ignition cycle.
Active Damping System
This vehicle is equipped with an electronic controlled
damping system. This system reduces body roll and pitch
in many driving situations including cornering, accelera-
tion and braking. There are 3 modes:
•Touring Mode(Available in terrain positions AUTO
and SNOW) — Used during highway speeds where a
touring suspension feel is desired.
•Firm Mode(Available in terrain positions SPORT and
TOW) — Provides a firm suspension for better han-
dling.
418 STARTING AND OPERATING
Page 421 of 636

•Full Firm(Available in TRACK mode) — Provides a
full firm suspension for an aggressive track experience.
Launch Mode — If Equipped
This system maximizes acceleration traction for straight
line racing. To use Launch Mode please follow the steps
below:
1. Bring vehicle to complete stop on a level track surface
with the engine running.
2. Set the steering wheel for straight ahead driving.
3. Fully press the brake pedal.
4. Press and release the “LAUNCH” Button.
5. Press the accelerator pedal to the floor.
NOTE:If the cluster launch DID message indicates all
conditions are correct for launch and the throttle is
pressed to the floor quickly (within approximately 1/2second) the system will hold the engine speed to a preset
speed (below the engine rev limiter speed).
6. Release the brake pedal.
Pressing the launch control button when launch control is
active will deactivate launch control.
NOTE:
•Launch Mode brings the engine to optimum RPM and
waits for the driver to release the brake. Launch Mode
then uses engine throttle only to achieve controlled
wheelslip for maximum acceleration through 62 mph
(100 km/h).
•Launch Mode can be initiated in any of the Select Trac
Modes.
•Launch Mode is not available until the 500 mile
(805 km) break-in has been achieved.
5
STARTING AND OPERATING 419