2015 JEEP GRAND CHEROKEE door lock
[x] Cancel search: door lockPage 351 of 717
•Headlights With Wipers — If Equipped
When this feature is selected, and the headlight switch is
in the AUTO position, the headlights will turn on ap-
proximately 10 seconds after the wipers are turned on.
The headlights will also turn off when the wipers are
turned off if they were turned on by this feature. To make
your selection, press the Headlights With Wipers button
on the touchscreen, until a check-mark appears next to
setting, showing that setting has been selected. Press the
back arrow button on the touchscreen to return to the
previous menu, or push the back button on the faceplate.
•Auto Dim High Beams — If Equipped
When this feature is selected, the high beam headlights
will deactivate automatically under certain conditions. To
make your selection, press the “Auto High Beams”
button on the touchscreen, until a check-mark appears
next to setting, showing that setting has been selected.
Press the back arrow button on the touchscreen to return
to the previous menu, or push the back button on the
faceplate. Refer to “Lights/Automatic High Beam — If
Equipped” in “Understanding The Features Of Your
Vehicle” for further information.
•Daytime Running Lights — If Equipped
When this feature is selected, the headlights will turn on
whenever the vehicle is set in motion. To make your
selection, press the “Daytime Running Lights” button on
the touchscreen, until a check-mark appears next to
setting, showing that setting has been selected. Press the
back arrow button on the touchscreen to return to the
previous menu, or push the back button on the faceplate.
•Flash Lights With Lock
When this feature is selected, the exterior lights will flash
when the doors are locked or unlocked with the Remote
Keyless Entry (RKE) transmitter. This feature may be
selected with or without the sound horn on lock feature
selected. To make your selection, press the “Flash Lights
4
UNDERSTANDING YOUR INSTRUMENT PANEL 349
Page 352 of 717
with Lock” button on the touchscreen, until a check-mark
appears next to setting, showing that setting has been
selected. Press the back arrow button on the touchscreen
to return to the previous menu, or push the back button
on the faceplate.
Doors & Locks
After pressing the Doors & Locks button on the touch-
screen the following settings will be available.
•Auto Door Locks
When this feature is selected, all doors will lock auto-
matically when the vehicle reaches a speed of 15 mph
(24 km/h). To make your selection, press the “Auto Door
Locks” button on the touchscreen, until a check-mark
appears next to setting, showing that setting has been
selected. Press the back arrow button on the touchscreen
to return to the previous menu, or push the back button
on the faceplate.
•Auto Unlock On Exit
When this feature is selected, all doors will unlock when
the vehicle is stopped, the transmission is in the PARK or
NEUTRAL position and the driver’s door is opened. To
make your selection, press the “Auto Unlock on Exit”
button on the touchscreen, until a check-mark appears
next to setting, showing that setting has been selected.
Press the back arrow button on the touchscreen to return
to the previous menu, or push the back button on the
faceplate.
•Flash Lights With Lock
When this feature is selected, the exterior lights will flash
when the doors are locked or unlocked with the Remote
Keyless Entry (RKE) transmitter, or when using the
passive entry feature. This feature may be selected with
or without the sound horn on lock feature selected. To
make your selection, press the “Flash Lights with Lock”
button on the touchscreen, until a check-mark appears
350 UNDERSTANDING YOUR INSTRUMENT PANEL
Page 353 of 717
next to setting, indicating that the setting has been
selected. Press the back arrow button on the touchscreen
to return to the previous menu.
•Sound Horn With Lock
When this feature is selected, the horn will sound when
the door locks are activated. To make your selection,
press either the “Off,” “1st Press,” or “2nd Press” button
on the touchscreen, until a check-mark appears next to
setting, showing that setting has been selected. Press the
back arrow button on the touchscreen to return to the
previous menu.
•Sound Horn With Remote Start
When this feature is selected, the horn will sound when
the remote start is activated. To make your selection,
press the “Sound Horn with Remote Start” button on the
touchscreen until a check-mark appears next to setting,
showing that setting has been selected. Press the back
arrow button on the touchscreen to return to the previous
menu.
•1st Press Of Key Fob Unlocks
When#Driver Door#is selected with 1st Press Of Key Fob
Unlocks, only the driver’s door will unlock with the first
press of the Remote Keyless Entry (RKE) transmitter
UNLOCK button. You must press the RKE transmitter
UNLOCK button twice to unlock the passenger’s doors.
When#All Doors#is selected for 1st Press Of Key Fob
Unlocks, all doors will unlock on the first press of the
RKE transmitter UNLOCK button.
4
UNDERSTANDING YOUR INSTRUMENT PANEL 351
Page 354 of 717
NOTE:If the vehicle is programmed 1st Press Of Key Fob
Unlocks “All Doors,” all doors will unlock no matter
which Passive Entry equipped door handle is grasped. If
1st Press Of Key Fob Unlocks “Driver Door” is pro-
grammed, only the driver ’s door will unlock when the
driver ’s door is grasped. With Passive Entry, if 1st Press
Of Key Fob Unlocks “Driver Door” is programmed,
touching the handle more than once will only result in
the driver ’s door opening. If “Driver Door” is selected,
once the driver door is opened, the interior door lock/
unlock switch can be used to unlock all doors (or use
RKE transmitter).
•Passive Entry
This feature allows you to lock and unlock the vehicles
door(s) without having to press the Remote Keyless
Entry (RKE) transmitter lock or unlock buttons. To make
your selection, press the “Passive Entry” button on the
touchscreen, until a check-mark appears next to setting,
showing that setting has been selected. Press the back
arrow button on the touchscreen to return to the previous
menu, or push the back button on the faceplate. Refer to
“Keyless Enter-N-Go™” in “Things To Know Before
Starting Your Vehicle”.
•Personal Settings Linked to Key Fob — If Equipped
This feature provides automatic recall of all settings
stored to a memory location (driver ’s seat, exterior
mirrors, steering column position and radio station pre-
sets) to enhance driver mobility when entering and
exiting the vehicle. To make your selection, press the
“Personal Settings Linked to Key Fob” button on the
touchscreen, until a check-mark appears next to setting,
showing that setting has been selected. Press the back
arrow button on the touchscreen to return to the previous
menu, or push the back button on the faceplate.
352 UNDERSTANDING YOUR INSTRUMENT PANEL
Page 355 of 717
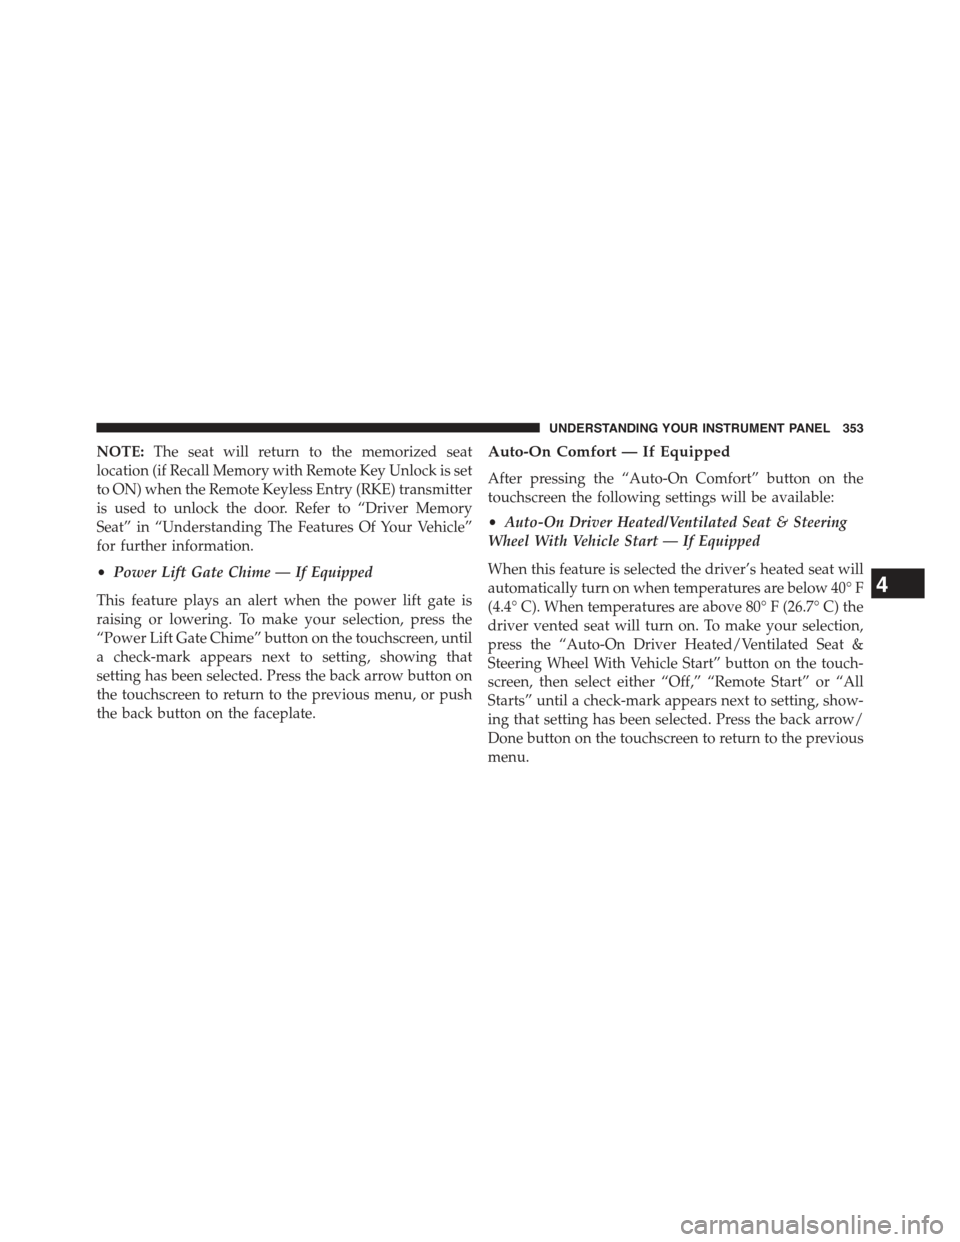
NOTE:The seat will return to the memorized seat
location (if Recall Memory with Remote Key Unlock is set
to ON) when the Remote Keyless Entry (RKE) transmitter
is used to unlock the door. Refer to “Driver Memory
Seat” in “Understanding The Features Of Your Vehicle”
for further information.
•Power Lift Gate Chime — If Equipped
This feature plays an alert when the power lift gate is
raising or lowering. To make your selection, press the
“Power Lift Gate Chime” button on the touchscreen, until
a check-mark appears next to setting, showing that
setting has been selected. Press the back arrow button on
the touchscreen to return to the previous menu, or push
the back button on the faceplate.
Auto-On Comfort — If Equipped
After pressing the “Auto-On Comfort” button on the
touchscreen the following settings will be available:
•Auto-On Driver Heated/Ventilated Seat & Steering
Wheel With Vehicle Start — If Equipped
When this feature is selected the driver’s heated seat will
automatically turn on when temperatures are below 40° F
(4.4° C). When temperatures are above 80° F (26.7° C) the
driver vented seat will turn on. To make your selection,
press the “Auto-On Driver Heated/Ventilated Seat &
Steering Wheel With Vehicle Start” button on the touch-
screen, then select either “Off,” “Remote Start” or “All
Starts” until a check-mark appears next to setting, show-
ing that setting has been selected. Press the back arrow/
Done button on the touchscreen to return to the previous
menu.
4
UNDERSTANDING YOUR INSTRUMENT PANEL 353
Page 410 of 717
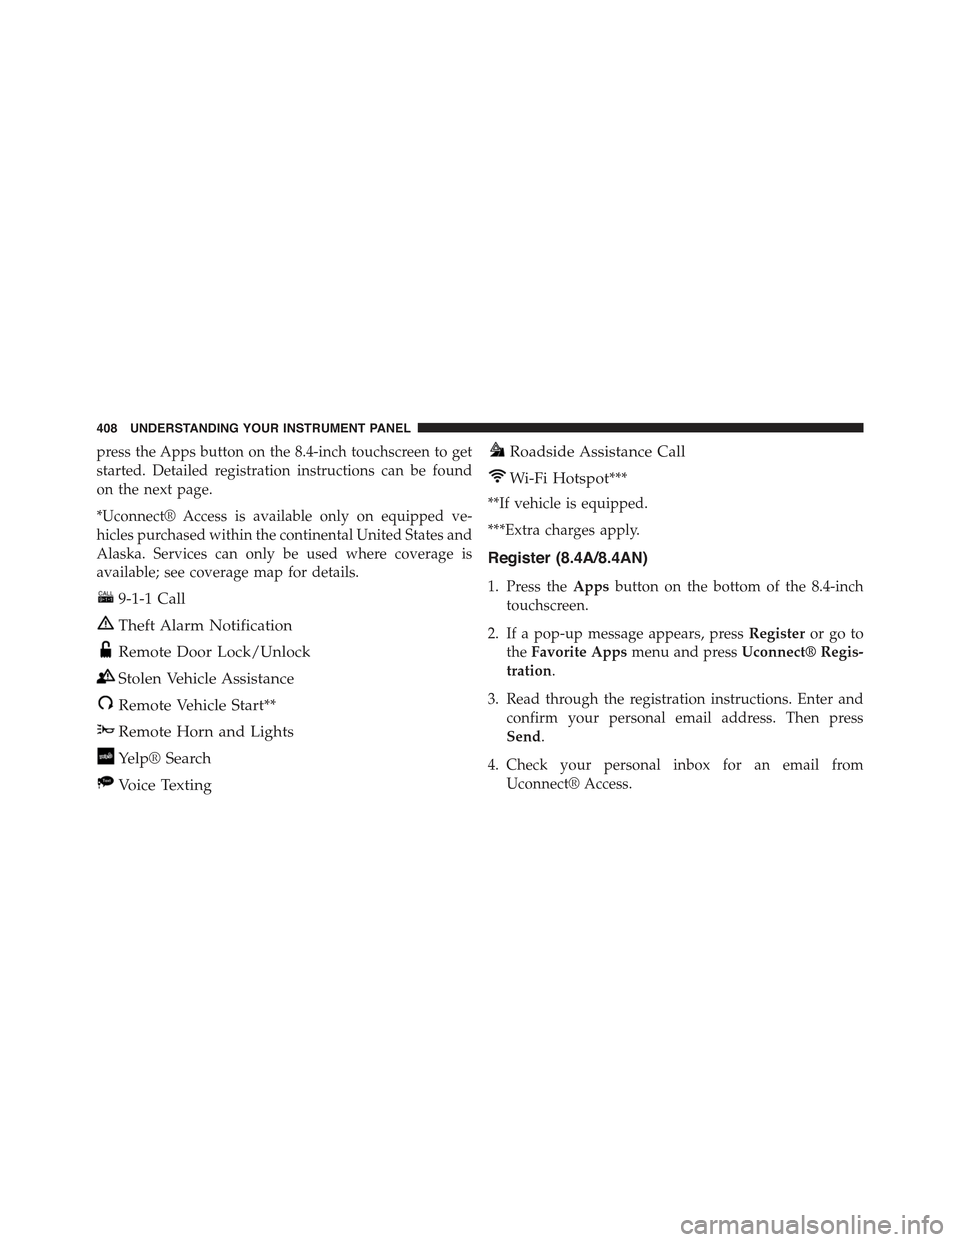
press the Apps button on the 8.4-inch touchscreen to get
started. Detailed registration instructions can be found
on the next page.
*Uconnect® Access is available only on equipped ve-
hicles purchased within the continental United States and
Alaska. Services can only be used where coverage is
available; see coverage map for details.
9-1-1 Call
Theft Alarm Notification
Remote Door Lock/Unlock
Stolen Vehicle Assistance
Remote Vehicle Start**
Remote Horn and Lights
Yelp® Search
Voice Texting
Roadside Assistance Call
Wi-Fi Hotspot***
**If vehicle is equipped.
***Extra charges apply.
Register (8.4A/8.4AN)
1. Press theAppsbutton on the bottom of the 8.4-inch
touchscreen.
2. If a pop-up message appears, pressRegisteror go to
theFavorite Appsmenu and pressUconnect® Regis-
tration.
3. Read through the registration instructions. Enter and
confirm your personal email address. Then press
Send.
4. Check your personal inbox for an email from
Uconnect® Access.
408 UNDERSTANDING YOUR INSTRUMENT PANEL
Page 623 of 717
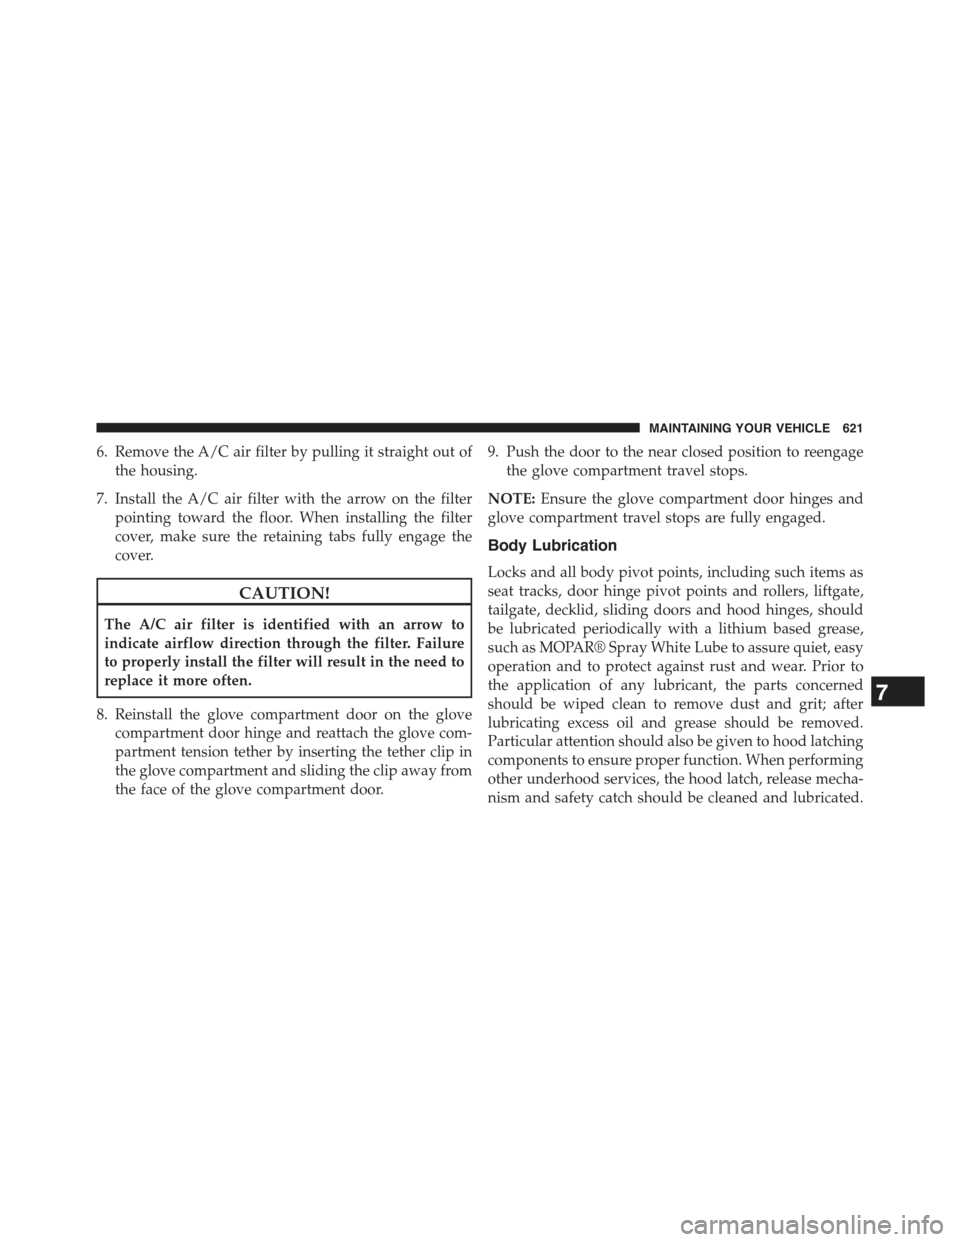
6. Remove the A/C air filter by pulling it straight out of
the housing.
7. Install the A/C air filter with the arrow on the filter
pointing toward the floor. When installing the filter
cover, make sure the retaining tabs fully engage the
cover.
CAUTION!
The A/C air filter is identified with an arrow to
indicate airflow direction through the filter. Failure
to properly install the filter will result in the need to
replace it more often.
8. Reinstall the glove compartment door on the glove
compartment door hinge and reattach the glove com-
partment tension tether by inserting the tether clip in
the glove compartment and sliding the clip away from
the face of the glove compartment door.
9. Push the door to the near closed position to reengage
the glove compartment travel stops.
NOTE:Ensure the glove compartment door hinges and
glove compartment travel stops are fully engaged.
Body Lubrication
Locks and all body pivot points, including such items as
seat tracks, door hinge pivot points and rollers, liftgate,
tailgate, decklid, sliding doors and hood hinges, should
be lubricated periodically with a lithium based grease,
such as MOPAR® Spray White Lube to assure quiet, easy
operation and to protect against rust and wear. Prior to
the application of any lubricant, the parts concerned
should be wiped clean to remove dust and grit; after
lubricating excess oil and grease should be removed.
Particular attention should also be given to hood latching
components to ensure proper function. When performing
other underhood services, the hood latch, release mecha-
nism and safety catch should be cleaned and lubricated.
7
MAINTAINING YOUR VEHICLE 621
Page 655 of 717
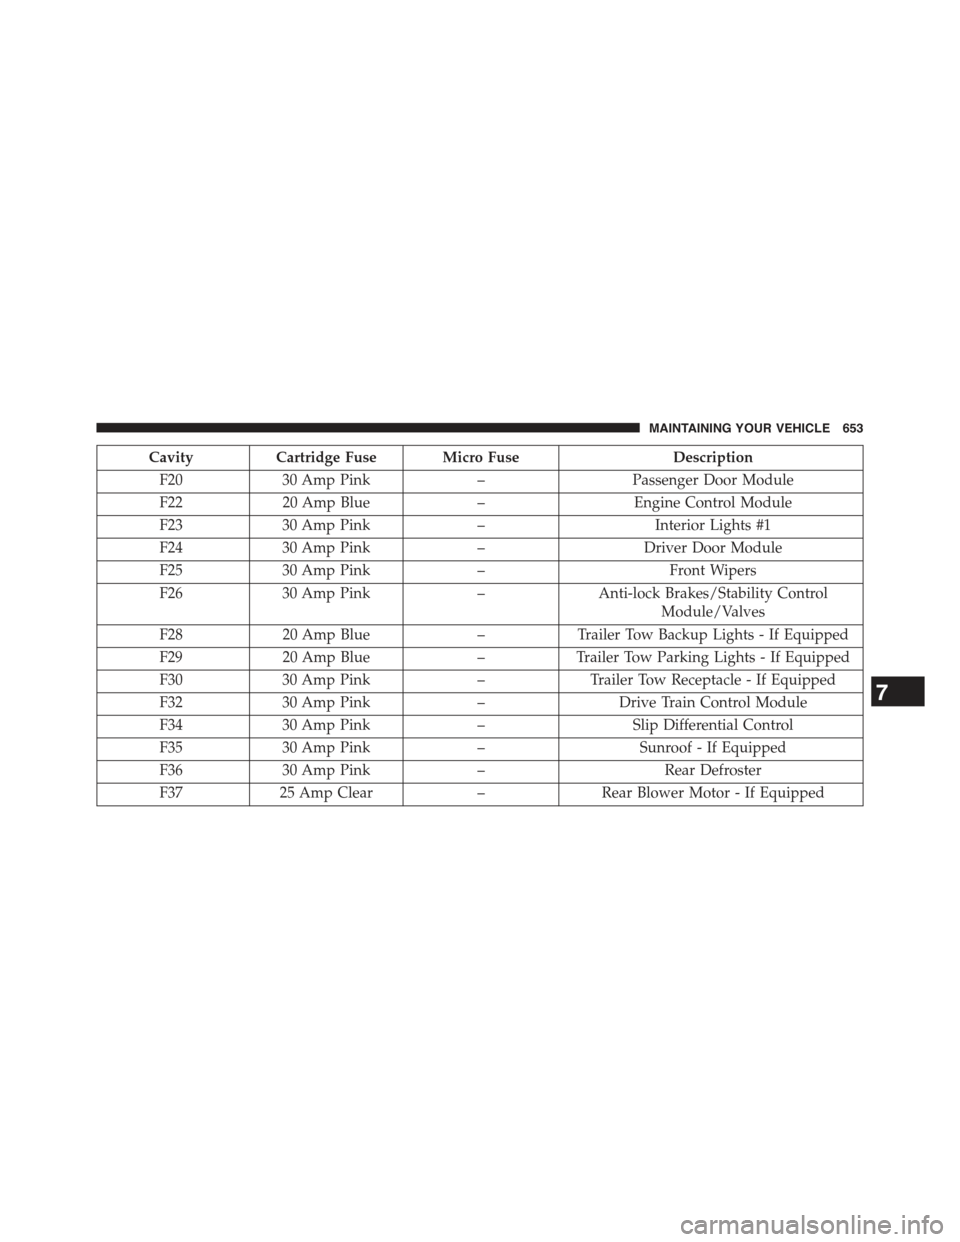
CavityCartridge Fuse Micro FuseDescription
F2030 Amp Pink–Passenger Door Module
F2220 Amp Blue–Engine Control Module
F2330 Amp Pink–Interior Lights #1
F2430 Amp Pink–Driver Door Module
F2530 Amp Pink–Front Wipers
F2630 Amp Pink–Anti-lock Brakes/Stability Control
Module/Valves
F2820 Amp Blue–Trailer Tow Backup Lights - If Equipped
F2920 Amp Blue–Trailer Tow Parking Lights - If Equipped
F3030 Amp Pink–Trailer Tow Receptacle - If Equipped
F3230 Amp Pink–Drive Train Control Module
F3430 Amp Pink–Slip Differential Control
F3530 Amp Pink–Sunroof - If Equipped
F3630 Amp Pink–Rear Defroster
F3725 Amp Clear–Rear Blower Motor - If Equipped
7
MAINTAINING YOUR VEHICLE 653