2015 JEEP GRAND CHEROKEE sport mode
[x] Cancel search: sport modePage 109 of 717
WARNING!
•The top tether anchorages are not visible until the
gap panel is folded down. Do not use the visible
cargo tie down hooks, located on the floor behind
the seats, to attach a child restraint tether anchor.
•An incorrectly anchored tether strap could lead to
increased head motion and possible injury to the
child. Use only the anchorage position directly
behind the child seat to secure a child restraint top
tether strap.
•If your vehicle is equipped with a split rear seat,
make sure the tether strap does not slip into the
opening between the seatbacks as you remove
slack in the strap.
Transporting Pets
Air Bags deploying in the front seat could harm your pet.
An unrestrained pet will be thrown about and possibly
injured, or injure a passenger during panic braking or in
a collision.
Pets should be restrained in the rear seat in pet harnesses
or pet carriers that are secured by seat belts.
ENGINE BREAK-IN RECOMMENDATIONS
A long break-in period is not required for the engine and
drivetrain (transmission and axle) in your vehicle.
Drive moderately during the first 300 miles (500 km).
After the initial 60 miles (100 km), speeds up to 50 or
55 mph (80 or 90 km/h) are desirable.
2
THINGS TO KNOW BEFORE STARTING YOUR VEHICLE 107
Page 138 of 717

•The BSM system detection zone DOES NOT change if
your vehicle is towing a trailer. Therefore, visually
verify the adjacent lane is clear for both your vehicle
and trailer before making a lane change. If the trailer or
other object (i.e., bicycle, sports equipment) extends
beyond the side of your vehicle, this may result in the
BSM warning light remaining illuminated the entire
time the vehicle is in a forward gear.
The area on the rear fascia where the radar sensors are
located must remain free of snow, ice, and dirt/road
contamination so that the BSM system can function
properly. Do not block the area of the rear fascia where
the radar sensors are located with foreign objects (bum-
per stickers, bicycle racks, etc.).The BSM system notifies the driver of objects in the
detection zones by illuminating the BSM warning light
located in the outside mirrors in addition to sounding an
audible (chime) alert and reducing the radio volume.
Refer to “Modes Of Operation” for further information.
Sensor Location
136 UNDERSTANDING THE FEATURES OF YOUR VEHICLE
Page 336 of 717
•Tire Jack Mode
When this feature is selected the air suspension system is
disabled to prevent auto leveling of the suspension, while
the vehicle is on a jack changing a tire. To make your
selection, press the “Tire Jack Mode” button on the
touchscreen, select “On” or “Off” followed by pressing
the back arrow button on the touchscreen.
•Transport Mode
When this feature is selected the air suspension system is
disabled to assist with flat bed towing. To make your
selection, press the “Transport Mode” button on the
touchscreen, select “On” or “Off” followed by pressing
the back arrow button on the touchscreen.
•Wheel Alignment Mode
This feature prevents auto leveling of the air suspension
while performing a wheel alignment service. Before
performing a wheel alignment this mode must be en-
abled. Refer to your authorized dealer for further infor-
mation.
Compass Settings — If Equipped
After pressing the “Compass Settings” button on the
touchscreen the following settings will be available:
•Variance
Compass Variance is the difference between Magnetic
North and Geographic North. To compensate for the
differences the variance should be set for the zone where
the vehicle is driven, per the zone map. Once properly
set, the compass will automatically compensate for the
differences, and provide the most accurate compass
heading.
334 UNDERSTANDING YOUR INSTRUMENT PANEL
Page 357 of 717
the touchscreen until a check-mark appears next to
setting, showing that setting has been selected. Press the
back arrow button on the touchscreen to return to the
previous menu.
Suspension — If Equipped
After pressing the Suspension button on the touchscreen
the following settings will be available.
•Auto Entry/Exit Suspension
When this feature is selected, the vehicle lowers the
suspension for easy entry/exit. Press the “Auto Entry/
Exit Suspension” button until a check-mark appears next
to the feature showing the system has been activated or
the check-mark is removed showing the system has been
deactivated. Press the back arrow button on the touch-
screen to return to the previous menu.
•Suspension Display Messages
When “All” is selected, all the Air Suspension Alerts will
be displayed. When “Warnings Only” is selected only the
Air Suspension Warnings will be displayed.
•Tire Jack Mode
When this feature is selected the air suspension system is
disabled to assist with changing a spare tire. Press the
“Tire Jack Mode” button until a check-mark appears next
to the feature showing the system has been activated or
the check-mark is removed showing the system has been
deactivated. Press the back arrow button on the touch-
screen to return to the previous menu.
•Transport Mode
When this feature is selected the air suspension system is
disabled to assist with flat bed towing. Press the “Trans-
port Mode” button until a check-mark appears next to
the feature showing the system has been activated or the
4
UNDERSTANDING YOUR INSTRUMENT PANEL 355
Page 433 of 717
The electronically-controlled transmission provides a
precise shift schedule. The transmission electronics are
self-calibrating; therefore, the first few shifts on a new
vehicle may be somewhat abrupt. This is a normal
condition, and precision shifts will develop within a few
hundred miles (kilometers).
Only shift from DRIVE to PARK or REVERSE when the
accelerator pedal is released and the vehicle is stopped.
Be sure to keep your foot on the brake pedal when
shifting between these gears.
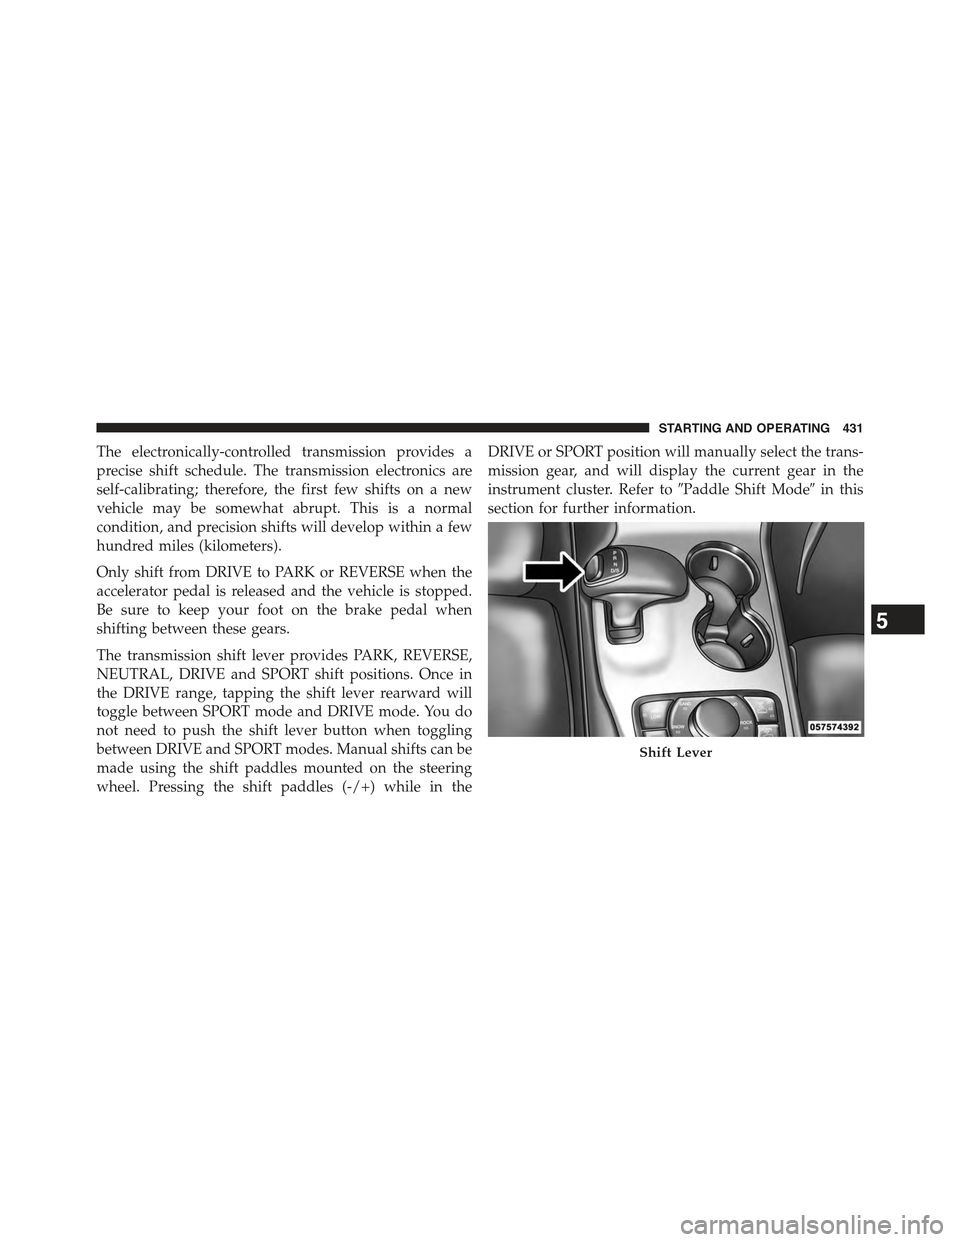
The transmission shift lever provides PARK, REVERSE,
NEUTRAL, DRIVE and SPORT shift positions. Once in
the DRIVE range, tapping the shift lever rearward will
toggle between SPORT mode and DRIVE mode. You do
not need to push the shift lever button when toggling
between DRIVE and SPORT modes. Manual shifts can be
made using the shift paddles mounted on the steering
wheel. Pressing the shift paddles (-/+) while in the
DRIVE or SPORT position will manually select the trans-
mission gear, and will display the current gear in the
instrument cluster. Refer to#Paddle Shift Mode#in this
section for further information.
Shift Lever
5
STARTING AND OPERATING 431
Page 438 of 717
DRIVE (D)
This range should be used for most city and highway
driving. It provides the smoothest upshifts and down-
shifts, and the best fuel economy. The transmission
automatically upshifts through all forward gears. The
DRIVE position provides optimum driving characteris-
tics under all normal operating conditions.
When frequent transmission shifting occurs (such as
when operating the vehicle under heavy loading condi-
tions, in hilly terrain, traveling into strong head winds, or
while towing heavy trailers), use the Paddle Shift
switches (refer to#Paddle Shift Mode#in this section for
further information) to select a lower gear. Under these
conditions, using a lower gear will improve performance
and extend transmission life by reducing excessive shift-
ing and heat buildup.
During extremely cold temperatures (-22°F [-30°C] or
below), transmission operation may be modified depend-
ing on engine and transmission temperature as well as
vehicle speed. Normal operation will resume once the
transmission temperature has risen to a suitable level.
SPORT (S)
This mode alters the transmission’s automatic shift
schedule for sportier driving. Upshift speeds are in-
creased to make full use of available engine power. To
switch between DRIVE and SPORT modes, tap the shift
lever rearward. SPORT mode is only accessible from
DRIVE.
NOTE:When Sport Mode is enabled, vehicles with the
Quadra-Lift™ air suspension system will operate in
“Aero” Mode. Please refer to#Quadra-Lift™#in#Starting
and Operating#for further information.
436 STARTING AND OPERATING
Page 440 of 717
NOTE:Even if the transmission can be reset, we recom-
mend that you visit your authorized dealer at your
earliest possible convenience. Your authorized dealer has
diagnostic equipment to determine if the problem could
recur.
If the transmission cannot be reset, authorized dealer
service is required.
Paddle Shift Mode
Paddle Shift mode is a driver-interactive transmission
feature providing manual shift control, giving you more
control of the vehicle. Paddle Shift allows you to maxi-
mize engine braking, eliminate undesirable upshifts and
downshifts, and improve overall vehicle performance.
This system can also provide you with more control
during passing, city driving, cold slippery conditions,
mountain driving, trailer towing, and many other situa-
tions.
Operation
When the transmission is in DRIVE or SPORT mode, it
will operate automatically, shifting between the eight
available gears. To activate Paddle Shift mode, simply tap
one of the steering wheel-mounted shift paddles (+/-)
while in DRIVE or SPORT mode. Tapping (-) to enter
Paddle Shift mode will downshift the transmission to the
next lower gear, while using (+) to enter Paddle Shift
mode will retain the current gear. When Paddle Shift
mode is active, the current transmission gear is displayed
in the instrument cluster.
In Paddle Shift mode, the transmission will shift up or
down when (+/-) is manually selected by the driver,
unless an engine lugging or overspeed condition would
result. It will remain in the selected gear until another
upshift or downshift is chosen, except as described
below.
438 STARTING AND OPERATING
Page 454 of 717
speed falls below 20 mph (32 km/h). The vehicle will
enter Aero Mode, regardless of vehicle speed if the
shift lever is in the “SPORT” position.
•Entry/Exit Mode (Lowers the vehicle approximately
1.6 in (40 mm)– This position lowers the vehicle for
easier passenger entry and exit as well as lowering the
rear of the vehicle for easier loading and unloading of
cargo. To enter Entry/Exit Mode, push the “Down”
button once from (NRH) while the vehicle speed is
below 25 mph (40 km/h). Once the vehicle speed goes
below 15 mph (24 km/h) the vehicle height will begin
to lower. If the vehicle speed remains between 15 mph
(24 km/h) and 25 mph (40 km/h) for greater than 60
seconds, or the vehicle speed exceeds 25 mph
(40 km/h) the Entry/Exit Mode change will be can-
celled. To exit Entry/Exit Mode, press the “Up” button
once while in Entry/Exit Mode or drive the vehicle
over 15 mph (24 km/h).
NOTE:Automatic lowering of the vehicle into Entry/
Exit Mode can be enabled through the Uconnect® Touch-
Screen Radio. If this feature is enabled, the vehicle will
only lower if the shift lever is in#PARK#, the terrain
switch is in#AUTO#, the transfer-case is in#AUTO” and
the vehicle level should be either in Normal or Aero
Mode. The Vehicle will not automatically lower if the air
suspension level is in Off Rd 2 or Off Rd 1. If the vehicle
is equipped with Intrusion Theft Module (ITM), the
lowering will be suppressed when the ignition is
switched Off and the Door is Open to prevent setting the
alarm Off.
The Selec-Terrain™ switch will automatically change the
vehicle to the proper height based on the position of the
Selec-Terrain™ switch. The height can be changed from
the default Selec-Terrain™ setting by normal use of the
air suspension buttons. Refer to “Selec-Terrain™” in
“Starting and Operating” for further information.
452 STARTING AND OPERATING