2015 FORD FOCUS ELECTRIC change time
[x] Cancel search: change timePage 2 of 369
The information contained in this publication was correct at the time of going to print. In the interest of
continuous development, we reserve the right to change specifications, design or equipment at any time
without notice or obligation. No part of this publication may be reproduced, transmitted, stored in a
retrieval system or translated into any language in any form by any means without our written permission.
Errors and omissions excepted.
© Ford Motor Company 2014
All rights reserved.
Part Number: 20141023165258
Page 53 of 369
PRINCIPLE OF OPERATION
MyKey allows you to program keys with
restricted driving modes to promote good
driving habits. All but one of the keys can
be activated with these restricted modes.
Any keys that remain unprogrammed are
referred to as administrator keys or admin
keys. They can be used to:
•
Create a MyKey.
• Program configurable MyKey settings.
• Clear all MyKey features.
When you have created a MyKey, you can
access the following information by using
the information display to determine:
• How many admin keys and MyKeys are
programmed to your vehicle.
• The total distance your vehicle traveled
with a MyKey.
Note: Switch the ignition on to use the
system.
Note: All MyKeys are programmed to the
same settings. You cannot program them
individually.
Note: For vehicles equipped with a
push-button start, when both a MyKey and
an admin key are present, the admin key will
be recognized by the vehicle while switching
the vehicle on to start.
Non-configurable Settings
The following settings cannot be changed
by an admin key user: •
Safety belt reminder. You cannot
disable this feature. The audio system
will mute when the front seat
passengers’ safety belts are not
fastened.
• Early low charge. The low-charge
warning activates earlier, giving the
MyKey user more time to recharge.
• Driver assist features, if equipped on
your vehicle, are forced on: parking aid.
Configurable Settings
With an admin key, you can configure
certain MyKey settings when you first
create a MyKey and before you recycle the
key or restart the engine. You can also
change the settings afterward with an
admin key.
• A vehicle speed limit can be set.
Warnings will be shown in the display
followed by an audible tone when your
vehicle reaches the set speed. You
cannot override the set speed by fully
depressing the accelerator pedal or by
setting cruise control. WARNING
Do not set MyKey maximum speed
limit to a limit that will prevent the
driver from maintaining a safe speed
considering posted speed limits and
prevailing road conditions. The driver is
always responsible to drive in accordance
with local laws and prevailing conditions.
Failure to do so could result in accident or
injury. 50
Focus (CDH), enUSA, First Printing MyKey
™
Page 55 of 369
Note:
You can clear or change your MyKey
settings at any time during the same key
cycle as you created the MyKey. Once you
have switched the vehicle off, however, you
will need an admin key to change or clear
your MyKey settings.
Note: When you make any changes to your
MyKey settings, you change the settings for
every MyKey. You cannot make individual
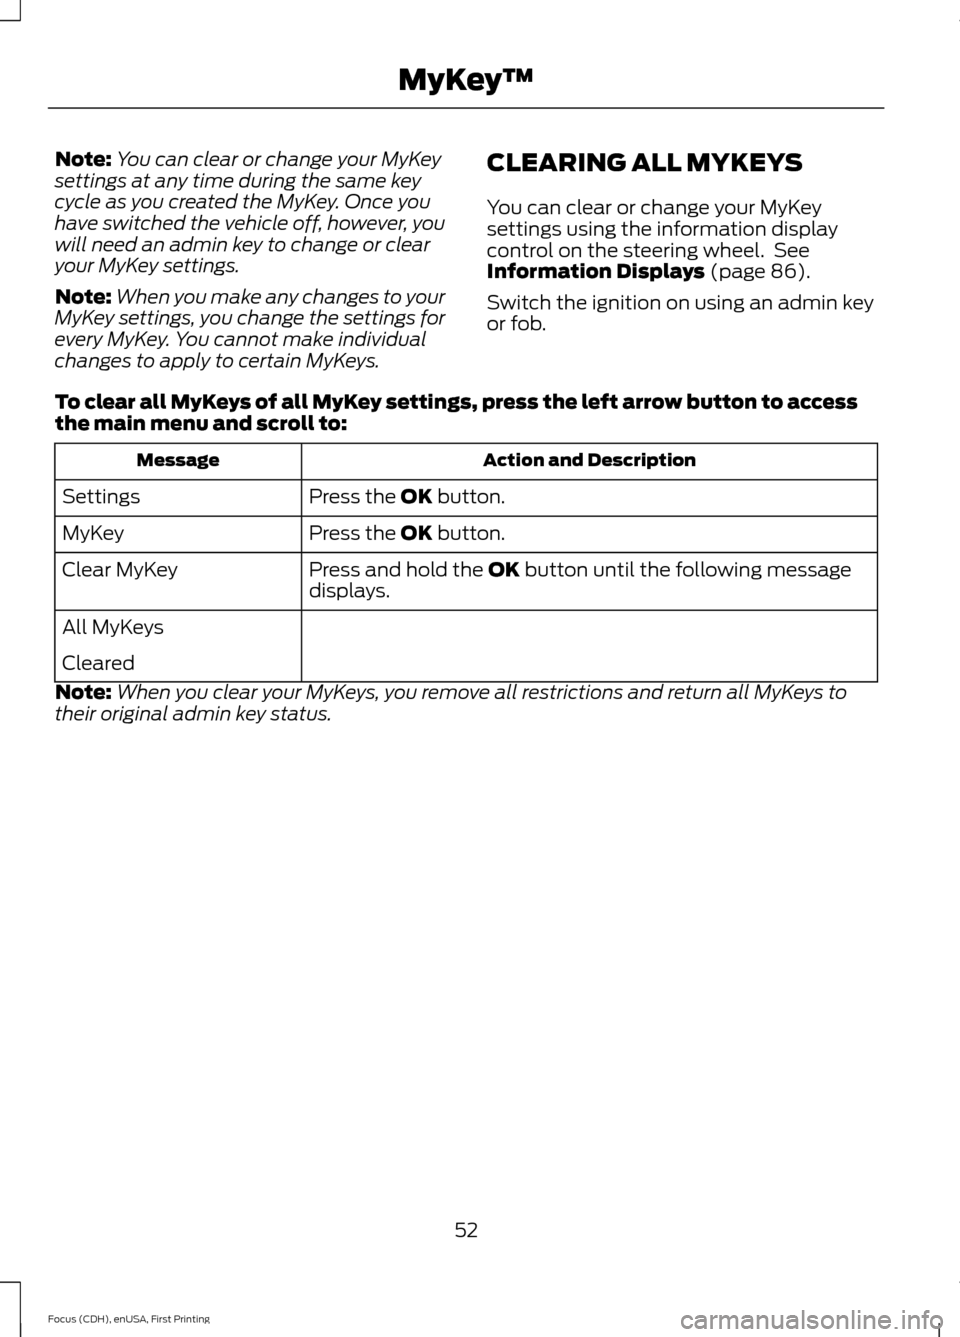
changes to apply to certain MyKeys. CLEARING ALL MYKEYS
You can clear or change your MyKey
settings using the information display
control on the steering wheel. See
Information Displays (page 86).
Switch the ignition on using an admin key
or fob.
To clear all MyKeys of all MyKey settings, press the left arrow button to access
the main menu and scroll to: Action and Description
Message
Press the
OK button.
Settings
Press the
OK button.
MyKey
Press and hold the
OK button until the following message
displays.
Clear MyKey
All MyKeys
Cleared
Note: When you clear your MyKeys, you remove all restrictions and return all MyKeys to
their original admin key status.
52
Focus (CDH), enUSA, First Printing MyKey
™
Page 60 of 369
LOCKING AND UNLOCKING
You can use the power door lock control
or the remote control to lock and unlock
your vehicle.
Power Door Locks
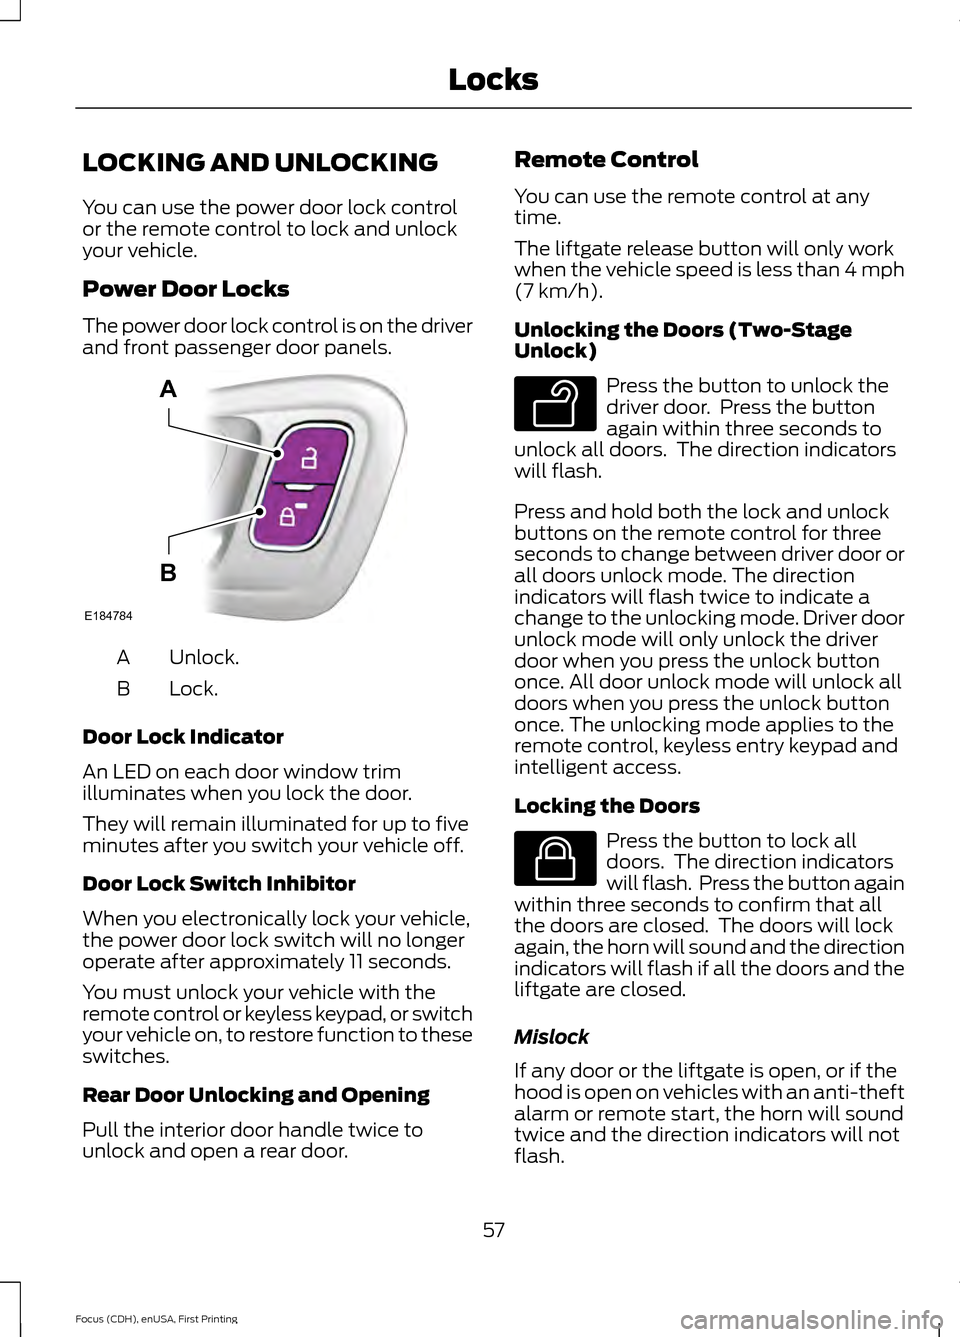
The power door lock control is on the driver
and front passenger door panels.
Unlock.
A
Lock.
B
Door Lock Indicator
An LED on each door window trim
illuminates when you lock the door.
They will remain illuminated for up to five
minutes after you switch your vehicle off.
Door Lock Switch Inhibitor
When you electronically lock your vehicle,
the power door lock switch will no longer
operate after approximately 11 seconds.
You must unlock your vehicle with the
remote control or keyless keypad, or switch
your vehicle on, to restore function to these
switches.
Rear Door Unlocking and Opening
Pull the interior door handle twice to
unlock and open a rear door. Remote Control
You can use the remote control at any
time.
The liftgate release button will only work
when the vehicle speed is less than 4 mph
(7 km/h).
Unlocking the Doors (Two-Stage
Unlock) Press the button to unlock the
driver door. Press the button
again within three seconds to
unlock all doors. The direction indicators
will flash.
Press and hold both the lock and unlock
buttons on the remote control for three
seconds to change between driver door or
all doors unlock mode. The direction
indicators will flash twice to indicate a
change to the unlocking mode. Driver door
unlock mode will only unlock the driver
door when you press the unlock button
once. All door unlock mode will unlock all
doors when you press the unlock button
once. The unlocking mode applies to the
remote control, keyless entry keypad and
intelligent access.
Locking the Doors Press the button to lock all
doors. The direction indicators
will flash. Press the button again
within three seconds to confirm that all
the doors are closed. The doors will lock
again, the horn will sound and the direction
indicators will flash if all the doors and the
liftgate are closed.
Mislock
If any door or the liftgate is open, or if the
hood is open on vehicles with an anti-theft
alarm or remote start, the horn will sound
twice and the direction indicators will not
flash.
57
Focus (CDH), enUSA, First Printing LocksE184784
A
B E138629 E138623
Page 75 of 369
GENERAL INFORMATION
Condensation in Lamp Assemblies
Exterior lamps have vents to
accommodate normal changes in air
pressure.
Condensation can be a natural by-product
of this design. When moist air enters the
lamp assembly through the vents, there is
a possibility that condensation can occur
when the temperature is cold. When
normal condensation occurs, a fine mist
can form on the interior of the lens. The
fine mist eventually clears and exits
through the vents during normal operation.
Clearing time may take as long as 48 hours
under dry weather conditions.
Examples of acceptable condensation are:
•
The presence of a fine mist (no streaks,
drip marks or large droplets).
• A fine mist covers less than 50% of the
lens.
Examples of unacceptable condensation
are:
• A water puddle inside the lamp.
• Streaks, drip marks or large droplets
present on the interior of the lens.
If you see any unacceptable condensation,
have your vehicle checked by an authorized
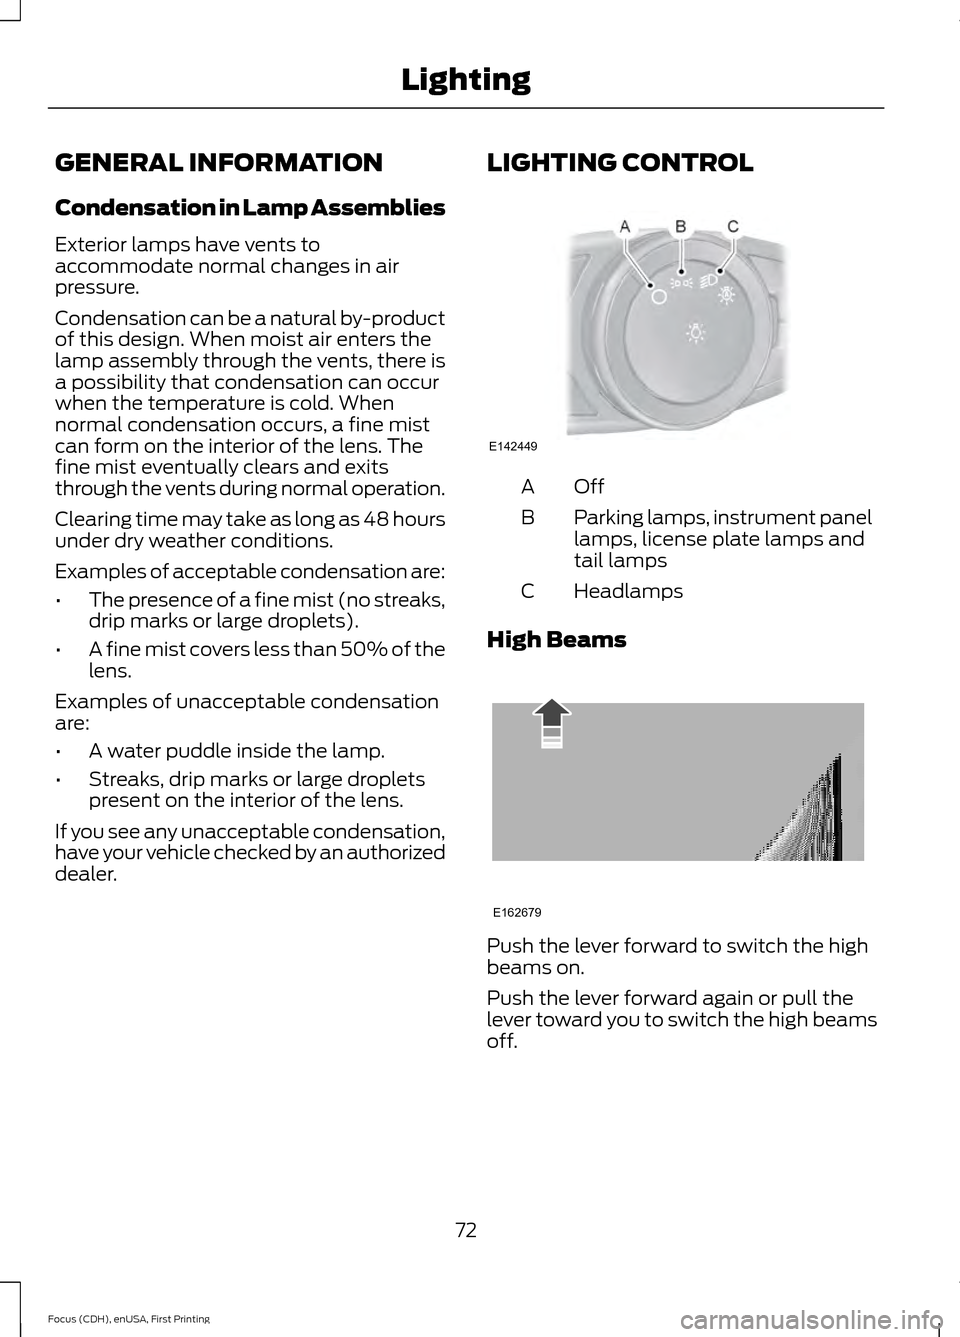
dealer. LIGHTING CONTROL OffA
Parking lamps, instrument panel
lamps, license plate lamps and
tail lamps
B
Headlamps
C
High Beams Push the lever forward to switch the high
beams on.
Push the lever forward again or pull the
lever toward you to switch the high beams
off.
72
Focus (CDH), enUSA, First Printing LightingE142449 E162679
Page 78 of 369
4.
The lighting control is in the autolamps
position.
5. The headlamps are off.
The other lighting control switch positions
do not activate the daytime running lamps,
and you can use them to temporarily
override autolamp control.
When switched off in the information
display, the daytime running lamps are off
in all lighting control switch positions.
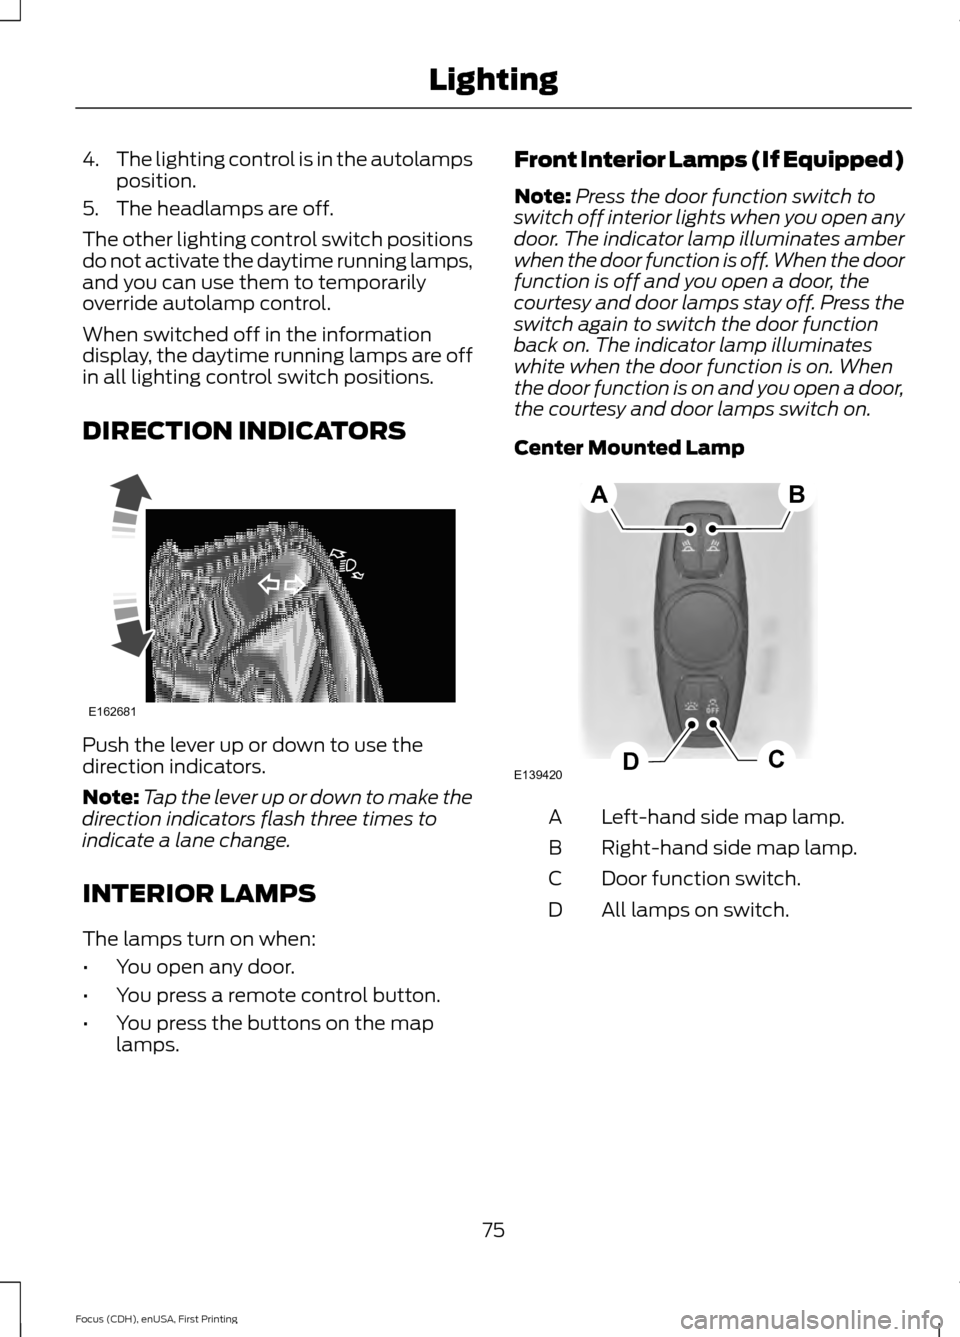
DIRECTION INDICATORS Push the lever up or down to use the
direction indicators.
Note:
Tap the lever up or down to make the
direction indicators flash three times to
indicate a lane change.
INTERIOR LAMPS
The lamps turn on when:
• You open any door.
• You press a remote control button.
• You press the buttons on the map
lamps. Front Interior Lamps (If Equipped)
Note:
Press the door function switch to
switch off interior lights when you open any
door. The indicator lamp illuminates amber
when the door function is off. When the door
function is off and you open a door, the
courtesy and door lamps stay off. Press the
switch again to switch the door function
back on. The indicator lamp illuminates
white when the door function is on. When
the door function is on and you open a door,
the courtesy and door lamps switch on.
Center Mounted Lamp Left-hand side map lamp.
A
Right-hand side map lamp.
B
Door function switch.
C
All lamps on switch.
D
75
Focus (CDH), enUSA, First Printing LightingE162681 E139420C
D
AB
Page 85 of 369
•
State of Charge - The state of charge
for the high voltage battery is shown
as a colored fill. The fill color is
normally blue. When a low battery
condition is reached the fill turns
amber. When the battery is depleted
the fill turns red. See the Information
Messages section for details on
associated Low Battery and Depleted
Battery warnings.
• Distance to Empty - The Range
Estimate in the Battery Gauge is
personalized to your key. This is the
estimated distance your vehicle can
travel before needing a recharge. The
Range Estimate is based on your
typical energy usage while driving. This
includes your Drive Habits as well as
your use of accessories such as Climate
Control. Your Range Estimate may
change immediately when you change
your Climate Control settings.
• Regen Display - A circular arrow
symbol appears in the center of the
Battery Gauge when energy is being
recaptured through the regenerative
braking system.
Brake Coach Display
The Brake Coach appears after your
vehicle has come to a stop. It coaches you
to brake in a manner which maximizes the
amount of energy returned through the
regenerative braking system. The percent
displayed is an indication of the
regenerative braking efficiency with 100%
representing the maximum amount of
energy recovery. If desired, this feature can
be disabled in the Display section of the
Settings menu. Trip Summary and Lifetime Summary
These summaries display after switching
off your vehicle. The Trip Summary
appears first, followed by the Lifetime
Summary. You can toggle between these
displays using the up and down arrow keys
on the left hand steering wheel controls.
Trip Summary data is from the last power
cycle, while Lifetime Summary data is
cumulative from the last Lifetime
Summary reset done through the Settings
menu in the information display.
Trip Summary:
•
Distance - The total distance traveled,
and regen distance are displayed.
Regen distance is the estimated range
gained from energy recaptured through
regenerative braking.
• Energy Used - The total kilowatt hours
and average watt hours per unit of
distance are displayed. The average
watt hours per mi (km) will be shown
in blue if less than (better than) the
lifetime average watt hours per mi
(km).
• Brake Score - The percentage of
braking energy recaptured and returned
to the high voltage battery through
regenerative braking. The brake score
will be shown in blue if greater than
(better than) the lifetime brake score.
Lifetime Summary:
• Distance - The total regen distance,
which is the estimated range gained
from energy recaptured through
regenerative braking.
• Energy Used - The average watt hours
per mi (km).
• Brake Score - The average percentage
of braking energy recaptured and
returned to the high voltage battery
through regenerative braking.
82
Focus (CDH), enUSA, First Printing Instrument Cluster
Page 89 of 369
GENERAL INFORMATION
WARNING
Driving while distracted can result in
loss of vehicle control, crash and
injury. We strongly recommend that
you use extreme caution when using any
device that may take your focus off the
road. Your primary responsibility is the safe
operation of your vehicle. We recommend
against the use of any hand-held device
while driving and encourage the use of
voice-operated systems when possible.
Make sure you are aware of all applicable
local laws that may affect the use of
electronic devices while driving. You can control various systems on your
vehicle using the information display
controls on the steering wheel.
The information display shows the
corresponding information.
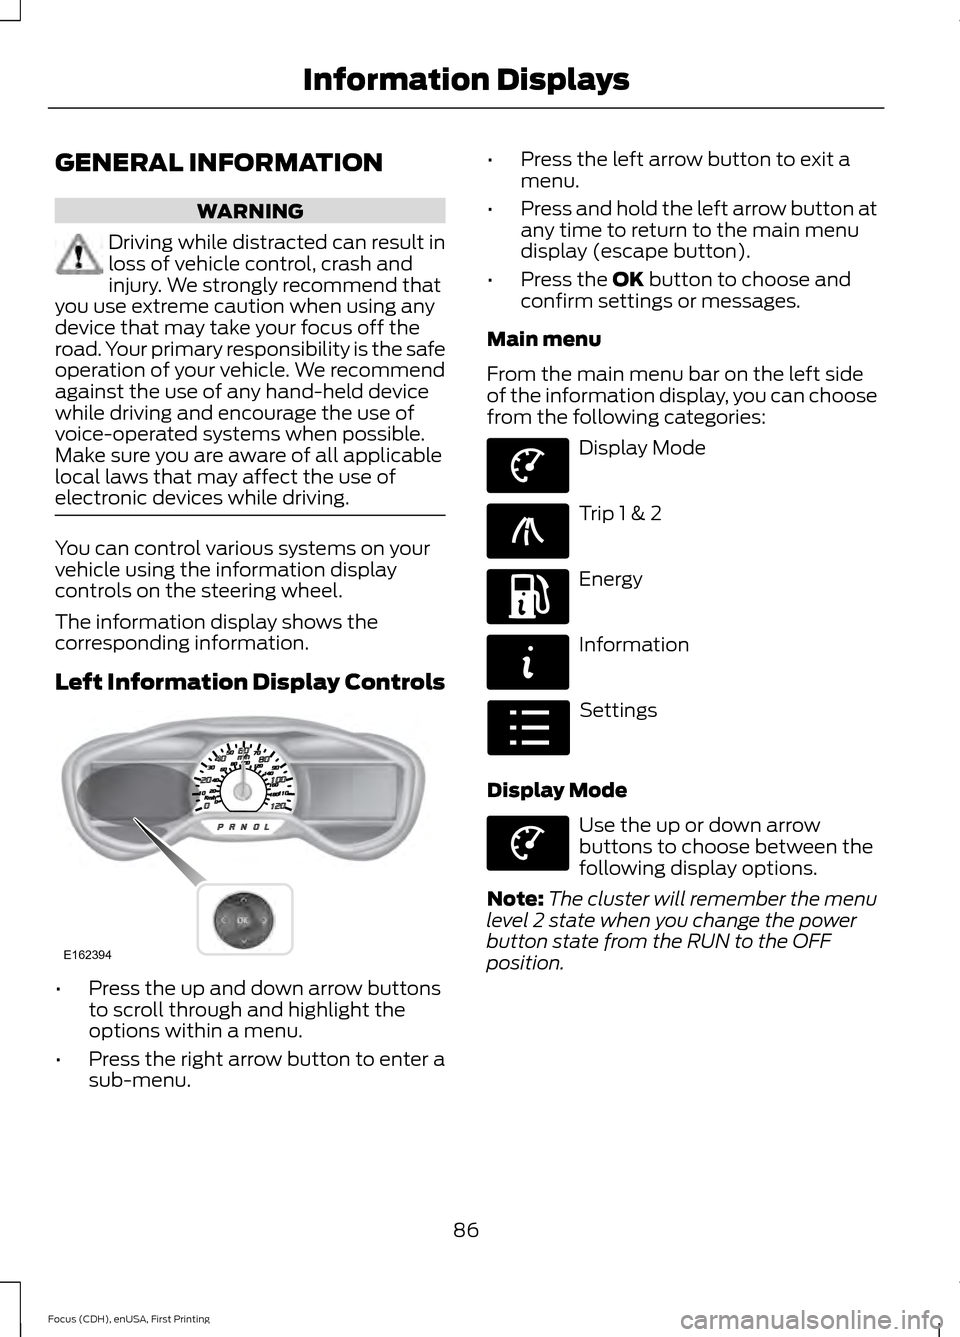
Left Information Display Controls
•
Press the up and down arrow buttons
to scroll through and highlight the
options within a menu.
• Press the right arrow button to enter a
sub-menu. •
Press the left arrow button to exit a
menu.
• Press and hold the left arrow button at
any time to return to the main menu
display (escape button).
• Press the OK button to choose and
confirm settings or messages.
Main menu
From the main menu bar on the left side
of the information display, you can choose
from the following categories: Display Mode
Trip 1 & 2
Energy
Information
Settings
Display Mode Use the up or down arrow
buttons to choose between the
following display options.
Note: The cluster will remember the menu
level 2 state when you change the power
button state from the RUN to the OFF
position.
86
Focus (CDH), enUSA, First Printing Information DisplaysE162394 E144639 E138660 E197200 E144642 E100023 E144639