2015 FORD FOCUS ELECTRIC display
[x] Cancel search: displayPage 125 of 369
AUTOMATIC TRANSMISSION
Single Speed Automatic
Transmission
WARNING
Always set the parking brake fully
and make sure you shift the gearshift
lever to park (P). Switch the ignition
off and remove the key whenever you leave
your vehicle. The single speed transmission is built
specifically to handle the high rotational
speed range of an electric motor.
Gearshift Lever Positions
Park.
P
Reverse.
R
Neutral.
N
Drive.
D
Low.L
Press the button on the gearshift lever to
change to each position.
The gearshift lever position appears in the
information display. Park (P)
In this position, power is not transmitted
to the drive wheels and the transmission
is locked. You can start the electric motor
with the gearshift lever in this position.
Reverse (R)
With the gearshift lever in reverse (R), the
vehicle moves backward. Always come to
a complete stop before shifting into and
out of reverse (R).
Neutral (N)
In this position, power is not transmitted
to the drive wheels but the transmission is
not locked. You can start the electric motor
with the gearshift lever in this position.
Drive (D)
The normal position for driving your vehicle.
The transmission operates in a single gear
built specifically to handle the electric
motor output.
Low (L)
Use this position for maximum motor
braking, for example when driving down a
steep hill. You can select this position at
any vehicle speed.
Brake-Shift Interlock
WARNINGS
Do not drive your vehicle until you
verify that the brake lamps are
working.
When performing this procedure, you
will be taking the vehicle out of park
which means the vehicle can roll
freely. To avoid unwanted vehicle
movement, always fully set the parking
brake prior to performing this procedure.
Use wheel chocks if appropriate.
122
Focus (CDH), enUSA, First Printing TransmissionE157387
Page 129 of 369
When the system is active, your vehicle will
remain stationary on the slope for two to
three seconds after you release the brake
pedal. This allows you time to move your
foot from the brake to the accelerator
pedal. The brakes are released
automatically once the engine has
developed sufficient drive to prevent your
vehicle from rolling down the slope. This
is an advantage when pulling away on a
slope, for example from a car park ramp,
traffic lights or when reversing uphill into
a parking space.
The system will activate automatically on
any slope that will cause significant vehicle
rollback. For vehicles with a manual
transmission, you can switch this feature
off using the information display. See
Information Displays (page 86). The
system will remain on or off depending on
how it was last set.
Note: The system only functions when you
bring your vehicle to a complete stop. Shift
into reverse (R) when facing downhill and
first gear (1) when facing uphill.
Note: There is no warning lamp to indicate
the system is either on or off.
Using Hill Start Assist
1. Press the brake pedal to bring your vehicle to a complete standstill. Keep
the brake pedal pressed.
2. If the sensors detect that your vehicle is on a slope, the system will activate
automatically.
3. When you remove your foot from the brake pedal, your vehicle will remain
on the slope without rolling away for
about two or three seconds. This hold
time will automatically be extended if
you are in the process of driving off.
4. Drive off in the normal manner. The brakes will release automatically.
126
Focus (CDH), enUSA, First Printing Brakes
Page 130 of 369
PRINCIPLE OF OPERATION
The traction control system helps avoid
drive wheel spin and loss of traction.
If your vehicle begins to slide, the system
applies the brakes to individual wheels
and, when needed, reduces engine power
at the same time. If the wheels spin when
accelerating on slippery or loose surfaces,
the system reduces engine power in order
to increase traction.
USING TRACTION CONTROL
If your vehicle is stuck in mud or snow,
switching traction control off may be
beneficial, this allows the wheels to spin.
You can switch this feature on or off using
the vehicle settings menu in the
information display or by pressing the
button on the instrument panel.
Switching the System Off Using
the Information Display Controls
(If Equipped)
Your vehicle comes with this feature
already enabled. You can switch this
feature on or off using the vehicle settings
menu in the information display. See
(page 86).
Switching the System Off Using a
Switch
(If Equipped)
The button is located on the instrument
panel. See Instrument Panel Overview
(page
15).
Press the button to switch the system off.
You will see a message in conjunction with
an illuminated icon in the display. Press
the button again to switch the system back
on.
When you switch the traction control
system off, stability control remains fully
active. System Warning Lamps and
Messages WARNING
If the warning lamp remains
illuminated or does not illuminate
when you switch the ignition on, this
indicates a malfunction. During a
malfunction the system will switch off.
Have the system checked immediately.
Operating your vehicle with the system
disabled could lead to the loss of vehicle
control, vehicle rollover, personal injury or
death. The warning lamp temporarily
illuminates when you start the
engine. It will flash when the
system is active. The warning lamp temporarily
illuminates when you start the
engine. It will illuminate when
you switch the system off.
When you switch the system off or on, a
message appears in the information
display showing system status.
127
Focus (CDH), enUSA, First Printing Traction ControlE138639
Page 133 of 369
Press the parking aid button to switch the
system off. If a fault is present in the
system, a warning message appears in the
information display and does not allow you
to switch the system on.
REAR VIEW CAMERA
WARNINGS
The rear view camera system is a
reverse aid supplement device that
still requires the driver to use it in
conjunction with the interior and exterior
mirrors for maximum coverage. Objects that are close to either
corner of the bumper or under the
bumper, might not be seen on the
screen due to the limited coverage of the
camera system. Back up as slow as possible since
higher speeds might limit your
reaction time to stop your vehicle.
Use caution when using the rear
video camera and the luggage
compartment door is ajar. If the
luggage compartment door is ajar, the
camera will be out of position and the
video image may be incorrect. All
guidelines disappear when the luggage
compartment door is ajar. Use caution when turning camera
features on or off. Make sure your
vehicle is not moving.
The rear view camera system provides a
video image of the area behind your
vehicle.
During operation, lines appear in the
display which represent your vehicle
’s path
and proximity to objects behind your
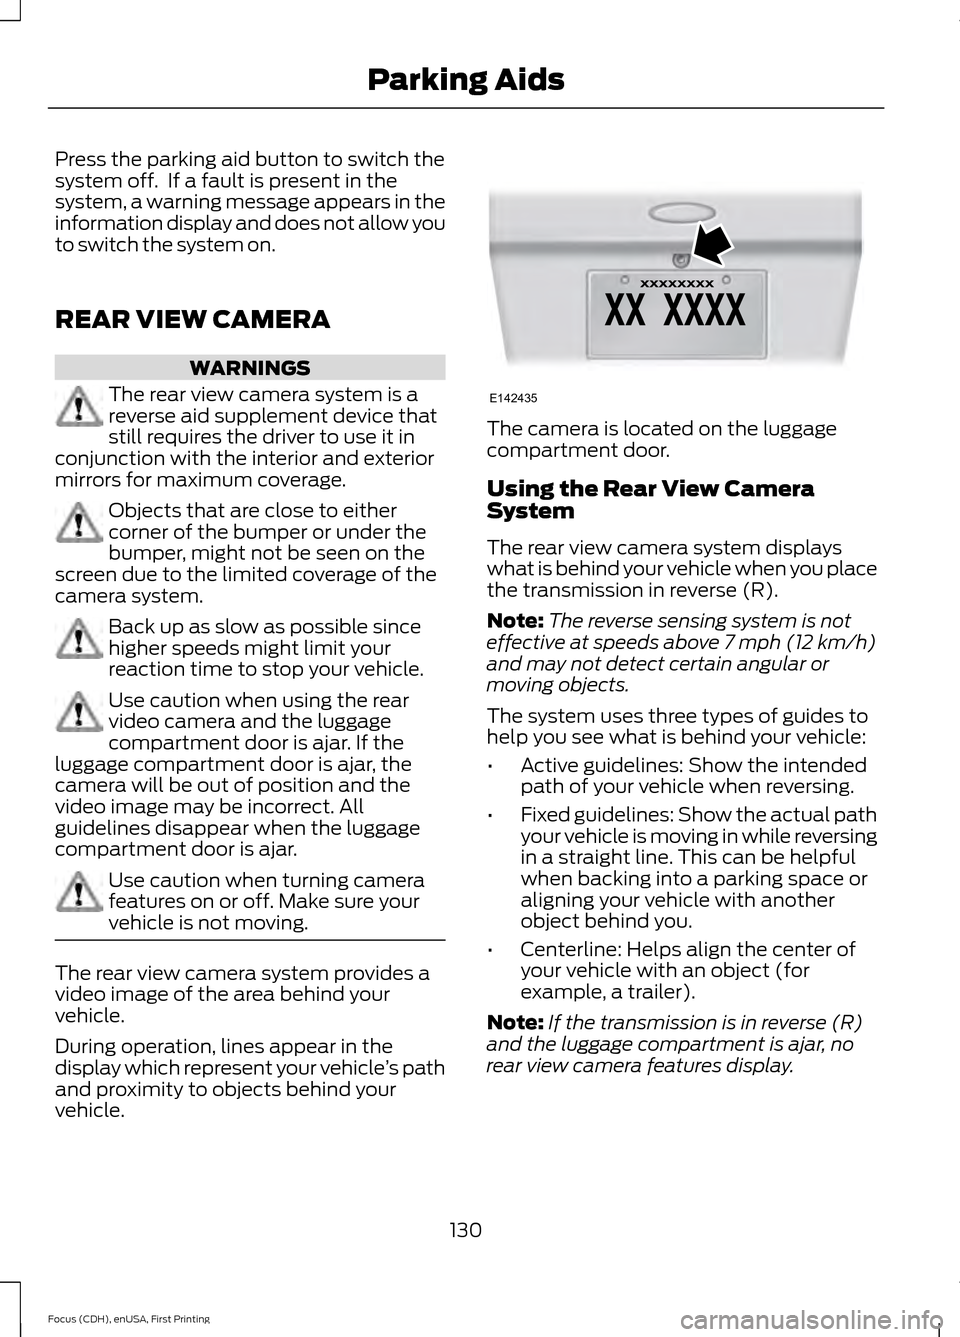
vehicle. The camera is located on the luggage
compartment door.
Using the Rear View Camera
System
The rear view camera system displays
what is behind your vehicle when you place
the transmission in reverse (R).
Note:
The reverse sensing system is not
effective at speeds above 7 mph (12 km/h)
and may not detect certain angular or
moving objects.
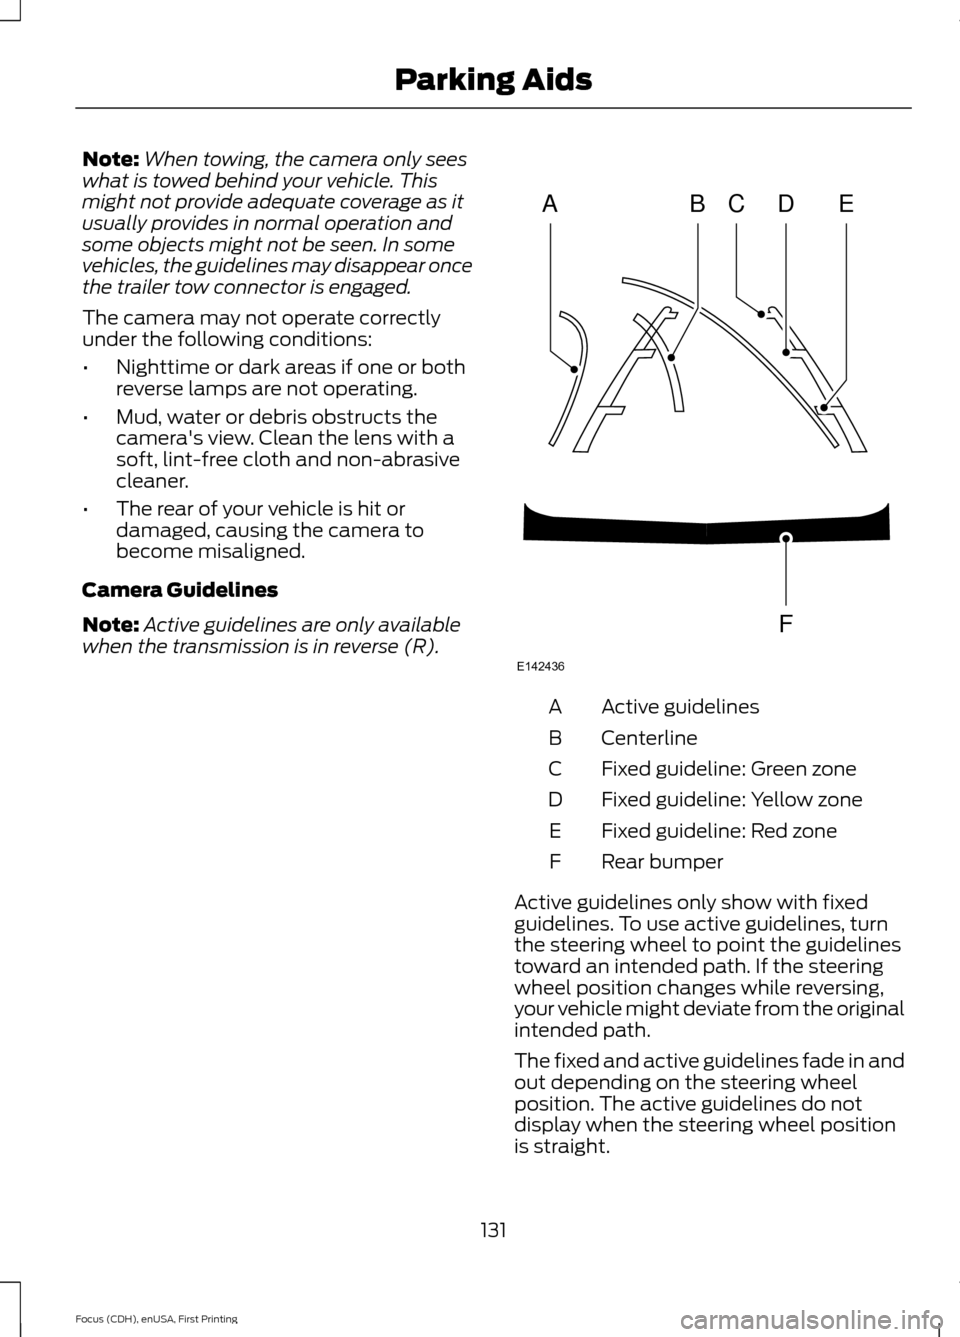
The system uses three types of guides to
help you see what is behind your vehicle:
• Active guidelines: Show the intended
path of your vehicle when reversing.
• Fixed guidelines: Show the actual path
your vehicle is moving in while reversing
in a straight line. This can be helpful
when backing into a parking space or
aligning your vehicle with another
object behind you.
• Centerline: Helps align the center of
your vehicle with an object (for
example, a trailer).
Note: If the transmission is in reverse (R)
and the luggage compartment is ajar, no
rear view camera features display.
130
Focus (CDH), enUSA, First Printing Parking AidsE142435
Page 134 of 369
Note:
When towing, the camera only sees
what is towed behind your vehicle. This
might not provide adequate coverage as it
usually provides in normal operation and
some objects might not be seen. In some
vehicles, the guidelines may disappear once
the trailer tow connector is engaged.
The camera may not operate correctly
under the following conditions:
• Nighttime or dark areas if one or both
reverse lamps are not operating.
• Mud, water or debris obstructs the
camera's view. Clean the lens with a
soft, lint-free cloth and non-abrasive
cleaner.
• The rear of your vehicle is hit or
damaged, causing the camera to
become misaligned.
Camera Guidelines
Note: Active guidelines are only available
when the transmission is in reverse (R). Active guidelines
A
Centerline
B
Fixed guideline: Green zone
C
Fixed guideline: Yellow zone
D
Fixed guideline: Red zone
E
Rear bumper
F
Active guidelines only show with fixed
guidelines. To use active guidelines, turn
the steering wheel to point the guidelines
toward an intended path. If the steering
wheel position changes while reversing,
your vehicle might deviate from the original
intended path.
The fixed and active guidelines fade in and
out depending on the steering wheel
position. The active guidelines do not
display when the steering wheel position
is straight.
131
Focus (CDH), enUSA, First Printing Parking AidsABCD
F
E
E142436
Page 135 of 369
Always use caution while reversing.
Objects in the red zone are closest to your
vehicle and objects in the green zone are
farther away. Objects are getting closer to
your vehicle as they move from the green
zone to the yellow or red zones. Use the
side view mirrors and rear view mirror to
get better coverage on both sides and rear
of your vehicle.
Manual Zoom
WARNING
When manual zoom is on, the full
area behind your vehicle may not
show. Be aware of your surroundings
when using the manual zoom feature. Note:
Manual zoom is only available when
the transmission is in reverse (R).
Note: When you enable manual zoom, only
the centerline is shown.
Selectable settings for this feature are
Zoom in (+) and Zoom out (-). Press the
symbol in the camera screen to change the
view. The default setting is Zoom OFF.
This allows you to get a closer view of an
object behind your vehicle. The zoomed
image keeps the bumper in the image to
provide a reference. The zoom is only
active while the transmission is in reverse
(R).
Camera System Settings
To access any of the rear view camera
system settings, make the following
selections in the multifunctional display
when the transmission is not in reverse (R):
• With Touch Screen: Settings > Vehicle
> Camera Settings
• Without Touch Screen: Menu > Camera
Settings Enhanced Park Aids or Park Pilot (If
Equipped)
Selectable settings for this feature are ON
and OFF.
The system uses red, yellow and green
highlights that appear on top of the video
image when any of the sensing systems
detect an object.
Rear Camera Delay
Selectable settings for this feature are ON
and OFF.
The default setting for the rear camera
delay is OFF.
When shifting the transmission out of
reverse (R) and into any gear other than
park (P), the camera image remains in the
display until:
•
Your vehicle speed sufficiently
increases.
• You shift your vehicle into park (P).
• 10 seconds of time elapse.
132
Focus (CDH), enUSA, First Printing Parking Aids
Page 136 of 369
PRINCIPLE OF OPERATION
Cruise control lets you maintain a set
speed without keeping your foot on the
accelerator pedal. You can use cruise
control when your vehicle speed is greater
than 20 mph (30 km/h).
USING CRUISE CONTROL WARNINGS
Do not use cruise control on winding
roads, in heavy traffic or, when the
road surface is slippery. This could
result in loss of vehicle control, serious
injury or death. When you are going downhill, your
vehicle speed may increase above
the set speed. The system will not
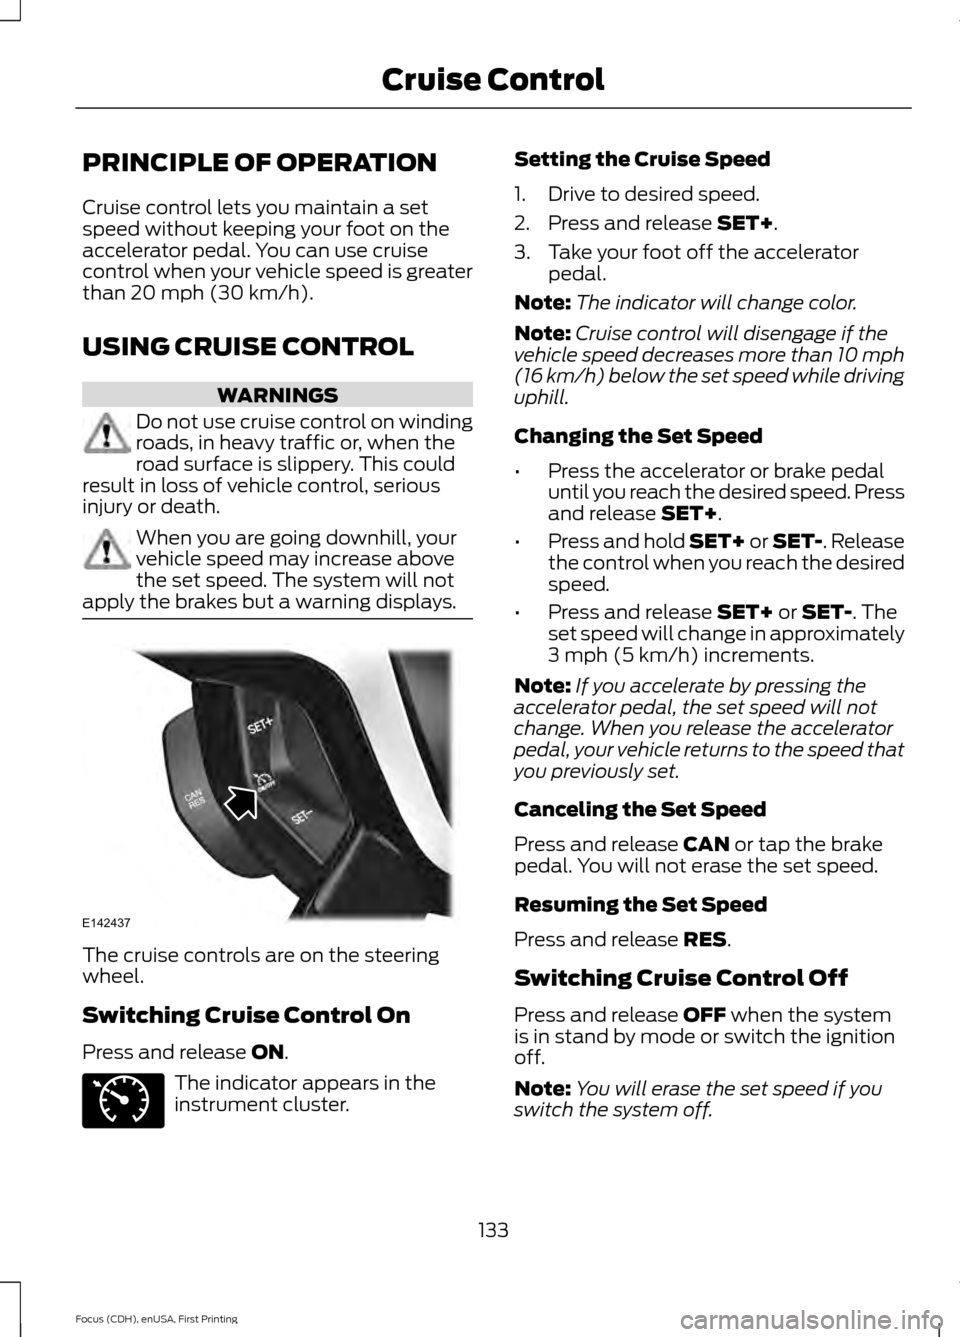
apply the brakes but a warning displays. The cruise controls are on the steering
wheel.
Switching Cruise Control On
Press and release
ON.
The indicator appears in the
instrument cluster. Setting the Cruise Speed
1. Drive to desired speed.
2. Press and release
SET+.
3. Take your foot off the accelerator pedal.
Note: The indicator will change color.
Note: Cruise control will disengage if the
vehicle speed decreases more than 10 mph
(16 km/h) below the set speed while driving
uphill.
Changing the Set Speed
• Press the accelerator or brake pedal
until you reach the desired speed. Press
and release
SET+.
• Press and hold SET+ or SET-. Release
the control when you reach the desired
speed.
• Press and release
SET+ or SET-. The
set speed will change in approximately
3 mph (5 km/h)
increments.
Note: If you accelerate by pressing the
accelerator pedal, the set speed will not
change. When you release the accelerator
pedal, your vehicle returns to the speed that
you previously set.
Canceling the Set Speed
Press and release
CAN or tap the brake
pedal. You will not erase the set speed.
Resuming the Set Speed
Press and release
RES.
Switching Cruise Control Off
Press and release
OFF when the system
is in stand by mode or switch the ignition
off.
Note: You will erase the set speed if you
switch the system off.
133
Focus (CDH), enUSA, First Printing Cruise ControlE142437 E71340
Page 137 of 369
STEERING
Electric Power Steering
WARNING
The electric power steering system
has diagnostic checks that
continuously monitor the system. If
a fault is detected, a message displays in
the information display. Stop your vehicle
as soon as it is safe to do so. Switch the
ignition off. After at least 10 seconds,
switch the ignition on and watch the
information display for a steering system
warning message. If a steering system
warning message returns, have the system
checked by an authorized dealer. Your vehicle has an electric power steering
system. There is no fluid reservoir. No
maintenance is required.
If your vehicle loses electrical power while
you are driving, electric power steering
assistance is lost. The steering system still
operates and you can steer your vehicle
manually. Manually steering your vehicle
requires more effort.
Extreme continuous steering may increase
the effort required for you to steer your
vehicle. This increased effort prevents
overheating and permanent damage to
the steering system. You do not lose the
ability to steer your vehicle manually.
Typical steering and driving maneuvers
allow the system to cool and return to
normal operation.
Steering Tips
If the steering wanders or pulls, check for:
•
Correct tire pressures.
• Uneven tire wear.
• Loose or worn suspension
components. •
Loose or worn steering components.
• Improper vehicle alignment.
Note: A high crown in the road or high
crosswinds may also make the steering
seem to wander or pull.
Adaptive Learning
The electronic power steering system
adaptive learning helps correct road
irregularities and improves overall handling
and steering feel. It communicates with
the brake system to help operate
advanced stability control and accident
avoidance systems. Additionally, whenever
the battery is disconnected or a new
battery installed, you must drive your
vehicle a short distance before the system
relearns the strategy and reactivates all
systems.
134
Focus (CDH), enUSA, First Printing Driving Aids