2015 FORD FOCUS ELECTRIC set clock
[x] Cancel search: set clockPage 31 of 369
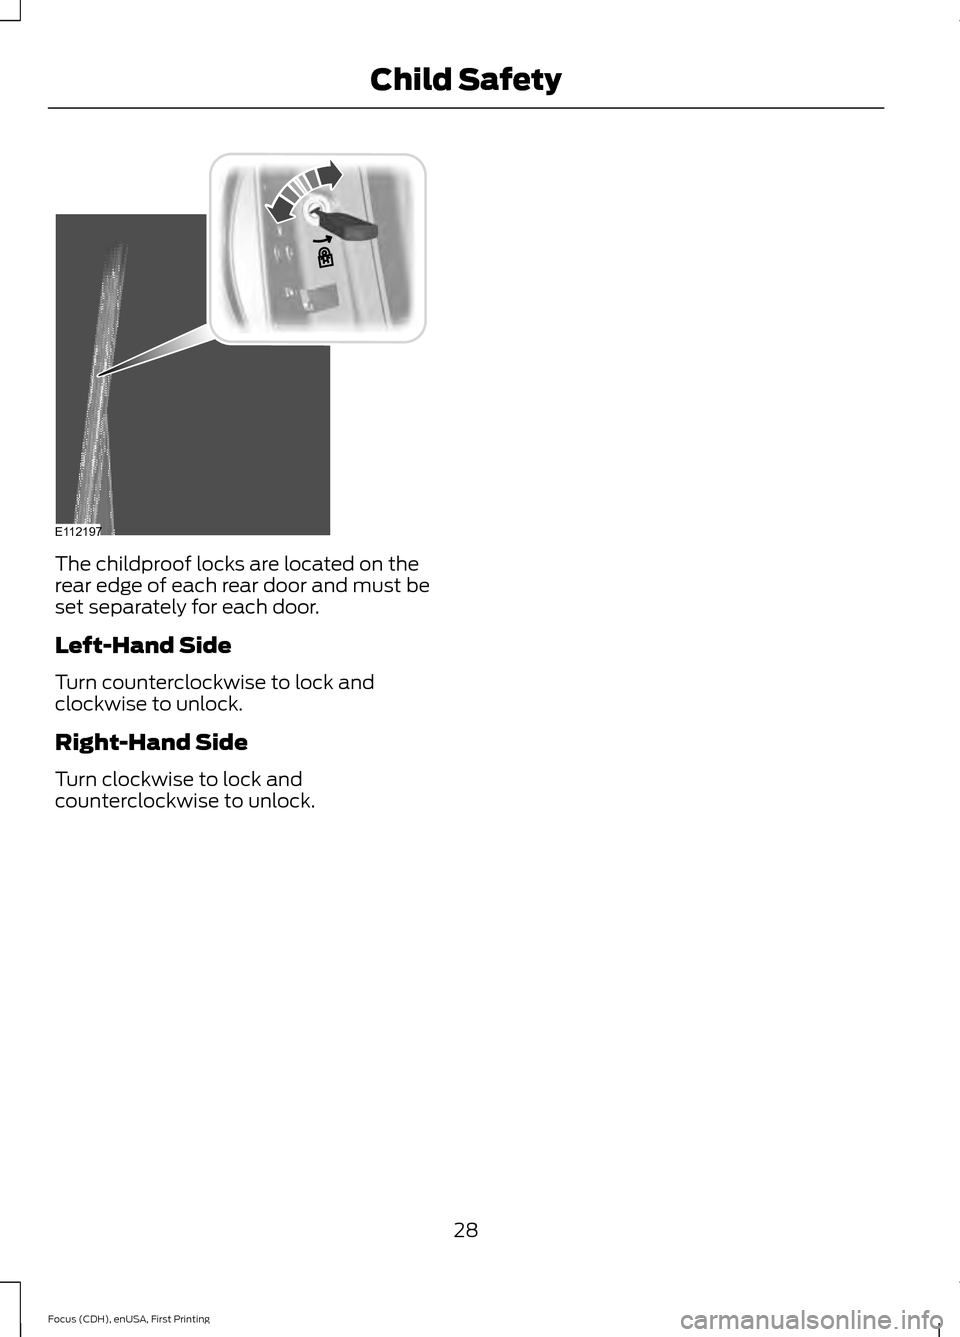
The childproof locks are located on the
rear edge of each rear door and must be
set separately for each door.
Left-Hand Side
Turn counterclockwise to lock and
clockwise to unlock.
Right-Hand Side
Turn clockwise to lock and
counterclockwise to unlock.
28
Focus (CDH), enUSA, First Printing Child SafetyE112197
Page 121 of 369
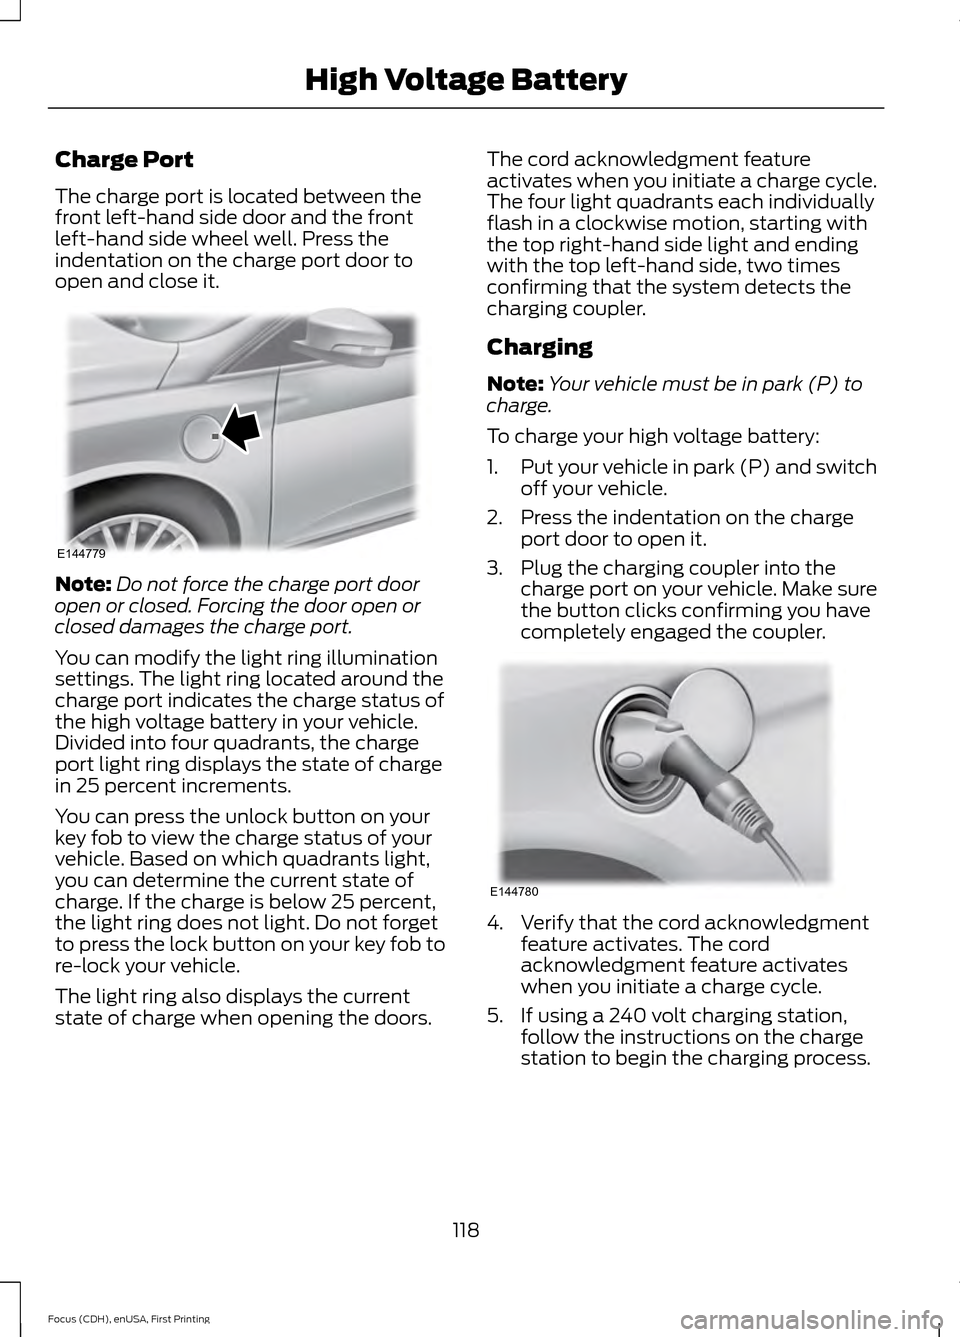
Charge Port
The charge port is located between the
front left-hand side door and the front
left-hand side wheel well. Press the
indentation on the charge port door to
open and close it.
Note:
Do not force the charge port door
open or closed. Forcing the door open or
closed damages the charge port.
You can modify the light ring illumination
settings. The light ring located around the
charge port indicates the charge status of
the high voltage battery in your vehicle.
Divided into four quadrants, the charge
port light ring displays the state of charge
in 25 percent increments.
You can press the unlock button on your
key fob to view the charge status of your
vehicle. Based on which quadrants light,
you can determine the current state of
charge. If the charge is below 25 percent,
the light ring does not light. Do not forget
to press the lock button on your key fob to
re-lock your vehicle.
The light ring also displays the current
state of charge when opening the doors. The cord acknowledgment feature
activates when you initiate a charge cycle.
The four light quadrants each individually
flash in a clockwise motion, starting with
the top right-hand side light and ending
with the top left-hand side, two times
confirming that the system detects the
charging coupler.
Charging
Note:
Your vehicle must be in park (P) to
charge.
To charge your high voltage battery:
1. Put your vehicle in park (P) and switch
off your vehicle.
2. Press the indentation on the charge port door to open it.
3. Plug the charging coupler into the charge port on your vehicle. Make sure
the button clicks confirming you have
completely engaged the coupler. 4. Verify that the cord acknowledgment
feature activates. The cord
acknowledgment feature activates
when you initiate a charge cycle.
5. If using a 240 volt charging station, follow the instructions on the charge
station to begin the charging process.
118
Focus (CDH), enUSA, First Printing High Voltage BatteryE144779 E144780
Page 123 of 369
You can modify the light ring lighting
conditions. See Charge Port Light Ring
Settings in the MyFord Touch section. See
MyFord Touch
™ (page 231).
Disconnecting the Charging
Coupler
Note: Do not pull the wall plug from the
wall while the vehicle is charging. Doing so
may damage the outlet and the cord.
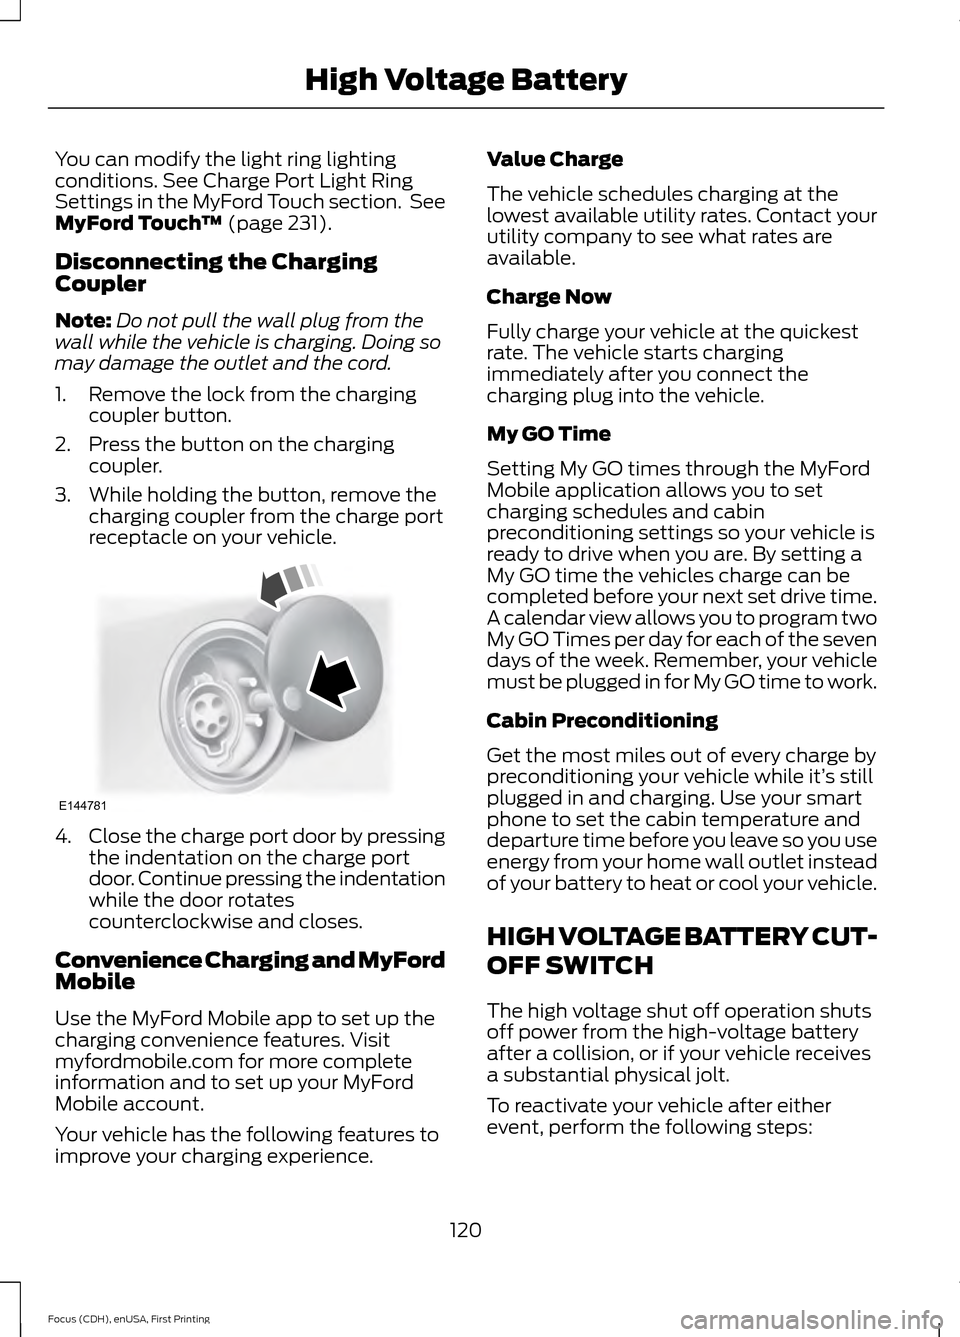
1. Remove the lock from the charging coupler button.
2. Press the button on the charging coupler.
3. While holding the button, remove the charging coupler from the charge port
receptacle on your vehicle. 4.
Close the charge port door by pressing
the indentation on the charge port
door. Continue pressing the indentation
while the door rotates
counterclockwise and closes.
Convenience Charging and MyFord
Mobile
Use the MyFord Mobile app to set up the
charging convenience features. Visit
myfordmobile.com for more complete
information and to set up your MyFord
Mobile account.
Your vehicle has the following features to
improve your charging experience. Value Charge
The vehicle schedules charging at the
lowest available utility rates. Contact your
utility company to see what rates are
available.
Charge Now
Fully charge your vehicle at the quickest
rate. The vehicle starts charging
immediately after you connect the
charging plug into the vehicle.
My GO Time
Setting My GO times through the MyFord
Mobile application allows you to set
charging schedules and cabin
preconditioning settings so your vehicle is
ready to drive when you are. By setting a
My GO time the vehicles charge can be
completed before your next set drive time.
A calendar view allows you to program two
My GO Times per day for each of the seven
days of the week. Remember, your vehicle
must be plugged in for My GO time to work.
Cabin Preconditioning
Get the most miles out of every charge by
preconditioning your vehicle while it’
s still
plugged in and charging. Use your smart
phone to set the cabin temperature and
departure time before you leave so you use
energy from your home wall outlet instead
of your battery to heat or cool your vehicle.
HIGH VOLTAGE BATTERY CUT-
OFF SWITCH
The high voltage shut off operation shuts
off power from the high-voltage battery
after a collision, or if your vehicle receives
a substantial physical jolt.
To reactivate your vehicle after either
event, perform the following steps:
120
Focus (CDH), enUSA, First Printing High Voltage BatteryE144781
Page 177 of 369
WARNINGS
Keep batteries out of reach of
children. Batteries contain sulfuric
acid. Avoid contact with skin, eyes or
clothing. Shield your eyes when working
near the battery to protect against possible
splashing of acid solution. In case of acid
contact with skin or eyes, flush
immediately with water for a minimum of
15 minutes and get prompt medical
attention. If acid is swallowed, call a
physician immediately. Battery posts, terminals and related
accessories contain lead and lead
compounds. Wash hands after
handling. Your vehicle is fitted with a Motorcraft
maintenance-free battery, which normally
does not require additional water.
Note:
After cleaning or replacing the
battery, make sure you reinstall the battery
cover or shield.
When a battery replacement is required,
you should replace the battery with a Ford
recommended replacement battery that
matches the electrical requirements of the
vehicle.
Note: Contact an authorized dealer for low
voltage battery access, testing or
replacement.
To make sure the battery management
system works correctly, do not connect an
electrical device ground connection
directly to the low voltage battery negative
post. This can cause inaccurate
measurements of the battery condition
and potential incorrect system operation.
Note: If you add electrical accessories or
components to the vehicle, it may adversely
affect the low voltage battery performance
and durability. This may also affect the
performance of other electrical systems in
the vehicle. For longer, trouble-free operation, keep the
top of the battery clean and dry.
If you see any corrosion on the battery or
terminals, remove the cables from the
terminals and clean with a wire brush. You
can neutralize the acid with a solution of
baking soda and water.
A computer electronically controls your
vehicle. The power of the low voltage
battery maintains the memory of some
settings, for example, clock setting or radio
presets. When the low voltage battery is
disconnected and then connected, these
settings erase.
To restore the settings, do the following:
1. Apply the parking brake.
2. Shift into park (P).
3. Switch off all accessories.
4. Press the brake pedal and start your
vehicle.
5. Reset the clock.
6. Reset the bounce-back feature. See Power Windows (page 77).
7. Reset the radio station presets. See Audio System
(page 227).
Make sure that you dispose of old batteries
in an environmentally friendly way. Seek
advice from your local authority about
recycling old batteries.
If storing your vehicle for more than 30
days without recharging the battery, we
recommend that you disconnect the
battery cables to maintain battery charge
for quick starting.
174
Focus (CDH), enUSA, First Printing Maintenance
Page 235 of 369
This system uses a four-corner strategy to
provide quick access to several vehicle
features and settings. The touchscreen
provides easy interaction with your cell
phone, entertainment, information and
system settings. The corners display active
modes within the menus, for example; your
cell phone's status.
Note:
Some features are not available while
your vehicle is moving.
Note: You can access the entertainment
features for 30 minutes after you switch the
ignition off, and no doors are opened.
Phone
Press to select any of the following: Message
Phone
Quick Dial
Phonebook
History
Messaging
Settings
Navigation
Press to select any of the following: Message
My Home
Favorites
Previous Destinations
Point of Interest
Emergency
Street Address
Intersection Message
City Center
Map
Edit Route
Cancel Route
CLIMATE
Press the corresponding icons to control
the following options:
• Driver Settings
• Recirculated Air
• Auto
• Dual
• Passenger Settings
• A/C
• Defrost
Settings Press to select any of the following:
Message
Clock
Display
Sound
Vehicle
Settings
Help
232
Focus (CDH), enUSA, First Printing MyFord Touch
™E142607
Page 244 of 369
Menu Item
Item
Clock
A
Display
B
Sound
C
Vehicle
D
Settings
E
Help
F
Clock Under this menu, you can set the
clock, access and adjust the
display, sound and vehicle
settings as well as access settings for
specific modes or the help feature.
To make adjustments using the touchscreen, select: Action and Description
Menu Item
Press the settings icon.
Settings
Press the + or - to adjust the time.
Clock
From this screen, you can also make other adjustments such
as 12-hour or 24-hour mode, activate GPS time synchroniza-
tion and have the system automatically update new time
zones.
You can also switch the outside air temperature display off
and on. It appears at the top center of the touchscreen, next
to the time and date.
Note: You cannot manually set the date. Your vehicle ’s GPS does this for you.
Note: If the battery has been disconnected, your vehicle needs to acquire a GPS signal to
update the clock. Once your vehicle acquires the signal, it may take a few minutes for the
update to display the correct time.
Display You can adjust the display using
the touchscreen or the voice
button on the steering wheel
controls.
241
Focus (CDH), enUSA, First Printing MyFord Touch
™E142607 E142607
Page 367 of 369

Remote Control..............................................46
Changing the Remote Control Battery.........47
Intelligent Access Key........................................ 46
Locating Your Vehicle.......................................... 47
Programming a New Remote Control..........47
Remote Start......................................................... 48
Sounding the Panic Alarm............................... 48
Remote Start
.................................................103
Removing a Headlamp................................177
Repairing Minor Paint Damage...............186
Replacement Parts Recommendation.........................................9
Collision Repairs...................................................... 9
Scheduled Maintenance and Mechanical Repairs................................................................... 9
Warranty on Replacement Parts.................... 10
Replacing a Lost Key or Remote Control............................................................49
Reporting Safety Defects (Canada Only)...............................................................157
Reporting Safety Defects (U.S. Only)...............................................................156
Roadside Assistance
...................................147
Vehicles Sold in Canada: Getting Roadside
Assistance......................................................... 147
Vehicles Sold in Canada: Using Roadside Assistance......................................................... 147
Vehicles Sold in the United States: Getting Roadside Assistance..................................... 147
Vehicles Sold in the United States: Using Roadside Assistance..................................... 147
Roadside Emergencies...............................147
Running-In See: Breaking-In.................................................. 145
S
Safety Belt Height Adjustment.................32
Safety Belt Minder.........................................33 Belt-Minder™........................................................ 33
Safety Belts
......................................................29
Principle of Operation........................................ 29
Safety Belt Warning Lamp and Indicator Chime...............................................................33
Conditions of operation..................................... 33
Scheduled Maintenance Record............351
Scheduled Maintenance
...........................347
Seats.................................................................104 Security..............................................................64
Settings...........................................................240
Clock........................................................................\
241
Display.................................................................... 241
Settings................................................................. 246
Sound..................................................................... 243
Vehicle.................................................................... 243
Side Airbags
......................................................41
Side Curtain Airbags.....................................43
Sitting in the Correct Position
.................104
Snow Chains See: Using Snow Chains.................................. 216
Special Notices
................................................10
New Vehicle Limited Warranty........................ 10
On-board Diagnostics (OBD-II)...................... 10
Special Instructions............................................. 10
Speed Control See: Cruise Control............................................. 133
Stability Control............................................128 Principle of Operation....................................... 128
Starting and Stopping the Electric Motor...............................................................112
Starting the Electric Motor.........................112 Keyless Starting.................................................... 112
Starting Your Vehicle.......................................... 112
Steering............................................................134 Electric Power Steering.................................... 134
Steering Wheel
................................................67
Storage Compartments...............................111
Sun Visors.........................................................80
Illuminated Vanity Mirror.................................. 80
Supplementary Restraints System..........37 Principle of Operation......................................... 37
Switching Off the Electric Motor..............113
Symbols Glossary.............................................5
T
Tailgate See: Manual Liftgate............................................ 61
Technical Specifications See: Capacities and Specifications.............222
364
Focus (CDH), enUSA, First Printing Index