2015 FORD EXPEDITION lights
[x] Cancel search: lightsPage 123 of 564
Towing
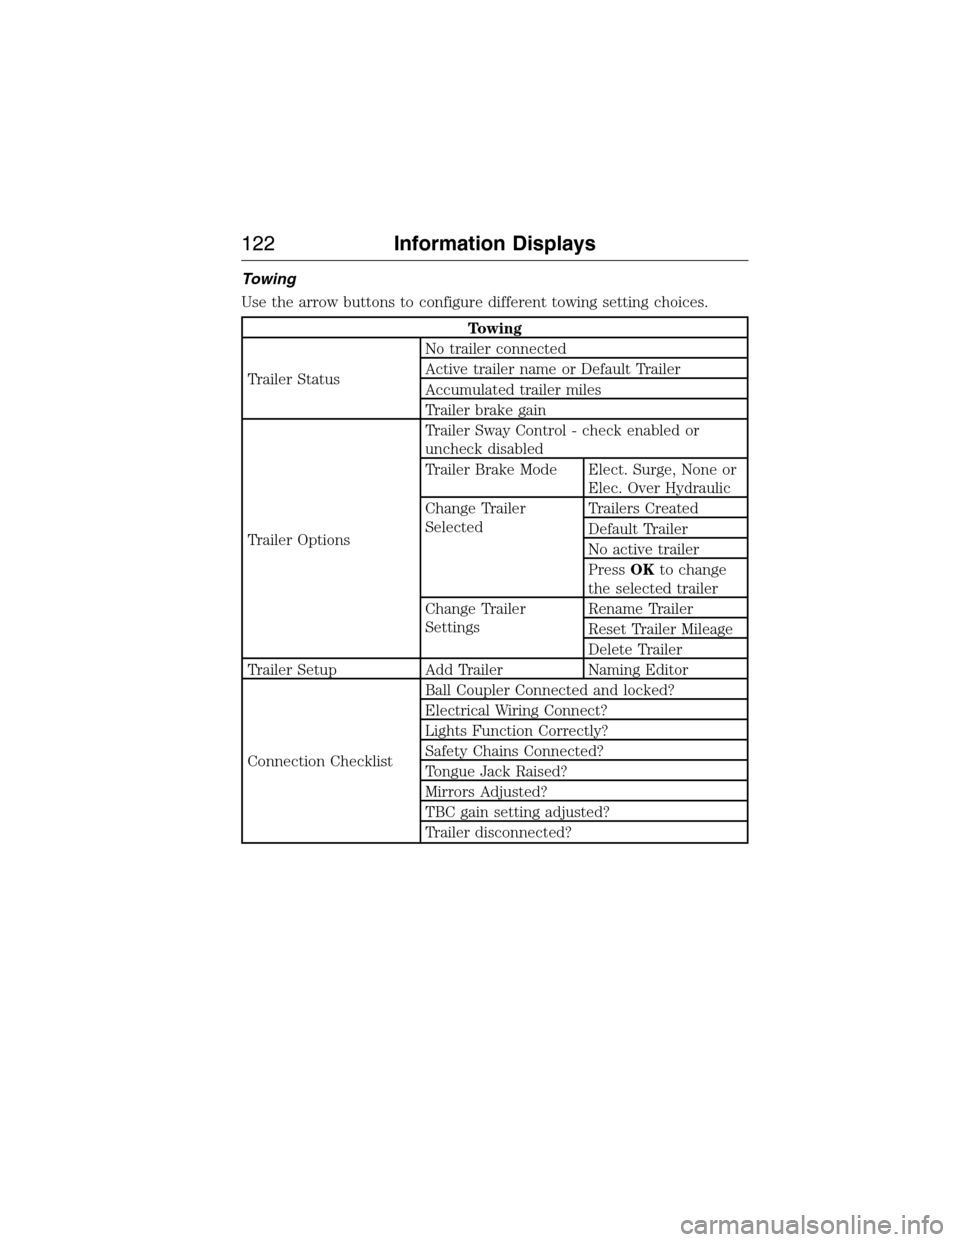
Use the arrow buttons to configure different towing setting choices.
Towing
Trailer StatusNo trailer connected
Active trailer name or Default Trailer
Accumulated trailer miles
Trailer brake gain
Trailer OptionsTrailer Sway Control - check enabled or
uncheck disabled
Trailer Brake Mode Elect. Surge, None or
Elec. Over Hydraulic
Change Trailer
SelectedTrailers Created
Default Trailer
No active trailer
PressOKto change
the selected trailer
Change Trailer
SettingsRename Trailer
Reset Trailer Mileage
Delete Trailer
Trailer Setup Add Trailer Naming Editor
Connection ChecklistBall Coupler Connected and locked?
Electrical Wiring Connect?
Lights Function Correctly?
Safety Chains Connected?
Tongue Jack Raised?
Mirrors Adjusted?
TBC gain setting adjusted?
Trailer disconnected?
122Information Displays
2015 Expedition(exd)
Owners Guide gf, 1st Printing, July 2014
USA(fus)
Page 157 of 564
Easy Entry and Exit Feature (If Equipped)
The Easy Entry and Exit feature adjusts the position of the seat and
steering column to allow easier exit and entry to the vehicle.
The driver seat automatically moves 2 inches (5 centimeters) rearward
when the transmission is in park (P) and you remove the key from the
ignition or you switch the ignition off.
The driver seat returns to the previous position when you put the key in
the ignition or switch the ignition on.
Enable or disable this feature through the information display. See the
Information Displayschapter.
Climate Controlled Seats (If Equipped)
Heated Seats
WARNING:Persons who are unable to feel pain to the skin
because of advanced age, chronic illness, diabetes, spinal cord
injury, medication, alcohol use, exhaustion, or other physical conditions,
must exercise care when using the seat heater. The seat heater may
cause burns even at low temperatures, especially if used for long
periods of time. Do not place anything on the seat that insulates against
heat, such as a blanket or cushion, because this may cause the seat
heater to overheat. Do not puncture the seat with pins, needles, or
other pointed objects because this may damage the heating element
which may cause the seat heater to overheat. An overheated seat may
cause serious personal injury.
Note:Do not do the following:
•Place heavy objects on the seat.
•Operate the seat heater if water or any other liquid is spilled on the
seat. Allow the seat to dry thoroughly.
The heated seats will only function when the engine is running.
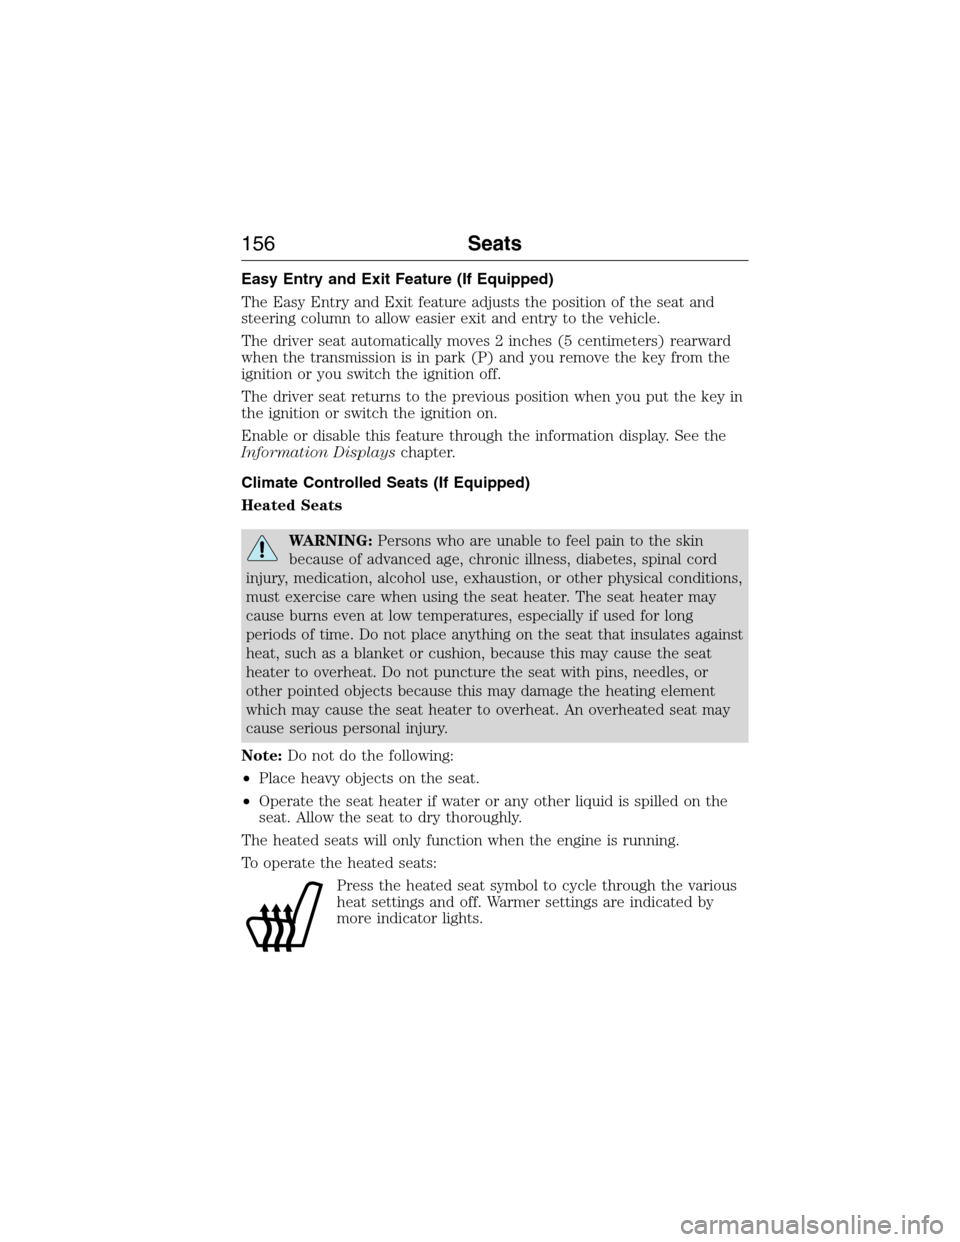
To operate the heated seats:
Press the heated seat symbol to cycle through the various
heat settings and off. Warmer settings are indicated by
more indicator lights.
156Seats
2015 Expedition(exd)
Owners Guide gf, 1st Printing, July 2014
USA(fus)
Page 158 of 564
Cooled Seats
The cooled seats will only function when the engine is running.
To operate the cooled seats:
Press the cooled seat symbol to cycle through the various
cooling settings and off. Cooler settings are indicated by
more indicator lights.
If the engine falls below 350 RPM while the cooled seats are
on, the feature will turn itself off. You will need to reactivate it.
Climate Controlled Seats Air Filter Replacement (If Equipped)
The climate controlled seat system includes air filters. You must replace
them periodically. Seescheduled maintenance informationfor more
information.
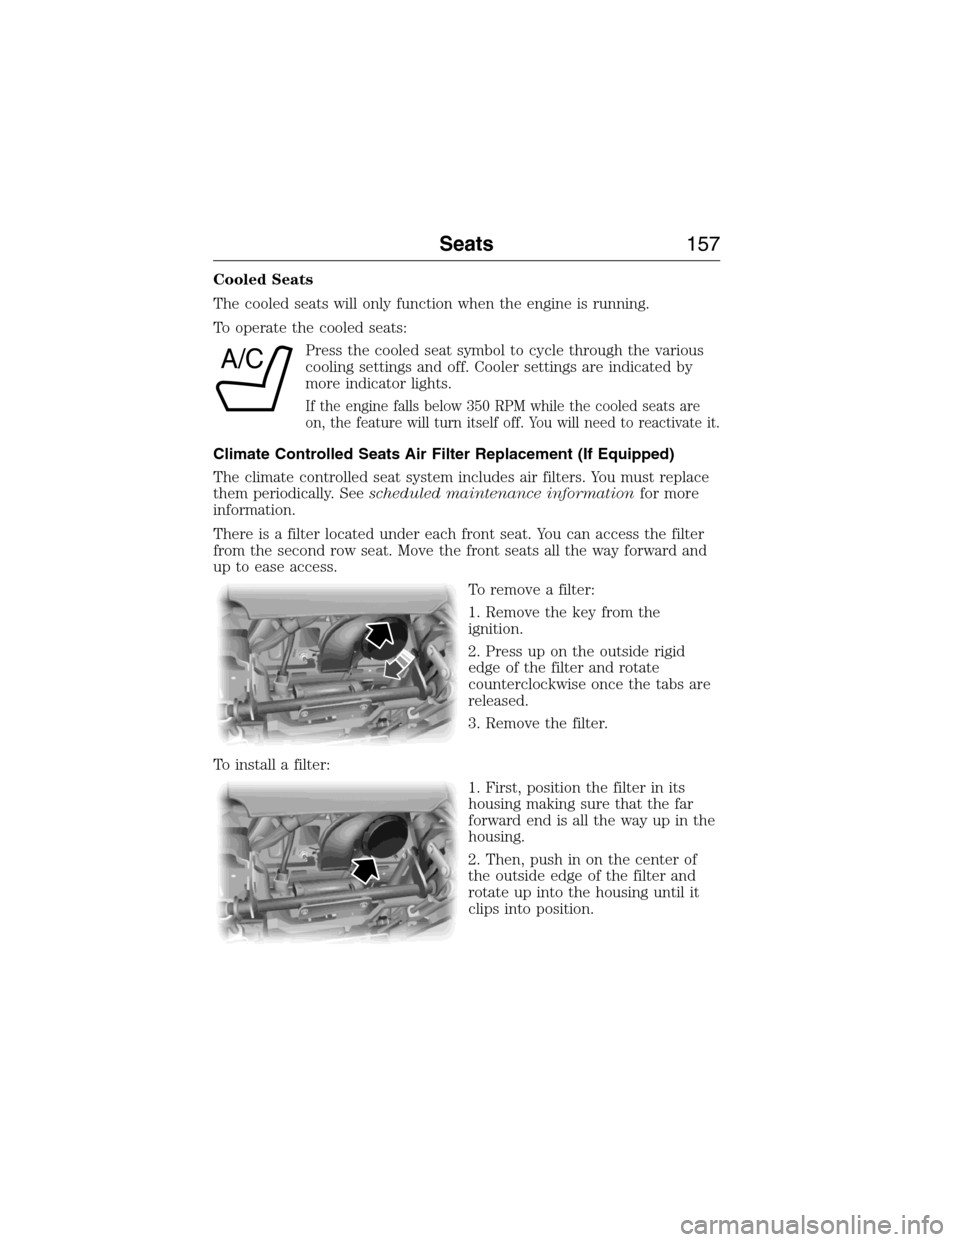
There is a filter located under each front seat. You can access the filter
from the second row seat. Move the front seats all the way forward and
up to ease access.
To remove a filter:
1. Remove the key from the
ignition.
2. Press up on the outside rigid
edge of the filter and rotate
counterclockwise once the tabs are
released.
3. Remove the filter.
To install a filter:
1. First, position the filter in its
housing making sure that the far
forward end is all the way up in the
housing.
2. Then, push in on the center of
the outside edge of the filter and
rotate up into the housing until it
clips into position.
A/C
Seats157
2015 Expedition(exd)
Owners Guide gf, 1st Printing, July 2014
USA(fus)
Page 166 of 564
Rear Heated Seats (If Equipped)
WARNING:Persons who are unable to feel pain to the skin
because of advanced age, chronic illness, diabetes, spinal cord
injury, medication, alcohol use, exhaustion, or other physical conditions,
must exercise care when using the seat heater. The seat heater may
cause burns even at low temperatures, especially if used for long
periods of time. Do not place anything on the seat that insulates against
heat, such as a blanket or cushion, because this may cause the seat
heater to overheat. Do not puncture the seat with pins, needles, or
other pointed objects because this may damage the heating element
which may cause the seat heater to overheat. An overheated seat may
cause serious personal injury.
Note:Do not do the following:
•Place heavy objects on the seat
•Operate the seat heater if water or any other liquid is spilled on the
seat. Allow the seat to dry thoroughly.
The rear seat heat controls are located on the rear of the center console.
The heated seats only operate when the ignition is on. To operate the
heated seats:
Press the heated seat button to cycle through the various
heat settings and off. Warmer settings are indicated by
more indicator lights.
Third Row Seats
Make sure that no objects are on the floor in front of the third row seats
or on the seat cushion before lowering them. Make sure that the head
restraints are lowered and the second row seats are not reclined.
Seats165
2015 Expedition(exd)
Owners Guide gf, 1st Printing, July 2014
USA(fus)
Page 171 of 564
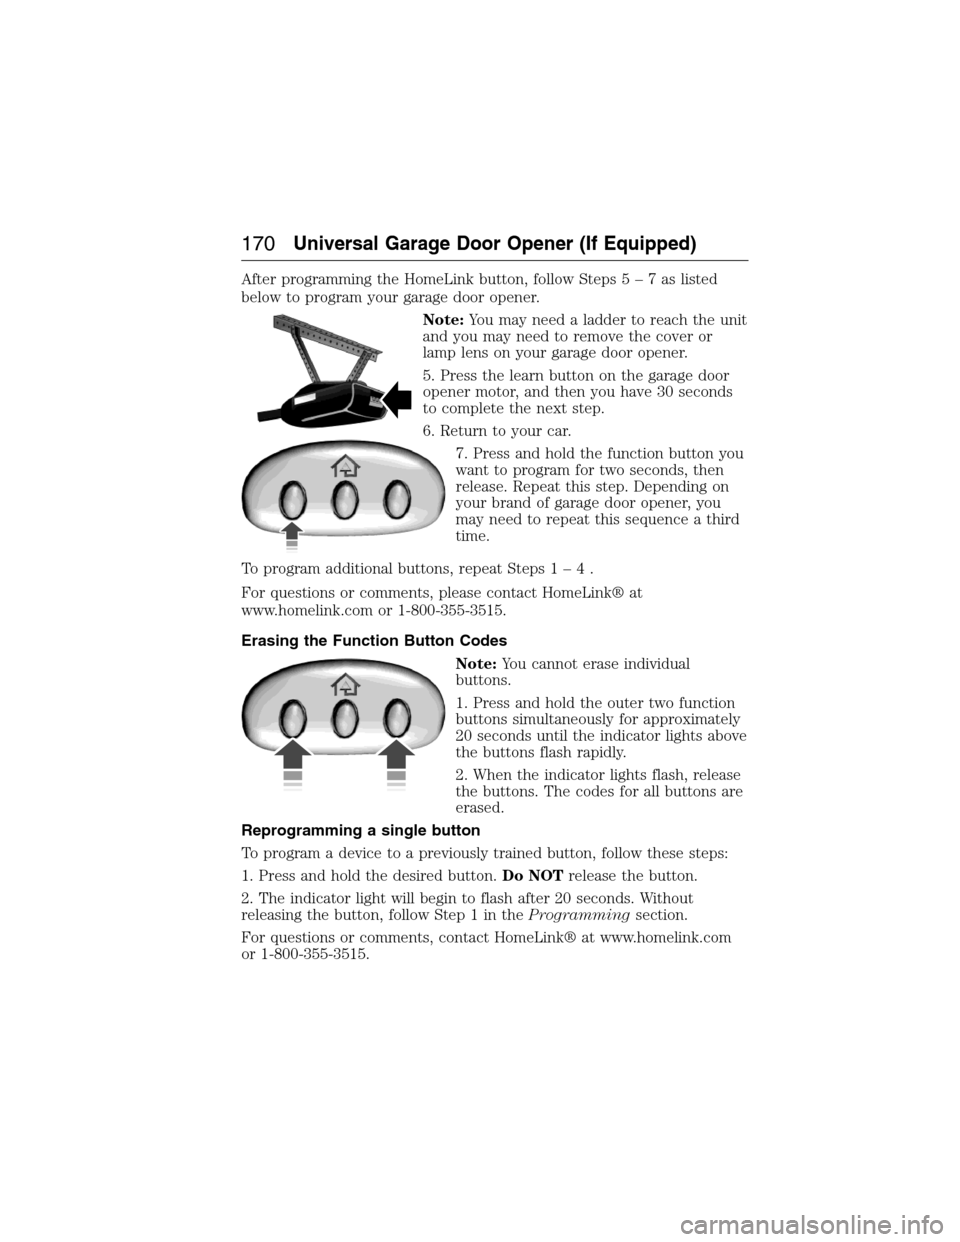
After programming the HomeLink button, follow Steps5–7aslisted
below to program your garage door opener.
Note:You may need a ladder to reach the unit
and you may need to remove the cover or
lamp lens on your garage door opener.
5. Press the learn button on the garage door
opener motor, and then you have 30 seconds
to complete the next step.
6. Return to your car.
7. Press and hold the function button you
want to program for two seconds, then
release. Repeat this step. Depending on
your brand of garage door opener, you
may need to repeat this sequence a third
time.
To program additional buttons, repeat Steps1–4.
For questions or comments, please contact HomeLink® at
www.homelink.com or 1-800-355-3515.
Erasing the Function Button Codes
Note:You cannot erase individual
buttons.
1. Press and hold the outer two function
buttons simultaneously for approximately
20 seconds until the indicator lights above
the buttons flash rapidly.
2. When the indicator lights flash, release
the buttons. The codes for all buttons are
erased.
Reprogramming a single button
To program a device to a previously trained button, follow these steps:
1. Press and hold the desired button.Do NOTrelease the button.
2. The indicator light will begin to flash after 20 seconds. Without
releasing the button, follow Step 1 in theProgrammingsection.
For questions or comments, contact HomeLink® at www.homelink.com
or 1-800-355-3515.
170Universal Garage Door Opener (If Equipped)
2015 Expedition(exd)
Owners Guide gf, 1st Printing, July 2014
USA(fus)
Page 173 of 564
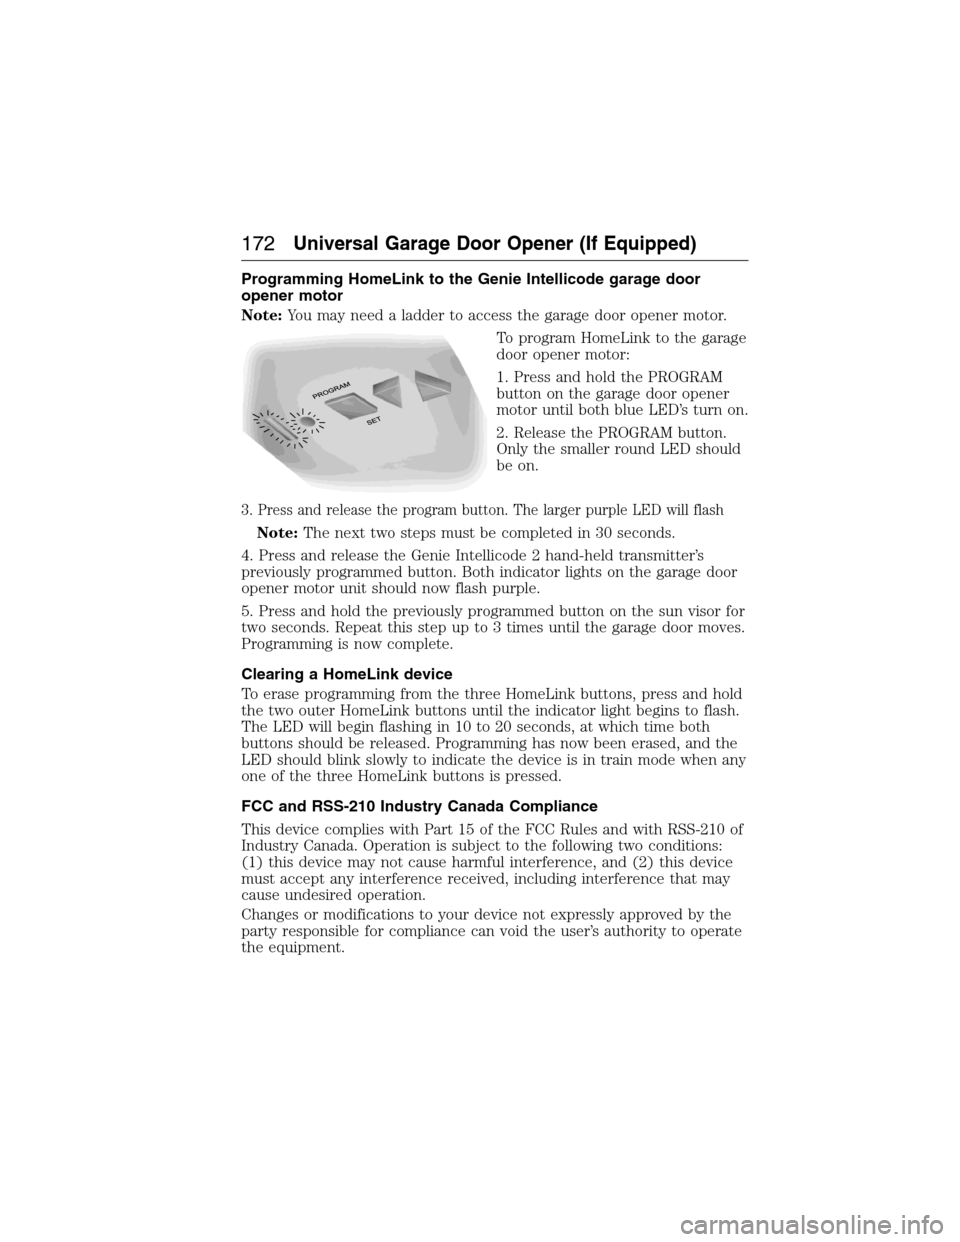
Programming HomeLink to the Genie Intellicode garage door
opener motor
Note:You may need a ladder to access the garage door opener motor.
To program HomeLink to the garage
door opener motor:
1. Press and hold the PROGRAM
button on the garage door opener
motor until both blue LED’s turn on.
2. Release the PROGRAM button.
Only the smaller round LED should
be on.
3. Press and release the program button. The larger purple LED will flash
Note:The next two steps must be completed in 30 seconds.
4. Press and release the Genie Intellicode 2 hand-held transmitter’s
previously programmed button. Both indicator lights on the garage door
opener motor unit should now flash purple.
5. Press and hold the previously programmed button on the sun visor for
two seconds. Repeat this step up to 3 times until the garage door moves.
Programming is now complete.
Clearing a HomeLink device
To erase programming from the three HomeLink buttons, press and hold
the two outer HomeLink buttons until the indicator light begins to flash.
The LED will begin flashing in 10 to 20 seconds, at which time both
buttons should be released. Programming has now been erased, and the
LED should blink slowly to indicate the device is in train mode when any
one of the three HomeLink buttons is pressed.
FCC and RSS-210 Industry Canada Compliance
This device complies with Part 15 of the FCC Rules and with RSS-210 of
Industry Canada. Operation is subject to the following two conditions:
(1) this device may not cause harmful interference, and (2) this device
must accept any interference received, including interference that may
cause undesired operation.
Changes or modifications to your device not expressly approved by the
party responsible for compliance can void the user’s authority to operate
the equipment.
172Universal Garage Door Opener (If Equipped)
2015 Expedition(exd)
Owners Guide gf, 1st Printing, July 2014
USA(fus)
Page 204 of 564
USING FOUR-WHEEL DRIVE (4WD) (IF EQUIPPED )
WARNING:For important information regarding safe operation
of this type of vehicle, seeGeneral Informationin theWheels
and Tireschapter.
Note:Do not use 4X4 mode on dry, hard surfaced roads. Doing so will
produce excessive noise, increase tire wear and may damage drive
components. 4X4 mode is only intended for consistently slippery or loose
surfaces.
Note:If 4X4 low is selected while the vehicle is moving above 3 mph
(5 km/h), the 4WD system will not perform a shift. This is normal and
should be no reason for concern. Refer toShifting to/from 4L (4X4
Low)for proper operation.
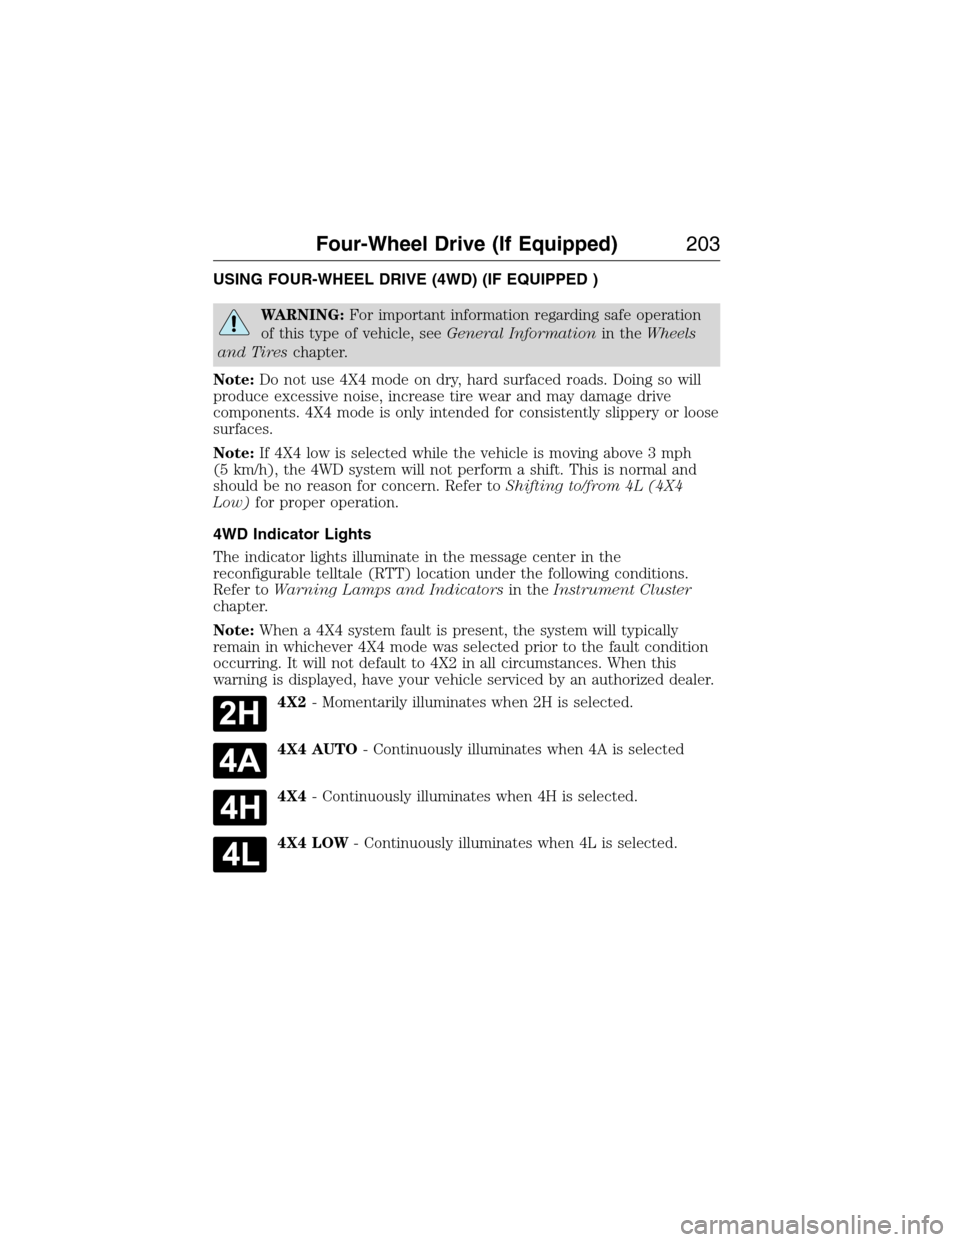
4WD Indicator Lights
The indicator lights illuminate in the message center in the
reconfigurable telltale (RTT) location under the following conditions.
Refer toWarning Lamps and Indicatorsin theInstrument Cluster
chapter.
Note:When a 4X4 system fault is present, the system will typically
remain in whichever 4X4 mode was selected prior to the fault condition
occurring. It will not default to 4X2 in all circumstances. When this
warning is displayed, have your vehicle serviced by an authorized dealer.
4X2- Momentarily illuminates when 2H is selected.
4X4 AUTO- Continuously illuminates when 4A is selected
4X4- Continuously illuminates when 4H is selected.
4X4 LOW- Continuously illuminates when 4L is selected.
Four-Wheel Drive (If Equipped)203
2015 Expedition(exd)
Owners Guide gf, 1st Printing, July 2014
USA(fus)
Page 215 of 564

Hill start assist keeps your vehicle stationary long enough to move your
foot from the brake pedal to the accelerator pedal when your vehicle is
on a slope.
The brakes are released automatically once the engine has developed
sufficient drive to prevent the vehicle from rolling down the slope. This
is an advantage when pulling away on a slope, (for example from a car
park ramp, traffic lights or when reversing uphill into a parking space).
Using Hill Start Assist
1. Press the brake pedal to bring the vehicle to a complete standstill.
Keep the brake pedal pressed.
2. If the sensors detect that the vehicle is on a slope, the hill start assist
feature will be activated automatically.
3. When you remove your foot from the brake pedal, the vehicle will
remain on the slope without rolling away for approximately two or three
seconds. This hold time will automatically be extended if you are in the
process of driving off.
4. Drive off in the normal manner. The brakes will be released
automatically.
214Brakes
2015 Expedition(exd)
Owners Guide gf, 1st Printing, July 2014
USA(fus)