2015 FORD EXPEDITION warning
[x] Cancel search: warningPage 258 of 564
Procedure for Adjusting Gain
Note:Only perform this procedure in a traffic-free environment at
speeds of approximately 20–25 mph (30–40 km/h).
The gain setting sets the trailer brake controller for the specific towing
condition. You should change the setting as towing conditions change.
Changes to towing conditions include trailer load, vehicle load, road
conditions and weather.
The gain should be set to provide the maximum trailer braking assistance
while making sure the trailer wheels do not lock when using the brakes.
Locked trailer wheels may lead to trailer instability.
1. Make sure the trailer brakes are in good working condition,
functioning normally and properly adjusted. See your trailer dealer if
necessary.
2. Hook up the trailer and make the electrical connections according to
the trailer manufacturer’s instructions.
3. When you plug in a trailer with electric or electric-over-hydraulic
brakes,TRAILER CONNECTEDappears in the information display.
4. Use the gain adjustment (+ and -) buttons to increase or decrease
the gain setting to the desired starting point. A gain setting of 6.0 is a
good starting point for heavier loads.
5. In a traffic-free environment, tow the trailer on a dry, level surface at
a speed of 20–25 mph (30–40 km/h) and squeeze the manual control
lever completely.
6. If the trailer wheels lock up, indicated by squealing tires, reduce the
gain setting. If the trailer wheels turn freely, increase the gain setting.
Repeat Steps 5 and 6 until the gain setting is at a point just below
trailer wheel lock-up. If towing a heavier trailer, trailer wheel lock-up
may not be attainable even with the maximum gain setting of 10.
Explanation of Information Display Warning Messages
Note:An authorized dealer can diagnose the trailer brake controller to
determine exactly which trailer fault has occurred. However, your Ford
warranty doesnotcover this diagnosis if the fault is with the trailer.
TRAILER BRAKE MODULE FAULT:Displays in response to faults
sensed by the trailer brake controller, accompanied by a single chime. If
this message appears, contact an authorized dealer as soon as possible
for diagnosis and repair. The controller may still function, but
performance may be degraded.
WIRING FAULT ON TRAILER:Displays when there is a short circuit
on the electric brake output wire. If theWIRING FAULT ON TRAILER
message displays, accompanied by a single chime, with no trailer
Towing257
2015 Expedition(exd)
Owners Guide gf, 1st Printing, July 2014
USA(fus)
Page 260 of 564
Trailer Lamps
WARNING:Never connect any trailer lamp wiring to the
vehicle’s tail lamp wiring; this may damage the electrical system
resulting in a fire. Contact an authorized dealer as soon as possible for
assistance in proper trailer tow wiring installation. Additional electrical
equipment may be required.
Trailer lamps are required on most towed vehicles. Make sure all running
lights, brake lights, turn signals and hazard lights are working.
Before Towing a Trailer
Practice turning, stopping and backing up to get the feel of your
vehicle-trailer combination before starting on a trip. When turning, make
wider turns so the trailer wheels clear curbs and other obstacles.
When Towing a Trailer
•Do not drive faster than 70 mph (113 km/h) during the first 500 miles
(800 kilometers).
•Do not make full-throttle starts.
•Check your hitch, electrical connections and trailer wheel lug nuts
thoroughly after you have traveled 50 miles (80 kilometers).
•When stopped in congested or heavy traffic during hot weather, place
the gearshift in positionPto aid engine and transmission cooling and
to help air conditioning performance.
•Turn off the speed control with heavy loads or in hilly terrain. The
speed control may turn off automatically when you are towing on
long, steep grades.
•Shift to a lower gear when driving down a long or steep hill. Do not
apply the brakes continuously, as they may overheat and become less
effective.
•If your transmission is equipped with a Grade Assist or Tow/Haul
feature, use this feature when towing. This provides engine braking
and helps eliminate excessive transmission shifting for optimum fuel
economy and transmission cooling.
•If your vehicle is equipped with AdvanceTrac™ with RSC, this system
may turn on during typical cornering maneuvers with a heavily loaded
trailer. This is normal. Turning the corner at a slower speed while
towing may reduce this tendency.
Towing259
2015 Expedition(exd)
Owners Guide gf, 1st Printing, July 2014
USA(fus)
Page 264 of 564
7. Leave the transmission in positionN.
•If your vehicle has an ignition key, turn the ignition as far as it
goes toward the off position (it does not turn fully off when the
transmission is in positionN.)You must leave the key in the
ignition while towing. To lock and unlock your vehicle, use the
keyless entry keypad or extra set of keys.
•If your vehicle has intelligent access, turn the ignition off by
pressing the engine START/STOP button once without pressing on
the brake pedal. You do not need to leave your keys in the
vehicle. You can lock and unlock your vehicle as you normally do.
WARNING:Do not disconnect the battery during recreational
towing. Doing so will prevent the transfer case from shifting
properly and may cause the vehicle to roll even if the transmission is in
P (Park).
WARNING:Shifting the transfer case to its neutral position for
recreational towing may cause the vehicle to be able to roll even
if the transmission is in P (Park). The driver or others could be injured.
Make sure the foot brake is depressed and the vehicle is in a secure
and safe position while the transfer case is being shifted to its neutral
position.
WARNING:Failing to put the transfer case in its neutral position
will damage vehicle components.
Note:You can check four-wheel-down towing status at any time by
opening the driver’s door or turning the ignition to the accessory or on
position and verifying theNEUTRAL TOW ENABLED LEAVE
TRANSMISSION IN NEUTRALmessage displays in the cluster.
Exiting four-wheel-down towing
To exit four-wheel-down towing and return the transfer case to its 2H
position:
1. With your vehicle still properly secured to the tow vehicle, put the
ignition in the on position:
•If your vehicle has an ignition key, turn the key to on. Do not
start the engine.
•If your vehicle has intelligent access, press the engine
START/STOP button twice without pressing the brake pedal. Do
not start the engine.
Towing263
2015 Expedition(exd)
Owners Guide gf, 1st Printing, July 2014
USA(fus)
Page 267 of 564
•Add particular accessories to your vehicle (e.g.; bug deflectors,
rollbars or light bars, running boards, ski racks).
•Drive with the wheels out of alignment.
DRIVING THROUGH WATER
WARNING:Do not drive through flowing or deep water as you
may lose control of your vehicle.
Note:Driving through standing water can cause vehicle damage.
Note:Engine damage can occur if water enters the air filter.
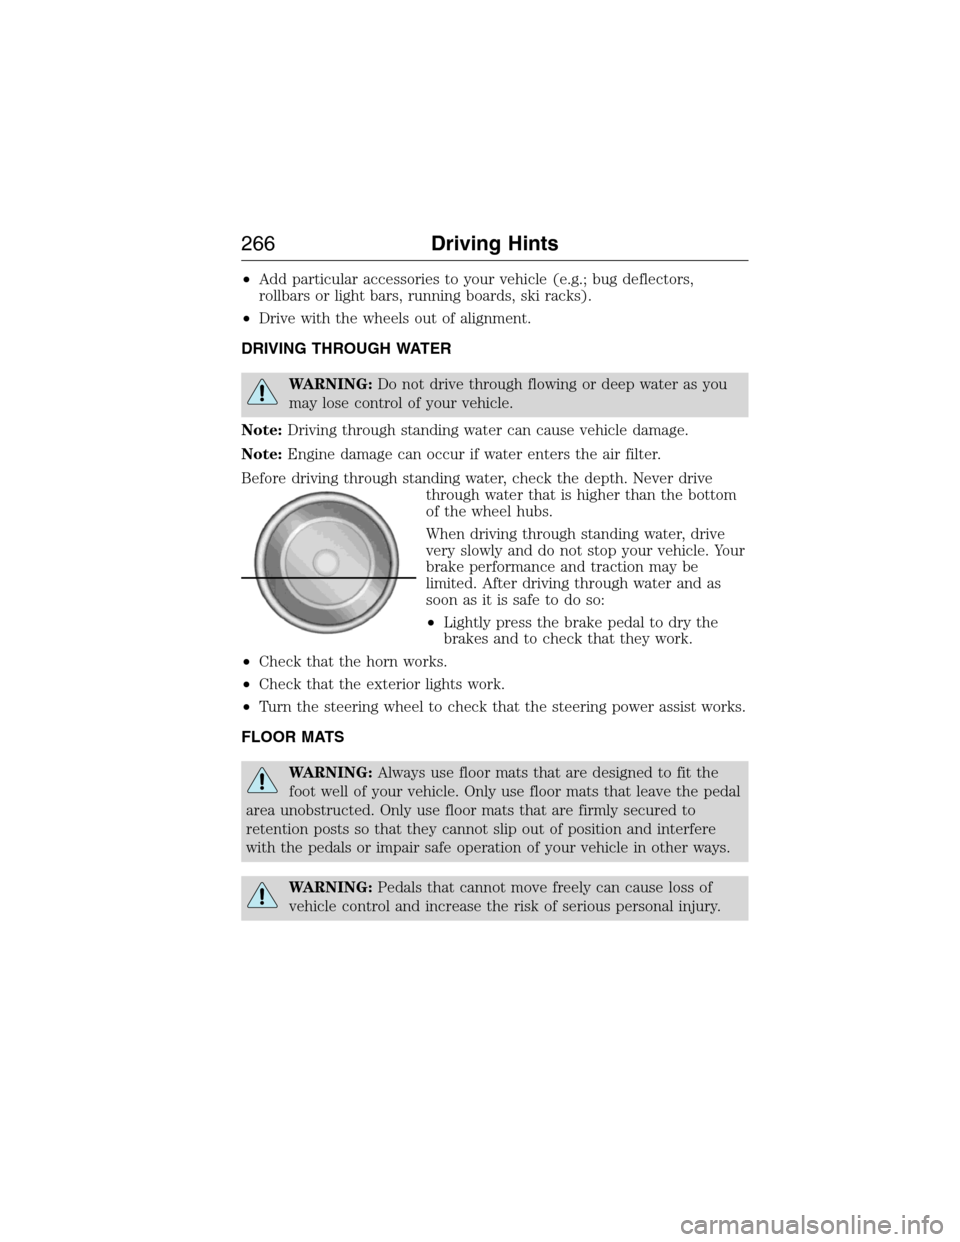
Before driving through standing water, check the depth. Never drive
through water that is higher than the bottom
of the wheel hubs.
When driving through standing water, drive
very slowly and do not stop your vehicle. Your
brake performance and traction may be
limited. After driving through water and as
soon as it is safe to do so:
•Lightly press the brake pedal to dry the
brakes and to check that they work.
•Check that the horn works.
•Check that the exterior lights work.
•Turn the steering wheel to check that the steering power assist works.
FLOOR MATS
WARNING:Always use floor mats that are designed to fit the
foot well of your vehicle. Only use floor mats that leave the pedal
area unobstructed. Only use floor mats that are firmly secured to
retention posts so that they cannot slip out of position and interfere
with the pedals or impair safe operation of your vehicle in other ways.
WARNING:Pedals that cannot move freely can cause loss of
vehicle control and increase the risk of serious personal injury.
266Driving Hints
2015 Expedition(exd)
Owners Guide gf, 1st Printing, July 2014
USA(fus)
Page 268 of 564
WARNING:Always make sure that the floor mats are properly
attached to the retention posts in the carpet that are supplied
with your vehicle. Floor mats must be properly secured to both
retention posts to make sure mats do not shift out of position.
WARNING:Never place floor mats or any other covering in the
vehicle foot well that cannot be properly secured to prevent them
from moving and interfering with the pedals or the ability to control the
vehicle.
WARNING:Never place floor mats or any other covering on top
of already installed floor mats. Floor mats should always rest on
top of vehicle carpeting surface and not another floor mat or other
covering. Additional floor mats or any other covering will reduce the
pedal clearance and potentially interfere with pedal operation.
WARNING:Check attachment of floor mats on a regular basis.
Always properly reinstall and secure floor mats that have been
removed for cleaning or replacement.
WARNING:Always make sure that objects cannot fall into the
driver foot well while the vehicle is moving. Objects that are loose
can become trapped under the pedals causing a loss of vehicle control.
WARNING:Failure to properly follow floor mat installation or
attachment instructions can potentially cause interference with
pedal operation causing a loss of vehicle control.
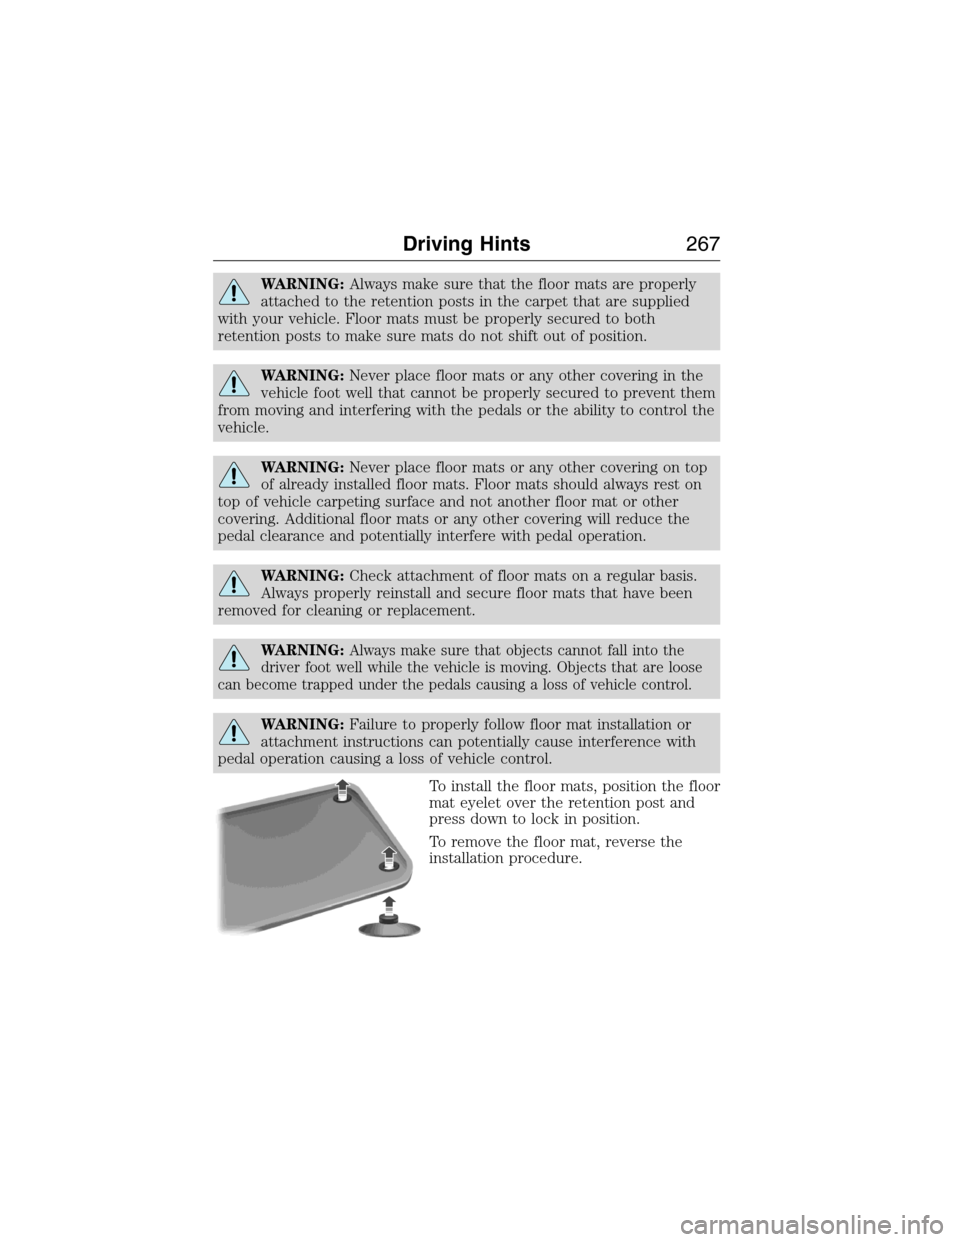
To install the floor mats, position the floor
mat eyelet over the retention post and
press down to lock in position.
To remove the floor mat, reverse the
installation procedure.
Driving Hints267
2015 Expedition(exd)
Owners Guide gf, 1st Printing, July 2014
USA(fus)
Page 271 of 564
HAZARD WARNING FLASHERS
The hazard flasher control is located on the instrument panel
by the radio. Use it when your vehicle is disabled and is
creating a safety hazard for other motorists.
•Press the flasher control and all front and rear direction signals will
flash.
•Press the flasher control again to turn them off.
Note:With extended use, the flashers may run down your 12–volt
battery.
FUEL SHUTOFF
WARNING:Failure to inspect and, if necessary, repair fuel leaks
after a collision may increase the risk of fire and serious injury.
Ford Motor Company recommends that the fuel system be inspected by
an authorized dealer after any collision.
In the event of a moderate to severe collision, this vehicle includes a fuel
pump shut-off feature that stops the flow of fuel to the engine. Not every
impact will cause a shut off.
Should your vehicle shut off after a collision, you may restart your
vehicle by doing the following:
1. Switch off the ignition.
2. Switch on the ignition.
3. Repeat Steps 1 and 2 to re-enable the fuel pump.
For vehicles equipped with a push button start system:
1. Press the START/STOP button to switch off the ignition.
2. Press the brake pedal and press the START/STOP button to start the
vehicle.
3. Remove your foot from the brake pedal and press the START/STOP
button to switch off the ignition.
4. You can either attempt to start the engine by pressing the brake pedal
and the START/STOP button, or switch on the ignition only by pressing
the START/STOP button without pressing the brake pedal. Both ways
re-enable the fuel system.
270Roadside Emergencies
2015 Expedition(exd)
Owners Guide gf, 1st Printing, July 2014
USA(fus)
Page 272 of 564
Note:When you try to restart your vehicle after a fuel shutoff, the
vehicle makes sure that various systems are safe to restart. Once your
vehicle determines that the systems are safe, then the vehicle will allow
you to restart.
Note:In the event that your vehicle does not restart after your third
attempt, contact an authorized dealer.
JUMP-STARTING THE VEHICLE
WARNING:The gases around the battery can explode if exposed
to flames, sparks, or lit cigarettes. An explosion could result in
injury or vehicle damage.
WARNING:Batteries contain sulfuric acid which can burn skin,
eyes and clothing, if contacted.
Do not attempt to push-start your automatic transmission vehicle.
Automatic transmissions do not have push-start capability. Attempting to
push-start a vehicle with an automatic transmission may cause
transmission damage.
When the battery is disconnected or a new battery is installed, the
automatic transmission must relearn its shift strategy. As a result, the
transmission may exhibit a combination of firm and soft shifts. This
operation is considered normal and will not affect function or durability
of the transmission. Over time, the adaptive learning process will fully
update transmission operation.
Preparing Your Vehicle
Note:Use only a 12–volt supply to start your vehicle.
Note:Do not disconnect the battery of the disabled vehicle as this could
damage the vehicle’s electrical system.
1. Park the booster vehicle close to the hood of the disabled vehicle making
sure the two vehicles do not touch. Set the parking brake on both vehicles
and stay clear of the engine cooling fan and other moving parts.
2. Check all battery terminals. Remove the positive terminal cover (if
equipped) and any excessive corrosion before you attach the battery
cables. Ensure that vent caps are tight and level.
3. Turn the heater fan on in both vehicles to protect from any electrical
surges. Turn all other accessories off.
Roadside Emergencies271
2015 Expedition(exd)
Owners Guide gf, 1st Printing, July 2014
USA(fus)
Page 273 of 564
Connecting the Jumper Cables
WARNING:Do not connect the end of the second cable to the
negative (-) terminal of the battery to be jumped. A spark may
cause an explosion of the gases that surround the battery.
Note:Do not attach the negative (-) cable to fuel lines, engine rocker
covers, the intake manifold or electrical components as grounding points.
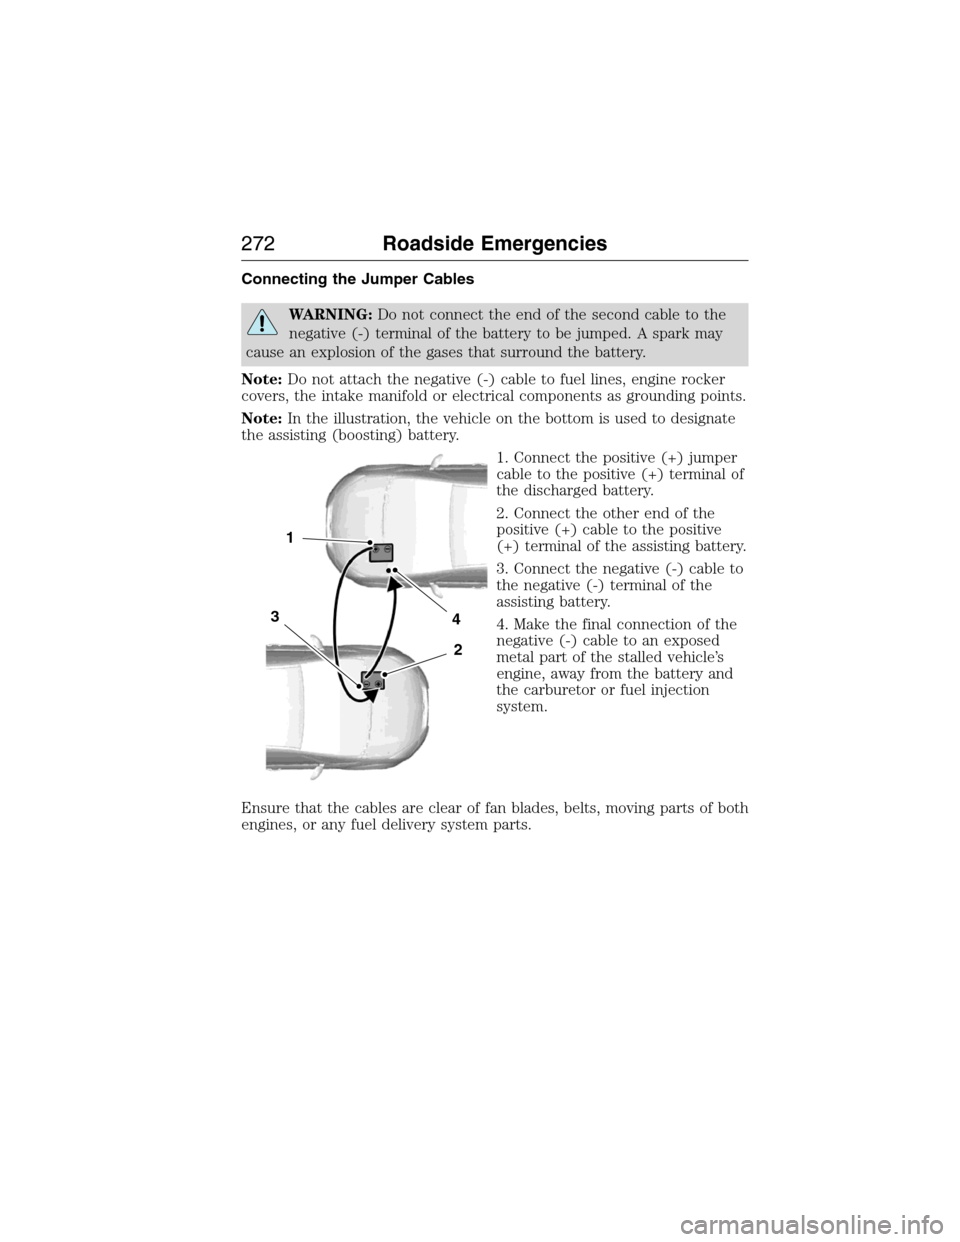
Note:In the illustration, the vehicle on the bottom is used to designate
the assisting (boosting) battery.
1. Connect the positive (+) jumper
cable to the positive (+) terminal of
the discharged battery.
2. Connect the other end of the
positive (+) cable to the positive
(+) terminal of the assisting battery.
3. Connect the negative (-) cable to
the negative (-) terminal of the
assisting battery.
4. Make the final connection of the
negative (-) cable to an exposed
metal part of the stalled vehicle’s
engine, away from the battery and
the carburetor or fuel injection
system.
Ensure that the cables are clear of fan blades, belts, moving parts of both
engines, or any fuel delivery system parts.
4
2
1
3
272Roadside Emergencies
2015 Expedition(exd)
Owners Guide gf, 1st Printing, July 2014
USA(fus)