Page 209 of 236
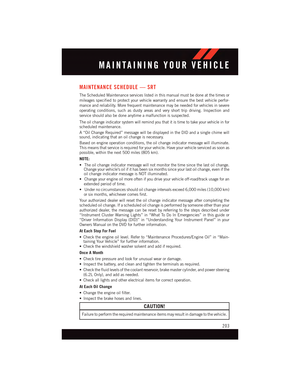
SRT MAINTENANCE RECORD
Odometer Date Signature, Authorized
Service Center
6,000 Miles(10,000 km) or6Months12,000 Miles(20,000 km) or12 Months18,000 Miles(30,000 km) or18 Months24,000 Miles(40,000 km) or24 Months30,000 Miles(50,000 km) or30 Months36,000 Miles(60,000 km) or36 Months42,000 Miles(70,000 km) or42 Months
Odometer Date Signature, Authorized
Service Center
48,000 Miles(80,000 km) or48 Months54,000 Miles(90,000 km) or54 Months60,000 Miles(100,000 km) or60 Months66,000 Miles(110,000 km) or66 Months72,000 Miles(120,000 km) or72 Months78,000 Miles(130,000 km) or78 Months
MAINTAINING YOUR VEHICLE
207
Page 210 of 236

FUSES
WARNING!
•When replacing a blown fuse, always use an appropriate replacement fuse with the
same amp rating as the original fuse. Never replace a fuse with another fuse of higher
amp rating. Never replace a blown fuse with metal wires or any other material. Failure
to use proper fuses may result in serious personal injury, fire and/or property damage.
•Beforereplacingafuse,makesurethattheignitionisoffandthatalltheother
services are switched off and/or disengaged.
•Ifthereplacedfuseblowsagain,contactanauthorizeddealer.
•If a general protection fuse for safety systems (air bag system, braking system), power
unit systems (engine system, gearbox system) or steering system blows, contact an
authorized dealer.
Front Power Distribution Center (Fuses)
The Front Power Distribution Center is located in the engine compartment. This module
contains fuses and relays.
CAUTION!
•Wheninstallingthepowerdistributioncentercover,itisimportanttoensurethe
cover is properly positioned and fully latched. Failure to do so may allow water to get
into the power distribution center and possibly result in an electrical system failure.•Whenreplacingablownfuse,itisimportanttouseonlyafusehavingthecorrect
amperage rating. The use of a fuse with a rating other than indicated may result in
adangerouselectricalsystemoverload.Ifaproperlyratedfusecontinuestoblow,
it indicates a problem in the circuit that must be corrected.
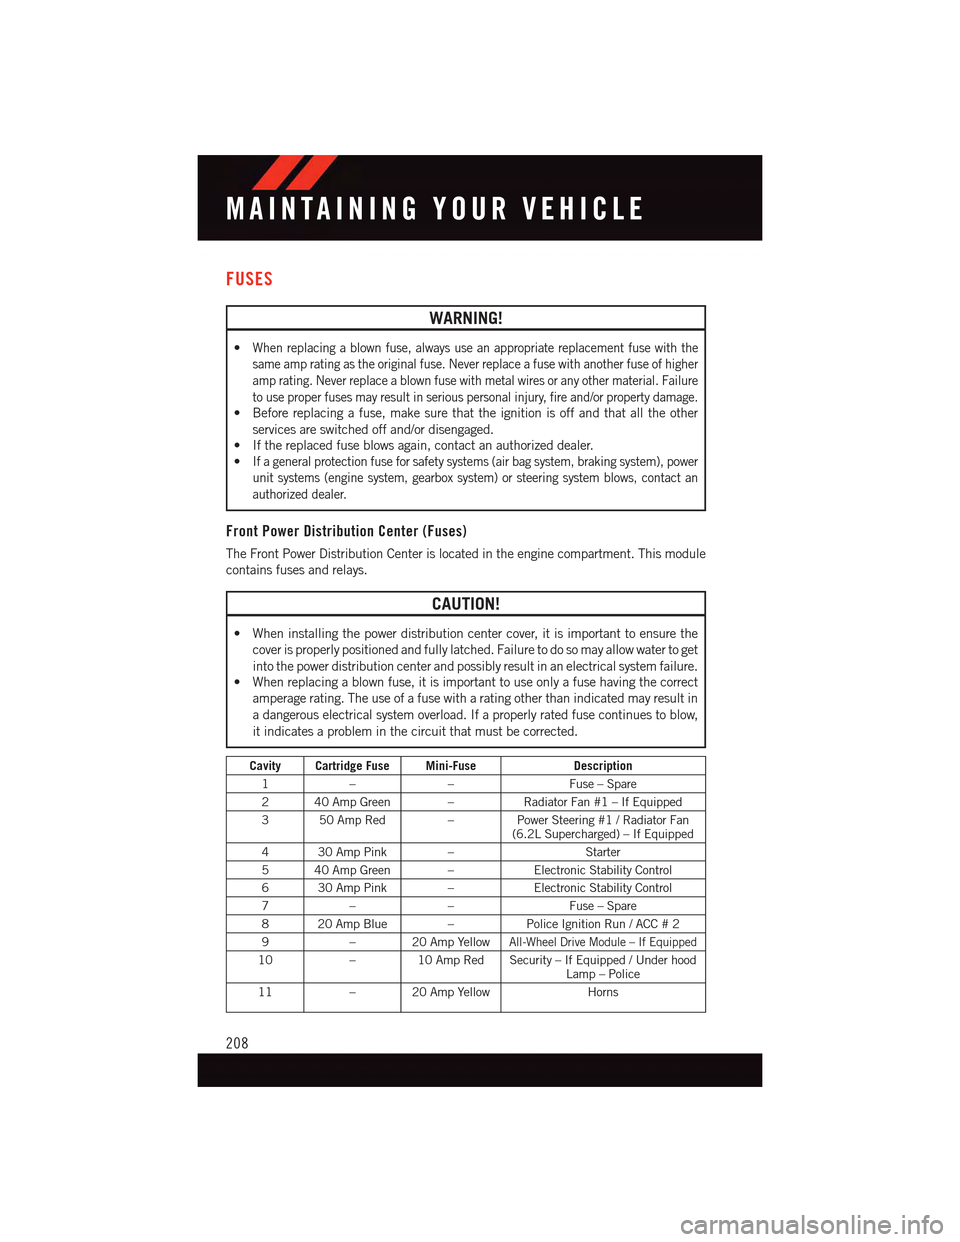
Cavity Cartridge Fuse Mini-FuseDescription
1––Fuse – Spare
240AmpGreen –Radiator Fan #1 – If Equipped
350AmpRed –Power Steering #1 / Radiator Fan(6.2L Supercharged) – If Equipped
430AmpPink –Starter
540AmpGreen –Electronic Stability Control
630AmpPink –Electronic Stability Control
7––Fuse – Spare
820AmpBlue –Police Ignition Run / ACC # 2
9–20AmpYellowAll-Wheel Drive Module – If Equipped
10–10AmpRedSecurity–IfEquipped/UnderhoodLamp – Police
11–20AmpYellowHorns
MAINTAINING YOUR VEHICLE
208
Page 211 of 236

Cavity Cartridge Fuse Mini-FuseDescription
12–10AmpRedAirConditioningClutch
13––Fuse – Spare
14––Fuse – Spare
15–20AmpYellowLeftHID–IfEquipped
16–20AmpYellowRightHID–IfEquipped
18 40 Amp Green –Radiator Fan #2 – If Equipped
19 50 Amp Red –Power Steering #2 / Radiator Fan(6.2L Supercharged)
20 30 Amp Pink –Wiper Motor
21 20 Amp Blue – Headlamp Washers – If Equipped /Police Feed
22 40 Amp Green /20 Amp Blue –Police
–EngineCoolingPump(6.2LSuper-charged) / Police Bat Feed#3–If Equipped
23 20 Amp Blue – Police Bat Feed # 1 – IfEquipped
24 20 Amp Blue – Police Bat Feed # 3 – IfEquipped
28––Fuse – Spare
29–15AmpBlueTransmissionControlModule(LA/LD Police)
30––Fuse – Spare
31–25AmpClearEngine Module
32––Fuse – Spare
33––Fuse – Spare
34–25AmpClearPowertrain #1
35–20AmpYellowPowertrain #2
36–10AmpRedAnti-LockBrakeModule
37–10AmpRedEngineController/RadFanRelays–If Equipped
38–10AmpRedAirbag Module
39–10AmpRedPowerSteeringModule/ACClutchRelay
48–10AmpRedAWDModule/FrontAxleDisconnect(LX) / Adaptive Cruise (LA) –If Equipped
49––Fuse – Spare
50––Fuse – Spare
51–20AmpYellowVacuum Pump
52–10AmpRedAdaptiveCruise(LD/LX)–If Equipped
53––Fuse – Spare
MAINTAINING YOUR VEHICLE
209
Page 212 of 236

Rear Power Distribution Center (Fuses)
There is also a power distribution center located in the trunk under the spare tire access
panel. This center contains fuses and relays.
CAUTION!
•Wheninstallingthepowerdistributioncentercover,itisimportanttoensurethe
cover is properly positioned and fully latched. Failure to do so may allow water to get
into the power distribution center and possibly result in an electrical system failure.•Whenreplacingablownfuse,itisimportanttouseonlyafusehavingthecorrect
amperage rating. The use of a fuse with a rating other than indicated may result in
adangerouselectricalsystemoverload.Ifaproperlyratedfusecontinuestoblow,
it indicates a problem in the circuit that must be corrected.
Cavity Cartridge Fuse Mini-FuseDescription
260AmpYellow—FrontPDCFeed#1
3——Fuse–Spare
460AmpYellow—FrontPDCFeed#2
530 Amp Pink—Sunroof/DomeLamp–Police
640AmpGreen—ExteriorLighting#1
740AmpGreen—ExteriorLighting#2
830AmpPink—InteriorLighting
940AmpGreen—PowerLocks
10 30 Amp Pink—DriverDoorControlModule
1130 Amp Pink—PassengerDoorControlModule
12—20 Amp Yellow Dual USB Center ConsoleRear/Cigar Lighter IP –If Equipped
15 40 Amp Green—HVACBlower
16 20 Amp Blue—LeftSpotLamp–Police
17——Fuse–Spare
1830 Amp Pink—ModNetworkInterface–Police
19——Fuse—Spare
20——Fuse—Spare
21
30 Amp Pink (6.2LSupercharged)25 Amp Clear(LD STD)
—FuelPump(6.2L Supercharged)Fuel Pump (LD STD)
MAINTAINING YOUR VEHICLE
210
Page 213 of 236

Cavity Cartridge Fuse Mini-FuseDescription
22—20 Amp Yellow –Police10 Amp Red – LA
Right Spot Lamp – PoliceIntegrated Center Stack – LA
23—10 Amp Red Fuel Door/Diagnostic Port
24—15 Amp Blue Integrated Center Stack –LD/LX
25—10 Amp Red Tire Pressure Monitor
26
—15 Amp Blue –LD/LX25 Amp Clear – LA30 Amp Green – LA6.2L Supercharged
Tr a n s m i s s i o n / E l e c t r o n i cShift Module (LD/LX)Fuel Pump (LA)Fuel Pump (LA 6.2LSupercharged)
27—25 Amp Clear Amplifier – If Equipped
31—25 Amp Breaker Power Seats
32—15 Amp Blue HVAC Module/Cluster
33—15 Amp Blue Ignition Switch/RF hubModule/Steering ColumnLock-LX If Equipped
34—10 Amp Red Steering Column Module/Clock/Spare – Police
35—5AmpTan BatterySensor
36—15 Amp Blue Electronic Exhaust Valve –If Equipped
37—20 Amp Yellow Radio
38
—15 Amp Blue –LD/LX20 Amp Yellow – LA
Console Power Outlet/ConsoleMedia Hub (LD/LX)Power Outlet Inside ArmRest/Console Media Hub (LA)
40——Fuse—Spare
41——Fuse—Spare
42 30 Amp Pink—RearDefrost
43—20 Amp Yellow Rear Heated Seats/SteeringWheel Module
44—10 Amp Red Park Assist / Blind Spot /Rear View Camera
45—15 Amp Blue Cluster / Rearview Mirror /Compass(LDLX)/HumiditySensor
46——Fuse—Spare
MAINTAINING YOUR VEHICLE
211
Page 214 of 236
Cavity Cartridge Fuse Mini-FuseDescription
47—10 Amp Red Adaptive Front Lighting / AutoHigh BEAM / Day Time Run-ning Lamps- If Equipped
48—20 Amp Yellow Active Suspension – SRT
49——Fuse—Spare
50——Fuse—Spare
51—20 Amp YellowFront Heated Seats –If Equipped
52—10 Amp RedHeated Cupholders/RearHeated Seat Switches –If Equipped
53—10 Amp RedHVAC Module/In CarTe m p e r a t u r e S e n s o r
54—10 Amp Red Airbag Module (LA)
55——Fuse—Spare
56——Fuse—Spare
57——Fuse—Spare
58—10 Amp Red Airbag Module (LD/LX)
59—20 Amp Yellow Adjustable Pedals – Police
60—5AmpTan HeatedWasherNozzles(LD)
61—20 Amp YellowCigar Lighter (LA) –If Equipped
62——Fuse—Spare
63——Fuse—Spare
64—25 Amp Breaker Rear Windows (LD/LX)
65—10 Amp Red Airbag Module
66——Fuse—Spare
67—10 Amp RedRain and Light Sensor/Sunroof
68—10 Amp RedDual USB Power Outlet –R/A Sense (LD/LX) RearSunshade (LD/LX)
69——Fuse—Spare
70——Fuse—Spare
MAINTAINING YOUR VEHICLE
212
Page 215 of 236

TIRE PRESSURES
Check the inflation pressure of each tire, including the spare tire (if equipped), at least
monthly and inflate to the recommended pressure for your vehicle.
The tire pressures recommended for your vehicle are found on the “Tire and Loading
Information” label located on the driver’s side door opening.
NOTE:
Refer to the Owner's Manual on the DVD for
more information regarding tire warnings
and instructions.
WARNING!
•Overloadingofyourtiresisdangerous.Overloadingcancausetirefailure,affect
vehicle handling, and increase your stopping distance. Use tires of the recom-
mended load capacity for your vehicle. Never overload them.
•Improperlyinflatedtiresaredangerousandcancausecollisions.Under-inflation
increases tire flexing and can result in over-heating and tire failure. Over-inflation
reduces a tire’s ability to cushion shock. Objects on the road and chuck holes can
cause damage that results in tire failure. Unequal tire pressures can cause steering
problems. You could lose control of your vehicle. Over-inflated or under-inflated
tires can affect vehicle handling and can fail suddenly, resulting in loss of vehicle
control. Always drive with each tire inflated to the recommended cold tire inflation
pressure.
Tire And Loading Information Location(Example)
MAINTAINING YOUR VEHICLE
213
Page 216 of 236

SPARE TIRES — IF EQUIPPED
NOTE:
For vehicles equipped with Tire Service Kit instead of a spare tire, please refer to “Tire
Service Kit” in “What To Do In Emergencies” on your DVD for further information.
CAUTION!
Because of the reduced ground clearance, do not take your vehicle through an
automatic car wash with a compact or limited-use temporary spare installed. Damage
to the vehicle may result.
Spare Tire Matching Original Equipped Tire And Wheel — If Equipped
Yo u r v e h i c l e m a y b e e q u i p p e d w i t h a s p a r e t i r e a n d w h e e l e q u i v a l e n t i n l o o k a n d f u n c t i o n
to the original equipment tire and wheel found on the front or rear axle of your vehicle. This
spare tire may be used in the tire rotation for your vehicle. If your vehicle has this option,
refer to an authorized tire dealer for the recommended tire rotation pattern.
Compact Spare Tire — If Equipped
The compact spare is for temporary emergency use only. You can identify if your vehicle
is equipped with a compact spare by looking at the spare tire description on the Tire and
Loading Information Placard located on the driver’s side door opening or on the sidewall
of the tire. Compact spare tire descriptions begin with the letter “T” or “S” preceding the
size designation. Example: T145/80D18 103M.
T, S = Temporary Spare Tire
Since this tire has limited tread life, the original equipment tire should be repaired (or
replaced) and reinstalled on your vehicle at the first opportunity.
Do not install a wheel cover or attempt to mount a conventional tire on the compact spare
wheel, since the wheel is designed specifically for the compact spare tire. Do not install
more than one compact spare tire and wheel on the vehicle at any given time.
WARNING!
Compact spares are for temporary emergency use only. With these spares, do not drive
more than 50 mph (80 km/h). Temporary use spares have limited tread life. When the
tread is worn to the tread wear indicators, the temporary use spare tire needs to be
replaced. Be sure to follow the warnings, which apply to your spare. Failure to do so
could result in spare tire failure and loss of vehicle control.
MAINTAINING YOUR VEHICLE
214