2015 AUDI S3 SEDAN reset
[x] Cancel search: resetPage 12 of 282

Instruments and indicato r Lights
Instruments and indicator Lights
Instruments
Instrument cluster overview
The instrument cluster is the central information center for the driver.
Fig. 3 Instrument cluster overview
(D Tachometer with indicator lights
@ Coolant temperature ind icator* or
Boost* (boost press ure indicato r)
® Turn signa l indicator lights
@ Display 12,29
- Indicator lights or . . . . . . . . . . . . 13
- Drive r information system . . . . . 27
- Date and time . . . . . . . . . . . . . . . 10
- Mileage . . . . . . . . . . . . . . . . . . . . 11
- Service interval display . . . . . . . 212
® Speedometer w ith indicator lights
® Fu el level .. ................ . .
0 Display for: Central indicator light
or system displays ..... ..... .. .
@ Trip odometer reset button 10.01
(D Tips
11
13
11
The needles in the instrument cluster are illu
minated when the ignition is switched on. The
gauges are also illuminated when the lights
are turned on . The instrument illum inat ion
dims automatically as the amount of light
outside decreases. This helps to remind the
driver to turn the headlights on as it becomes
darker outside.
10
Setting the time/date
Fig. 4 Instrument cluste r: time and date
The date, time of day, time and date format can
be set in the MMI. Refer to the MMI owner's
manua l for instructions .
(0 Tips
-When you switch the ignition off or open
the driver's door, the date and time are dis
played for approximately 30 seconds.
- You can also turn on the display with the
IO.O ! button when the ignition is switched
off
I:=;) page 10, fig. 3.
g .., 0 :> CX) m
Page 13 of 282
M N
0 > co ,...., \!) 1.1'1
1.1'1
1.1'1
,....,
Tachometer
The tachometer shows the number of engine rev
olutions per minutes .
The beginning of the red zone in the tachometer
indicates the maximum permissible engine speed
for all gears once the engine has been broken in
and when it is warm. You should select the "0/
S" (Drive) selector leve r position or take your foot
off the accelerator pedal before reach ing th is
area.
It is best to avoid high engine speeds, even when
driving in tiptronic mode
<=> page 87.
(D Note
The tachometer needle © c::> page 10, fig. 3
should only be in the red zone briefly:
@ For the sake of the environment
Upshifting early helps you to save fuel and re
duce operating noise .
Odometer
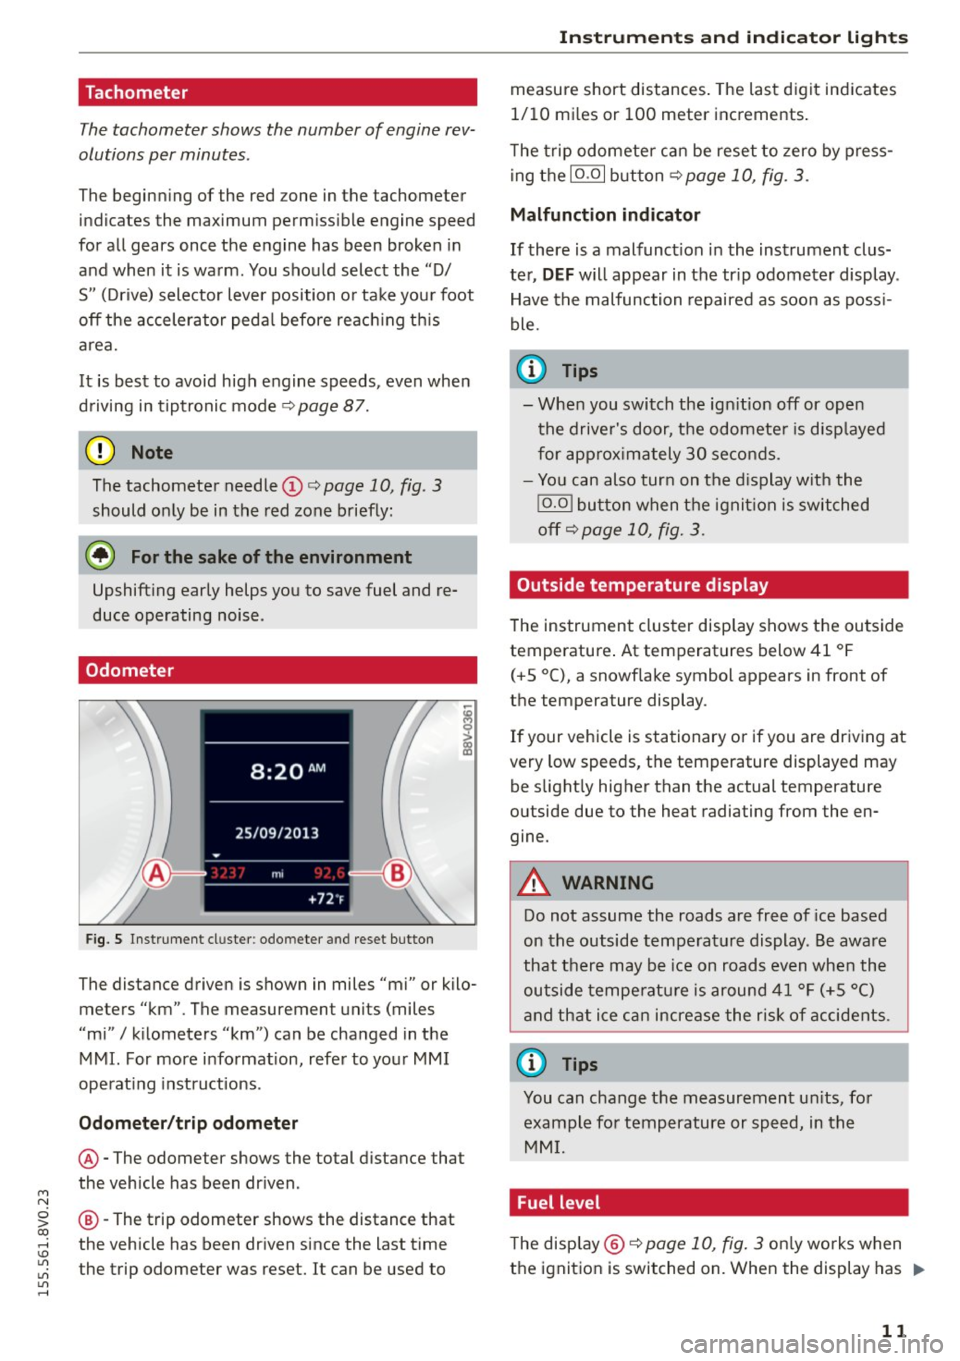
Fig. S Instrument cluster : odo meter and reset button
The distance driven is shown in miles "mi" or kilo
meters "km". The measuremen t units (miles
"mi"
I kilometers "km") can be changed in the
MMI. For more information, refer to your MMI
operat ing instructions .
Odometer/trip odometer
@-The odometer shows the total distance that
the vehicle has been driven .
@-The trip odometer shows the distance that
the vehicle has been driven since the last time
the trip odometer was reset. It can be used to
Instruments and indicator lights
measure short distances. The last digit indicates
1/10 mi les or 100 meter increments.
T he trip odometer can be reset to zero by press
ing the
10.01 button <=> page 10, fig . 3.
Malfunction indicator
If there is a malfunct ion in the instrument clus
ter,
DEF will appear in the tr ip odometer display .
Have the malfunction repaired as soon as poss i
ble.
@ Tips
- When you switch the ign ition off or open
the driver's door, the odometer is disp layed
for approximately 30 seconds.
- You can also turn on the display with the
!O .O I button when the ignition is switched
off c::>
page 10, fig. 3.
Outside temperature display
The instrument cluster display shows the outside
temperature . At temperatures below 41 °F
(+ S °C), a snowflake symbol appears in front of
the temperature display .
If your vehicle is stationary or if you are driving at
very low speeds, the temperature displayed may
be slightly higher than the actual temperature
outside due to the heat radiating from the en
gine.
A WARNING
-Do not assume the roads are free of ice based
on the outside temperature display. Be aware
that there may be ice on roads even when the
outside temperature is around 41 °F (+5 °()
and that ice can increase the risk of accidents.
@ Tips
You can change the measurement un its, for
example for temperature or speed, in the
MMI.
Fuel level
The display @ c::>page10, fig. 3 on ly works when
the ignition is switched on. When the display has .,.
11
Page 31 of 282
....,
N
0 > co
rl I.O
"'
"'
"'
rl
.. To confirm a selection, press the thum bwheel
@ .
.. To se lect a function programmed to a steer ing
whee l button , press the button @. For addi
tiona l information, see c:>
page 29, Assigning
a function to a programmable steering wheel
button
Opening the Vehicle functions
.. Se lect the f irst tab w ith the button (!) .
.,. Press the button @. The
Veh icle functions
menu is displayed 9 fig. 10.
.. To select a menu item, turn and press the
t hu mbwheel @.
Resetting values to zero
.. In the Vehicle funct ions menu, select On-board
computer or Efficiency program .
.. Se lect a va lue in the desired trip computer or in
t h e efficie ncy prog ram .
.,. To reset t he val ues in a memo ry, press and hold
t h e thu mbw heel @for on e secon d.
Recalling indicator lights and messages
.. Press the button CD repeated ly until the Q tab
appea rs.
The
Q tab is only visibl e when there is a mal
f u nction.
Assigning a function to a programmable
steering wheel button
.. Se lect: the I MENU j button >Car > Systems *
control button > Vehicle settings > Steering
wheel button programming .
The Q tab is only visible when there is at lea st
one ind icat or light or message displayed.
(D Tips
- If the vehicle battery is discon nected , all
memo ry values a re erased.
- In form ation on the e fficiency pr ogra m
c:> pag e 29 .
-There is more inf orm atio n on the m ultifunc
t io n st eering wheel in the MMI* owner 's
manua l.
Driver information system
Boost indicator
Applies to vehicles: with boost pressure indicator
Fig. 11 Instrume nt cl ust e r: boost in dic ato r
Boost pressure indicator (boost)
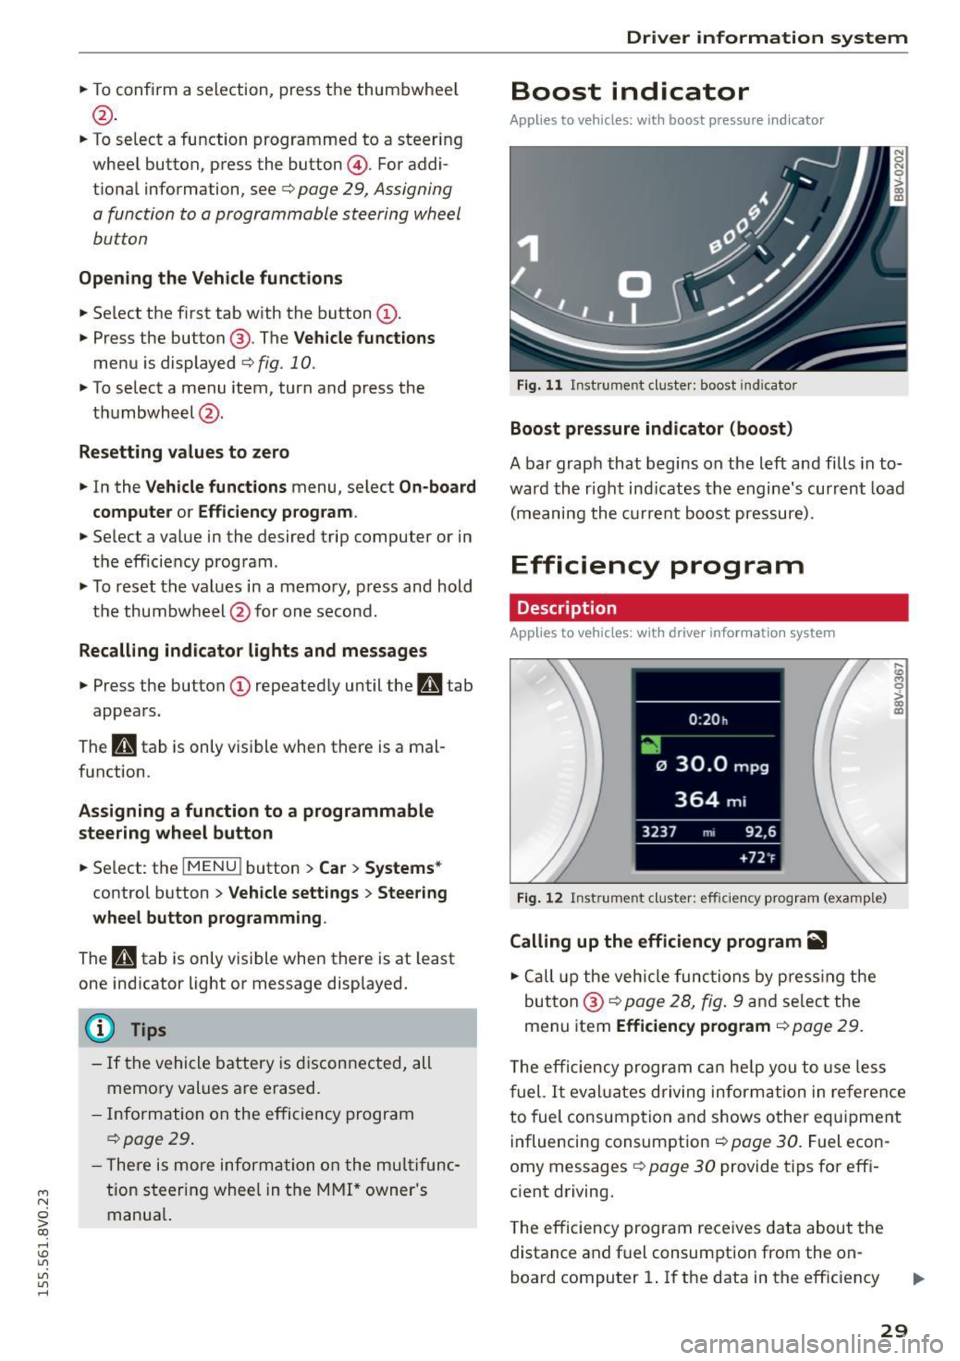
A bar grap h that begins on the l eft and fills in t o
wa rd the righ t ind icates the engine's cu rrent load
( m eaning the cur rent b oost pressure).
Efficiency program
Description
App lies to vehicles: with driver info rmation system
Fig. 12 Inst rume nt clust er: effici ency p rogram (exa mple)
Calling up the efficiency program ii1
.. Call up the veh icle functio ns by pre ss in g the
but to n @ c:>
page 2 8, fig . 9 and se lec t the
menu item
Efficiency program c:> page 29.
,._
m
T he effi ciency pro gr am can he lp y ou to use le ss
f uel.
It eval uates driving inform ati on in ref ere nce
to fuel consump tion and shows o ther eq uipme nt
i nfluencing consumpt ion c:>
page 30 . Fue l econ
omy messages
c:> page 30 provide t ips for eff i
c ient driving .
T he efficiency program rece ives data abou t the
distance and f uel consumpt ion from the on
board compu ter
1. If the data in t he eff iciency
29
Page 32 of 282
Driver information system
program is deleted ¢page 29, the values in the
on-board computer 1 are also reset.
Other equipment
Applies to vehicles: with driver information system
Fig. 13 Instrument cluster: Other equ ipment (examp le)
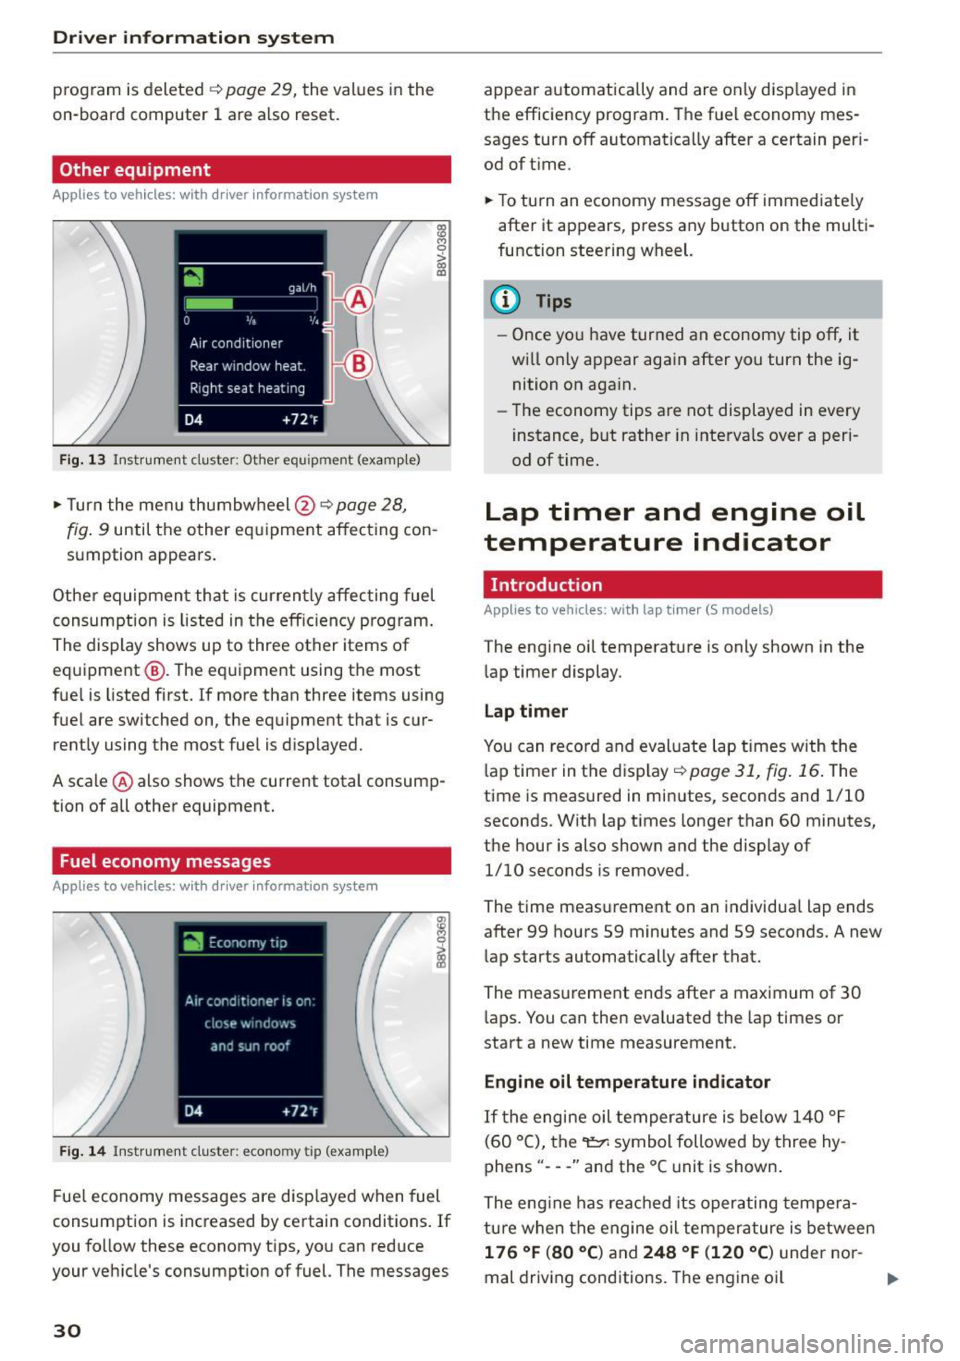
"'T urn the menu thumbwheel @ ¢ page 28,
l8 M 0
>
"' a,
fig. 9 until the other equipment affecting con
sumption appears.
Other equipment that is currently affecting fuel
consumption is listed in the efficiency prog ram.
The display shows up to three other items of
equipment @. The equipment using the most
fue l is listed first. If more than three items using
fuel are switched on, the equ ipment that is cur
rently using the most fuel is displayed.
A scale @ also shows the current total consump
tion of all other equipment.
Fuel economy messages
Applies to vehicles: with driver information system
Fig. 14 Instrument cluster: economy tip (example)
Fuel economy messages are disp layed when fuel
consumption is increased by certain conditions . If
you follow these economy tips, you can reduce
your veh icle's consumption of fuel. The messages
30
appear automatically and are only disp layed in
the efficiency program. The fuel economy mes
sages turn off automatically after a certain per i
od of t ime.
"'T o turn an economy message off immediate ly
after it appears, press any button on the multi
function steering wheel.
(D Tips
- Once you have turned an economy tip off, it
wi ll only appear again after you turn the ig
nition on again.
- The economy tips are not displayed in every
instance, but rather in intervals over a peri
od of time.
Lap timer and engine oil
temperature indicator
Introduction
Applies to veh icles: with lap tim er (S models)
The engine oil temperature is only shown in the
lap timer display.
Lap timer
You can record and evaluate lap times with the
l ap timer in the display¢
poge 31, fig. 16. The
time is measured in minutes, seconds and 1/10
seconds. With lap times longer than 60 minutes,
the hour is also shown and the display of
1/10 seconds is removed.
The time measurement on an individua l lap ends
after 99 hours 59 minutes and 59 seconds. A new
lap starts automatically after that.
The meas urement ends after a maximum of 30
laps. You can then eva luated the lap times or
start a new time measurement.
Engine oil temperature indicator
If the engine oil temperature is below 140 °F
(60 °C), the~ symbol followed by three hy
phens" ---" and the °C unit is shown .
The engine has reached its operating tempera
ture when the engine oil tempera ture is between
176 °F (80 °() and 248 °F (120 °C) under nor-
mal driving conditions. The engine oil
IJI>
Page 34 of 282
Driver information system
® Current time measurement
@ Menu:
- Lap 1 (start)
- New lap (start another lap)
- Split time (time with in section of the
route)
- Pause (interrupts measurement)
- Statistics (evaluation of lap times)
- Rese t (all values are deleted)
Evaluating or resetting recorded times
Applies to vehicles: with lap timer (S models)
You can evaluate the fastest, slowest and aver
age lap times.
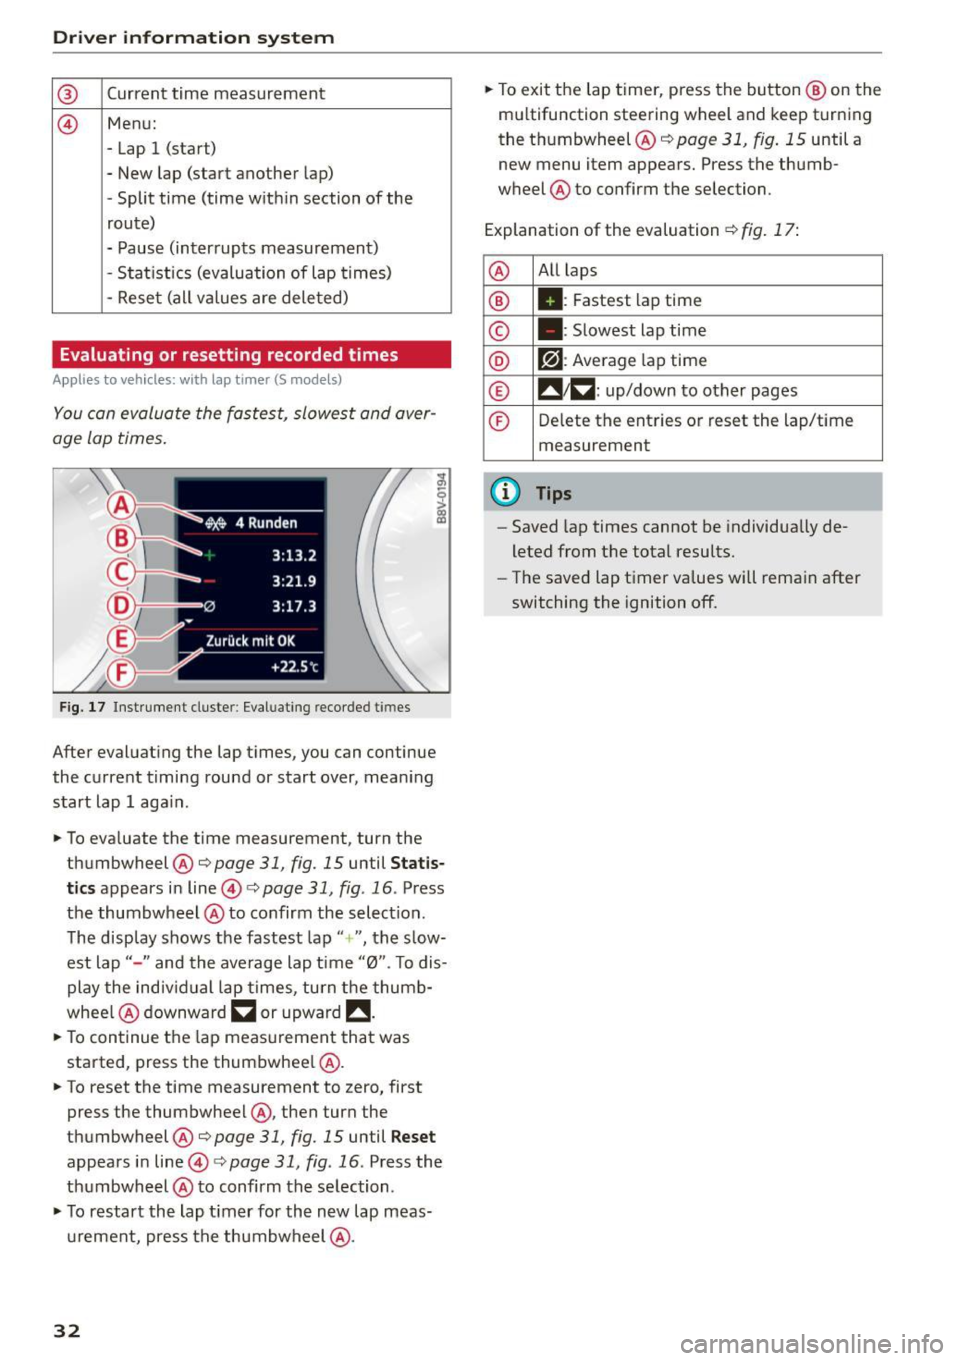
Fig. 17 Instrument cluste r: Eval uat ing reco rded t imes
After evaluating the lap times, you can continue
the current timing round or start over, meaning
start lap 1 aga in.
• To eva luate the time measurement, turn the
thumbwheel @c::>
page 31, fig. 15 until Statis
tics
appears in line@c::> page 31, fig . 16 . Press
the thumbwheel @to confirm the select ion.
The disp lay shows the fastest lap"+ ", the s low
est lap" -" and the average lap time "0". T o dis
play the individual lap times, turn the thumb
whee l@ downward
~ or upward !!.
• To continue the lap measurement that was
started, press the thumbwheel @.
• To reset the time measurement to zero, first
press the thumbwheel @, then turn the
thumbwheel @c::>page
31, fig. 15 until Reset
appears in line@i=>page31 , fig .16 . Press the
thumbwheel @to confirm the se lection .
• To restart the lap timer for the new lap meas
urement, press the thumbwheel @.
32
• To exit the lap timer, press the button @ on the
mu ltifunction steering wheel and keep turning
the thumbwheel @c::>
page 31, fig. 15 until a
new menu item appears. Press the thumb
wheel @to confirm the selection.
Explanation of the evaluation c::>
fig. 17:
@ All
laps
® II: Fastest lap time
© . : Slowest lap time
® r?l : Average lap time
® !! 1~ : up/down to other pages
© Delete the entries or reset the lap/time
measurement
@ Tips
- Saved lap times cannot be individua lly de
leted from the total results.
- The saved lap timer values will remain after
switching the ignition off.
Page 215 of 282

M N
0 > co ,...., \!) 1.1'1
1.1'1
1.1'1
,....,
Resetting the indicator
Your authorized Audi dealer or authorized Audi
Service Facility will reset the service interval dis
play after performing service.
If you perform an oil change yourself to the Audi
specifications, you must reset the service interval
display.
To reset the display, select the
I MENU I button>
Car > Systems* control button > Service & con
trol
> Service intervals > Reset oil change inter
val.
(1) Note
- Only reset the oil change indicator if the oil
was changed.
- Following the service intervals is critical to
maintaining the service life and value of
your vehicle, especially the engine. Even if
the mileage on the vehicle is low, do not ex
ceed the time for the next service.
- Calculating the time to the next oil change
is interrupted when the vehicle battery is
disconnected. If the vehicle is not driven for
a long period of time, check the mainte
nance schedule so that you can follow the
maintenance intervals.
Checking and Filling
213
Page 277 of 282
M N
0 > co ,...., \!) 1.1'1
1.1'1
1.1'1
,....,
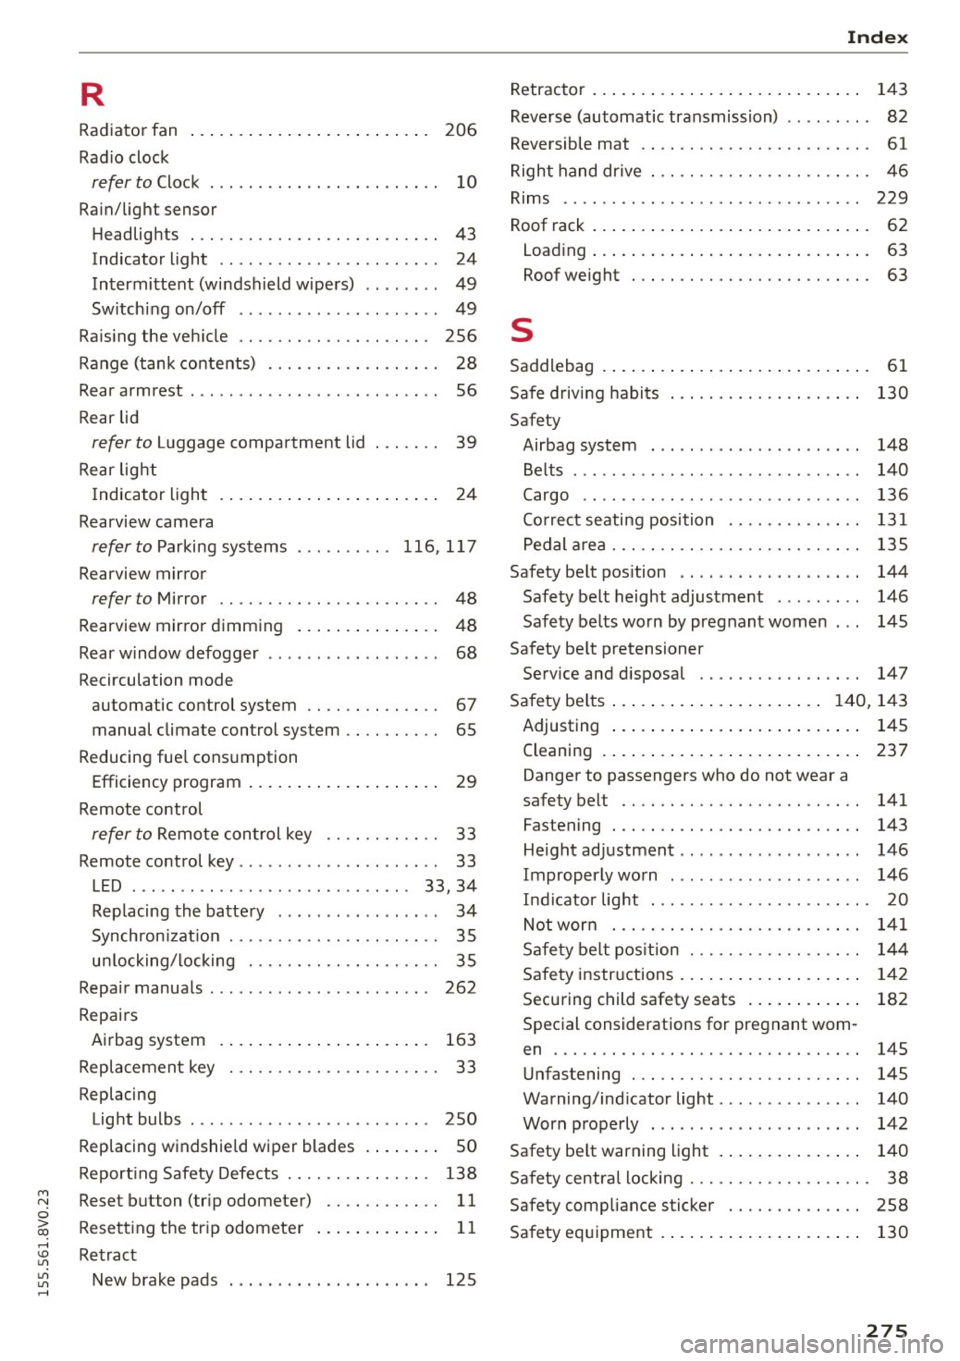
R
Radiator fan
Radio clock 206
refer to Clock
. . . . . . . . . . . . . . . . . . . . . . . . 10
Rain/light sensor
Headlights . . . . . . . . . . . . . . . . . . . . . . . . . . 43
Indicator light . . . . . . . . . . . . . . . . . . . . . . . 24
Intermittent (windshield wipers) . . . . . . . . 49
Sw itching on/off . . . . . . . . . . . . . . . . . . . . . 49
Raising the vehicle . . . . . . . . . . . . . . . . . . . . 256
Range (tank contents) . . . . . . . . . . . . . . . . . . 28
Rear armrest . . . . . . . . . . . . . . . . . . . . . . . . . . 56
Rear lid
refer to luggage compartment lid . . . . . . . 39
Rear light
Indicator light . . . . . . . . . . . . . . . . . . . . . . . 24
Rearview camera
refer to Parking systems 116,117
Rearview mirror
refer to Mirror . . . . . . . . . . . . . . . . . . . . . . . 48
Rearview mirror dimming . . . . . . . . . . . . . . . 48
Rear window defogger . . . . . . . . . . . . . . . . . . 68
Recirculation mode
automatic control system . . . . . . . . . . . . . . 67
manual climate control system . . . . . . . . . . 65
Reducing fue l consumption
Efficiency program . . . . . . . . . . . . . . . . . . . . 29
Remote control
refer to Remote control key . . . . . . . . . . . . 33
Remote control key . . . . . . . . . . . . . . . . . . . . . 33
LED . . . . . . . . . . . . . . . . . . . . . . . . . . . . . 33, 34
Replacing the battery . . . . . . . . . . . . . . . . . 34
Synch ron izat ion . . . . . . . . . . . . . . . . . . . . . . 35
u nl ocking/locking . . . . . . . . . . . . . . . . . . . . 35
Repair manuals . . . . . . . . . . . . . . . . . . . . . . . 262
Repairs Airbag system . . . . . . . . . . . . . . . . . . . . . . 163
Replacement key . . . . . . . . . . . . . . . . . . . . . . 33
Replacing Light bulbs . . . . . . . . . . . . . . . . . . . . . . . . . 250
Replacing windshield wiper blades . . . . . . . . 50
Report ing Safety Defects . . . . . . . . . . . . . . . 138
Reset button (tr ip odometer) . . . . . . . . . . . . 11
Resetting the tr ip odometer . . . . . . . . . . . . . 11
Retract New brake pads . . . . . . . . . . . . . . . . . . . . . 125
Ind ex
Retractor . . . . . . . . . . . . . . . . . . . . . . . . . . . . 143
Reve rse (automatic transmission) . . . . . . . . . 82
Reversible mat . . . . . . . . . . . . . . . . . . . . . . . . 61
Right hand dr ive . . . . . . . . . . . . . . . . . . . . . . . 46
Rims ......... ... .. ................. 229
Roof rack . . . . . . . . . . . . . . . . . . . . . . . . . . . . . 62
Load ing . . . . . . . . . . . . . . . . . . . . . . . . . . . . . 63
Roof weight . . . . . . . . . . . . . . . . . . . . . . . . . 63
s
Saddlebag . . . . . . . . . . . . . . . . . . . . . . . . . . . . 61
Safe drivi ng habits . . . . . . . . . . . . . . . . . . . . 130
Safety Airbag system . . . . . . . . . . . . . . . . . . . . . . 148
Belts . . . . . . . . . . . . . . . . . . . . . . . . . . . . . . 140
Cargo . . . . . . . . . . . . . . . . . . . . . . . . . . . . . 136
Co rrect seating position . . . . . . . . . . . . . . 131
Pedal a rea . . . . . . . . . . . . . . . . . . . . . . . . . . 135
Safety be lt pos ition . . . . . . . . . . . . . . . . . . . 144
Safety belt height adjustment . . . . . . . . . 146
Safety be lts worn by pregnant women 145
Safety be lt pretensioner
Serv ice and disposal . . . . . . . . . . . . . . . . . 147
Safety be lts . . . . . . . . . . . . . . . . . . . . . . 1 40, 143
Adjusting . . . . . . . . . . . . . . . . . . . . . . . . . . 145
Cleaning . . . . . . . . . . . . . . . . . . . . . . . . . . . 23
7
Danger to passengers who do not wear a
safety belt . . . . . . . . . . . . . . . . . . . . . . . . . 141
Fastening . . . . . . . . . . . . . . . . . . . . . . . . . . 143
Height ad justment . . . . . . . . . . . . . . . . . . . 146
Improperly wo rn . . . . . . . . . . . . . . . . . . . . 146
Indicator lig ht . . . . . . . . . . . . . . . . . . . . . . . 20
Not worn . . . . . . . . . . . . . . . . . . . . . . . . . . 141
Sa fe ty be lt pos ition . . . . . . . . . . . . . . . . . . 144
Safety instr uctions . . . . . . . . . . . . . . . . . . . 142
Securing child safety seats . . . . . . . . . . . . 182
Special considerations for pregnant wom-
en . . . . . . . . . . . . . . . . . . . . . . . . . . . . . . . . 145
Unfastening . . . . . . . . . . . . . . . . . . . . . . . . 145
Warning/ind icator light . . . . . . . . . . . . . . . 140
Worn properly . . . . . . . . . . . . . . . . . . . . . . 142
Safety be lt warning light . . . . . . . . . . . . . . . 140
Safety centra l locking . . . . . . . . . . . . . . . . . . . 38
Safety compliance sticker . . . . . . . . . . . . . . 258
Safety eq uipment . . . . . . . . . . . . . . . . . . . . . 130
275