Page 17 of 141

Basic operation17
item via the touchscreen will be
described as "...select
name>/- ".
Moving items
Tap on and hold the element you wish to move until frame marks appear
around the icons. Move your finger to
the desired location and release the
element.
Notice
Constant pressure must be applied
and the finger must be moved at
constant speed.
All other items are rearranged.
Press one of the buttons on the
instrument panel to exit edit mode.
Notice
In subsequent chapters the
operating steps for moving a screen element via the touch screen will be
described as "...drag the...icon to..."
or "...drag the...menu item to...".
Scrolling lists
If there are more items available than
presentable on the screen, the list has to be scrolled.
To scroll through a list of menu items,you may optionally:
■ Place your finger anywhere on the screen and move it upwards or
downwards.
Notice
Constant pressure must be applied
and the finger must be moved at
constant speed.
■ Tap on o or n at the top and at
the bottom of the scroll bar.
■ Move the slider of the scroll bar with
your finger up and down.
■ In alphabetically ordered lists, tap on the respective letter in the
vertical keyboard. The list jumps to
the corresponding location within
the list.
To return to the top of the list, tap on the list title.
Notice
In subsequent chapters the
operating steps for scrolling to a list
item via the touch screen will be
described as "...scroll to
name>".
Page 18 of 141

18Basic operation
Touch pad
The touch pad has a touch-sensitive
surface that allows additional
functions for menu control on the
centre display. It is located behind the gearshift lever.
Notice
The touch pad provides haptic
(tactile) feedback while it is
operated.
BACK button
Press BACK to return to the previous
screen.
Press and hold BACK to return to the
Home screen.
h button
Press h to enter or exit the character
recognition function 3 23.
Selecting a screen button or menu
item
Place your finger on the pad. A hand
cursor appears on the screen.
Depending on the position of your
finger, the system may highlight an
element on the screen.
Notice
The cursor disappears after a
certain timeout period.
Move your finger in the direction of the
element you wish to select. The hand cursor moves from one selectable
screen element to the next.
When the desired element is
highlighted, stop moving.
Press down on the pad to select the
respective element.
Notice
In subsequent chapters the
operating steps for selecting and
activating a screen button or menu
item via the touch pad will be
described as "...select
name>/- ".
Page 19 of 141

Basic operation19
Scrolling lists
If there are more items available than
presentable on the screen, the list has to be scrolled.
To scroll through a list of menu items: Place two fingers on the pad and
simultaneously move them upwards or downwards.
Notice
In subsequent chapters the
operating steps for scrolling to a list
item via the touch pad will be
described as "...scroll to
name>".
Scrolling pages
If the available items are organised on
more than one page, e.g. on the
Home screen, the pages have to be
scrolled.
Notice
Pages are only scrollable if there is
more than one page set up.Scrolling Home screen pages
To scroll from one page to another:
Place two fingers on the pad and simultaneously move them left to
scroll to the next page or right to scroll
to the previous page.
Scrolling favourites pages
To scroll from one favourites page to
another:
Place three fingers on the pad and
simultaneously move them left to
scroll to the next pages or right to
scroll to the previous pages.
Notice
In subsequent chapters the
operating steps for scrolling pages
via the touch pad will be described
as "...scroll to...page...".
Page 20 of 141

20Basic operation
Steering wheel controlsFor an overview of all relevant
steering wheel controls in "Control
elements overview" 3 8.
Five-way controller
The five-way controller is used to
operate the menus in the Driver
Information Centre.
The five-way controller consists of
four directional buttons and a
confirmation button ( 9).
i (back) button
When operating the submenus in the
Driver Information Centre, the i
button serves as back button.
Press i to return to the next higher
menu level.Selecting an application
To display the menu for application
selection, press i.
Repeatedly press P or Q to select a
menu item.
Press 9 to confirm your selection.
The respective application is
activated.Selecting an application-specific
function
To display the main menu of the
application currently active, press j.
Repeatedly press P or Q to select a
menu item.
Press 9 to confirm your selection. A
submenu with further options is displayed or the selected function is
activated.Notice
If you are requested to confirm a
function or message in the Driver
Information Centre by pressing SEL
(Select), press 9.
Speech recognition system
For a detailed description of the
speech recognition system in
"Speech recognition" 3 77.
Menu operation
Home screen
The Home screen is shown on the
centre display.
Page 21 of 141

Basic operation21
All applications installed may be
accessed from the Home screen.
The Home screen comprises up to
five pages with up to eight
applications on each page.
Home button
Press ; on the instrument panel to
access the Home screen.
If you press ; while already being on
the Home screen, you are returned to
the first page.
Activating an application
Select the respective application icon
to launch the application and enter
the application main menu.
The radio and media functions are
selected via the respective buttons.
Notice
The icons of unavailable
applications are greyed out.Personalising the Home screenEntering edit mode
Tap and hold an application icon for a
few seconds. The screen changes as you enter edit mode:
■ Frame marks are displayed around
all application icons indicating that
they might be moved to a new
position.
■ The application tray (see below) is displayed.
■ When scrolling, a blank home screen page appears in the right-
most page position for a new page to be arranged.
Exiting edit mode
The system automatically exits edit
mode after a few seconds of
inactivity.
To exit edit mode immediately,
press ; on the instrument panel.Moving icons
To enter edit mode, see "Entering edit
mode" above.
Drag the icon you wish to move to its
new position. Release the icon to
drop it in the respective location.
Application tray
Page 22 of 141

22Basic operation
The application tray is located in the
top centre of the screen and
accessible from all main menus.
Three to five application icons may be stored in the application tray.
Some application icons dynamically
adapt to the current situation, e.g.
indicating that you missed a phone
call.
Activating an application
Select the respective application icon
to launch the application and enter
the application main menu.
Notice
The icons of unavailable
applications are greyed out.
Personalising the application trayAdding icons to the application tray
To enter edit mode, see "Entering edit
mode" above.
Drag the icon of the desired
application into the application tray.
The Home screen icon changes to a
small application tray icon.
Release the icon to drop it in the
respective location.
If there are five icons in the
application tray already and a new
icon is added, one of the existing
icons is replaced.
Drag the new icon to the position of
the existing icon you wish to replace.
The existing icon appears greyed out
to indicate that it is removed.
Release the new icon to store it in the
respective location.Removing icons from the application
tray
To enter edit mode, see "Entering edit mode" above.
Drag the respective application icon
out of the application tray and release
it anywhere on the screen. The
application is removed from the
application tray.
Interaction selector bar
The interaction selector bar is located
at the bottom of the screen and
accessible from all main menus.
Page 23 of 141

Basic operation23
Via the interaction selector bar, you
may change the different views within one application or perform
application-specific actions, e.g. start
a speech recognition session.
Activating another tab
Select the respective screen button
on the interaction selector bar to
switch to another view or perform an
action.
Notice
If a function is currently not available
in a menu, the respective icon on the
interaction selector bar is greyed
out.
Displaying the interaction selector bar When interacting with the screen
buttons in the main menu, the
interaction selector bar is often
minimised.
To display the interaction selector
bar, select n at the bottom of the
screen.Messages
In the case of a system event, before
the execution of a system function, or
due to an outside trigger, e.g.
incoming phone call, you may be
prompted with a message.
Select one of the available options.
If ignored, most of the messages are dismissed automatically after a
certain period of time. Alerts that are
not dismissed automatically remain
on the screen until they are
acknowledged or the trigger becomes invalid.
Keyboards Keyboard
Letter keyboard:
Symbol keyboard:
Page 24 of 141

24Basic operation
Depending on the application or
function currently active, the
keyboard menu is displayed
differently.
To switch to the symbol keyboard,
select Sym.
To switch to the letter keyboard,
select ABC.
Entering characters
To enter a character, tap on the
respective screen button. The
character is entered on release.
If you accidentally tapped on the
wrong screen button, slide across the screen to the desired character and
release.
Tap on and hold a letter screen button
to display associated letters in a letter pop-up menu. Release and then
select the desired letter.
To confirm the input, select the
respective confirmation button.
Autocomplete function
If a character sequence has been
entered once, it is stored within the
system and may be recalled by the autocomplete function.
As soon as one character (letter or
digit) is entered, the autocomplete
function becomes active. Every
additional character entered is
considered in the matching process,
reducing the list of autocomplete
matches.
Select o next to the characters
entered to display a list of all
autocomplete matches.
Notice
Above the o screen button, the
number of available options is
displayed. It changes according to
the number of matches found.
Select the respective list item. The
keyboard is redisplayed with the
respective list entry shown in the
entry field.
Editing text
To place the cursor, tap at the
respective position within the text. Enter your changes.
Depending on the application, select
╳ to delete one entered character.
Tap and hold ╳ to delete all
characters.
Select the respective confirmation screen button to confirm an input.
Mixed case characters
In most cases, only capital letters may
be entered.
 1
1 2
2 3
3 4
4 5
5 6
6 7
7 8
8 9
9 10
10 11
11 12
12 13
13 14
14 15
15 16
16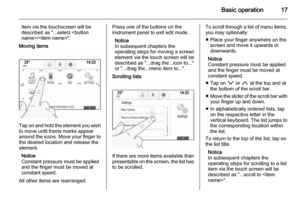 17
17 18
18 19
19 20
20 21
21 22
22 23
23 24
24 25
25 26
26 27
27 28
28 29
29 30
30 31
31 32
32 33
33 34
34 35
35 36
36 37
37 38
38 39
39 40
40 41
41 42
42 43
43 44
44 45
45 46
46 47
47 48
48 49
49 50
50 51
51 52
52 53
53 54
54 55
55 56
56 57
57 58
58 59
59 60
60 61
61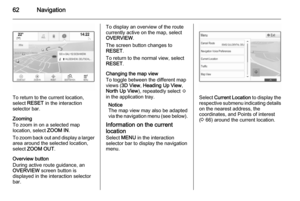 62
62 63
63 64
64 65
65 66
66 67
67 68
68 69
69 70
70 71
71 72
72 73
73 74
74 75
75 76
76 77
77 78
78 79
79 80
80 81
81 82
82 83
83 84
84 85
85 86
86 87
87 88
88 89
89 90
90 91
91 92
92 93
93 94
94 95
95 96
96 97
97 98
98 99
99 100
100 101
101 102
102 103
103 104
104 105
105 106
106 107
107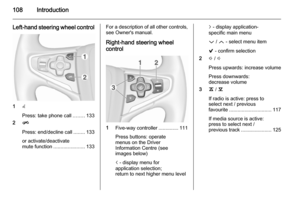 108
108 109
109 110
110 111
111 112
112 113
113 114
114 115
115 116
116 117
117 118
118 119
119 120
120 121
121 122
122 123
123 124
124 125
125 126
126 127
127 128
128 129
129 130
130 131
131 132
132 133
133 134
134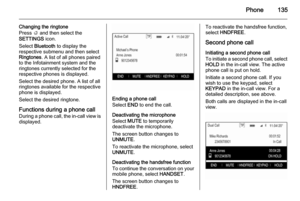 135
135 136
136 137
137 138
138 139
139 140
140